Frames…okay can we add frames to the list of things I can’t pass up when I see a great deal? That’s frames, mirrors, and picnic baskets ha ha. I’m sensing a theme here…ahem hoarder.
Welcome back, awesome friends! I’m getting down to the final few pieces from my last thrifting/estate sale haul, and today I’m repurposing this pretty frame:
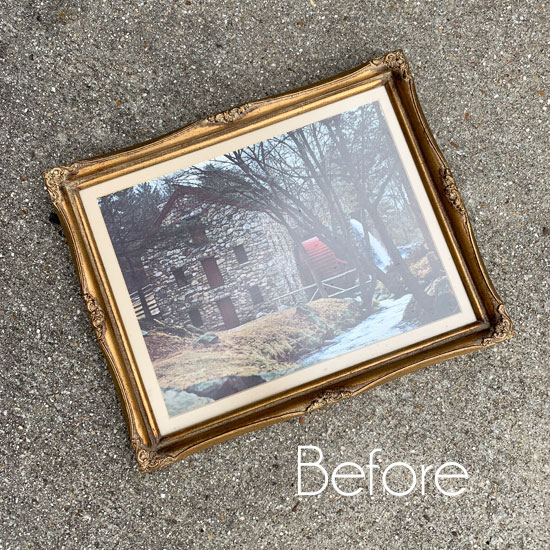
Anytime I see a frame with these curvy lines, I just can’t resist picking it up, especially when it’s half off of! This was $3.25 but all blue tags were half price, so I only paid $1.63 for this frame!
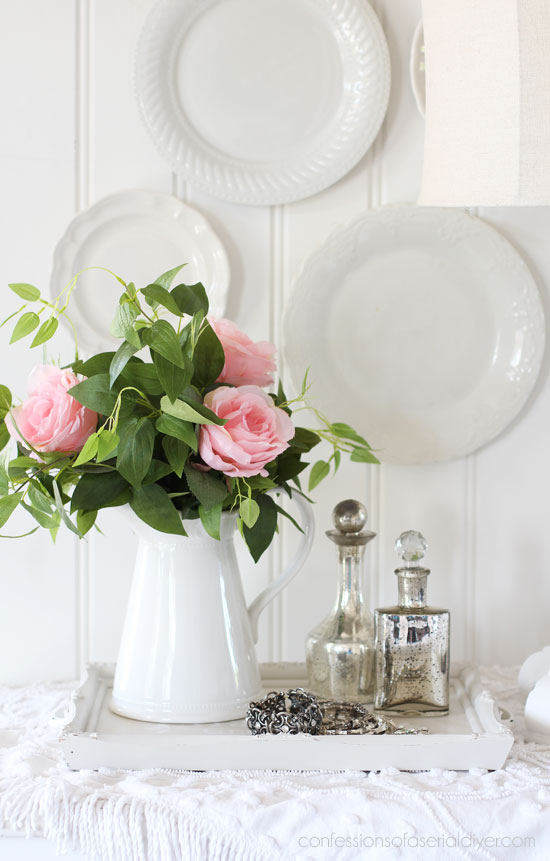
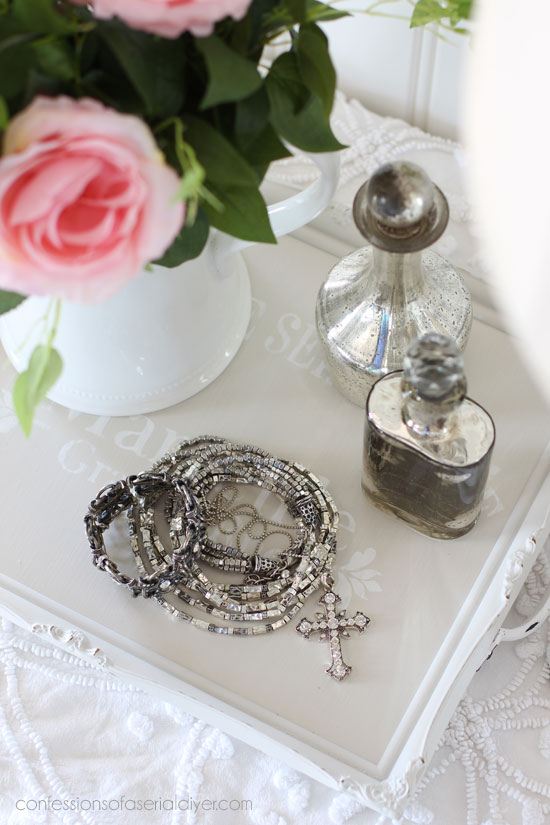
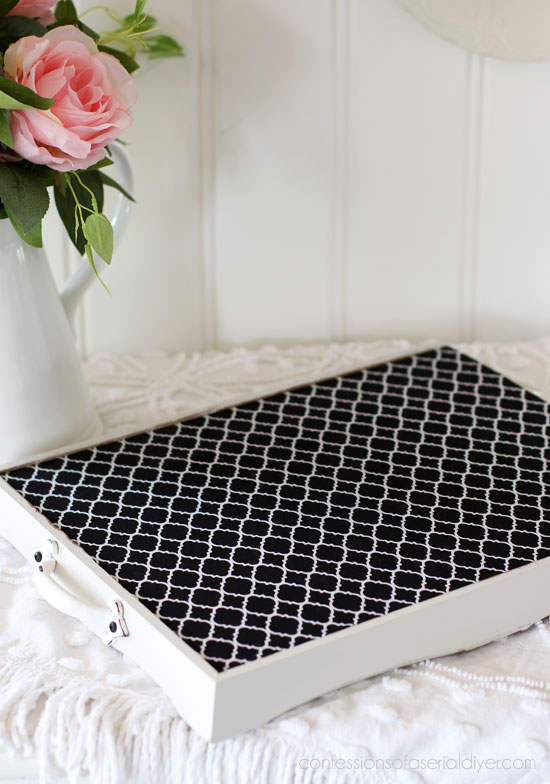
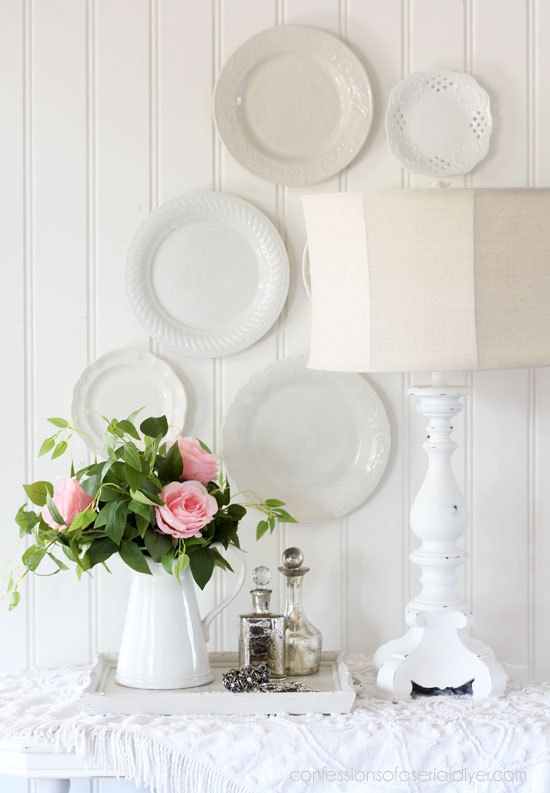
There are only so many things you can do with a frame, but my favorite is turning them into trays!
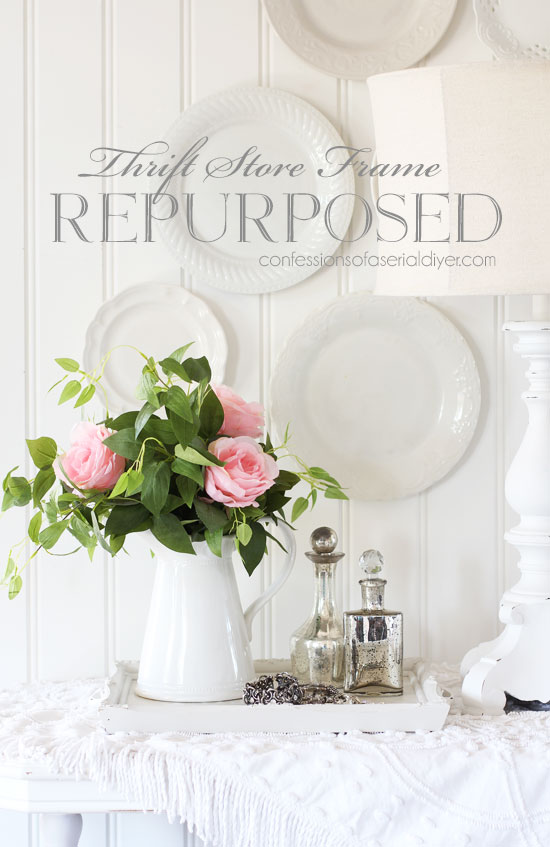
This one would be perfect for a vanity with its petite size…
I’ve included a few affiliate links so you can find the products I love.
For the bottom of my tray, I used a piece of scrap luan that I cut using both my jigsaw and miter saw. My sliding miter saw only cuts up to 12″, so I needed a little help from my jigsaw for the longer sides.
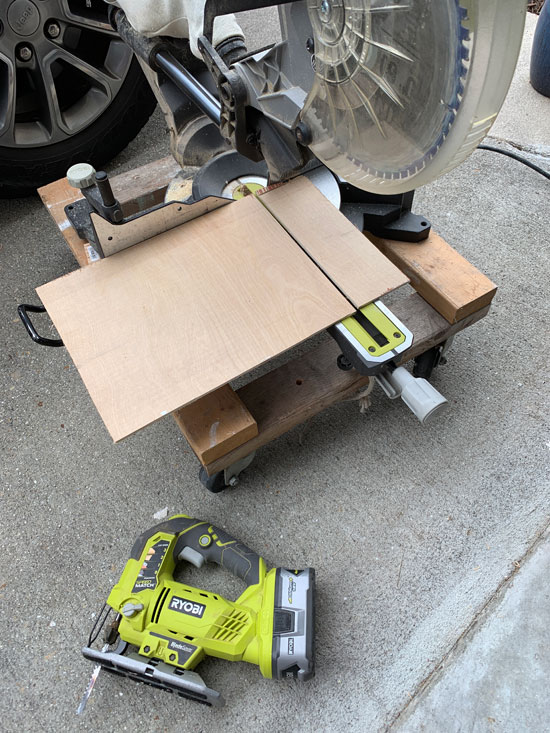
I sanded my new tray bottom with 220 grit sandpaper and then painted everything in Campfire Ash by Behr, made into DIY chalk paint. (Recipe HERE.)
Then I added parts of this stencil to the bottom:

I put together a video to show exactly how I add my stencils and make them look like they were hand-painted:
If you have any trouble viewing the video, you can see it on YouTube HERE.
And here are the products I used in the video:
I used spray adhesive to hold the stencil firmly in place, and I get questions about what to do with the sticky stencil after. I wash the paint off of the front side and lay it sticky side up on a paper towel to dry. When it’s dry, I store it flat on top of my other stencils on a shelf in one of my storage cabinets. It will stick a bit to other stencils, but I can still easily use it again the next time I need it. You can try to clean it with mineral spirits or a product like Goo Gone, but I don’t bother.
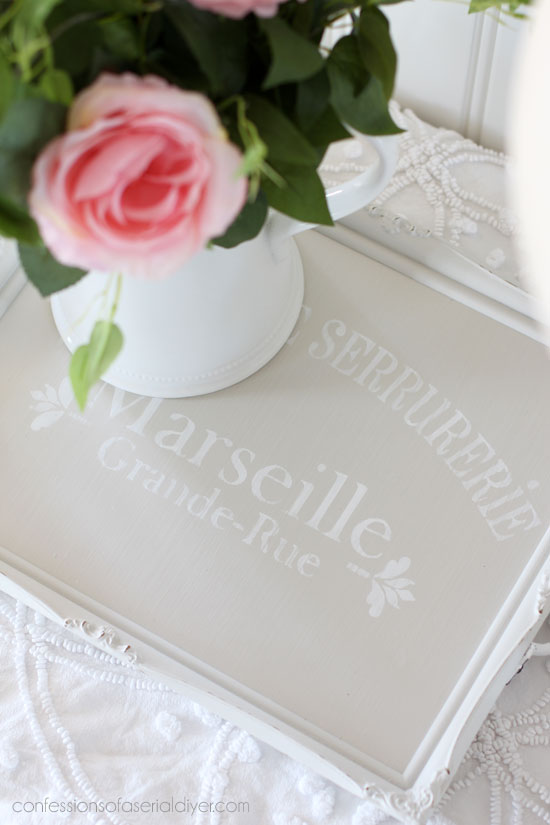
Doesn’t look so much like a stencil now, right?

I sealed the frame with Annie Sloan’s Clear Wax and gave the bottom a coat of Dixie Belle’s water-proof Gator Hide before I assembled it. Gator Hide might be my new favorite sealer! It is super durable and goes on flat surfaces nicely with Dixie Belle’s applicator sponge. I need to try it out using my sealer brush and see how it does. I’ll report back when I do.
I picked up the handles at Hobby Lobby…
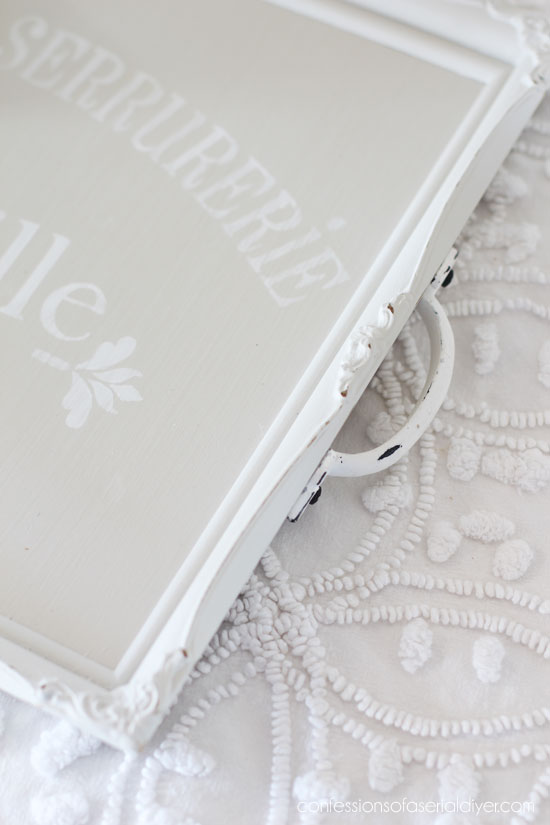
They just screw in place. Don’t forget to predrill when working with thinner frames like this.
I just love the romantic details on this frame…
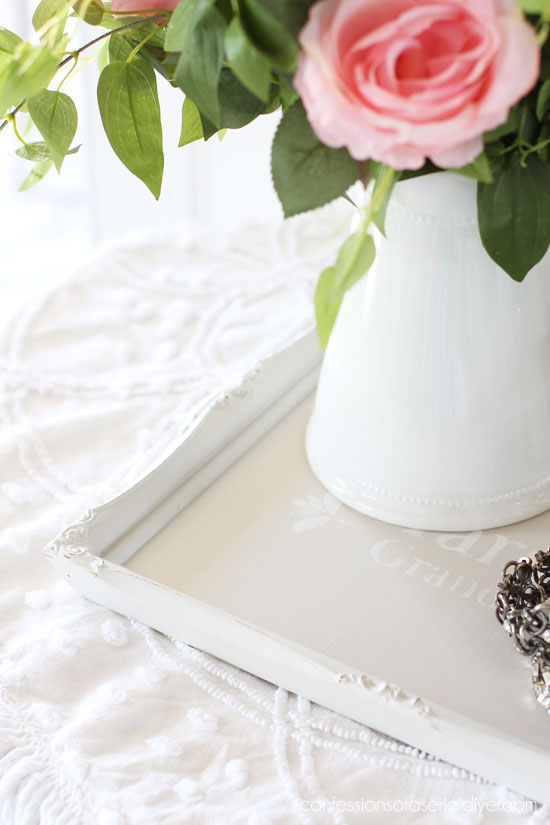

I used the original backing to secure the new bottom since it slid in place conveniently from the side, but I added fabric using matte Mod Podge to make it prettier…
And that’s that!

One more done! Yay!!
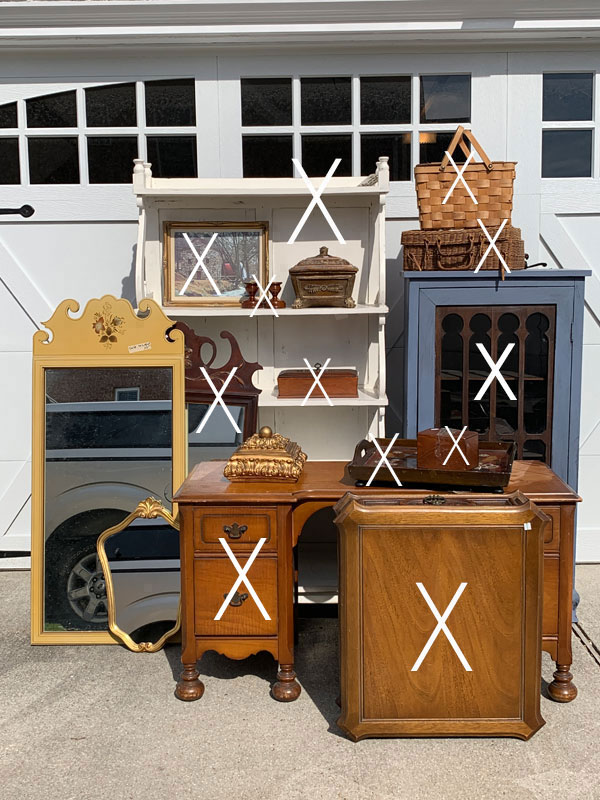
Here are links to all the makeovers in this haul so far:
Estate Sale Shelving Unit Makeover
$6 Thrift Store End Table Makeover
Thrift Store Baskets go Coastal
$24 Estate Sale Cabinet Makeover
I’ll see y’all back here on Tuesday with these two boxes:
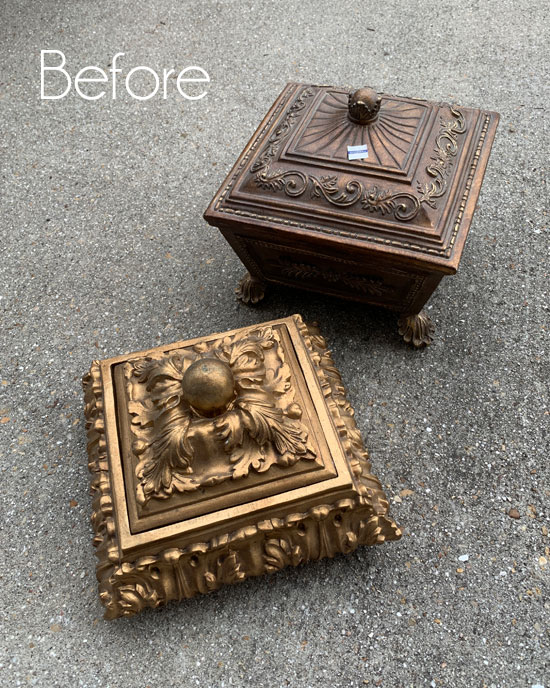
UPDATE: See how a simple makeover made these two pretties shine like new HERE now!
Have a fantastic weekend! 🙂
XO,
![]()
Don’t Miss a Thing!
If you like what you see, there are several ways to follow along!
Email * Facebook * Pinterest * Twitter *Instagram


")


")


Petra says
Very pretty. You constantly amaze me with your vision ????
Christy says
Aww I appreciate that so much, Petra, thank you!! XOXO
Mary Kaiser says
I can do that, now I can go get a old frame and a stencil and be a artist like you!! Thanks for another great video!
Christy says
Yes you can!! My pleasure, Mary! Have a great weekend! XOXO
Christina in SW FL says
SWEEEEEET tray Christy! Love the bottom, the color.. everything about it! I bet it doesn’t last long in your booth if it is headed there. 🙂
Have a wonderful weekend! (I am looking forward to the two boxes)
Christy says
Thanks, Christina! Have a great weekend as well! XOXO
Janice Holt says
Love the tray and to even finish the bottom. You don’t miss a thing do you. Going thrifting today with my sisters and so excited. You are such an inspiration.
Christy says
Thank you so much, Janice!! I hope you find some amazing treasures today…have fun!! XOXO
Becky says
What a gorgeous tray! You have me totally hooked on trays. I was looking around just last night, counting all the trays around my house… You did a post a few years ago on decorating with trays. You pointed out that all the little cluttery things become polished and orderly when placed on a tray. You were right. I’ve been making trays ever since, and I…Love…Them! Thanks for passing on that bit of smarts! This tray is a beauty!!!
Christy says
Thanks, Becky! That is too funny…I still love using trays and I too have them all over our home! And ha ha that seems like forever ago! Glad the advice is still relevant. 🙂 XOXO
Larissa ~ Prodigal Pieces says
Beautiful save, Christy!
Christy says
Thanks, sweet friend! XOXO
Beth Holt says
Another amazing project! I love everything about this tray!
Christy says
Thank you so much, Beth!! XOXO
Tracey says
Another beautiful tray!
Question:
How do you safely secure the new bottom to prevent those heavy decorative items was from falling through? (since the original frame’s purpose was merely to hold artwork in place, vertically)
No nails or tacks of any kind??? Don’t know that I’d trust the support of only adding the original backing with the new luan…
Christy says
Thank you, Tracey! This frame had a notched groove where the original backing that was on there slid into it from the side. It was really heavy duty cardboard so I feel confident that it will hold up well, plus on the side that was open, I added a small screw to be sure the backing doesn’t slide back out. This isn’t a tray that one would use to carry heavy drinks on or anything. You can see how I might have secured the bottom otherwise here: https://www.confessionsofaserialdiyer.com/how-to-make-a-tray-from-a-frame-my-best-selling-tray/ XOXO
Teresa Smith says
Love ALL of your items. Quick question. I collect plates and have to downsize due to a move. What product do you use to hang your plates in wall? I’m trying not to put holes in my new walls.
Thanks much.
Christy says
Thank you, Teresa! I attached a paper clip, bent to form an “S”, with E6000 glue, to the backs of my plates. Then I hang them on the wall with small nails. I bet you could try a Command product though?
Mary says
Thanks for the great video, really appreciate it! Nice job on the tray.
Christy says
My pleasure, Mary! Thank you! XOXO
Ange Mills says
Yea, I finally get to see the after. I tried to click on link you posted on FB but the link didn’t work. I left you a comment to let you know but it wouldn’t post my comment.
I think that cute little tray would looks adorable on my dresser. As always great job.
Christy says
Oh no, Ange…I’m so sorry you were having trouble getting through. Thank you so much! XOXO
Robyn Wright says
My next new obsession! I love everything you do!
Christy says
Ha ha! Thank you so much, Robyn!! XOXO
Addie says
Yeah…i’ll whip up 5-6 of those before lunch!!! Good video. thanks for sharing!!!!
Have a good weekend!!!
Addie-Bug!!!
Christy says
Ha ha! Thank you Addie-Bug!! Enjoy your weekend too!! XOXO
Lizzy Leff says
I would have picked up that frame, too. Love what you did with it. So sweet and pretty.
Christy says
Thank you, Lizzy!! XOXO
Shirley says
Pass up a beautiful ornate picture frame ????, Never! I have a collection of them in a variety of shapes, sizes and “ornateness” over the headboard of my bed, They are all painted white as is the headboard. Love your tray inspiration. I feel another addiction ❤️ coming on.????
I am new to your blog, received it for the first time today; can’t wait to see more of your inspirations.
Shirley
Christy says
I bet that looks beautiful, Shirley!! Thank you so much! I’m so thrilled you found me! XOXO
Marie says
You always do such a beautiful job with your picture frame trays!
Christy says
Aww thank you, Marie! XOXO
Wendi says
This little picture is perfect as a tray! You have the best vision when it comes to seeing the potential of a piece. So pretty! Pinned 🙂
Christy says
Thanks so much, Wendi! XOXO