Welcome to Furniture Themed Thursday, where a bunch of my DIY loving friends and I share a themed furniture makeover. This month’s theme is decoupage! My favorite decoupage redo is this dresser I found at a yard sale for $20. This time I thought I would try paper instead of fabric.
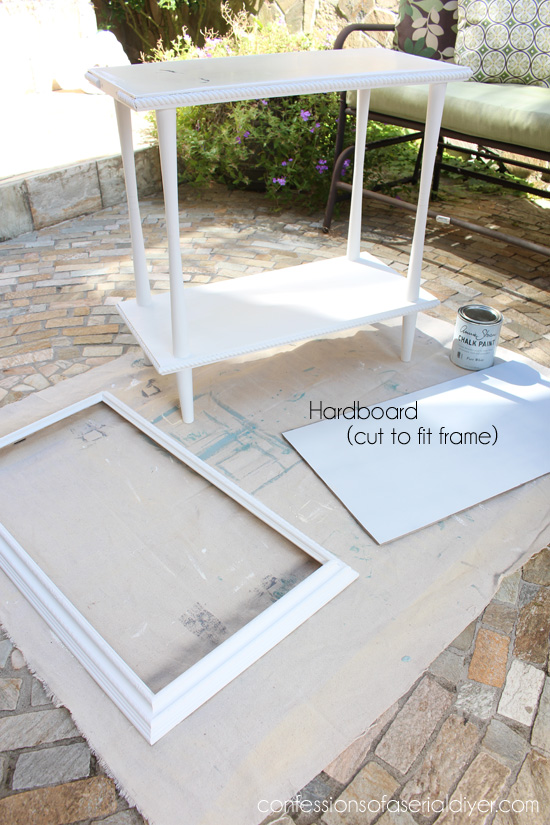
This is what I had to work with:
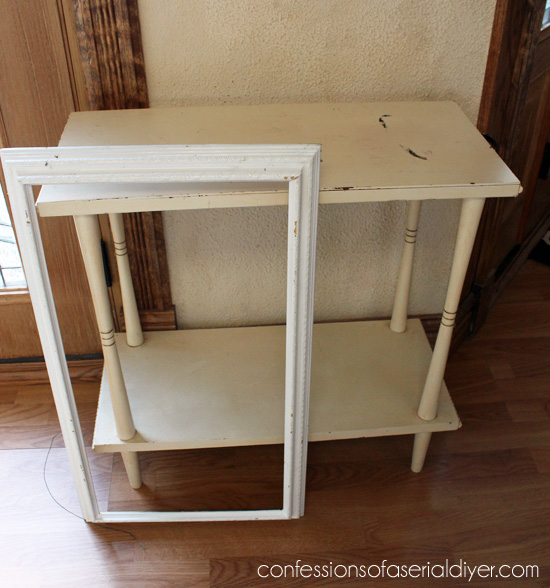
Lovely, right? He he…the little table was one of my Lucketts trip finds last year, a $2 Yard sale table I found at a yard sale on our way there. The frame is from a painting my Mom was selling at our yearly Spring yard sale that didn’t sell.
Here’s what I did with them:
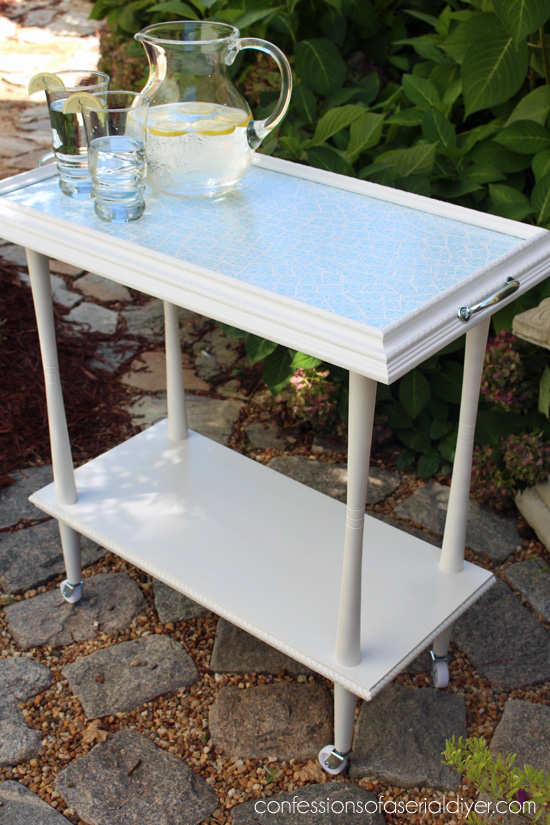
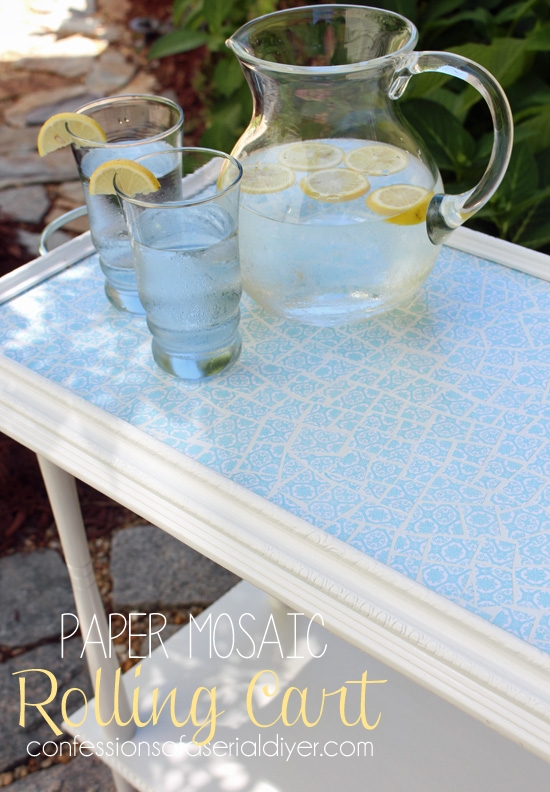
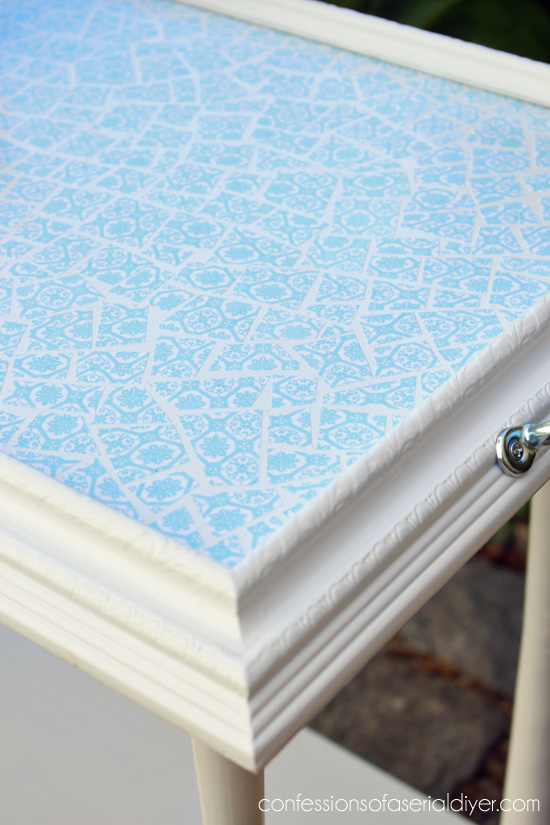
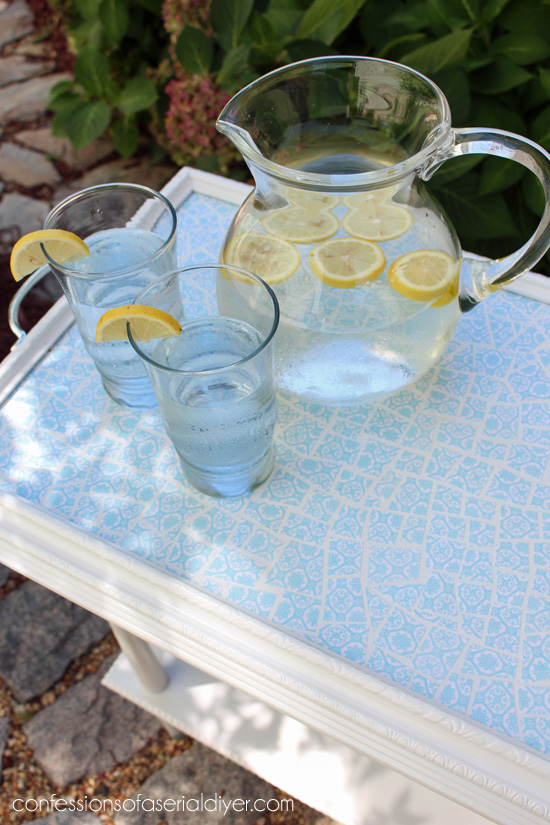
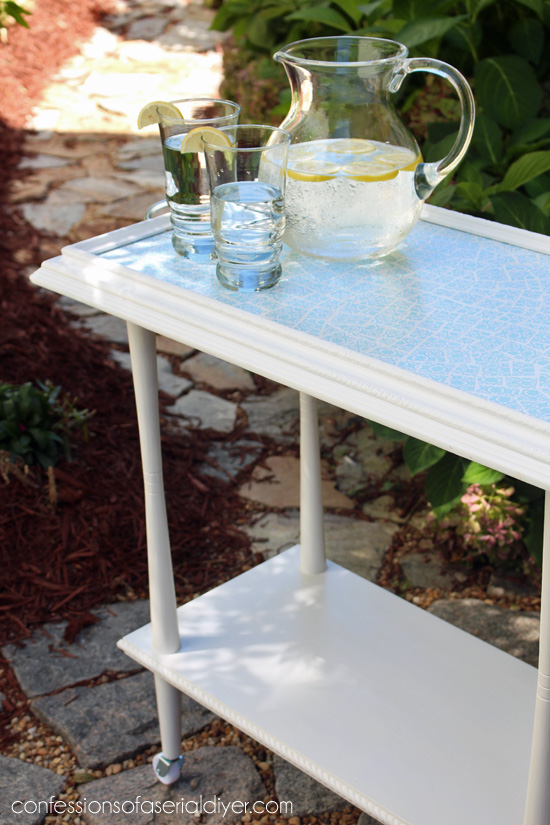
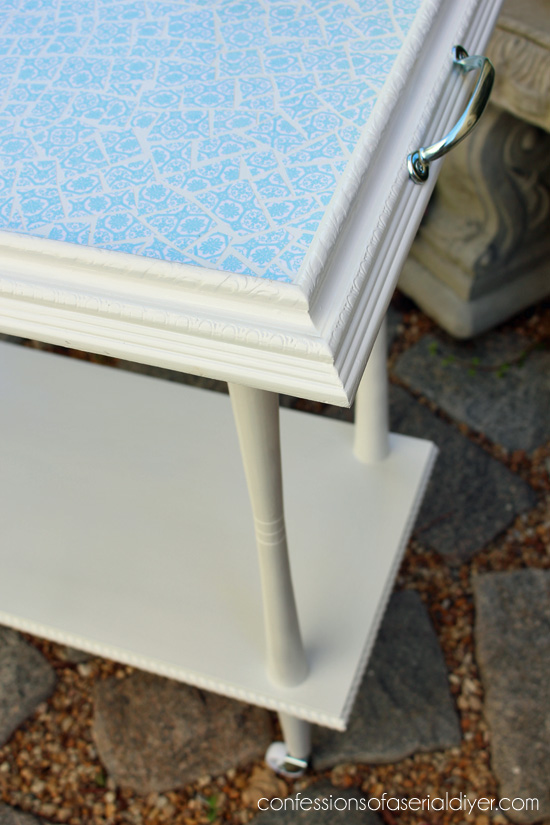
So much prettier, right? I wanted the top to look like broken tiles, so I chose a paper that looked like pretty tile:
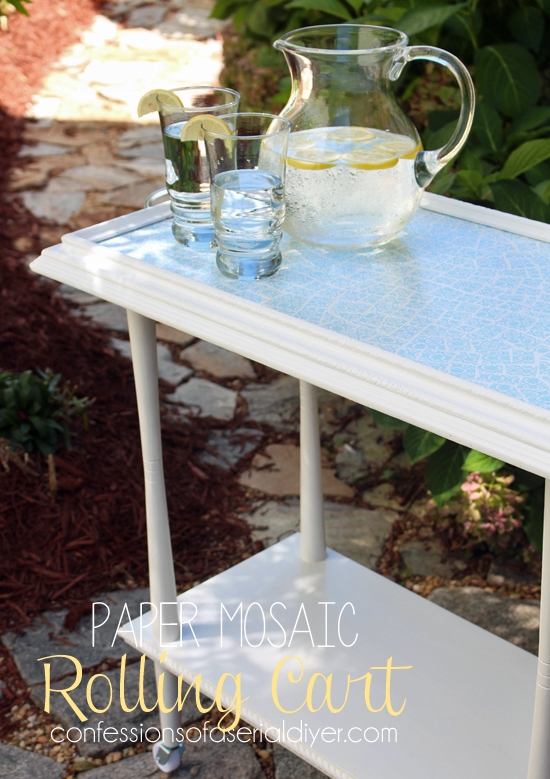
It’s fun. It would be perfect in a sun room or in a little girl’s room as a tea cart, or in a laundry room to hold supplies.
I started by painting my table, frame, and a piece of 1/4″ hardboard with white paint. I used a little ASCP in Pure White as well as some Rustoleum spray paint.
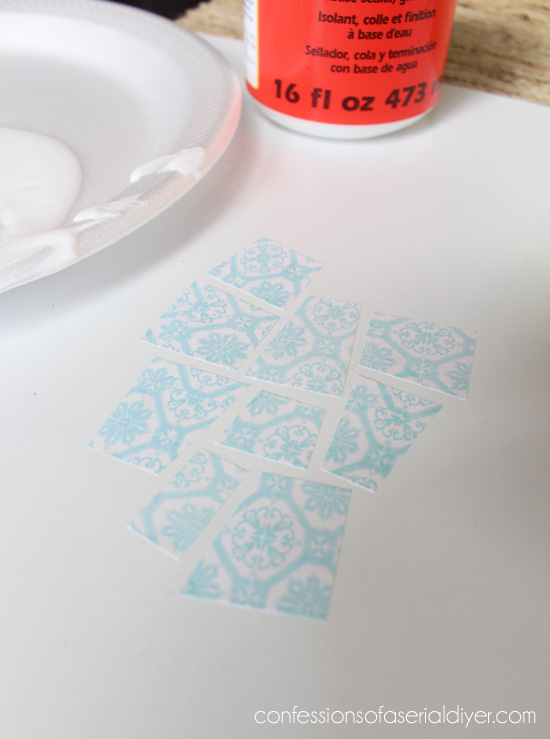
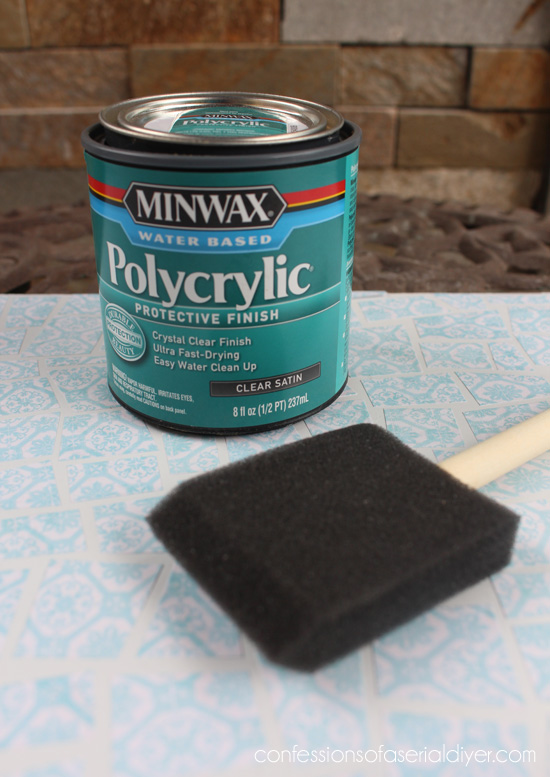
To do the mosaic, I gathered my supplies:

I cut my paper into random irregular shapes like you see below, painting Mod Podge on the back of each piece like a glue.
This was my favorite part. Much like the Quilled Paper Skull or Heart I made, I love how relaxing it is to get lost in the fine details.
Almost done…
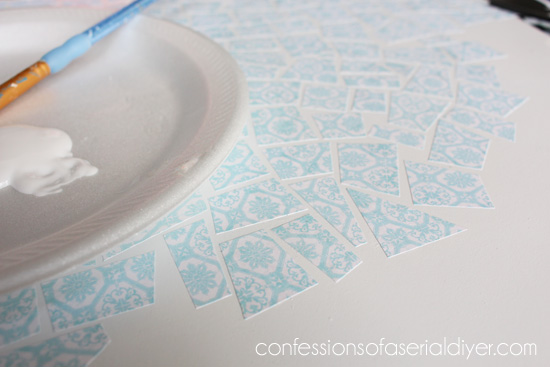
I had to fill in some larger gaps with tiny pieces. When I was happy with it, I sealed the top with Minwax Polycrylic using a foam brush. I gave it two coats.
That’s it! Now it’s a light bright whimsical piece that would have surely been headed for the trash!
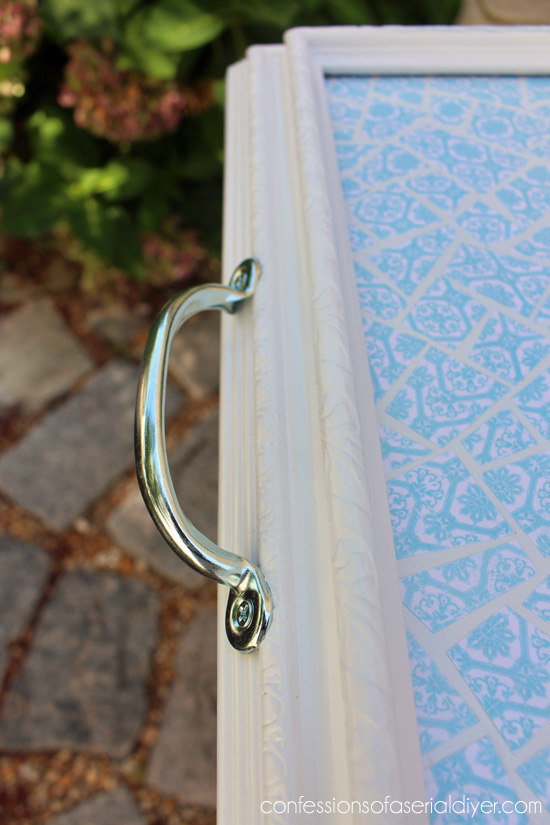
I added screen door handles to act as tray handles, although the top doesn’t really lift off.
I also added wheels to make it mobile…
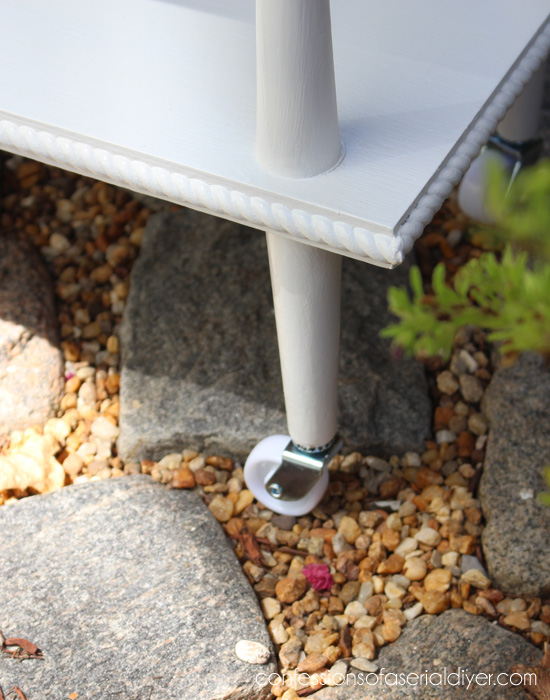
There were already holes in the legs so perhaps this table had wheels at one time, however they were too big. No worries…I just wrapped a little frog tape around the wheel posts and squeezed them in. Perfect!

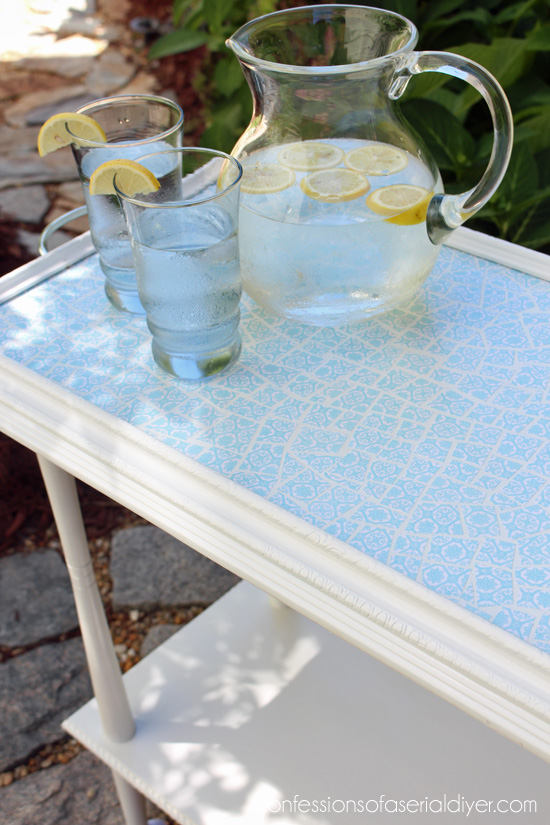
The polycrylic did a fantastic job of sealing the surface. This water pitcher and these glasses sat here for almost an hour collecting the condensation that rolled onto the table. Just a quick wipe with a paper towel and it was perfect again!
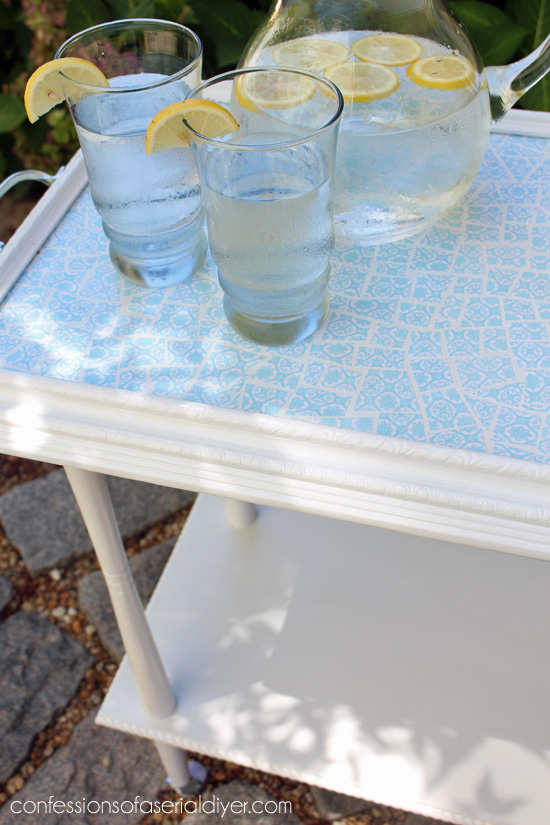
Who drank that water?? Oops it looked so refreshing…
Hope you enjoyed this fun little makeover!
You can see the rest of my Themed Furniture Thursday pieces here: Bold, Travel, Metallic, Flowers, and most recently…Numbers:
And here’s that dresser I mentioned:
Be sure to visit my friends and see what furniture pieces they transformed with decoupage too!
[inlinkz_linkup id=439922 mode=1]
Have a fantastic day!
XO,
![]()
If you like what you see, there are several ways to follow along! ![]()
Email * Facebook * Pinterest * Hometalk * Twitter * Instagram


Debbie says
I love it! A rolling cart from that, oh yeah, you’re good!
Christy K. James says
Thanks so much, Debbie! So excited to have you on the tour!! XO
Angie @ Postcards from the Ridge says
This turned out so nice! It’s the perfect lemonade stand or drink cart. You must be super paitent to cut all of those pieces and attach each one. Great job.
Christy K. James says
Thanks, Angie! It was actually very relaxing sitting there mindlessly cutting and gluing. 🙂
Kathy, Petticoat Junktion says
Your projects are always amazing Christy. Fantastic idea! I want to go to Lucketts.
Christy K. James says
Aww thanks, Kathy! I missed Lucketts this past Spring, but hope to go again next year! This was a fun theme 🙂
Melissa @ DaisyMaeBelle says
What a creative way to save a table and a frame! LOVE this precious table! And the mosaic is perfect! Life to the full! Melissa
Christy K. James says
Thanks, Melissa! That table has been sitting in a pile in my garage for a year and a half. Glad to finally do something with it! So glad to have you on the tour! XO
Wendi @ H2OBungalow says
So creative! Love the idea of creating a mosaic top. Your frame and handles finish your teacart perfectly.. Love!
Christy K. James says
Thanks, Wendi! XO XO
Meegan says
Christy,
I can’t get over the fact that you used a frame for the top-amazing! Your furniture makeovers are always top-notch. Thanks for the inspiration.
Christy K. James says
You are always so sweet, Meegan! I am always excited to see how everyone interprets the theme 🙂
Sonya~At Home with The Barkers says
I LOVE IT! Cutting the paper like mosiac tiles is so creative. Great job my friend. ~Sonya
Christy K. James says
Thanks so much, Sonya! Looks like everyone had fun with this one! XO
Nancy @ Artsy Chicks Rule says
Aren’t you clever!!! …with the “tiles” and the tray top!! LOVE, love it Christy!!
As always…great job!! xo
Nancy
Christy K. James says
Probably not my favorite themed furniture project, but I appreciate the kind words anyway sweet friend! XO
Jeanette says
Christy,
Your projects always amaze and inspire me. Love visiting your website. Fun tour! ~Jeanette
Christy K. James says
Thanks so much, Jeanette! I agree…this is a fun tour! XO
Tami @ Curb Alert! says
Great job as always. I love how you added the frame to the cart!
~Tami
Christy K. James says
Thanks, Tami! And thanks for giving us a heads up about sealing the top…you saved me because I don’t think I would have done that!
Paula@SweetPea says
I love how you created the tile effect with scrapbook paper and Mod Podge. So creative! This cart is going to be so much fun to use. Love it!
Christy K. James says
Thanks so much, Paula! Our group had a lot of fun with this theme! XO
Linda Petersen says
You are totally amazing! Love the cut paper idea~~~~I wish I could think of these ideas as easily as you do 🙂 .
XO, Linda
Christy K. James says
Thanks, Linda! Sometimes it takes a deadline to force the ideas out ha ha 😉
Christy @ Our Southern Home says
Super creative, Christy!!! I just love the idea of manipulating the paper to look like broken tile! Beautiful! ~Christy
Christy K. James says
Thanks so much, Christy 🙂
Abby @ Just a Girl and Her Blog says
Ooh it turned out so pretty, Christy!! LOVE the paper you chose! I don’t know how you come up with these amazing furniture ideas, but keep them coming! They’re awesome!
~Abby =)
Christy K. James says
Aww thanks so much, Abby! 🙂
Beth says
Really cute Christy! Cutting the paper and making it mosaic really did the trick!
Christy K. James says
Thanks, Beth! 🙂
Jilly says
Decoupage is so much fun, your rolling cart looks great. We recently decoupaged a vintage phone, theres a post on my blog about it.
Jilly
jillyjillyblog
Christy K. James says
Thanks, Jilly! Coming over to peek at your phone 🙂
Breanna says
This so so cute! I love the fact that you made it mosaic! The possibilities are endless with this 🙂
Christy K. James says
Thanks, Breanna! XO
Jen @ Girl in the Garage says
Christy I know this project must’ve taken a long time and it paid off! What a great idea adding the frame to the top and the wheels to the bottom. And that mosaic paper is so pretty!
Christy K. James says
Thank you, Queen of the decoupage tour lol. I’m still in love with your desk. 🙂
Shanna Gilbert says
The re purposing queen strikes again! I love how you took two discarded items and blended them together so beautifully!
Christy K. James says
Thanks, Shanna! XO 🙂
andi says
So cute! You girls are so stinkin’ talented. 😛
-andi
Christy K. James says
Thank ya 🙂
Therese @ Fresh Idea Studio says
Christy, what a cute cart! From the addition of the frame and wheels to the pretty paper you created such a cool broken tile look with…I love it!
Christy K. James says
Thanks so much, Therese! XO
Marie@The Interior Frugalista says
Love it Christy! The picture frame really dressed the top of the table nicely. The paper mosiac idea is so creative.
Christy K. James says
Thanks so much, Marie! Enjoy the rest of your week! XO