Hello lovelies, and welcome to Trash-to-Treasure Tuesday!! You know this is one of my favorite days of the month! Not only do I get to share a thrifty makeover (My favorite!!), I get to do it with four other amazing ladies! Be sure to look for their makeovers at the bottom of this post!
You’ve heard me talk many times about my stash which once resided in the garage, but you’ve never heard me mention anything about our storage unit. It mostly held boxes of sentimental stuff, seasonal decorations, and my hubby’s football gear. However I did manage to stash a few pieces of furniture in there.
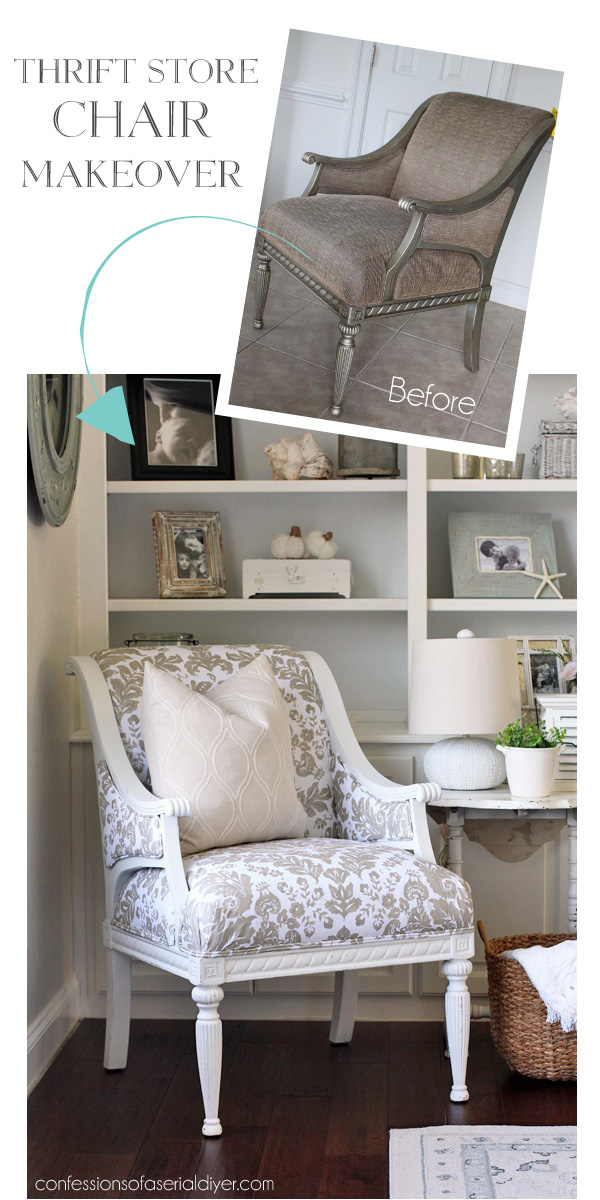
As soon as my hubby unloaded this baby, I knew I had my project for today:

I bought this chair at a thrift store that isn’t even in business anymore at least three years ago for $35. I loved the details of it and knew some new fabric would make this chair shine again.
And I was right:
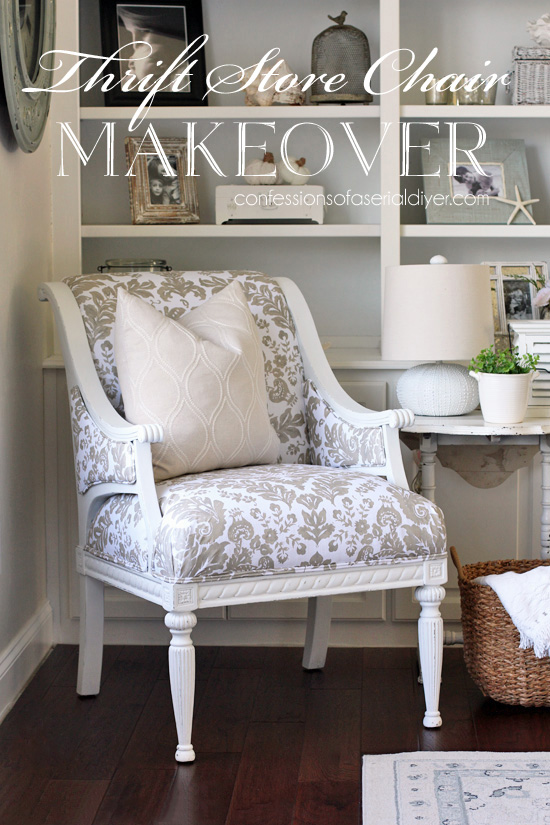
Right??
I was in need of a chair for my living room and this one worked out perfectly!
I always take my sweet time getting to the upholstered pieces, but some of them aren’t too bad at all to redo. I have included a few affiliate links so you can find the products I use.
I just needed to remove those panels on the sides and the panel that went across the back, and I was ready to get started.
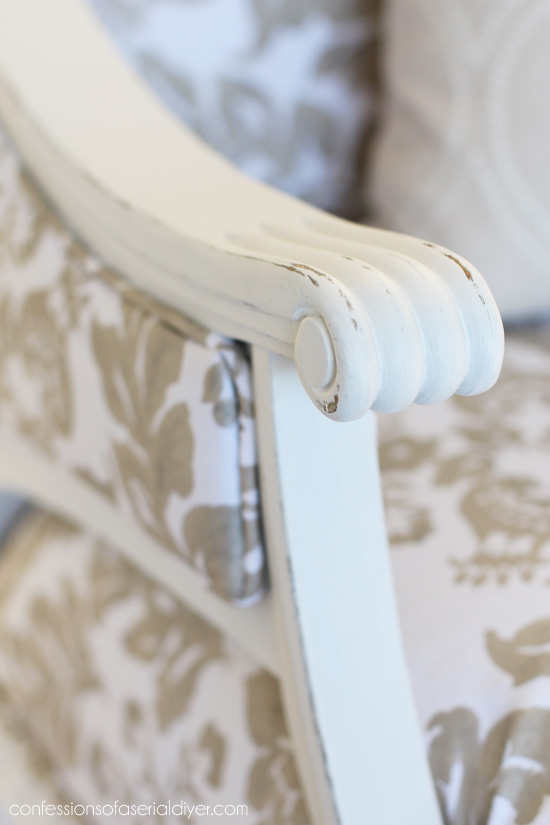
The first thing I did was paint the frame of the chair with Fusion Mineral Paint in Casement while I still had it out from painting my cane-back chairs last week.

This was two coats. After it was dry, I sanded here and there to highlight some of the details. (No topcoat required!)
Not all upholstery projects are created equal, but I took pics along the way just in case anyone has a similar chair to tackle.
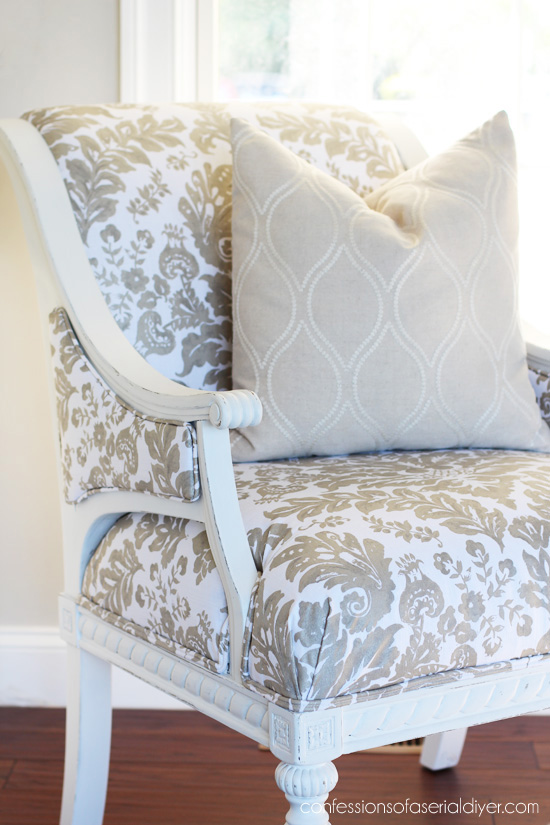
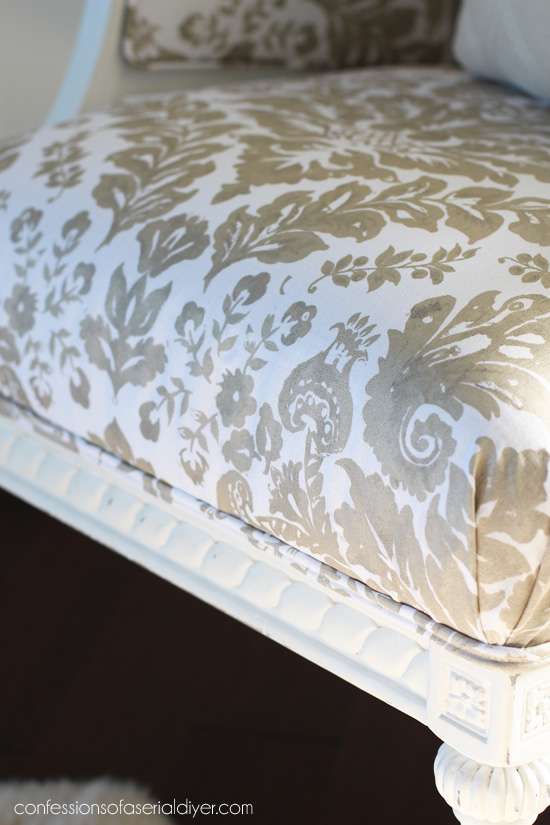
First let me share what I used to cover this chair:
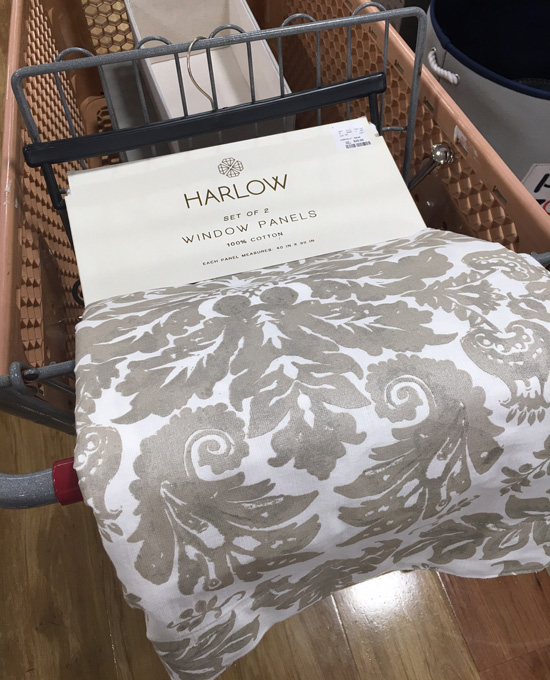
Yup. Drapery panels from HomeGoods! For $29.99 I got plenty of fabric to cover this chair! Isn’t it so pretty? 🙂
Here is how the upholstery came together…
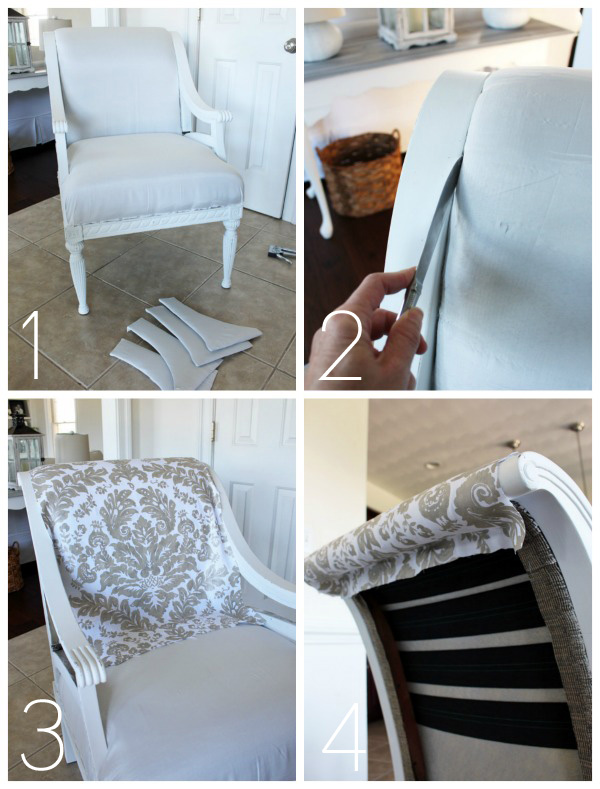
- I quickly realized that the pretty white background on my fabric became very dull when I laid it on top of the original upholstery. I decided to use the liner from the drapery panels to cover the chair first so the background would be white. (That also gave me a chance to practice upholstering it!) Hopefully you can just skip to the fabric!
- This picture is just to show that I used a butter knife to get the fabric into those tight spots.
- I cut the fabric to fit the back first, making sure my pattern was even and centered.
- Then I stapled the fabric to the top of the back with my el cheapo staple gun.
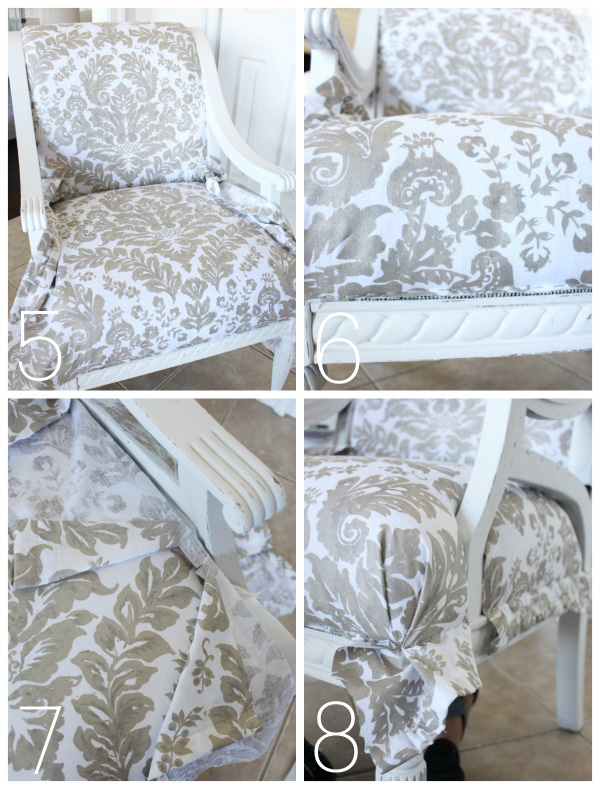
- I folded the sides of the top over and secured them in the crevice using my butter knife and hot glue:
I used hot glue to secure the bottom of the front piece in the crevice between the top and bottom. Then I cut a piece for the bottom, making sure it would reach down both sides. I also secured that in the same way in the crevice. (How many times can I use the word “crevice”??) - I pulled the fabric down over the front and stapled it in place all along the front.
- To work around the arms, I cut the fabric as pictured, then folded it under and wrapped it down around the arms.
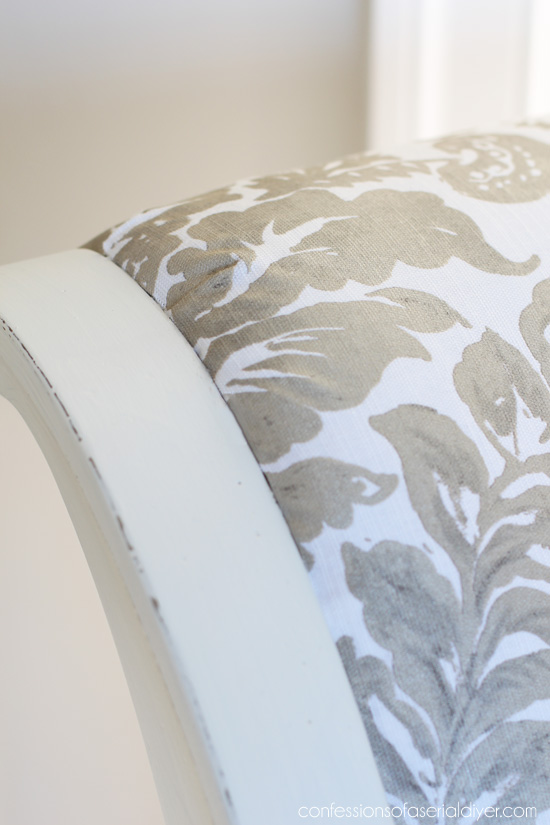
- I secured the sides all along the edges with staples. (I pleated the front corner just the same as the original fabric had been pleated.)

- Using sharp scissors. I trimmed any excess fabric.
- To cover the staples I made double welt trim. (Find my tutorial for that HERE. If you can sew a straight line, you can totally do this!)
- I added the welting using my hot glue gun. (Did you know Ryobi makes a cordless hot glue gun?? I just found out recently and had to have one! Find it HERE.)
- I covered the side panels in fabric also, securing with hot glue. Then I made piping (tutorial HERE) to add around the edges like the original chair had. I just hot glued those back in place. I also covered the back panel and was able to nail that back in place with the original nails that were still attached.
And that’s it!

Upholstery projects can be intimidating, but take your cues from the original upholstery.
Take pictures as you remove pieces so you can see how it came together
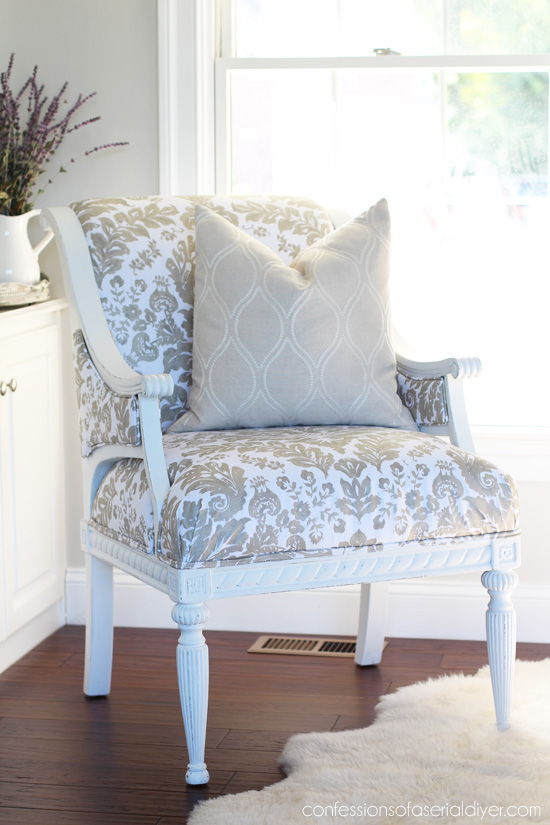
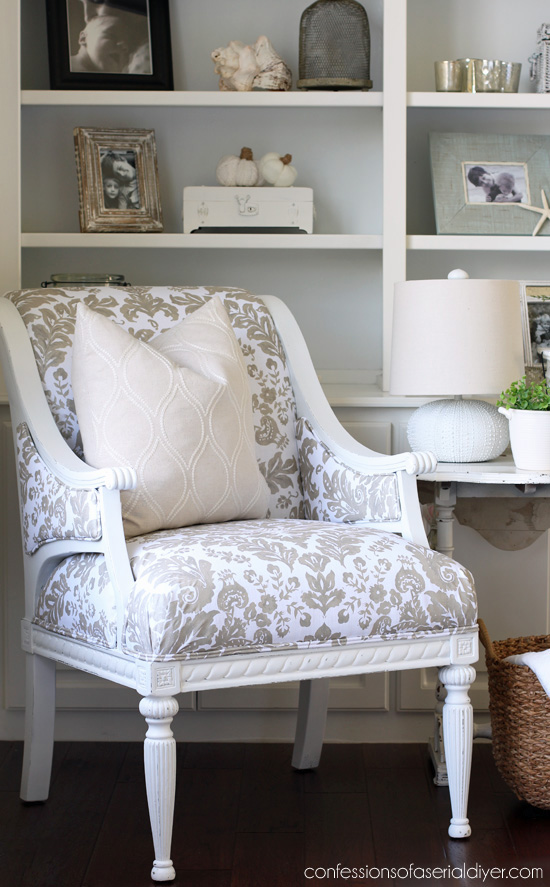
This is the opposite corner in my living room and this is where this chair will stay.
This didn’t look super trashy before, but the finish on this before was pretty gross up close:
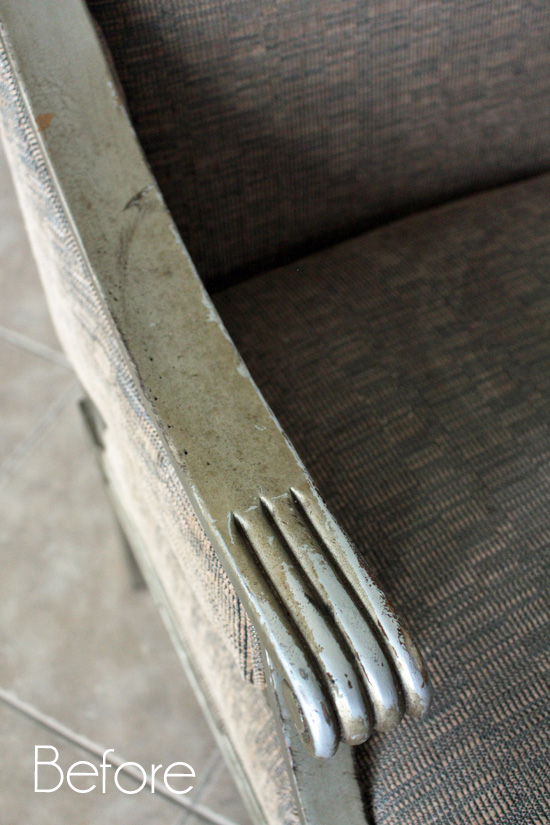
Nothing a little paint couldn’t fix though…
I just love this fabric! Too bad they didn’t have enough in the right size for my windows!
For $35 plus the drapery panels, this only cost me $65. You just can’t beat that.
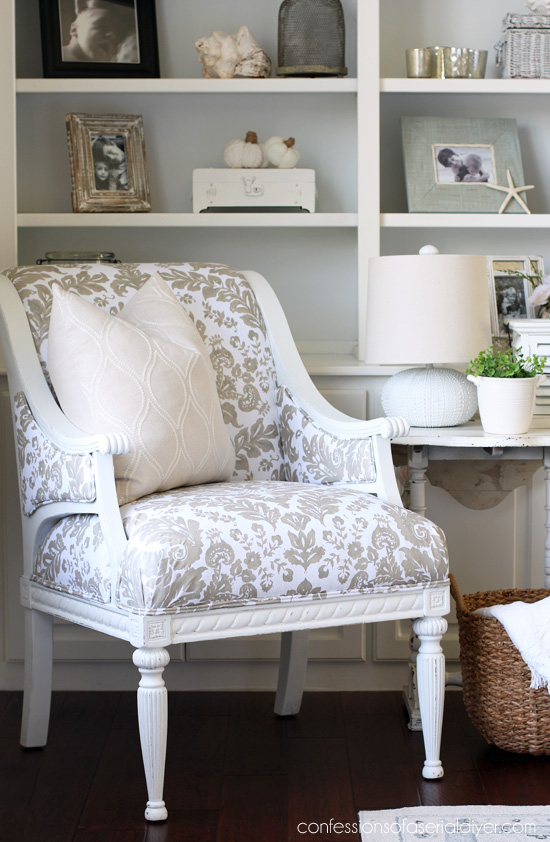
My living room is really coming together now. I still need something to fill one wall, a coffee table solution, and window treatments. Then it will be done!
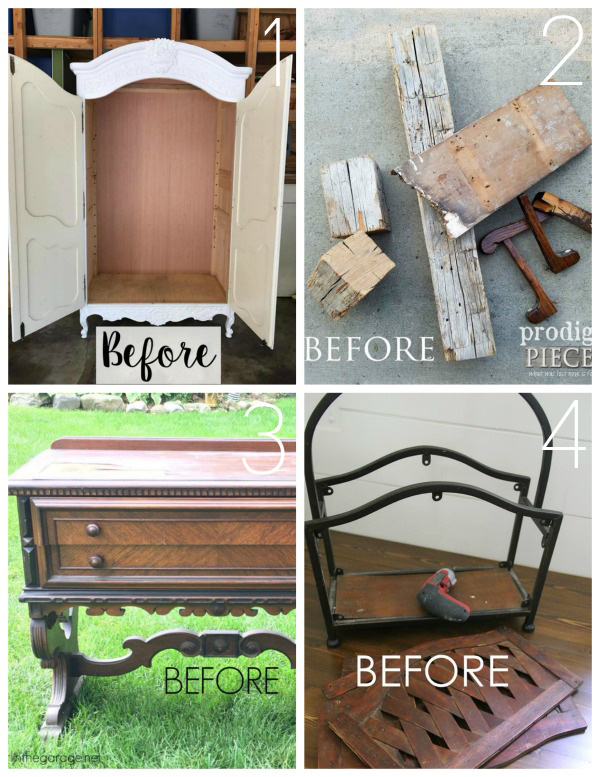
Don’t go anywhere yet! My friends have trash-to-treasure makeovers to share too!

Click the links below the image to see the afters!
I mentioned this the other day…there is a brand new Facebook Group made just for thrifty makeover lovers like us:

It’s totally free and it is seriously filled with nothing but thrifty makeover goodness. There are also opportunities to share your own thrifty makeovers and finds if you like! Visit it HERE to join us. 🙂
If you missed any of my new house adventures so far, you can catch up here:
Ready for Move-in Day: House Progress so far
Pedestal Kitchen Table Makeover
I’ll be back on Thursday with my wainscoting tutorial since so many of y’all were interested in seeing how that went up.
UPDATE: It’s done…check out the wainscoting how-to HERE now!
XOXO,
![]()
Don’t Miss a Thing!
If you like what you see, there are several ways to follow along!


Mary Kaiser says
I Love how that chair turned out. You may have spent $65 dollars, but it probably would have cost at least $265 new, maybe more. I think it looks better than new, now it has “Christy Character”, that is the best kind! You are so amazing and you sure inspire me with every post, you even make me believe I can do it!!
Christy says
Thank you, Mary! You are so right…huge savings here! And thank you for your very kind words…you CAN do it! 🙂 XOXO
ColleenB.~ Tx. says
OhMyGosh! Absolutely Love that and like you; love the detail of the chair.
Who had thought; using window panels as covering for a piece of furniture………only you.
Painting it white and putting on new fabric really turned out beautifully. The chair wasn’t bad before put you tuned it from an ugly duckling to a gorgeous swan.
If only I lived closer; I would buy that chair from you in a heart beat; providing it was 4 sale that is.
Great Job.
Christy says
Thank you, Colleen!! The drapery aisle is a treasure trove of beautiful home décor fabric ha ha! I will actually be keeping this pretty piece! 🙂 XOXO
Larissa ~ Prodigal Pieces says
You rocked this makeover, Christy! It looks so refreshed and ready to go. The fabric is gorgeous. ????
Christy says
Thanks, Larissa! I’m so happy with how this fabric worked out! XOXO
Paula says
What a beautiful addition to your home! You were so smart to use curtain panels for your fabric. This looks so nice in your new living room.
Christy says
Thank you, Paula! I love the drapery aisle for fabric! XOXO
Pam says
I love your do-overs. You’ve given me the confidence I need to try my hand at painting and reupholstering furniture. This chair for your living room is exactly my style. I shop the thrift stores for drapes to use because I can find some really good quality fabric for a little bit of investment. Thanks.
Christy says
Thank you, Pam! I’m so excited to hear you are ready to tackle an upholstery project! And looking out at the thrift store for draperies is a great idea too! XOXO
Patty says
Another beauty! I just can’t seem to get enough of your chair re-do’s! Just so pretty!! Can you tell that I love chairs?! But yours are my most favorites! Thanks so much for sharing – your house is coming together so quickly and just lovely!
Christy says
Aww thanks, Patty! I too love a good chair makeover…bonus for me is that this chair is no longer on my to-do list taking up space yay! The house is getting there! 🙂 XO
Marcie Lovett says
You got a head start on this one, Christy! It looked pretty good before (except the silver finish). Your upholstery skills astound me and this chair looks like it cost a fortune. Great score on the fabric, too. Even the lining came in handy!
Christy says
It was a pretty chair before and yes that helps! 🙂 So glad that fabric worked out. Thanks, Marcie!! XOXO
Rebecca says
This is such a unique piece. Love it!! Great job!
I wanted to use window panels to recover my ottoman, but they weren’t the right size, so I used a shower curtain instead. 🙂
Christy says
Thanks, Rebecca! Glad the shower curtain worked out! 🙂
Mary Helene says
Let me give you my address so you can send me that beautiful chair.
Christy says
Ha ha! 😀
Terry M says
Your chair is gorgeous, I love the curtain fabric you chose to use. Thanks for the in depth tutorial on how you recovered it, so very helpful.
Christy says
Thank you, Terry! It is my pleasure! XOXO
Sherry Stuifbergen says
Rooms are never “done.” Your decorating will always evolve, become “collected” over time. I can’t wait to see your livingroom! The chair is fabulous. I want to try the double welting. I wish you were my neighbor. You are light a “jolt” of strong coffee, that can stimulate me to get MY work done. You get so much accomplished! I envy you and your imaginative eye!
Christy says
Well thank you, Sherry! Ya’ll and this blog help me to get things done for sure! And you are so right…rooms are truly never done! XOXO
Sandra powell says
Good morning Christy, I see your move has been successful and things are looking great! We are still in renovations with our move , waiting on the new kitchen , but we have accomplished putting in new hardwood floors???? ! Renovations are not for the faint at heart????
At any rate, once again your makeover is so pretty, are a talented woman This chair is an amazing transformation!!!! I love it!! Have a great day❤️
Christy says
Hi Sandra! Yep the move went well! I don’t envy you and the renovations…hopefully you can see a light at the end of the tunnel…floors sound like good progress! Thanks, girl! XOXO
Marie says
You always make it look so easy, Christy! When I saw the chair at the end of your last post I thought to myself, now that looks like an upholstery challenge, one I’d be too chicken to take on. Thank you for breaking it down for us, pinned. What a difference – it’s beautiful! Love that fabric, can’t beat the price and guess which aisle I’ll be perusing for my next upholstery project.
Christy says
Thanks, Marie! You’ve done some amazing upholstery projects yourself! I have never tackled a chair like this yet I didn’t hesitate to get started ha ha. I guess I figure I don’t have much to lose, eh?? And yep…the drapery aisle is one of my favorite home décor fabric shops! 😀
Joan says
Love the makeover and the addition of the taupe into the living room! You are SO GREAT at upholstery and your things have such a professional finish. I can see why the chair appealed to you – love the lines of it. Beautiful job as usual!!
Christy says
Thanks so much, Joan! I didn’t need this chair when I saw it but I just couldn’t pass it up, and I’m glad now that I didn’t! XOXO
Kim says
I loved the original chair. When I seen pix I thought it was the make over. Everything does not need to be painted white or at all. This is a trend that has overstayed. Now their saying you need to add wood elements. Get your sanders out girls.. You know all those beautiful pieces you painted white. Who makes up this stuff??
Christy says
The original chair was filthy, Kim. No everything does not need to be painted, but that is the look that I like. You can have a sea of wood in your own home since apparently that is what you like. You are most definitely entitled to your opinion, but you don’t need to be so rude about it. You must be hungry.
Tara C says
I love this transformation! How well does the hot glue hold everything together after the chair has been used for awhile?
Christy says
Thanks, Tara! I’ll let you know in about six months ha ha. Honestly though, hot gluing fabric to fabric is near impossible to pull apart, so it should do just fine. I always hot glue my piping and welt trims on and they have stayed put. 🙂
Nancy @ Artsy Chicks Rule says
Like night and day! So pretty now!
Christy says
Thanks, Nancy!! I didn’t think this was going to be a huge transformation when I got started, but it does look so different now! 🙂 XOXO
Mary Wells says
I love it! I never would have thought about using curtain panels. I have a chair to recover something like this one and I couldn’t figure out how to get around the arms. Is there a way you could show how you did the pleats? Thanks for the tutorial.
Christy says
Thanks, Mary! I turned to curtain panels a few years ago when I was having a hard time finding home décor fabric I liked, and haven’t looked back! For the corner pleats, I stapled the fabric in place along the side and then across the front, leaving the corner to the last. I pulled the fabric on the very corner straight down and then folded the fabric on either side of it towards it. You can see a bit of what I mean in the photo labeled #8 in the tutorial. Hope this helps! XOXO
Suzanne says
Gorgeous!!!! You do such beautiful work.
Christy says
Thank you, Suzanne! XO
Susan Williams says
Beautiful make over! Im anxious to see the whole room make over. I love the trash to treasure Tuesdays.
Christy says
Thank you, Susan! I can’t wait for this space to be complete…it is so close! And T2T Tuesdays are my favorite!! XOXO
Gina Keysor says
What a lovely fabric and great job on the chair. You gave me a idea, I recently was given 2 sets of nice heavy drapes also from Homegoods and only needed one set on my bedroom window, I could make a set of matching shams for my bed since its a white down and will match! Thx for all the inspiration, I bet your having fun in your new home with all sorts of new areas to decorate. I have that same sea urchin lamp you have on the side table. Homegoods gotta LOVE IT!!
Christy says
Thank you, Gina! Well there you go…now you have a use for those extra drapes! I really am having a ball with my new home…I just want it all done right away though ha ha! Yes HomeGoods is the best…love that little lamp!! XOXO
Mary Ann says
This looks incredible! I love it and it provides me great inspiration.
Christy says
Thank you, Mary Ann! XOXO
Marcia Banach says
Great reupholstery tutorial, and the chair looks awesome! Thanks for sharing.
Christy says
Thanks, Marcia! It’s my pleasure! XOXO
Lois Keffer says
I just love the way your junk chair truly turned into a lovely treasure. Your successes never cease to encourage us. Bless you for your hard work and inspiration. We’ve been praying for you during the extra stress of moving. Love you so much!
Christy says
Thank you from the bottom of my heart, Lois! Your sweet comment completely made my day!! It is my pleasure to share in hopes of inspiring others to tackle projects they never thought they could. I appreciate those prayers too!! XOXOXO
Jen @ Girl in the Garage says
Wowza, what a beautiful makeover Christy! You gave that worn out chair a fresh new life. And thank you for always sharing such detailed steps when you reupholster a chair. <3
Christy says
Thanks, Jen! I dreaded this one, but it actually wasn’t too bad at all this time! XOXO
Sandy Long says
Hi Christy, This chair is stunning. I am always so impressed by your upholstery projects. They look like brand new, high end pieces. I really love how detailed your instructions are with pictures at every step. I have been sewing my whole life, but have never had the nerve to tackle upholstery. I’m starting to think that there might be a chair redo in my future! I look forward to your emails each week. Everything you do is amazing and inspiring.
Christy says
Aww thank you so much, Sandy! If you can sew, I’m sure you can tackle an upholstery project! You never know until you try, right? 🙂 XO
Norma says
Oh my love this chair redo and love the detail of the chair You did a wonderful job God bless
Christy says
Thank you so much, Norma! XO
Naomi S. says
Christy, that turned out to be just beautiful! I love that fabric, too. Wonder if you could find out the company who makes it and see if they still sell it. It’s a long shot, but maybe worth a try.
Here’s the great thing about this post: I think after reading it and looking at the photos that I might be able to do a simple chair myself! I find it so intimidating usually, but your tutorial gives me hope! Thanks!
Christy says
Thank you, Naomi! I did try to look up the info that was on the tag, but it was very vague. It really only shared the brand…no style name or number. Weird! I am so excited to hear that you are feeling a little less intimidated by an upholstery project! Some are easier than others for sure, but just take your cues from the original upholstery and you’ll do fine! 🙂 XOXO
Carole says
Once again you made it beautiful. What a wonderful addition to your living room.
Christy says
Thank you, Carole!! One step closer to finishing my living room! ????
Becky says
Lovely! Beautiful styling on those shelves too! Is the new house starting to feel like home? Things are looking good!!!
Christy says
Thanks, Becky!! I am really enjoying our new house so far. We still have a lot to do to make it our own, but we are getting there! XOXO
Lauren says
Curtain panels?! That is brilliant! This chair turned out so beautifully, Christy! Classic and glam and timeless. Love!
Christy says
Thanks, Lauren! My favorite home décor fabric shop is the drapery aisle at HomeGoods ha ha! XOXO
Vicki and Jenn 2 Bees in a Pod says
You make this look so easy! Your chair makeover is absolutely stunning! We love that you used curtain panels as fabric! Beautiful!
Christy says
Thanks so much, ladies!! Yep, the curtain aisle at Homegoods and TJ Maxx are my favorite resources for décor fabric! 🙂
Kimberly says
Christy, I know this is an older post so you may not see this but if you do could you help me understand step 5? I know that if I try to get hot glue down in the crevice I will have it all over the chair and my new fabric so I was hoping you could give me some pointers. (I have a similar chair and am thinking of taking the plunge.)
BTW, as I was scanning through the comments I saw that rude person and when you responded that they must be hungry it cracked me up. People amaze me. Even when I buy furniture (from random strangers, not my grandma) they will tell me I am not allowed to paint it. I think silently, once I hand you this cash if I want to paint it using a paint ball gun it is my choice. One day I am going to say, if you are so attached to it and its future why is it out here at your garage sale for 10 bucks? And as for random blog readers who don’t even have a dog in the fight just shut up and move along.
Christy says
OMGosh you make me laugh! I usually try to be nice as sugar to those that leave snarky comments, but sometimes I can’t help myself ha ha. And you are exactly right! I bought a little table from a yard sale for $7 once and the lady said she hoped I wouldn’t slap paint on it because it had been part of her family for years…well then why are you selling it for $7 at your yard sale lol? As for step 5 on the chair, I used a butter knife to wedge in that crevice and flatten the chair enough to create a space to drop some glue in. Does that make sense? Hope so, my friend! XOXO
Kimberly says
Yes makes perfect sense, thanks! I got that the butter knife poked the fabric in, but I guess it didn’t occur to me to use it to hold the gap open (duh). Thanks as always for giving me a DIY push!
Christy says
Ha ha no worries…sometimes it’s hard to put those vague steps into words! I’m glad to be your DIY pusher lol! 😀