Amazing friends, welcome back!! Ya’ll know this is one of my favorite days…it’s Trash-to-Treasure Tuesday!! WooHoo! I’m excited to check out what my friends have rescued today as well…be sure to be on the lookout for their projects at the bottom!
I am only two projects away from kissing my latest haul good-bye, and today’s project is actually three things: a trio of trays!
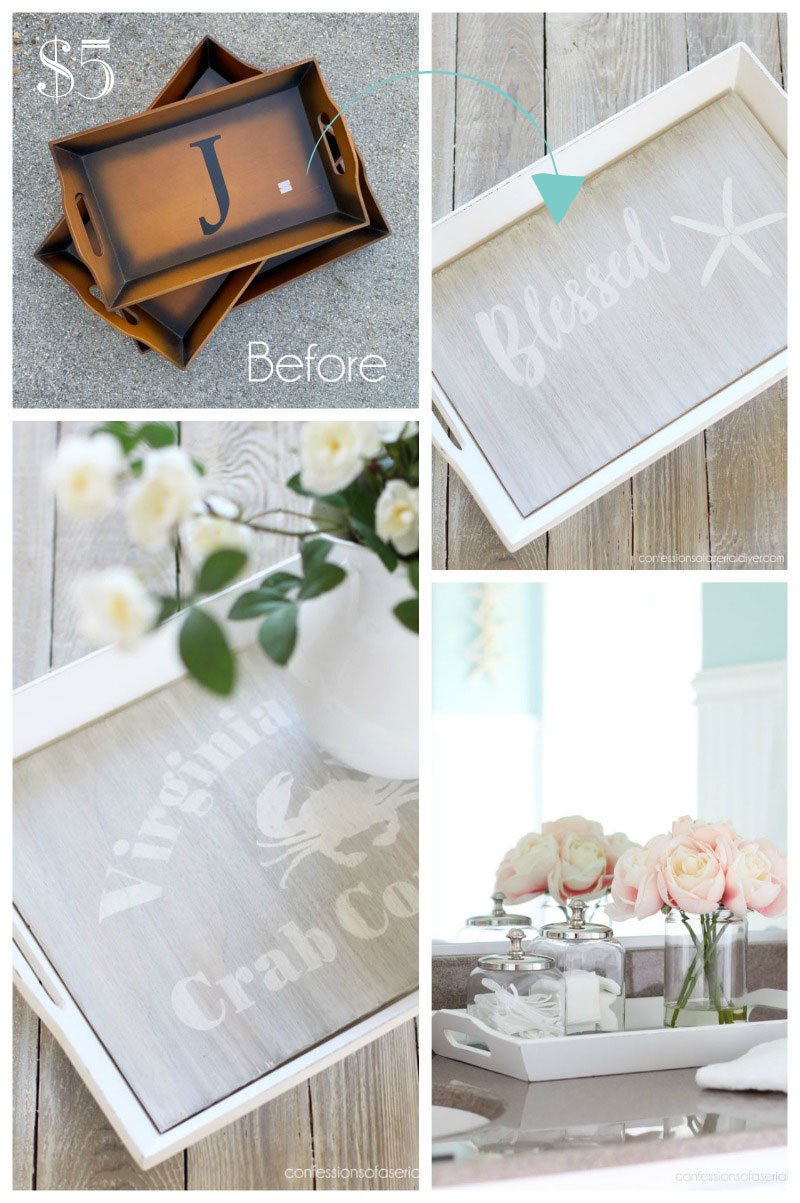
I picked these up for super cheap…only $5.25 for the set of three:
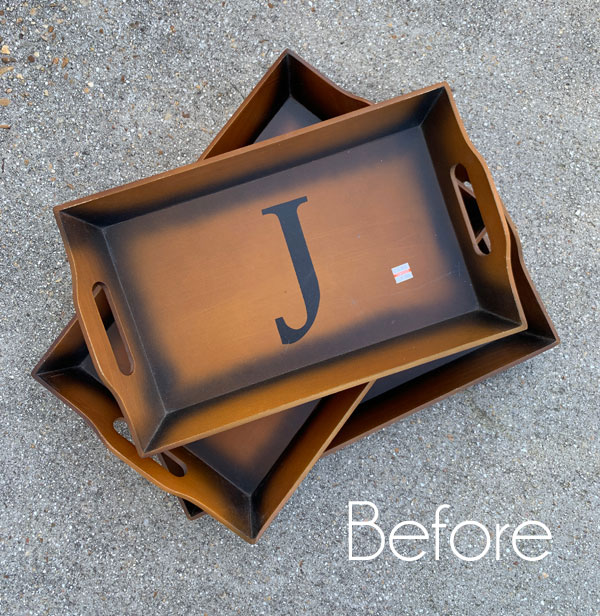
They are quite handsome, eh? And they even have a J for our last name! However, y’all know I did not keep them like this.
For this transformation, I started with three coats of Cotton:
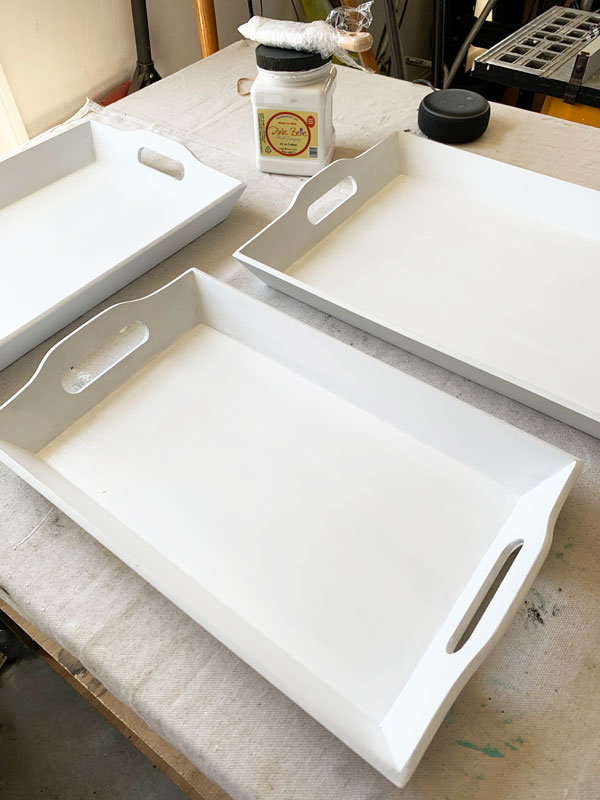
I needed a blank canvas so I could imagine better what I could do with them. They sat like this for several days until I came up with an idea.
I’ve included a few affiliate links so you can find the products I love.
Plan A was to white wash some old wood I found from an outdoor playhouse that had been torn down and use it to line the bottoms of the trays. I quickly discovered that each piece was tapered:
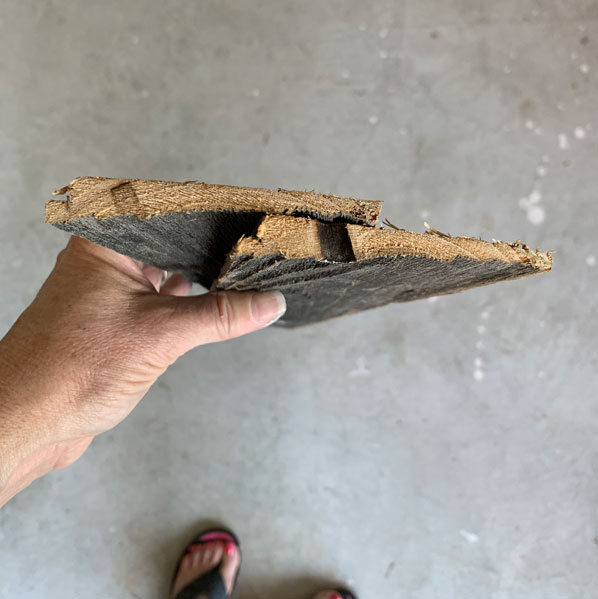
And they would not work as the new bottoms in my trays. I quickly had to come up with a plan B!
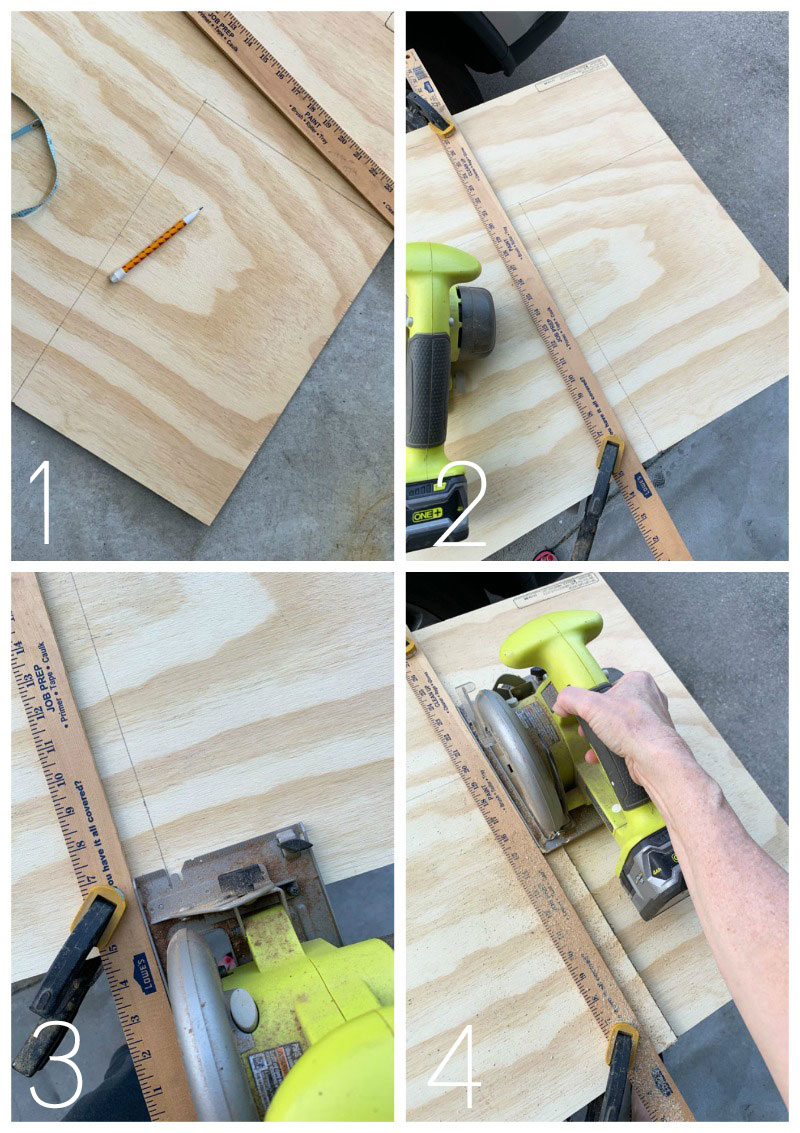
I was really committed to the idea of white washing the bottoms of the trays, so I found this piece of thin plywood in our garage:
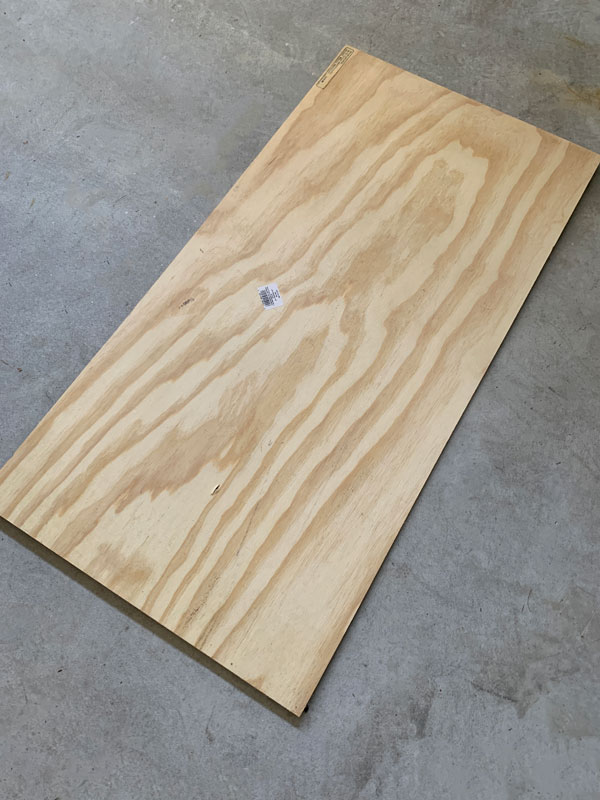
I decided to cut a piece to fit the bottoms of each of the trays and white wash them instead!
I measured the bottoms of each and then used my small circular saw to cut them out:
Then I white washed them using Dixie Belle’s Up in Smoke VooDoo gel stain and watered down Cotton:
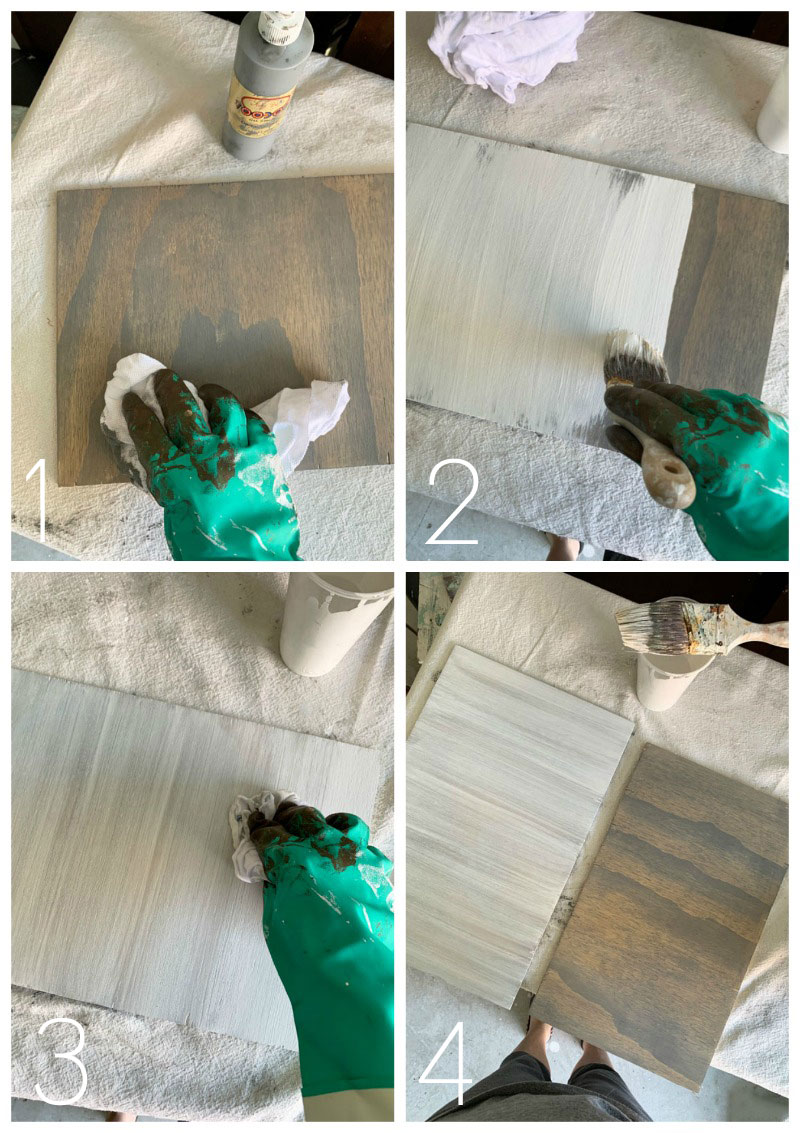
1. I used a clean cloth to apply the VooDoo gel stain in Up in Smoke.
2. Then I brushed on about a 50/50 mix of Cotton and water. I wanted it a bit thinner this time.
3. Then I quickly took a clean cloth and wiped the Cotton/water mix back off. The wiping motion is what creates those lines, so you want to go in nice straight lines.
4. Up in Smoke makes the perfect gray base for this white washed finish.
You can see a video of how I white wash below if you like:
If you have trouble viewing, find it on YouTube HERE.
Next, I used my Silhouette Cameo to print out some “stencils” of graphics I had created for previous projects that I had save on my computer.
If you have a Silhouette and want to use your own graphics too, I shared how I upload my own graphics to my Silhouette HERE. If you don’t own a Silhouette, HERE is another way to add graphics to your pieces without all the fancy cutting machines.
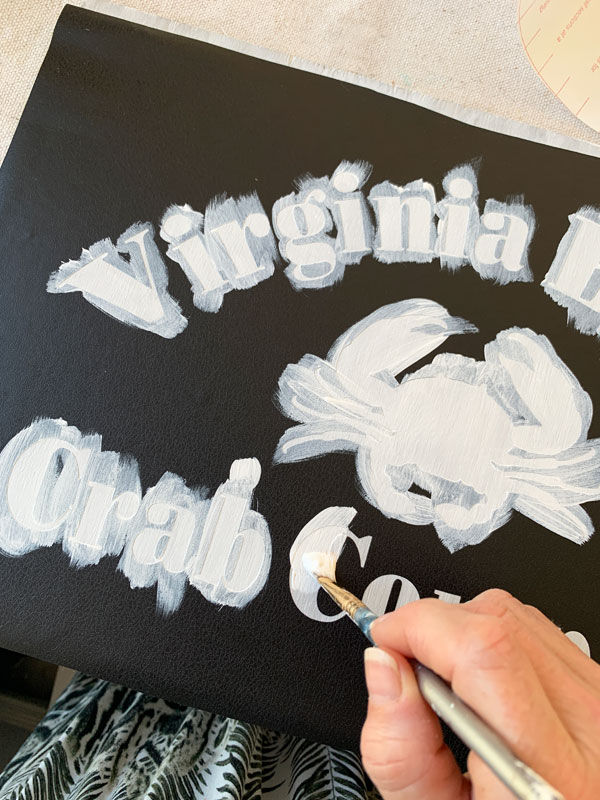
This looks like I used black vinyl, but it is actually black contact paper. I used a small brush and two coats of acrylic craft paint to fill in the “stencil”:
When I removed the contact paper, I lightly sanded all over with 220 grit sandpaper and sealed with Dixie Belle’s Clear Coat in satin. I adhered the plywood to the bottoms of the trays with some Power Grab construction adhesive my Hubby had.
Are y’all ready to see how they turned out??
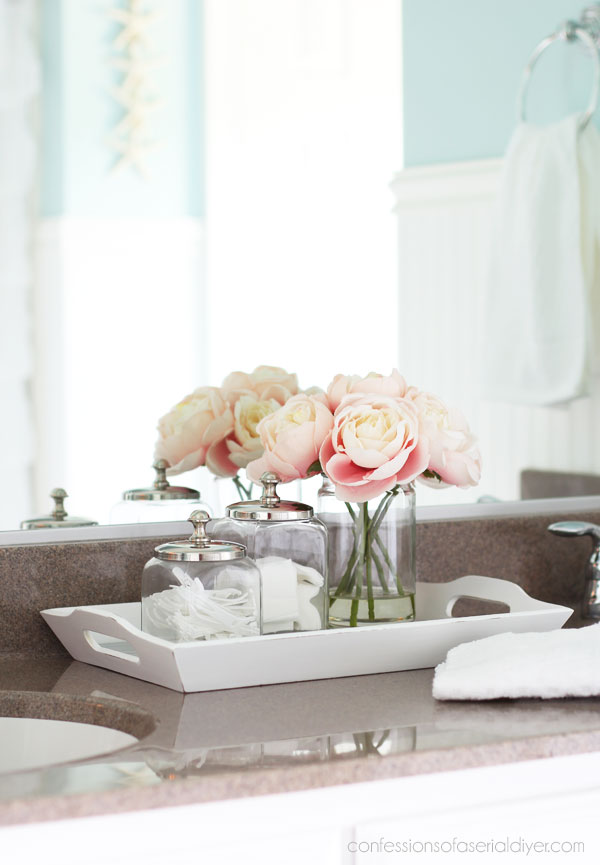
Let’s start with the smallest of the three. I played with this one in our downstairs guest bath:
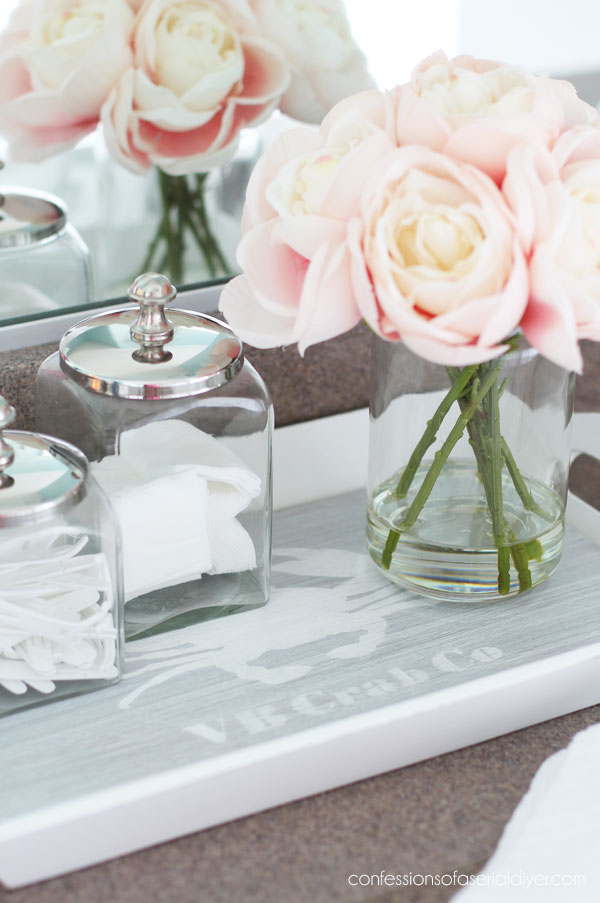
VB Crab Co… the VB stands for Virginia Beach!
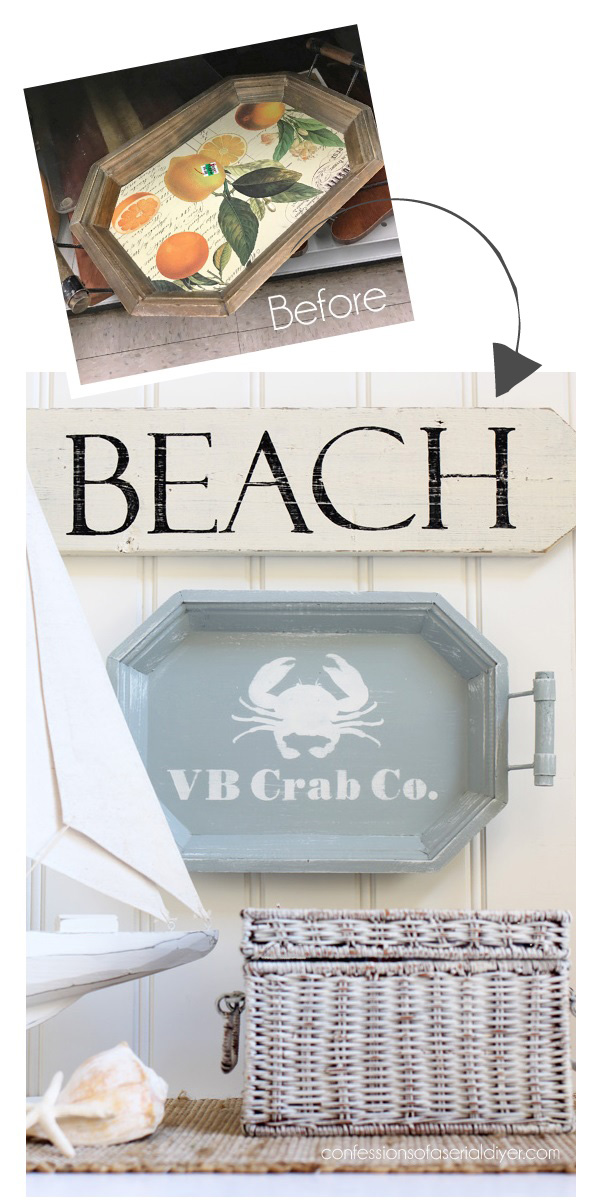
I originally used this graphic on this little tray I redid years ago:
The second biggest one got something a little different on it…
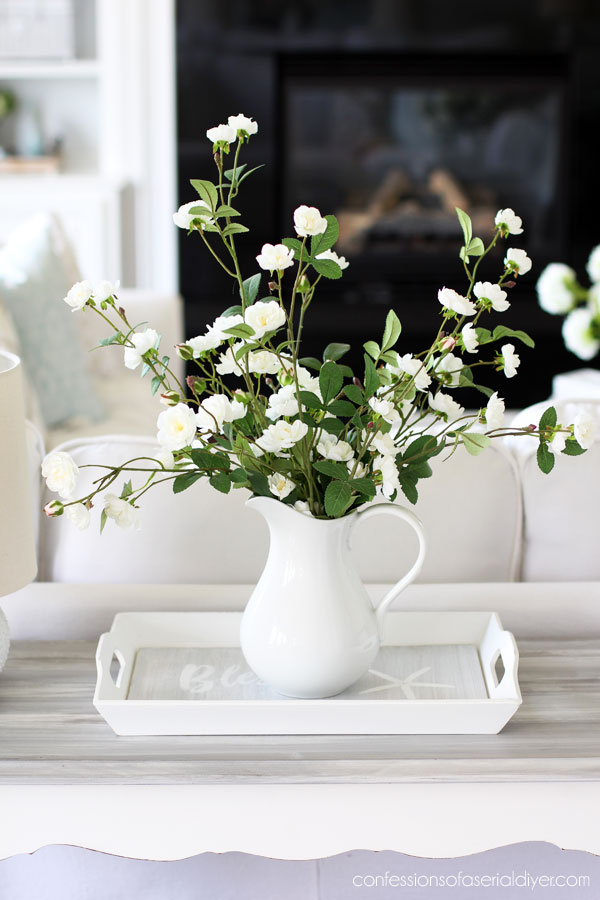
This is actually only part of the original graphic I created…
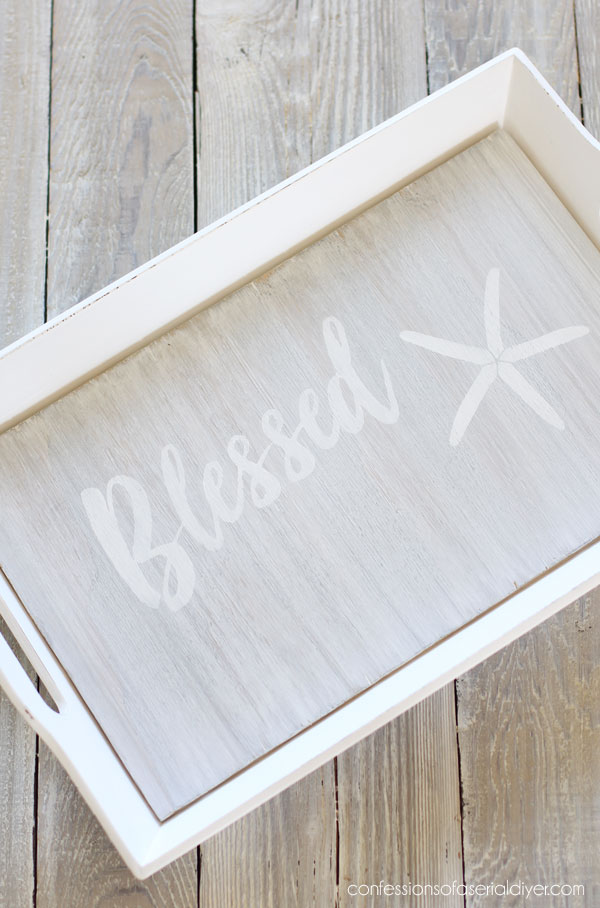
The rest of it didn’t cut properly, so I just used this part. I like the simple sentiment.
The basket on top is the project I created it for originally:
You can see how it turned out HERE!
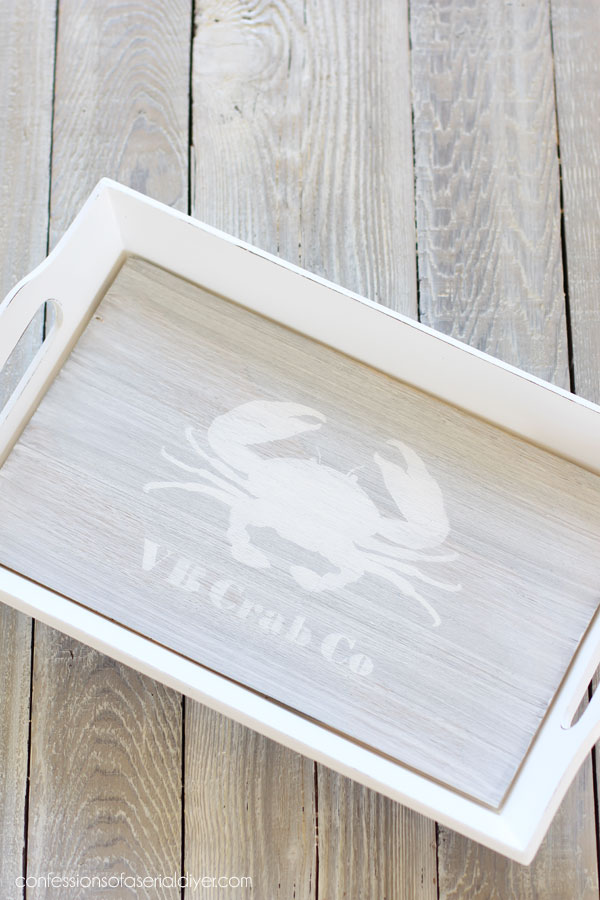
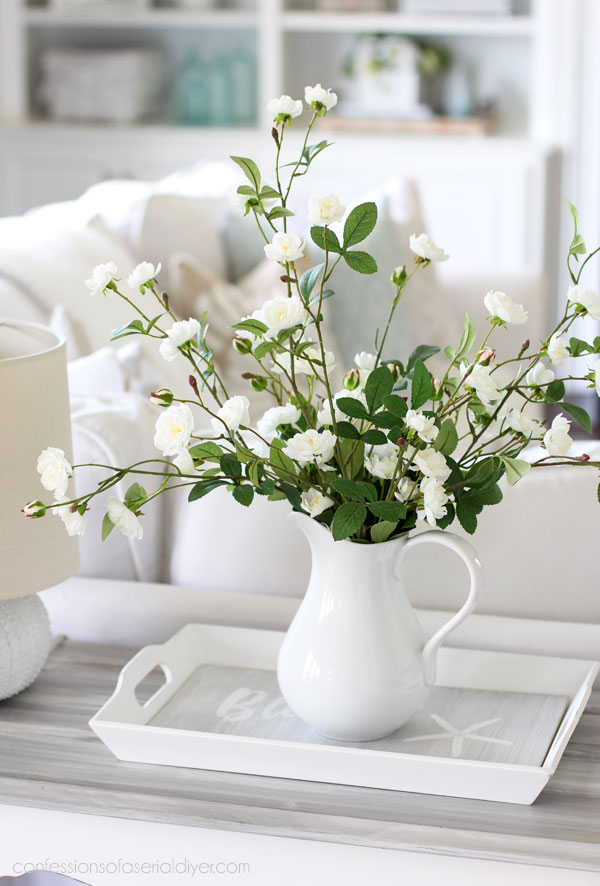
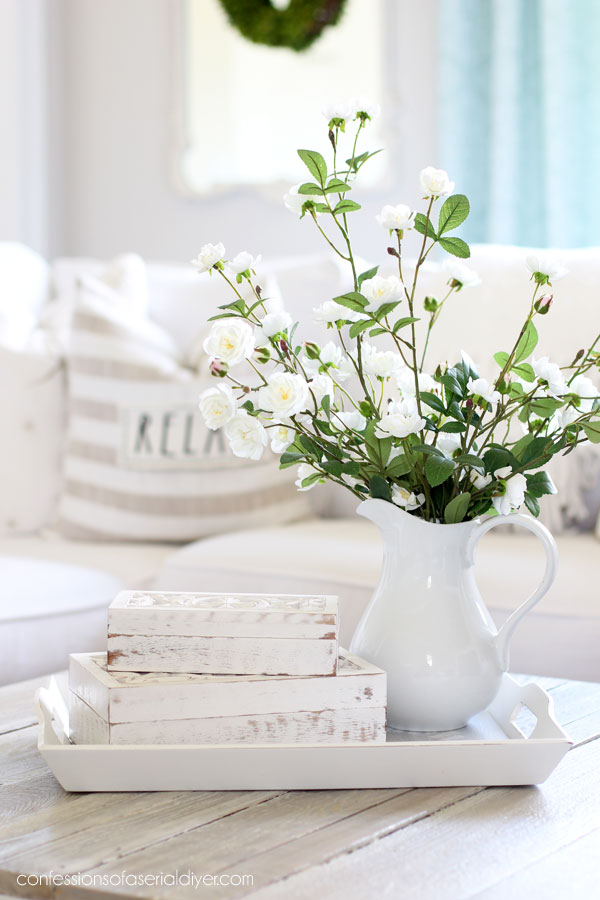
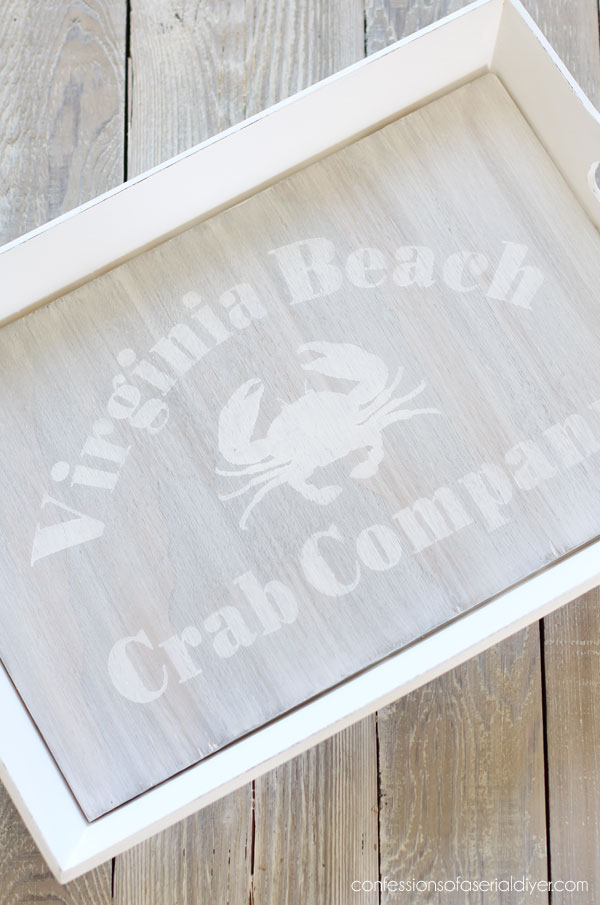
And finally, the largest of the three is my favorite:
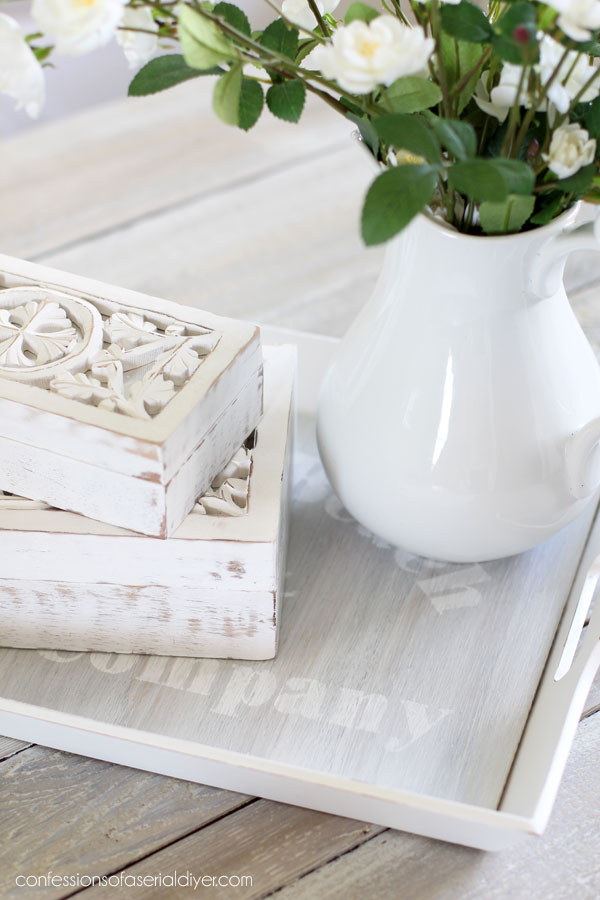
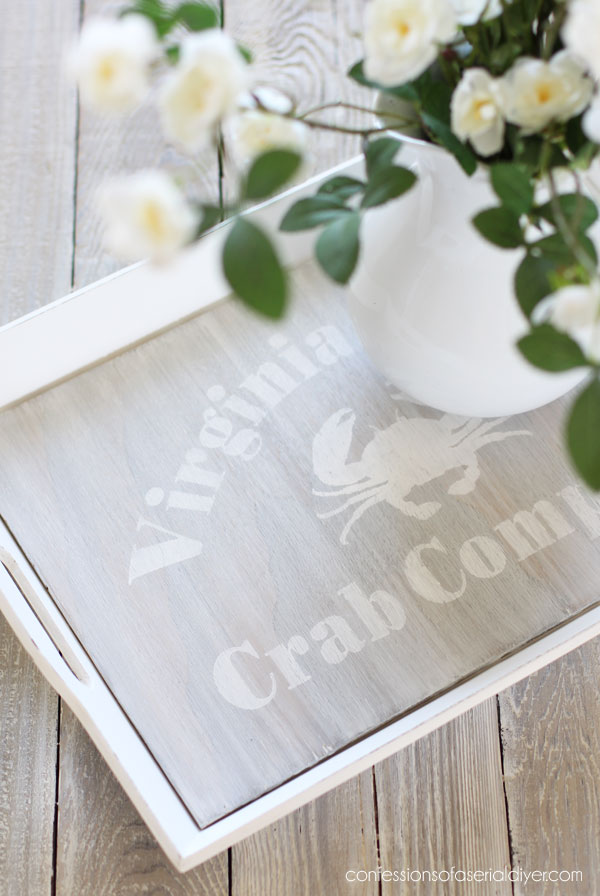
I’ve used a similar version of this graphic I created on several projects, but this was what it was originally made for:

I straightened out the bottom lettering for this one:
These trays were anything but coastal when they started, but I think they suit their new look perfectly!
Don’t forget to check out what my friends are rescuing today as well!
I can’t wait to see for myself!!

Only one teeny tiny piece left and it is actually done, but I just haven’t photographed it yet because it’s just a simple paint job.

If you missed any or want to revisit any of these pieces, you can find them here:
Repurposed Thrift Store Frames
Queen Anne Table Makeover & Mirror too!
$5 Dressing Table Bench Makeover
Thrifted Metal Wall Decor Makeover and a Brand New Thrift shop Shakedown Video!
We have family heading into town this week for what was supposed to be Jack’s graduation. We all went in on a beach house back in the Fall, and although the graduation ceremony was put on hold, we decided we were going to get together anyway! So, like I do every Summer, I will be taking a break for the next couple of weeks! Don’t worry though, I will still be here on Tuesdays and Thursdays! I just won’t be creating brand new content, so you’ll be seeing some old favorites and probably ones that you may not have even seen before!
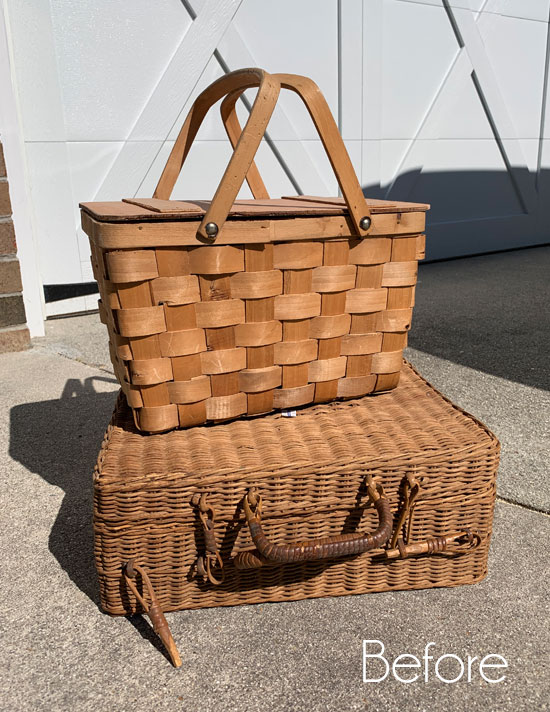
I’ll still be checking in and answering comments, so I hope to see you back on Thursday. I’ll be recapping my first thrift store haul:
UPDATE: See how these pieces got their happily ever after HERE now!
XOXO,
![]()
Don’t Miss a Thing!
If you like what you see, there are several ways to follow along!
Email * Instagram * Facebook * Pinterest * Twitter


Mary Kaiser says
I love how all of them turned out. How exciting that your getting a nice vacation. I love simple tray makeovers that you do, they always turn out so beautiful. I have a few more old trays to make beautiful again in my stash and now I have been inspired by you to get them done! Have a fun time with your family
Christy says
Thank you, Mary!! I wasn’t sure what I would do with these, but I could imagine better once I started painting. I am very much looking forward to a few lazy days…thank you!! XOXO
Rebecca says
How beautiful!!! You always amaze!
Christy says
Thank you so much, Rebecca!! XOXO
Christina says
Christy, I adore these trays! Beautiful job and the white washed inserts are amazing looking… love the stencils. 🙂
Enjoy your family to the hilt! Congratulations to Jack!
xo
Christy says
Thank you, Christina!! Looking forward to a few sun-filled days and thanks for the congrats for Jack…he definitely earned it! Have a great week! XOXO
Andrea says
Amazing transformation Christy! Your trays look totally different, updated, and pretty. All of your projects are beautiful. I always look forward to seeing what you will do next.
Christy says
Hi Andrea!! Thank you so much! XOXO
Larissa ~ Prodigal Pieces says
So refreshing! I love each one and the whimsy you added, Christy.
Christy says
Thank you, Larissa!! Definitely more my style now lol! XOXO
Denise Cox says
LOVE… LOVE… LOVE… 😍….
Christy says
Thank you, Denise!! XOXO
Sue Mellette says
What a gorgeous makeover! The “weathered” wood and transfers really make them so pretty. What a nice addition to your guest bath as well!
Christy says
Thank you, Sue!! I wasn’t sure I would keep these for myself, but the one in the guest bath is still in there, so I just might!! XOXO
gwen says
good tuesday morning Christy! as always, i love the trays with their fresh new look! and the refresher links on how to transfer graphics gets me lost for awhile in your previous projects. even tho i’ve seen most of them, i always enjoy looking back!
i am curious about the gap between the plywood and the tray. did you think of filling it with some sort of caulk? i would be afraid of crumbs getting wedged down there! (that’s my lifestyle!)
enjoy your time at the beach house and be safe!
Christy says
Aww thank you so much, Gwen! I too get lost down the rabbit hole visiting past projects! I though about trimming the trays out around the inside edge and in fact, bought trim to do just that, but I took a poll here at home and the boys thought they looked fine. I would just hit it with the vacuum hose every once in a while. I am so looking forward to a little time in the sun…thank you! Have a great week! XOXO
Maryellen Webber says
Beautiful trays! Love the whitewash technique! Thanks for the inspiration! Have a great day!
Christy says
Thank you, Maryellen!! I hope you have a wonderful day too! XOXO
Tawn says
I am SO excited to see this post!! Literally, I just started working on a tray that is almost the same as those shown. And I have DB stain and paint, and my much loved and trusty Silhouette. I know what I will be doing!!
Thank you.
Christy says
Oh yay! Good timing! Have fun with yours! XOXO
Denise says
The trays turned out fabulous! 💙 enjoy your beach house vacay my friends! 🤗🌸🌞 XOXO
Christy says
Thank you, Denise!! We definitely will!! Have a great week! XOXO
Mira says
Love your blog. The trays are great!
Congratulations to your son Jack!
Christy says
Thank you so much, Mira! And thank you for the congrats for Jack! XOXO
Cecilia from Georgia says
Sweet and simple! Have a wonderful visit with your family! Hope the weather is nice! It’s been overcast Down here in Cocoa Beach, FL where I’ve been visiting. Darn Hurricanes! Enjoy the good sea food!
Christy says
Thank you, Cecilia! I hope we have good weather! Enjoy the rest of your stay…I hope the weather improves! XOXO
Jen @ Girl in the Garage says
What a lucky score, and these turned out super cute Christy! I love how they’re all different yet they coordinate together so well. xo
Christy says
Thanks, Jen! I might have passed on them if they weren’t so cheap, but I’m glad I didn’t! XOXO
Petra says
I really like that smokey stain you put on first then the white-washing. Very effective 😀
Christy says
Thank you, Petra! It really works so well! XOXO
Marcie Lovett says
They look great now! Not just functional, but fun, too. Have a wonderful vacation and stay safe.
Christy says
Thank you, Marcie!! Looking forward to a lazy week lol! XOXO
Nancy @ Artsy Chicks Rule says
Those all turned out so cute!! Perfect for your decor! xo
Christy says
Thanks, Nancy!! XOXO