Do y’all love chocolate as much as I do? There are few things I love more, but how about as a theme for a furniture makeover? Today my furniture flippin friends and I are all sharing furniture makeovers inspired by chocolate. Say what?
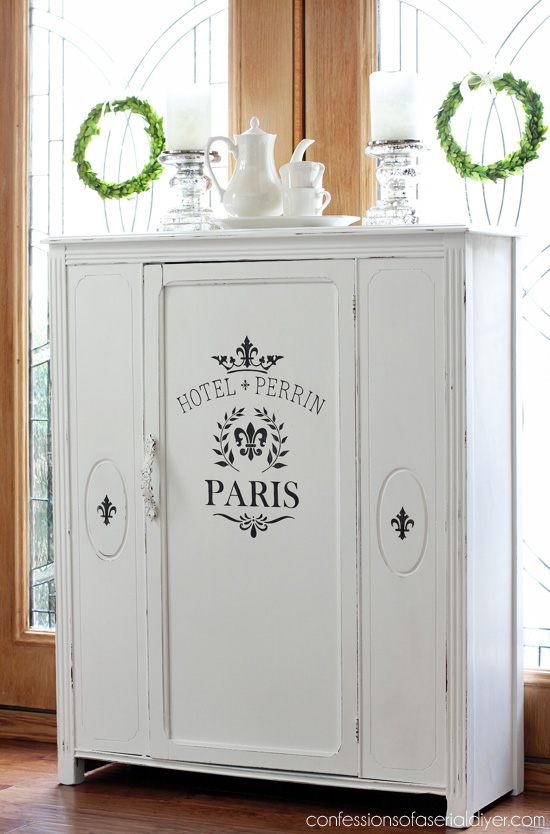
A few weeks ago I spied an antique cabinet at the DAV thrift store near my house. It was $79 and probably totally worth that, but the door was missing the glass and didn’t close real smoothly so I passed. I went back a week later and it was marked to $49! I just couldn’t pass it up the second time:
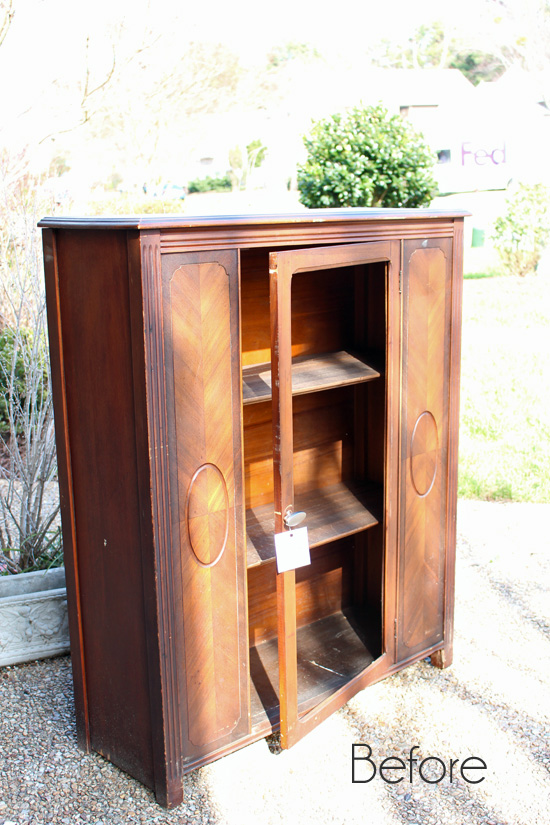
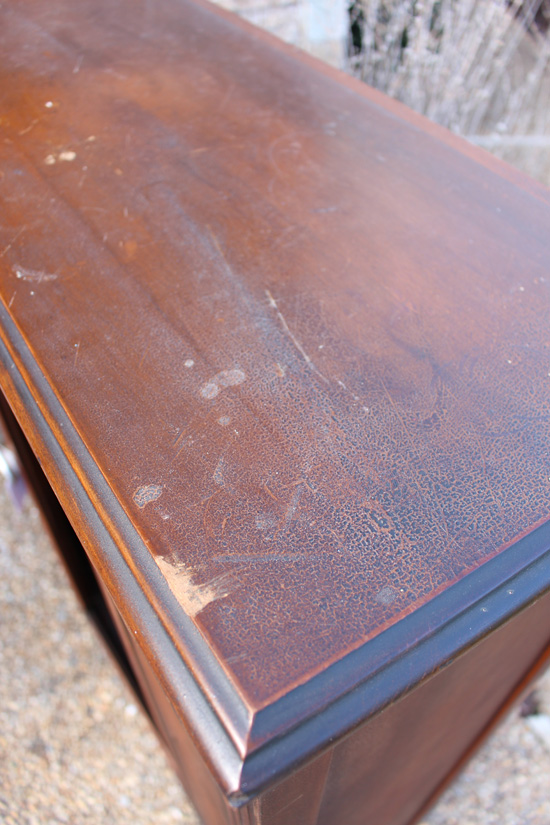
It doesn’t actually look too bad in this photo but it wasn’t great in person. I’m not exactly sure what was built up on that corner there, but there were a few places like that…
I decided this would be the piece I would use for this themed makeover, and I had the perfect plan. I decided that with Valentine’s Day so near and all that I would give this makeover a romantic feel. Chocolate=romance right? (For my Hubby it does…wink wink.)
And what would be a better way to translate romance to a piece of furniture than a French love letter stencil?
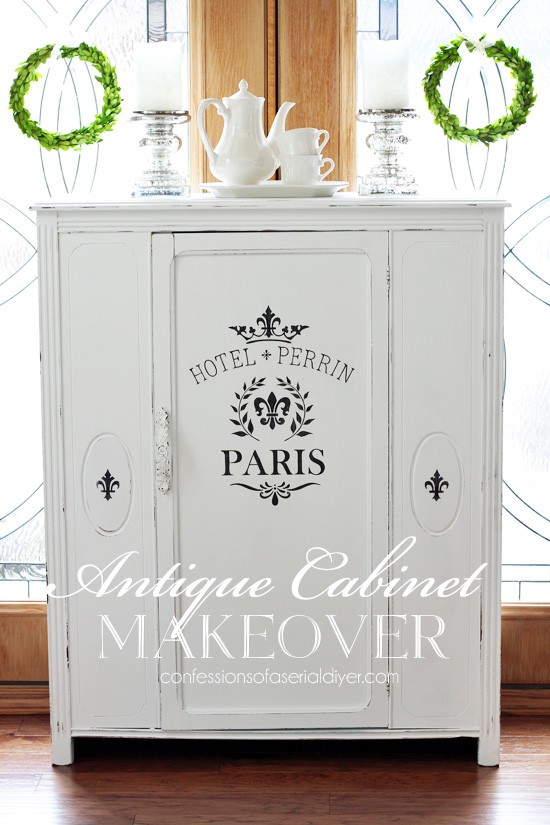
Pretty, right? Okay so it’s not brown like chocolate…but how about white chocolate? And hmmm that does NOT look anything remotely close to a French love letter on the door there.
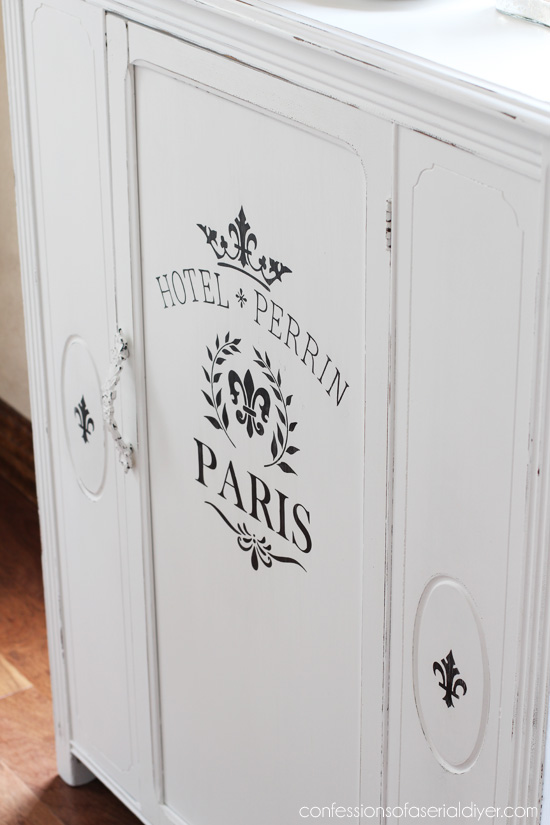
Okay you got me. That love letter stencil business turned out to be a big hot mess. I knew I wanted to add a panel to the door instead of replacing the glass so it could provide closed storage, and my original plan was to add the pretty French script across the entire door panel. It was a huge fail. I use spray adhesive like always, but instead of using a small brush like I usually do, I used a sponge and it was a blobby disaster. I decided I needed a plan B, stat. But anything Paris is romantic right? So this is plan B. And romance=chocolate, right? (Even if it is white. 😉 )
The door panel is hardboard. It’s like pegboard but without the holes and I find it at Lowes or the Home Depot. (This is the same thing I use to make chalkboards.) It is super smooth and paints up beautifully. I’ve included affiliate links in this post for your convenience. See my full disclosure here. I attached it to the inside of the door frame with my Logan Point Driver. (Seriously one of my favorite tools in my toolbox!)

This piece gave me quite a bit of trouble though. I was almost out of my tried and true Bulls Eye Clear Shellac, so I was headed to the store to pick up some more since I knew this older piece would likely be a bleeder. It was unseasonably cold for our area so I was reading the recommended minimum temps to be used in when I saw on the label that they had another product they suggested for painted pieces. It was their shellac-based white primer. Perfect!
Oh no it was NOT perfect at all. I applied a coat of that first, then my DIY chalk paint in Pure White (Behrs white right off the shelf). Bled through. I gave it another coat of the shellac primer and a coat of chalk paint, bled through. I gave it a coat of regular old white Zinsser Primer and a coat of chalk paint and guess what? It STILL bled through. Know how I fixed it? I finally decided to wax the darn thing with Annie Sloan’s clear wax, and then applied my chalk paint over that and the heavens opened up and the angels sang! It worked.
I could have kiss that wax! It might have just been this particular piece and whatever that gunk was that had accumulated on the surface, but next time I’m going straight for my regular ole clear shellac!
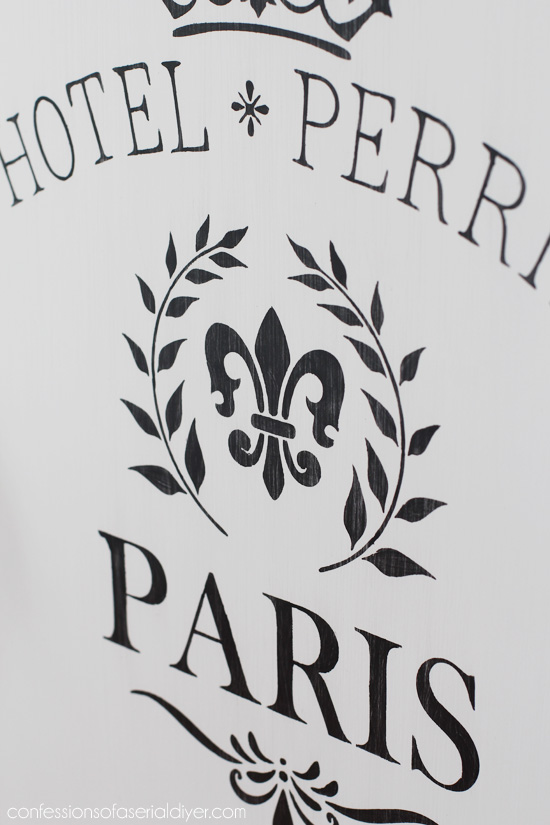
By the time I got to the stencil on the door and it looked so awful, I knew I had to stop right there and switch to something tried and true.
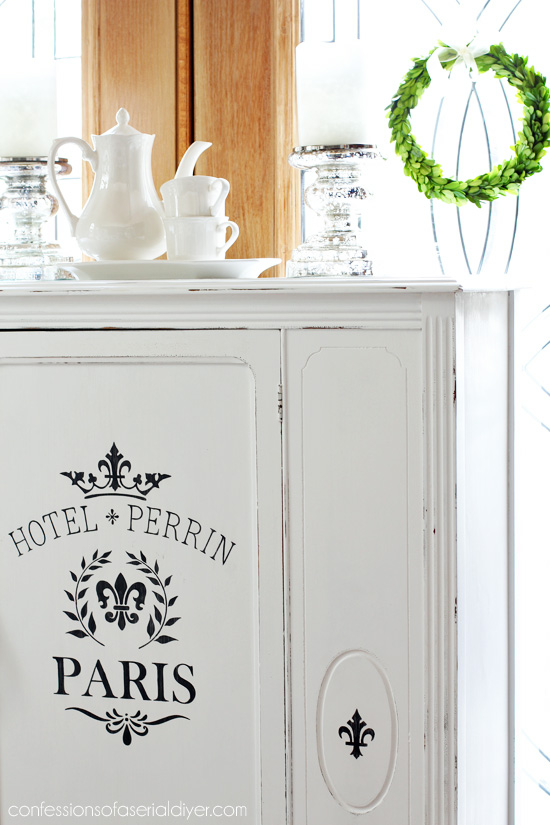
I used a mix of two stencils for the door. This one and this one. (They are both 30% off right now through the end of February-no affiliation, just a good product and a good deal. 🙂 )
Stencils are the easiest way to achieve this look for the least amount of effort. I used spray adhesive to temporarily adhere my stencil to the surface of my project. (Spray the stencil, not the project surface.) It should not stick permanently or leave any sticky residue. Then I used the smallest brush from this 3-piece nylon brush set
to fill in the stencil using acrylic paint
, brushing away from the edges.
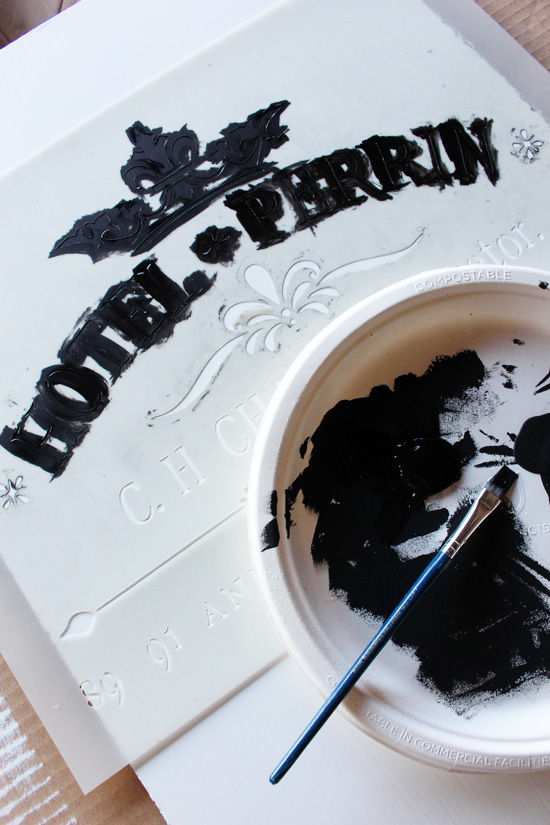
After I removed the stencil, I had a couple of areas to fix here and there which I used a script liner brush for. This time it came out really well thank goodness! I also filled in all the gaps in the lettering that gives it away as a stencil using the same brush. (Rinse your stencil right away with warm water. Allow the sticky back to air dry.)

After allowing the paint to dry to completely, I sanded using 220 grit sand paper and sealed with Annie Sloans’s clear soft wax.

The handle is a perfect match, found at Hobby Lobby.


And for the inside…
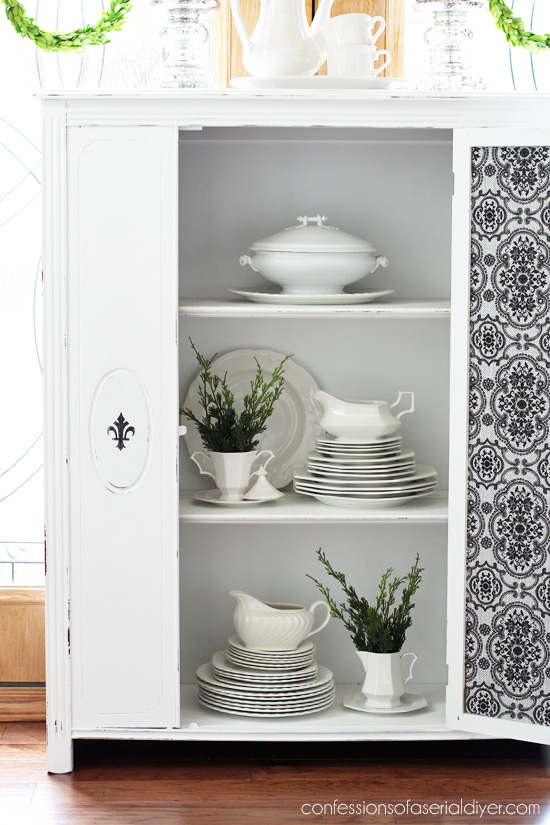
Ooh la la. I decided instead of just painting the ugly brown hardboard on the back of the cabinet door white, I would cover it in fabric instead. This also covered the points that are holding the panel in place. I had this in my fabric stash…
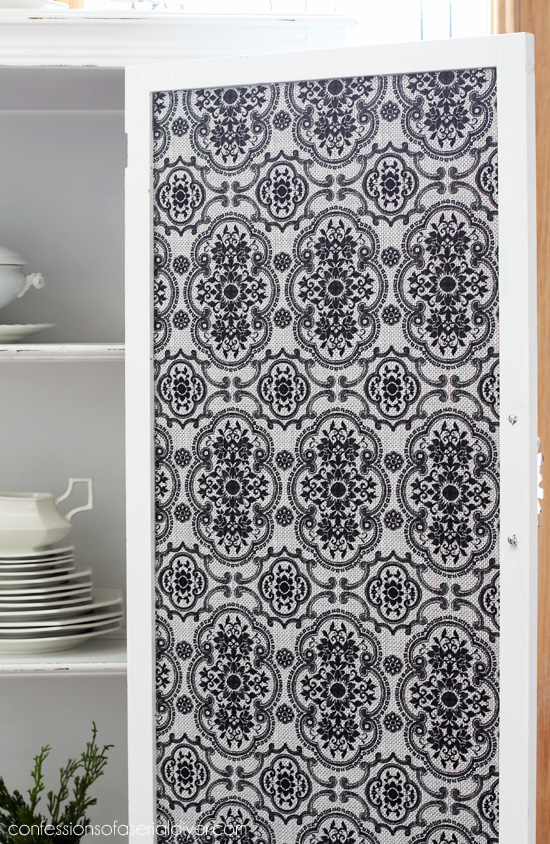
I adhered it with matte Mod Podge. I brushed it on like a glue, and added the fabric over top. To make it easier to cut the fabric straight for panels like this, I always use my rotary cutting set
.
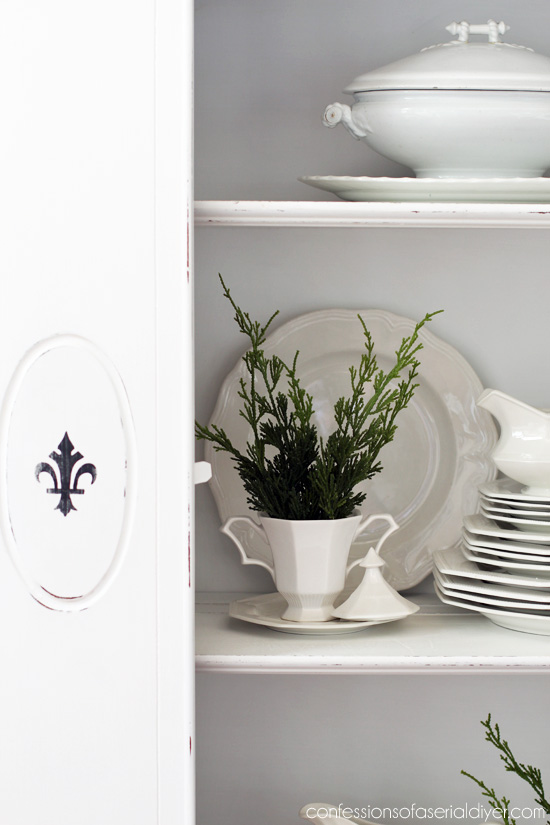
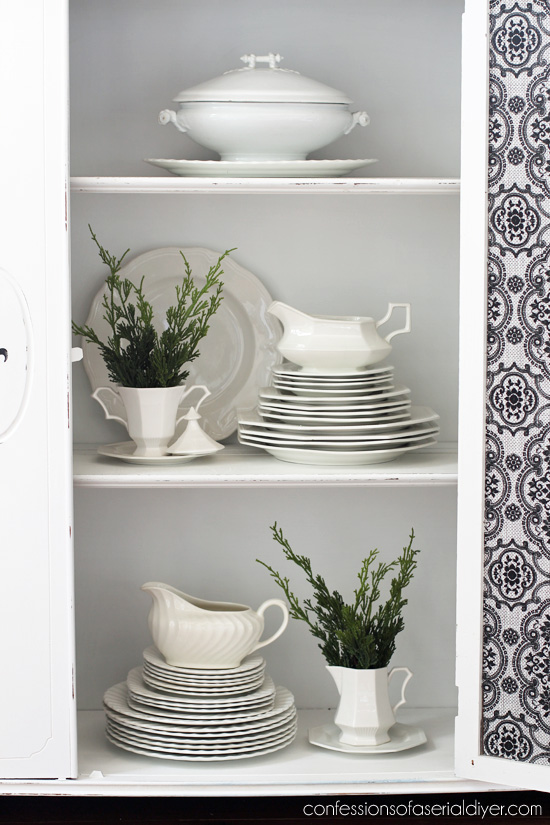
I kept the rest of the inside a simple white. My thrifted ironstone looks so pretty in it.

I am really so pleased with this cabinet makeover, and I love this inexpensive alternative to replacing the glass.
Several of my friends are also sharing furniture makeovers inspired by chocolate. Visit them at the links below!

I’ll be back on Tuesday and EVERY day after in March sharing a thrifty makeover, 31 thrifty makeovers in 31 days!! It’s going to be fun!

Here’s thrifty makeover #1:
See ya then!!
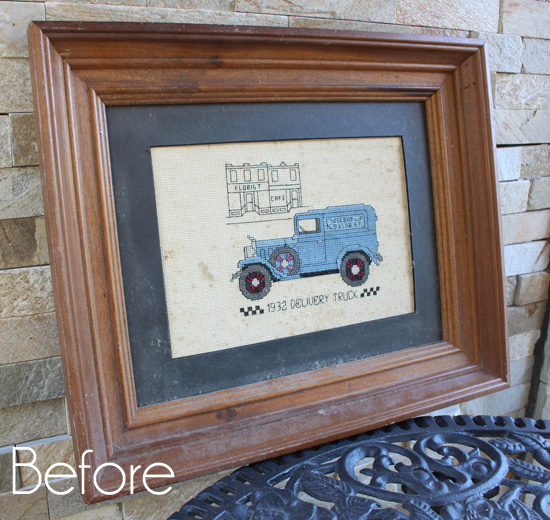
UPDATE: See this old picture makeover HERE!
XO,
![]()
Don’t Miss a Thing!
If you like what you see, there are several ways to follow along!
Email * Facebook * Pinterest * Hometalk * Twitter * Instagram

I love to share at these great parties:
The Happy Housie Design Dining and Diapers Liz Marie Blog Funky Junk Interiors Savvy Southern Style Tatertots and Jello DIY Show Off Between Naps on the Porch Just a Girl and Her Blog Sand and Sisal Interior Frugalista


victoria says
Hi Christy , J’adore it, it is so nice, original, delicate and beautiful…. you are really talented and inspiring…. CONGRATULATIONS.
Big hug , xoxo
Victoria
Christy K. James says
Thanks so much, Victoria! XOXO
Janie Hayes says
Christy,
That is beautiful!
Did you paint the door panel, stencil it and then install it to the cabinet or did you install the panel and then paint and stencil?
Thanks,
Janie
Christy K. James says
Thank you, Janie! I painted and stenciled the panel first. That made it much easier. 🙂
Larissa ~ Prodigal Pieces says
White chocolate…love it! (though I don’t really care for real white chocolate – ha!) Love the face that you made use of the empyt space and so createivly too. Great job, Christy!
Christy K. James says
Thanks, Larissa! I love white chocolate, but only in small doses! XOXO
Amy | Canary Street Crafts says
So pretty, Christy! I painted a vanity for my niece over the summer and I swear I’ve never seen a piece of furniture bleed as much as it did. It bled through every single primer I put on it. I wish I had thought of the wax trick! Definitely saving that one for next time. Love what you did with the cabinet, as always :).
Christy K. James says
Thanks, Amy! Isn’t suborn bleed through the worst? I could have painted four of these cabinets in the same time. The wax worked wonders, just don’t sand down to that layer on the flat surfaces, you will see the darker waxed area. 🙂
DebraShoppeno5 says
In spite of everything you went through it turned out fantastic. Some projects just seem full of problems but the end result is worth it.
Christy K. James says
Thank you, Debra! This was definitely one of those problem pieces, but yes well worth it. 🙂
Lindsay Eidahl says
You find the best pieces! This is stunning! You made it beautiful! I love it!
Christy K. James says
Thanks so much, Lindsay! XO
Sandra Powell says
That looks so good , amazing how some paint and stencil just transform it. Will you sell this one ?
Christy K. James says
Thanks, Sandra! SO true…paint and stencils can do wonders. I just dropped this off at my booth today. Bittersweet! XO
Susie@TheChelseaProject says
Christy,
For all your trouble, you surely came out on top. This is now a one-of-a-kind original. Art and function wrapped into one. I’m sure I will be referring back to your excellent tutorial many times. Congratulations on another great project!
XOXO
Susie from The Chelsea Project
Christy K. James says
Thanks so much, Chelsea! I too love that it has so much function. 🙂
Anne @ DesignDreams says
Beautiful job! I really love the design inside the door too.
Christy K. James says
Thank you, Anne! I’ve had that piece of fabric forever and I’m so glad I finally found a use for it! 🙂
Marie Fox says
Christy, did you put clear wax on it and then wipe off before painting? I have a hutch that I am having problems with bleed through. I have put two coats of shellac but it is still bleeding through.
Christy K. James says
Hi Marie! There sure are some stubborn pieces out there! I waxed and then buffed it in, removing most of it just like I was sealing it. Waxing is definitely my least favorite part, but I was just so grateful it worked. Take care not to sand the flat surfaces too far down after painting over the wax because it will appear a bit darker in those areas. Hope this helps…good luck!
Marilyn says
Hey Christy. I have a dresser and night stand that is solid Alder wood that I bought 20 years ago. It still is in perfect condition but it is very dark stain and I would love to paint it an antique white and change the handles. I have never re-done a piece of furniture and not sure I would be able to do it. It does have a gloss finish on it. Knowing me I will end up putting it in the garage sale and paying for something new. I’m scared to death I will mess it up. Any KIND words of advice on where to even start. Thanks
Christy K. James says
Ok if you are willing to let it go at a yard sale, don’t be afraid of messing it up! What is the worst that can happen? Paint isn’t permanent either. Perhaps you might even consider painting the body a lighter color and leaving the top stained…it will still update the look. I would start with your nightstand and see how it goes. Here is everything I can think of about painting with chalk paint in one post that should be helpful: https://www.confessionsofaserialdiyer.com/how-to-paint-furniture-using-chalk-paint/ Go for it and good luck! 🙂
Amy @ Highstyle Restyle says
THAT CABINET!! I am in love! The French-inspired makeover was a perfect choice for this piece and I am drooling over the fabric you chose! Are you keeping it?!
Christy K. James says
Thanks so much, Amy!! I just dropped it off at my booth today…relieved it made it there safely, but a bit sad to say good bye! That always happens lol. 🙂
Marie, The Interior Frugalista says
First, can’t beat that price – good thing you went back! Sorry to hear this piece gave you such a hard time (sounds like my chair last month). I would have never thought to wax the piece first and then chalk paint it. But you’re right, good ole shellac works like a charm every time. Love what you did with this cabinet Christy and swooning over the fabric lined door! Pinning to share ☺
Christy K. James says
This was a great deal even at $75, but I’m so glad I passed it up the first time! So glad you like it, Marie!! XOXO
Maggie M says
I only wish I had your skills to makeover furniture pieces like this cabinet. You are truly talented. Lots of work but the result is fabulous:)
Christy K. James says
Aww you are so sweet, Maggie! Thank you!!
Tami @ Curb Alert! says
So pretty, I love the surprise fabric! Looking forward to your 31 days Series! ~Tami
Christy K. James says
Thanks, Tami! I am too eek! 🙂
Kim @ Hunt & Host says
I love everything you do and this is no exception. The stencil is great, but the fabric inside, umm…love!!!
Christy K. James says
Aww thanks, Kim you are so sweet! I’ve had that fabric for forever and I’m so glad I decided to use it on this project! XO
kate says
its beautiful. Let me ask you this…I can never get my stencil not to smudge…ive gotten REALLY good at fixing the mistakes…but do you have a technique that you just swear by?? Ive tried taping it down but that doesnt really work either…
Christy K. James says
Hi Kate! I use a spray adhesive to hold it in place. I linked to the one I use in the post. I think it’s from Loctite. I also use a brush to apply the paint and brush away from the edges of the stencil as much as possible. I usually need to do a touch up or two as well, I think that’s the nature of this stenciling business. Hope this helps!
Jeanie @ create&babble says
Your turned that great find into such a beautiful piece! Wow! The handle, the color, the stencil! I love it all!
Christy K. James says
Thanks so much, Jeanie!
Jenny @ Refresh Living says
Wow – what a project this one was! I’m sure you’re glad it’s done after all that trouble it gave you. 🙂 It turned out so beautiful – I just love the fabric on the inside of the door. Plus, what a steal on the price. I love it when that sort of thing happens!
Christy K. James says
Isn’t it funny how some projects that you think will be super easy turn out to be really stubborn? I’m glad I finally got it done. SO glad you like it!! XO
Karen Marie Kedzuch says
Christy,
I love how your challenging chocolate inspired cabinet turned out beautiful.
Happy Creating,
Karen Marie
Christy K. James says
Thanks, Karen!
Becky says
Wow, lovely–such a great makeover!
Christy K. James says
Thanks, Becky! 🙂
Jen @ Girl in the Garage says
Girl I am so freakin in love with this! It’s probably one of my favorite pieces you’ve done. <3 I also feel like maybe your cabinet could be friends with my little patisserie table- haha 😉
Christy K. James says
Ha ha you are so funny! Thank you!! I knew this would be right up your alley, and yes our pieces could definitely be BFFs! XOXO
Cheryl says
Love, love, love it!! Great job and great find!!
Christy K. James says
Thanks, Cheryl! I was so excited to see it was still there AND marked down! 🙂
Cristina says
Oh Christy, drooling all over this piece! So sorry to hear about all the trouble it gave you, but hey, you came up with an awesome solution. Gotta save it in my book! Love it!
Christy K. James says
Aww you are so sweet, Cristina! Thank you! XO
Joanne Taggart says
It’s awesome Christy! The handle and fabric are icing on the cake — chocolate cake! Who knew paint, fabric and wood furniture would work so well together. I never knew you could put fabric on furniture. I am inspired to try the technique. Thank you!
Christy K. James says
Thank you, Joanne! I was just going to paint the back of the door, but it needed a little pizazz…so glad it worked out! 🙂
Paula@SweetPea says
What an amazing transformation! I love the French graphics that you used. I know I’d much rather use a stencil any day over having to paint in tiny detail from a transfer. You had to have been so frustrated when the paint kept bleeding through. What a pain. Adding a door instead of keeping the glass was such a good idea. This should sell quickly!
Christy K. James says
Thank you, Paula!! Oh yes, give me a stencil any day! I used hand paint all my graphics and it is so time-consuming. I do hope this sells quickly! Have a great weekend! XO
Karin Chudy (ART IS BEAUTY) says
I just LOVE this so much! SO SO GORGEOUS! You did an amazing job. I know this will sell in a heartbeat! Who wouldn’t love to have this!
Hugs,
Karin
Christy K. James says
Thanks so much, Karin! Its such a great storage piece after adding the panel to the door, that I kind of wish I had painted it to match a perfect spot I have for it! Hope it sells quickly too 🙂
kathy@petticoatjunktion says
You would never know you had all those problems Christy. The piece is gorgeous!!
Christy K. James says
Thanks, Kathy! It was a trouble maker for sure, but it seems the best ones always are lol! XO
Rose L. says
I love this one. Bravo!
Christy K. James says
Thanks, Rose! XOXO
Kerryanne @ Shabby Art Boutique says
Love all the aspects of this beautiful piece Christy. It may have had a few issues to begin with, but totally worth it for the fabulous outcome. Love everything from the stencil to the back of the door… simply gorgeous! I’m delighted to be featuring your cabinet at Shabbilicious Friday tomorrow.
Hugs ~ Kerryanne
Christy K. James says
Thanks so much, Kerryanne, I really appreciate the feature! It’s always the prettiest pieces that are the biggest trouble makers! XOXO
debra williams says
I just had a cabinet I did and had major bleed through. After 4 coats of chalk paint I had spots that still didn’t cover. I had a crusty black gooey something on the top of the cabinet and down the side that I sanded before I started and that’s where it was the worst. I used Citristrip and took off all of the paint I had just put on. While I was waiting for the Citristrip to work I noticed pools of oil here and there on the top of the cabinet. Tongue Oil. Somebody oiled it so heavy that even sanding wouldn’t get rid of it. I had to strip it twice before I no longer saw a trace of the oil. The paint then went on beautifully with only one coat and I love my “new” 1920’s cabinet.
Christy K. James says
Isn’t always the best pieces that give us so much trouble? I’m glad you were able to get it done!