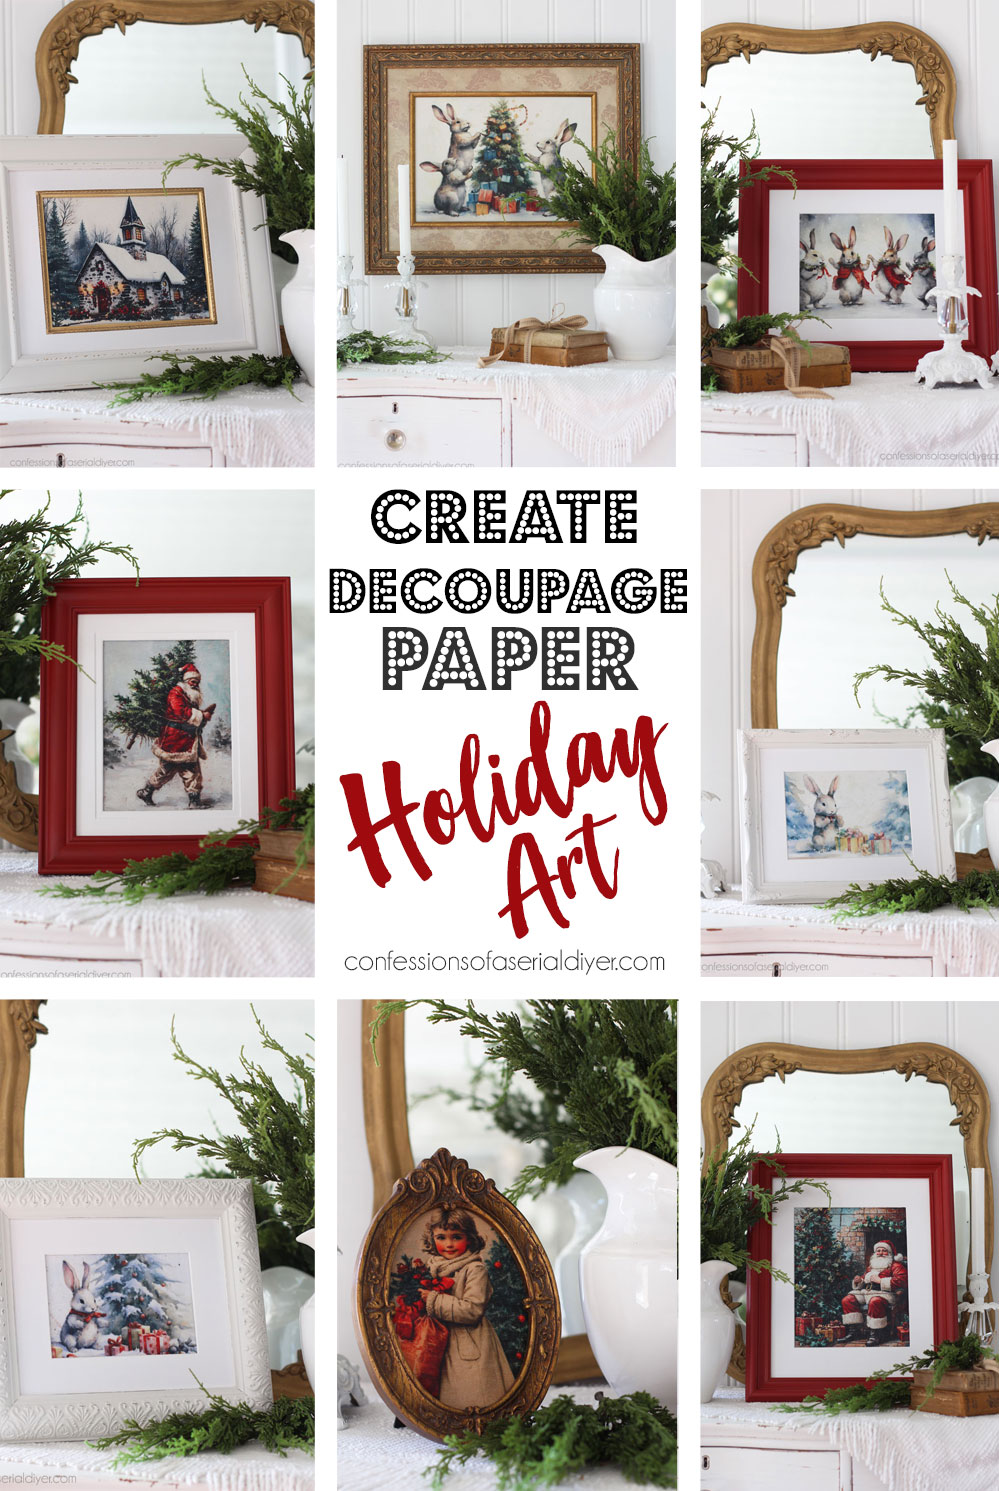
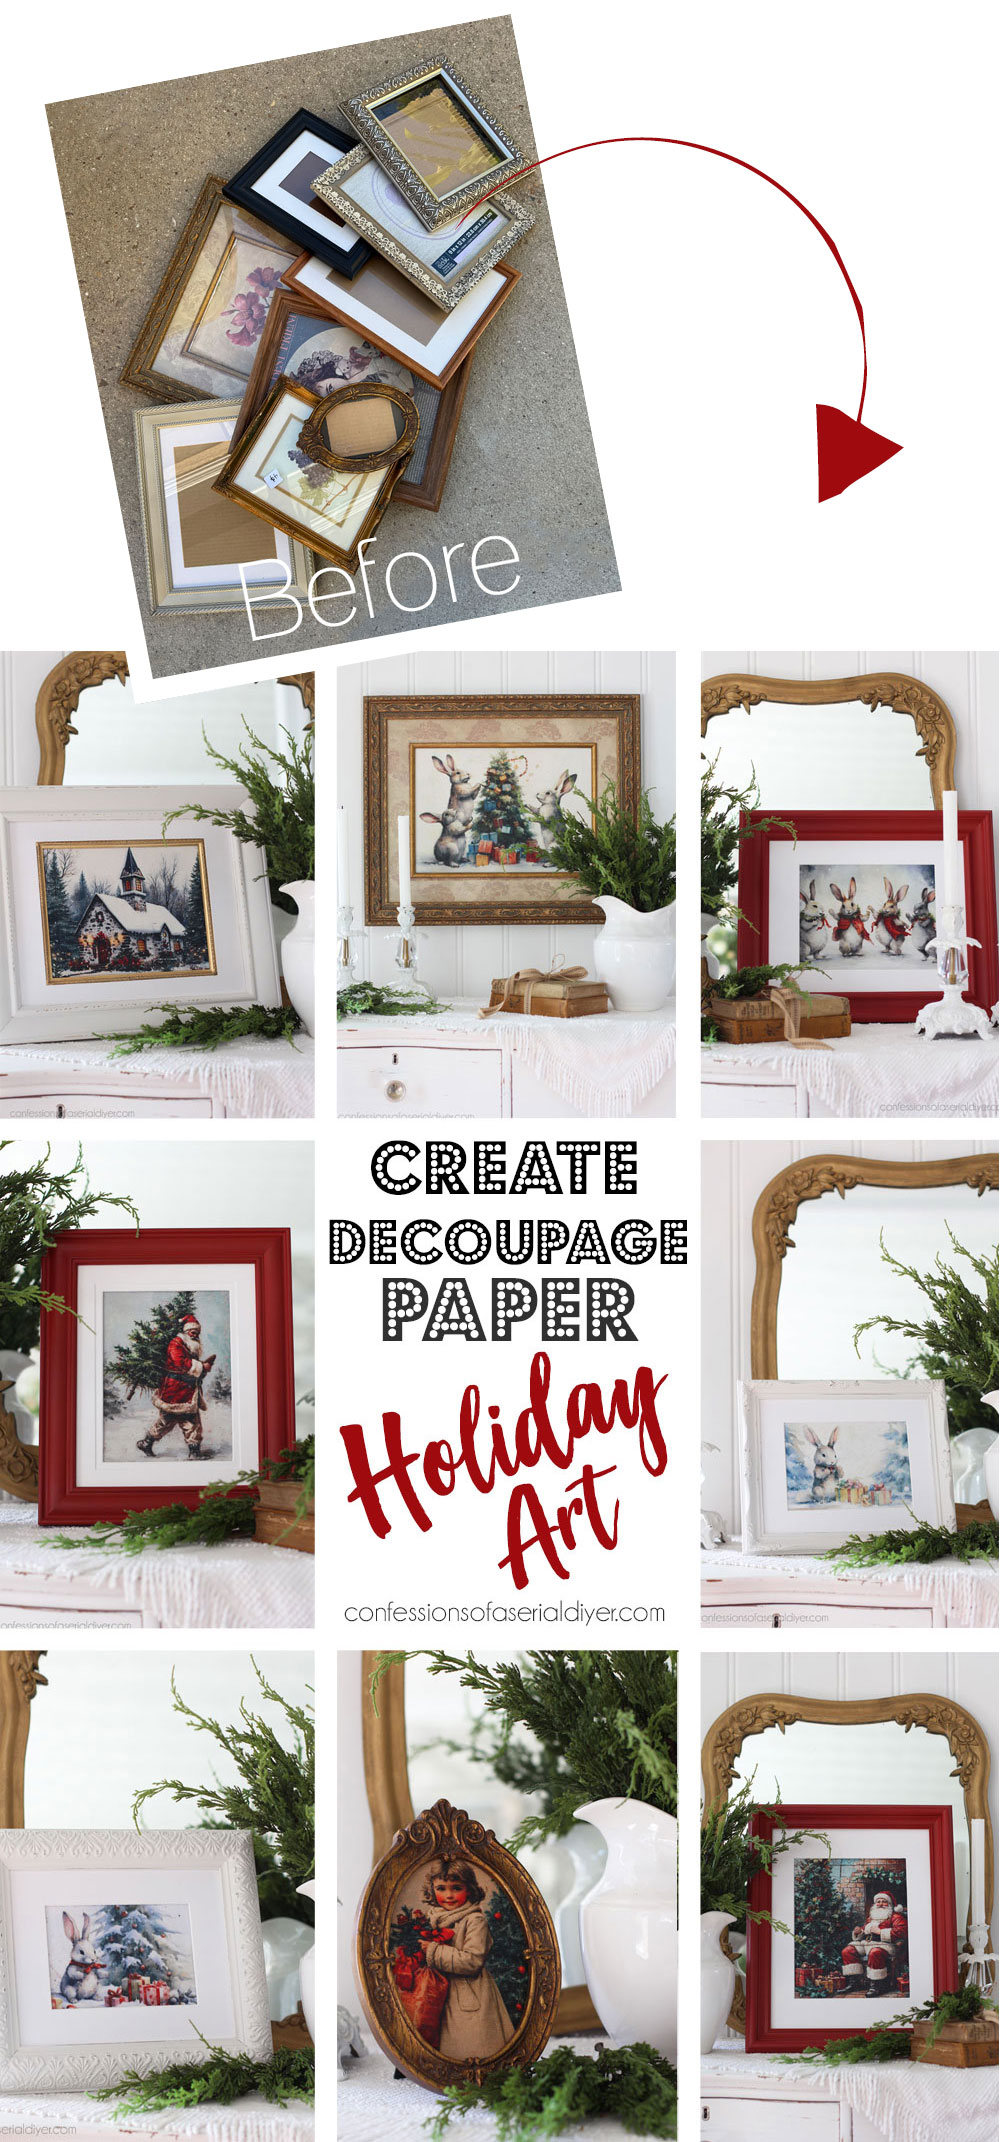
Hello, beautiful friends! I promised some smalls today, and while I don’t have a traditional Painting the Smalls post to share, I do have nine small items for you! I’m sharing how easy it is to create holiday art with decoupage paper!
I stopped by my booth on Thursday to restock and refresh, and they were playing holiday music. And wouldn’t you know I don’t have one single ready-made holiday item to offer my customers!
I shared a video of my recent refreshed space HERE on my Facebook page yesterday.
I don’t traditionally sell a lot of holiday decor, but I felt like I needed to get some holiday items in there and fast!
Here is what I’m using to do just that:
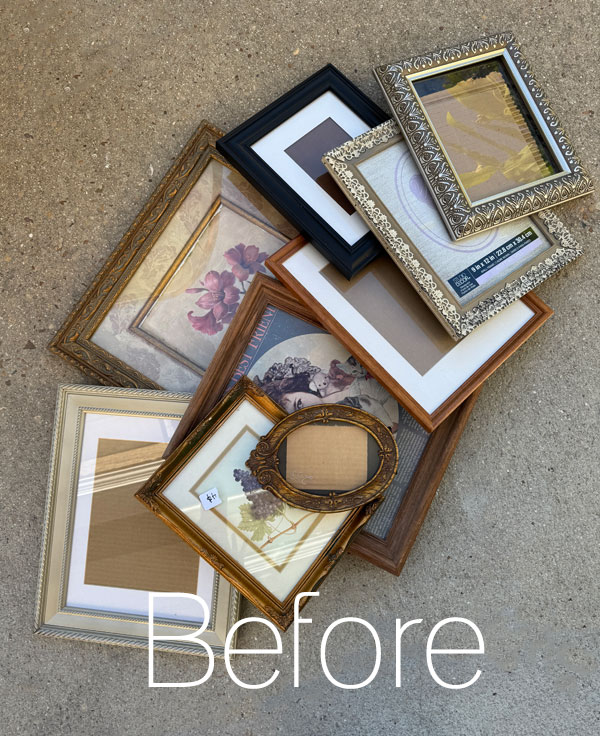
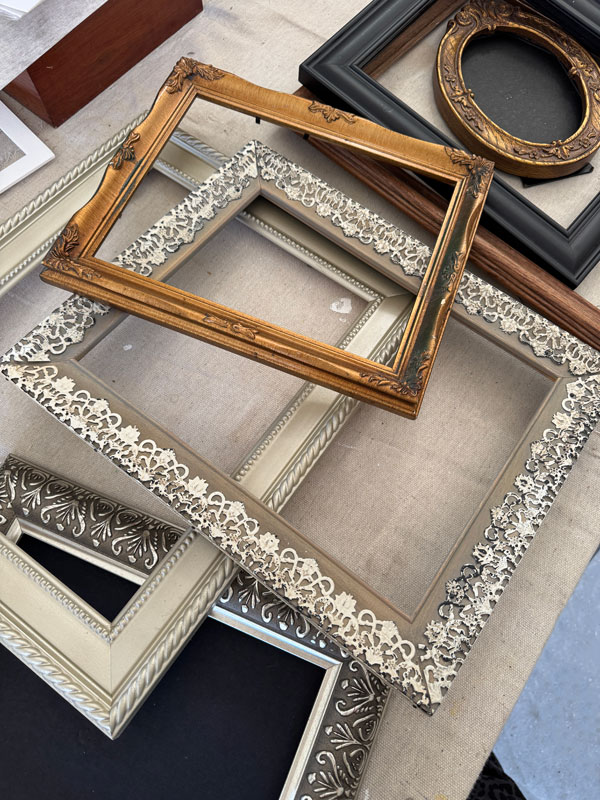
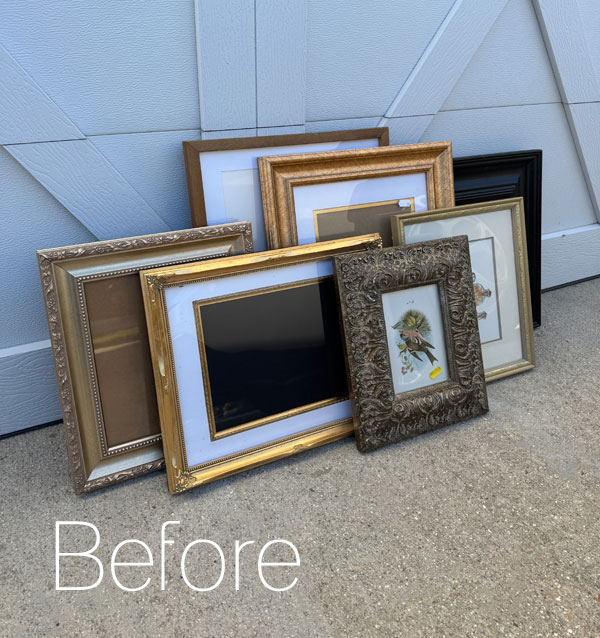
I had a few frames already on hand and then found a few more at the thrift store on Friday.
I did this last year as well and I’ll link to those at the bottom!
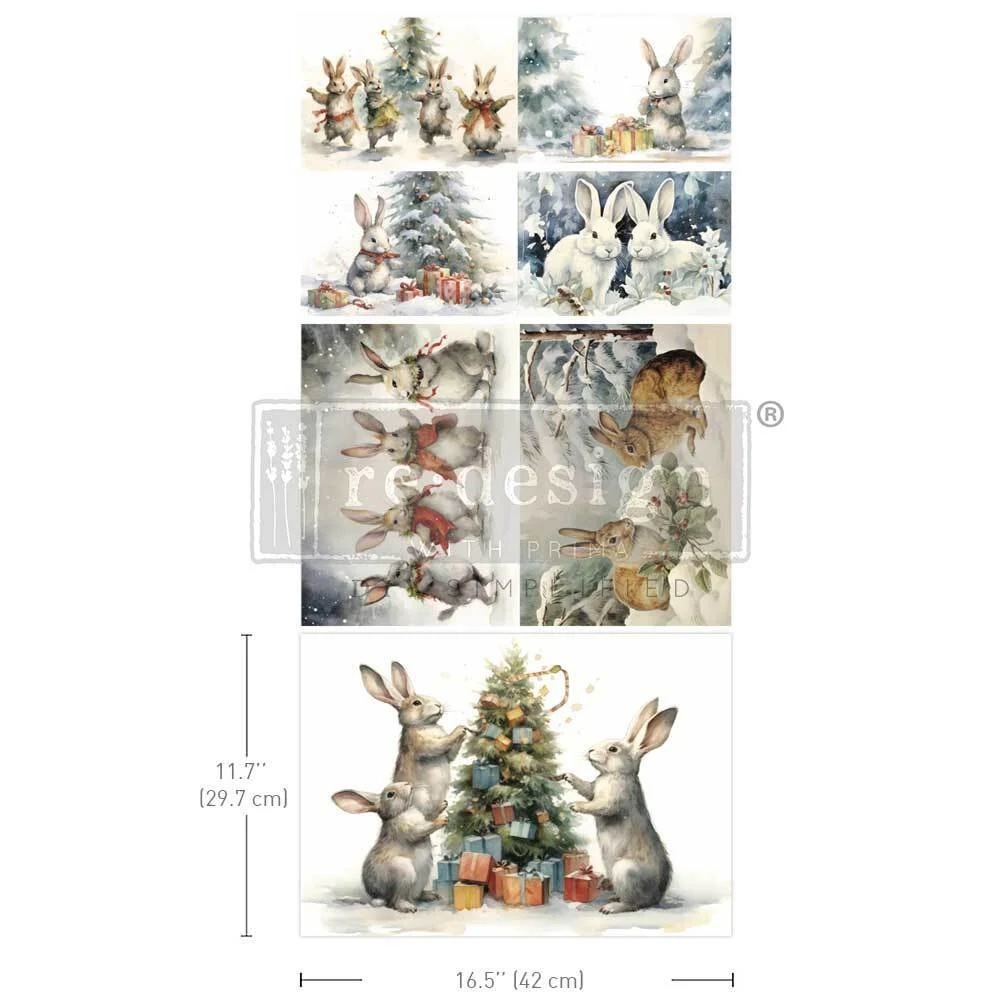
To create art with these frames, I used a few decoupage papers, including this Bunny Wonderland decoupage paper set that I used last year as well:
I also used a few of the new A4 papers, and you’ll see those in a bit.
Prep the Frames
I started by removing all the backs, the current artwork, and the glass until they were all empty:
(I ended up not using that pretty frame in the center with the metal lace trim.)
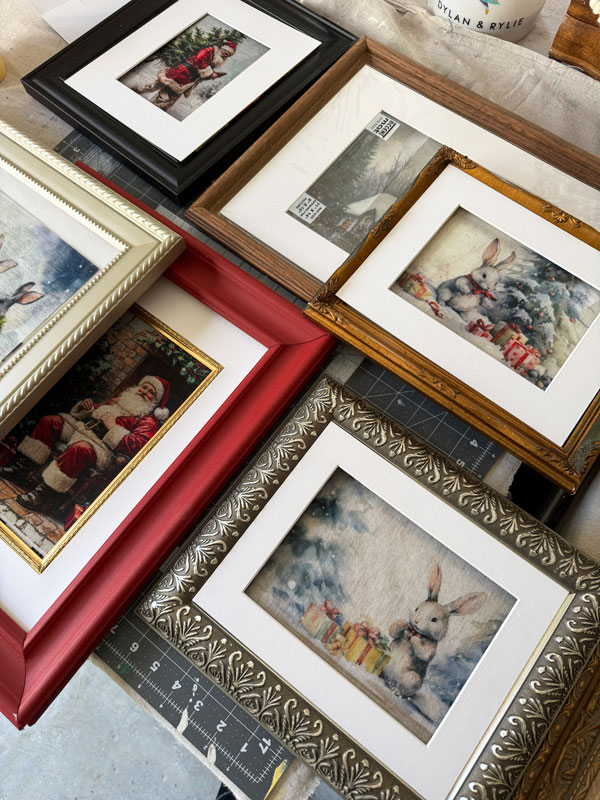
Then I pulled out this assortment of mats I scored at the thrift store a few weeks back:
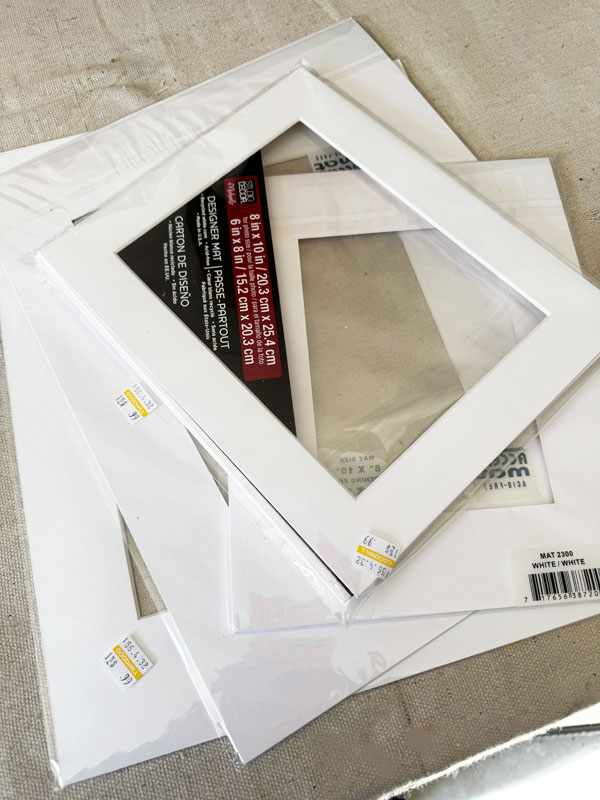
Next, I matched up the designs to the mats and frames:
Clean
All the frames got a good cleaning with White Lightning, then a quick rinse with clean water…
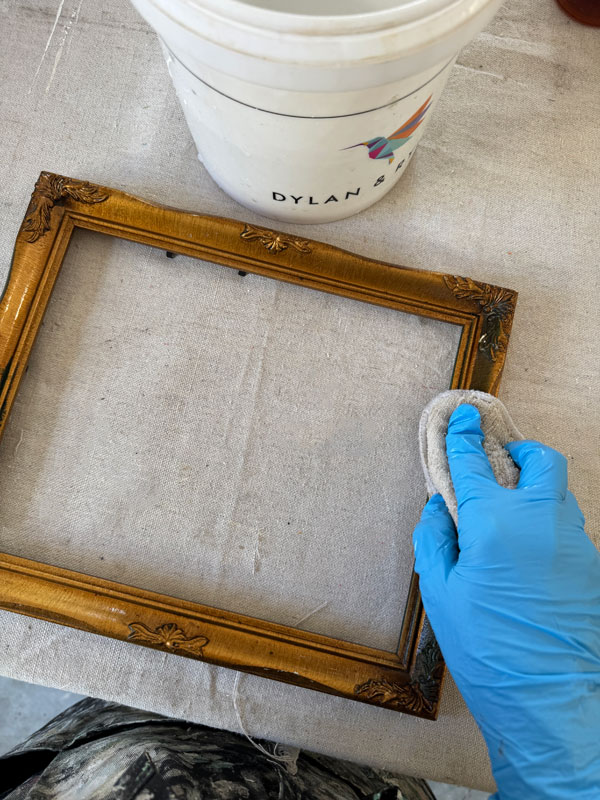
That frame was a yard sale find and was quite old and dirty as you can see!
Paint
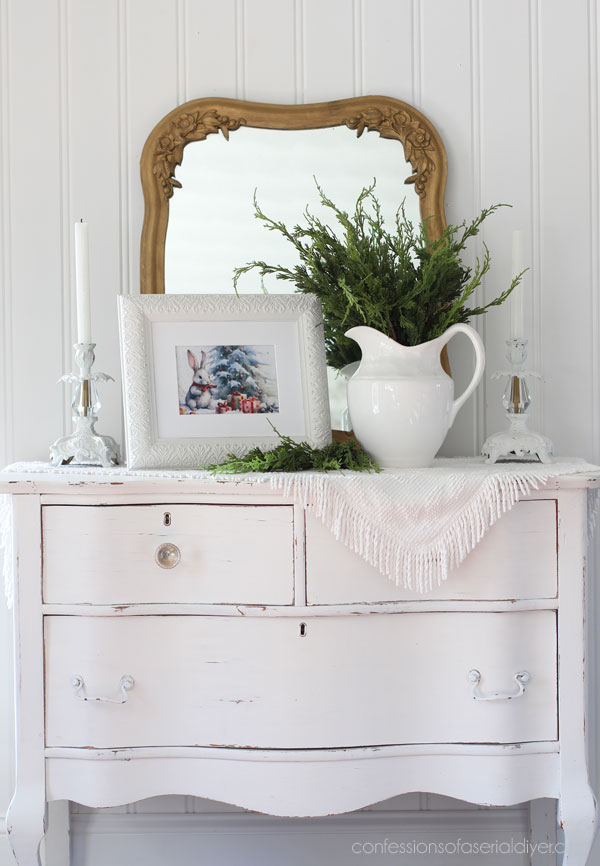
Like last year, I decided to stick with two main colors, and I chose Fluff for the bunny ones, applying it to the detailed pieces with my Belle Brush:
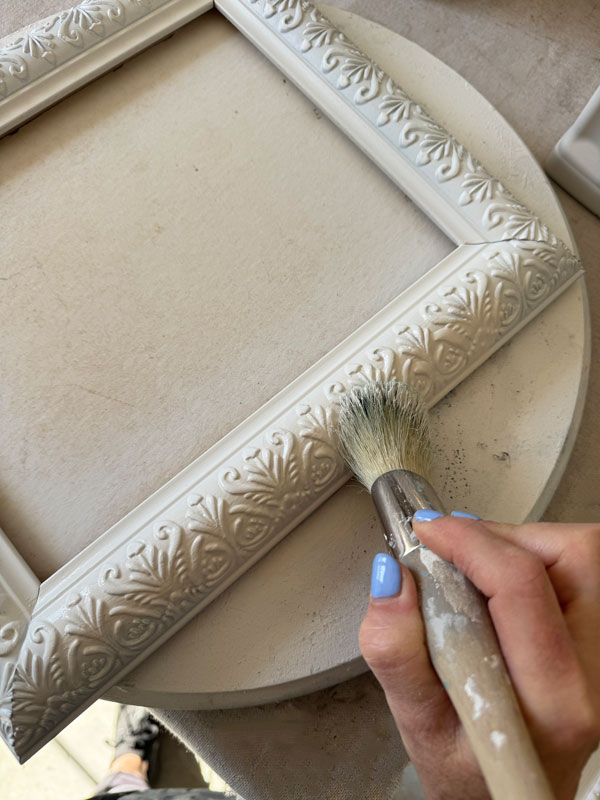
The mop head on that brush is great for getting into all those details easily.

I painted the rest in Barn Red:
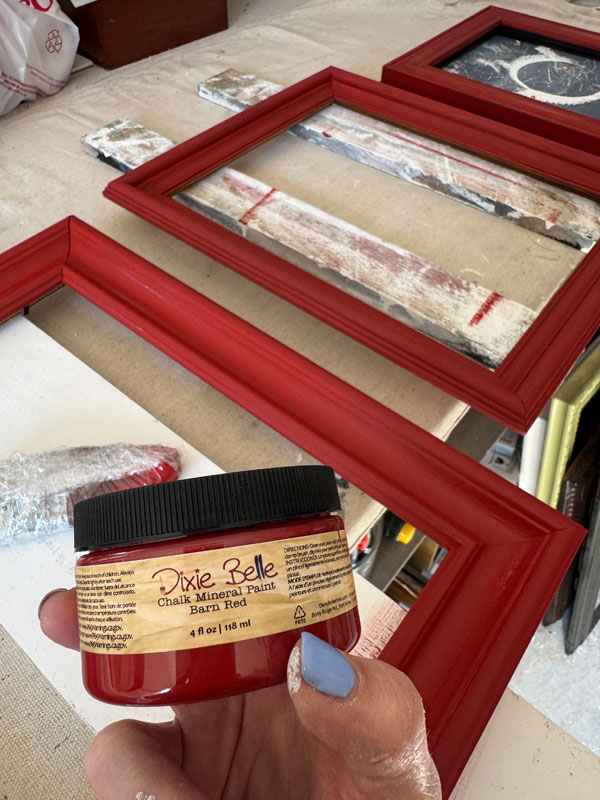
Once they were all painted, I sanded to smooth the red ones and distress the white a bit.
Seal
To seal, I took the easy way out and spray sealed them with Rustoleum Clear Satin Spray:
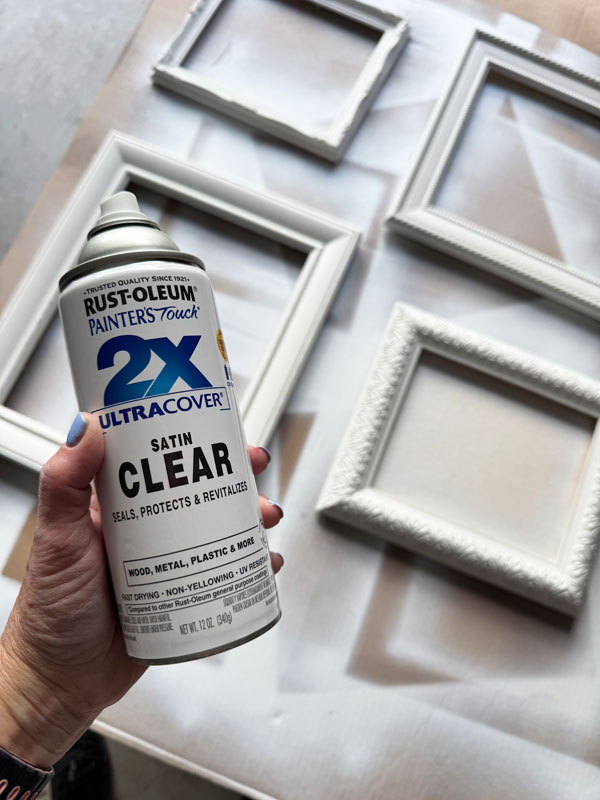
I usually use Best Dang Wax in clear, but this was just quicker since I had so many of them! (But also stinkier!)
Adding the Decoupage Paper
Now for the fun part!
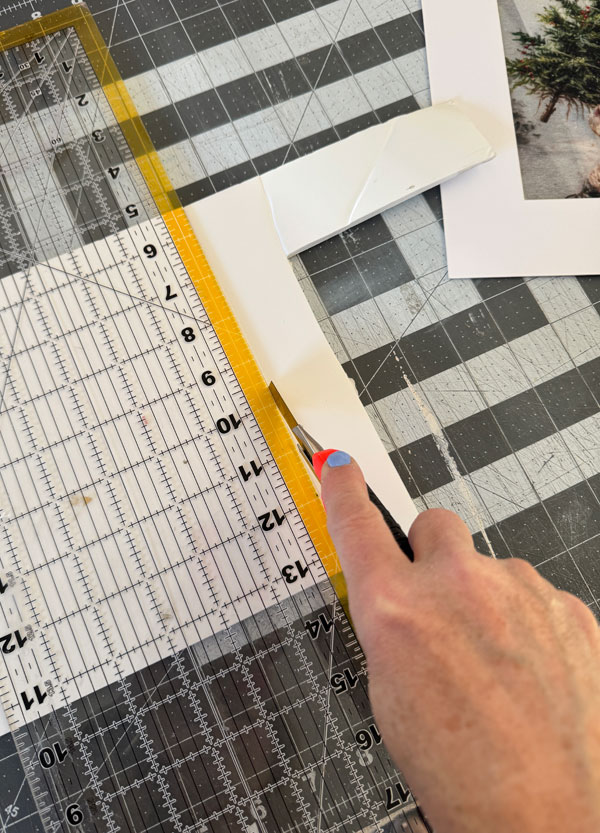
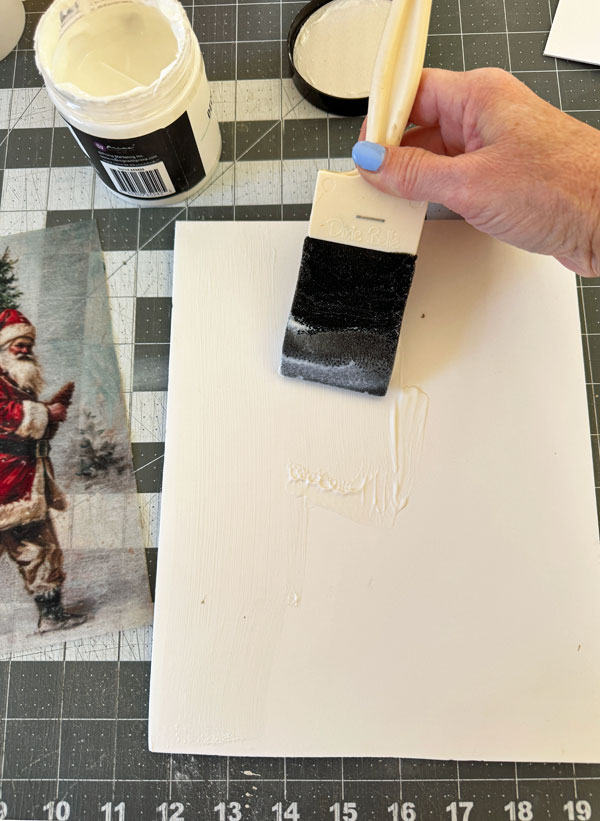
It is best to give the paper a white background to make the colors really pop. To do that, you can either paint the original artwork white which I did with a couple, or cut foam core for each one. That’s what I did with the rest. (Be sure you have enough space in your frame depth-wise if you choose to use foam core.)
I used an exacto knife to cut it to fit each frame…
Then I made sure to check placement in the mat before applying gel:
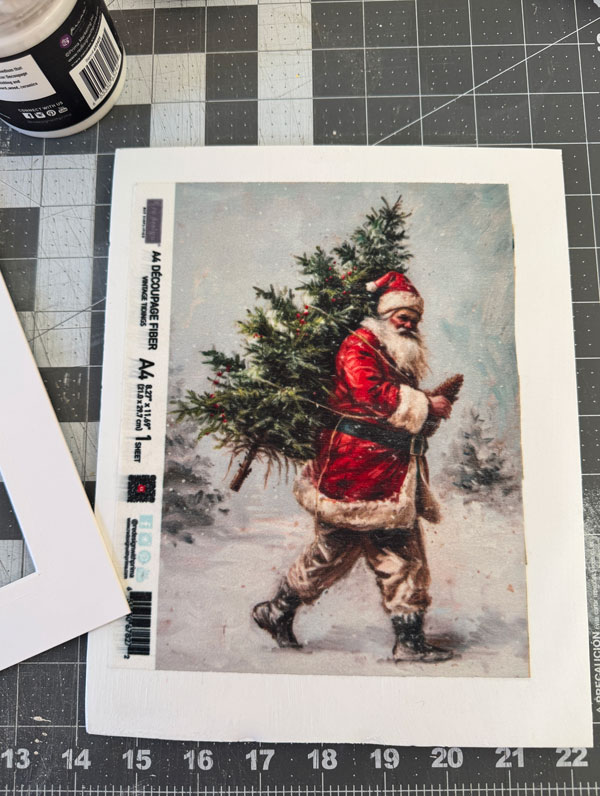
I didn’t do it on this one but I learned my lesson real quick! I marked the corners with a pencil on the rest of them, so I would know where to place the image once I applied the gel.
I used my iron on the LOWEST setting to remove the creases:
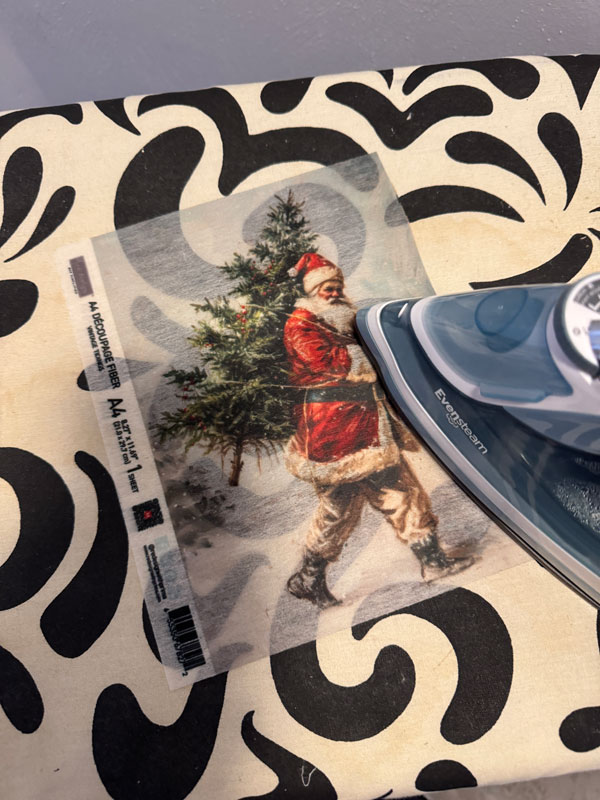
You can also use a hair dryer on WARM or a steamer.
Then, I used Redesign Decoupage Gel in the matte finish, to spread it onto my foam core using a 2″ Foam n Dandy brush which works perfectly:
I then laid the paper. And here’s a tip I learned from another retailer…use a piece of saran wrap to smooth out the paper before adding the topcoat. It glides nicely over the paper!
I got a picture while doing this one:
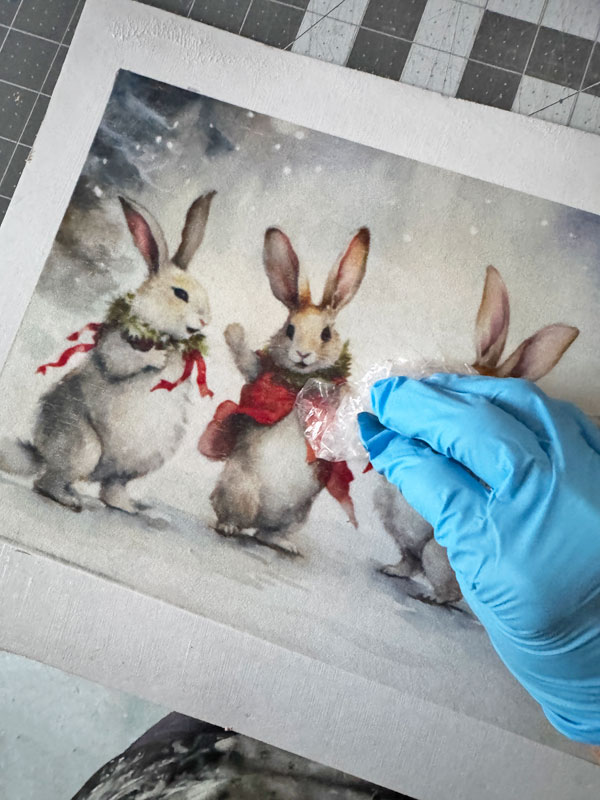
Once I had the paper smoothed out, I applied another layer of decoupage gel over the top:
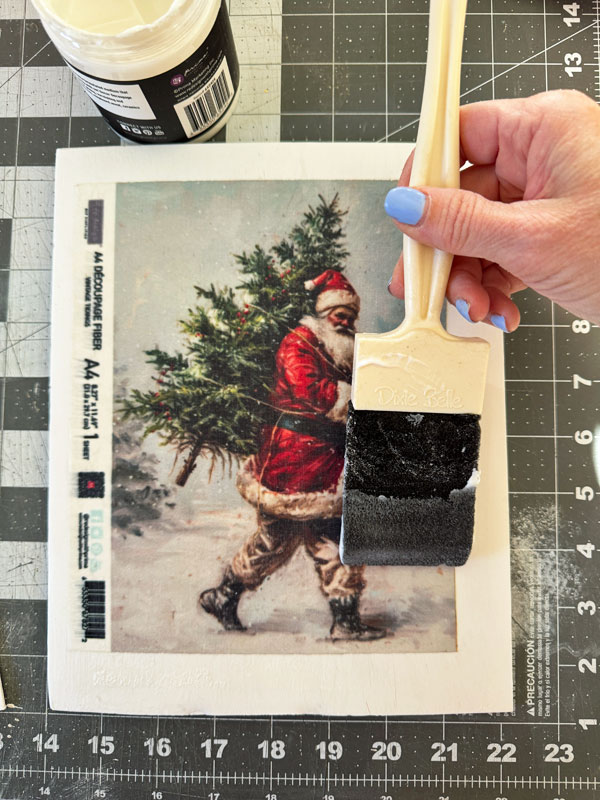
If I were framing this image without the glass, I would go back over it with a coat of Satin Clear Coat to give it some sheen or opt for the shine version of the gel instead. This makes it appear more like a painting.
All that was left to do once the gel dried was to reassemble all the frames!
Create Holiday Art with Decoupage Paper the Reveal!
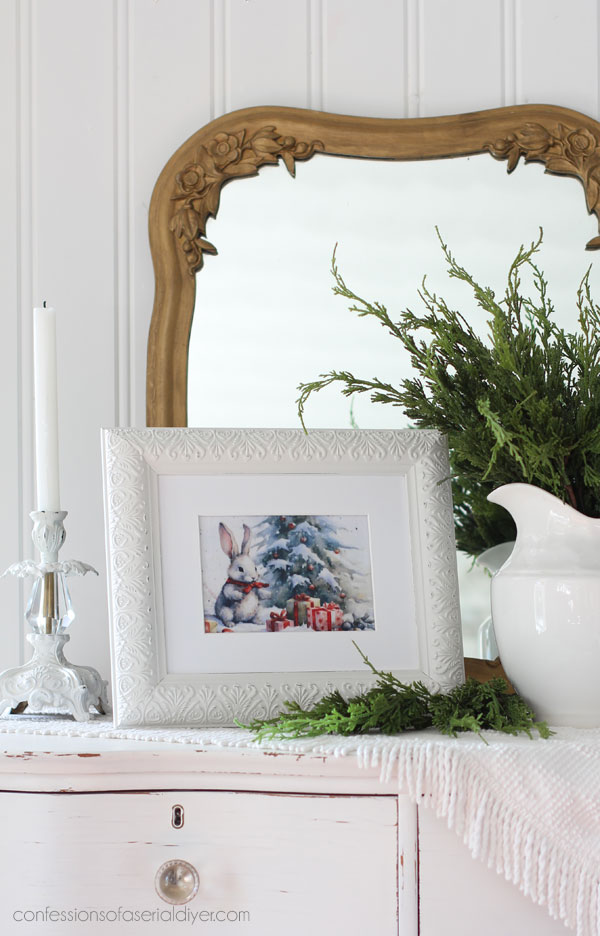
Like last year, I kept the glass out for photos as they photograph much better without the glare, but they will all be sold with the glass!
New Decoupage Holiday Art #1
Here is the first one before:
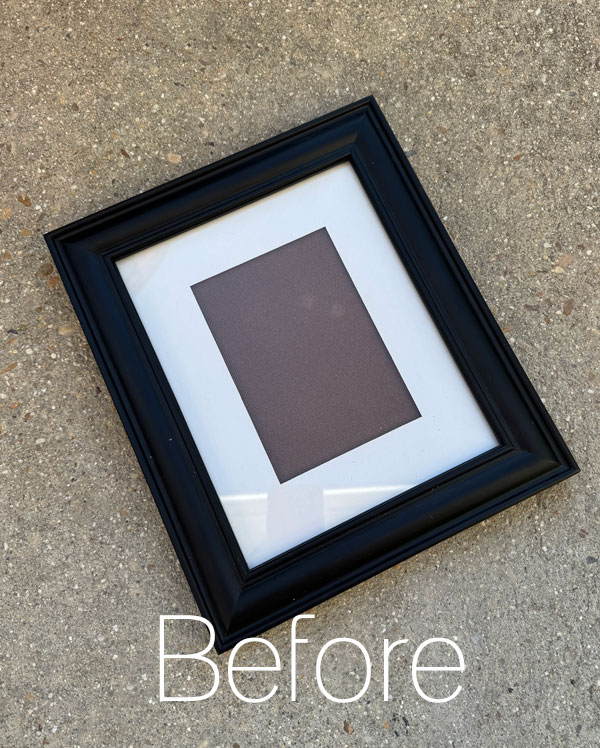
This super simple frame was $1.99 at the thrift store and bonus that it already had a mat!
Here it is now!
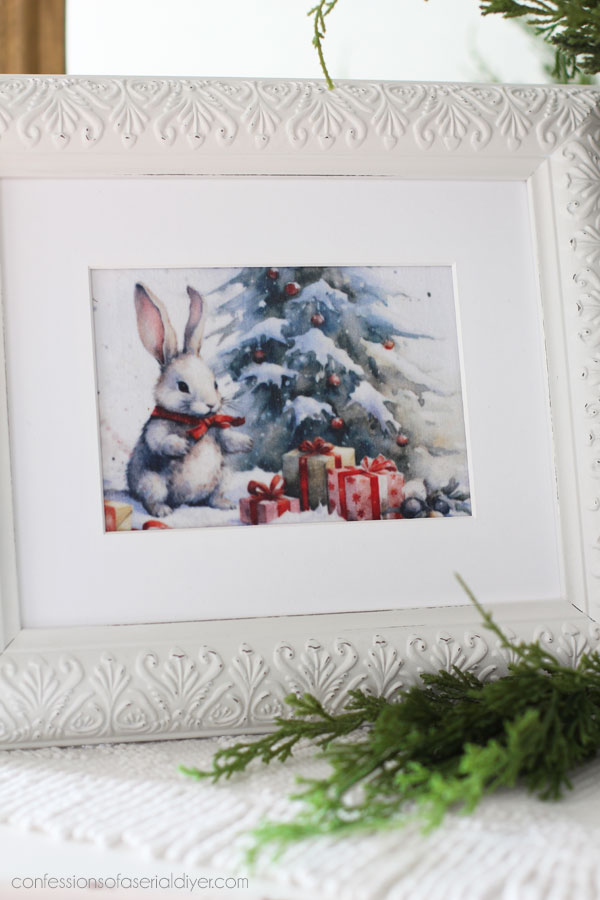
This is one of the newest papers, Vintage Tidings, and it comes with this smaller image and one more you’ll see soon.
New Decoupage Holiday Art #2
Next up is this chunkier frame that was also $1.99:
This one got one of the sweet bunnies!
So sweet!
New Decoupage Holiday Art #3
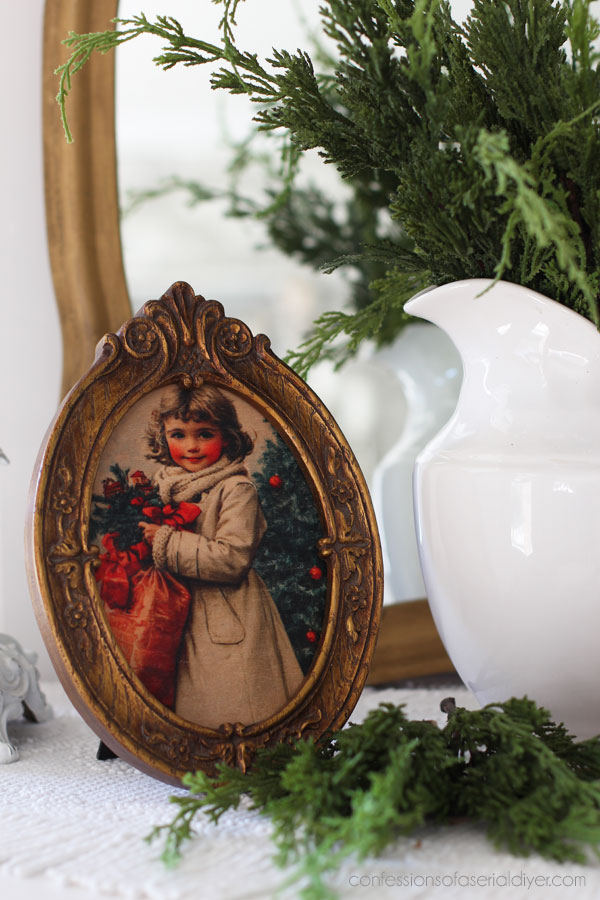
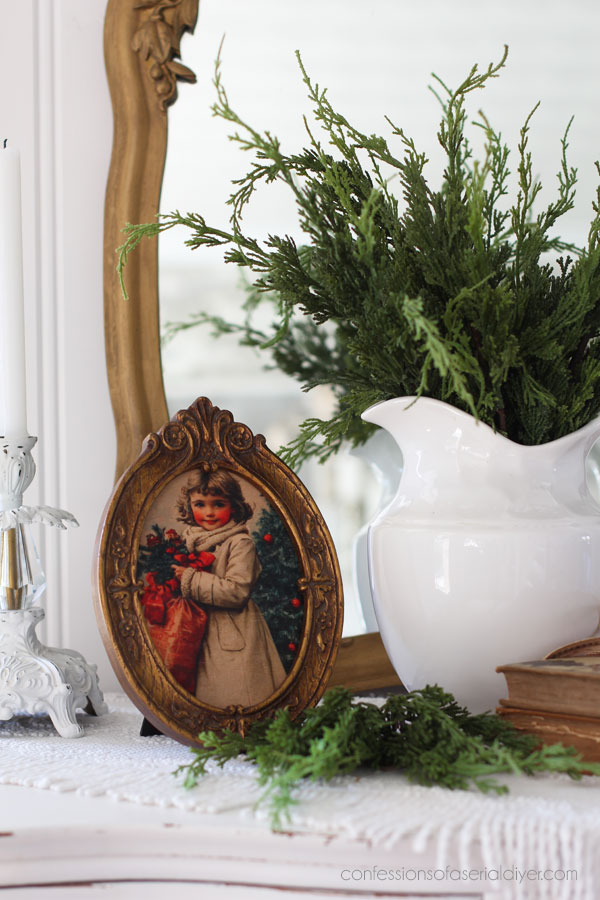
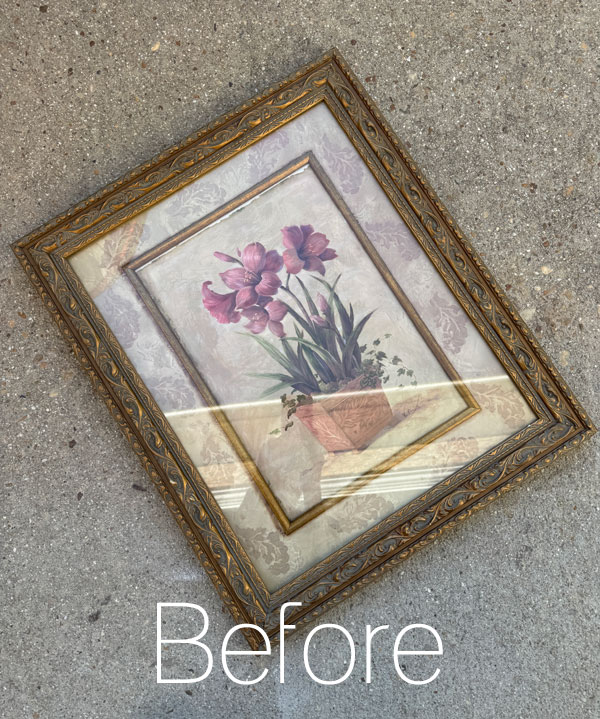
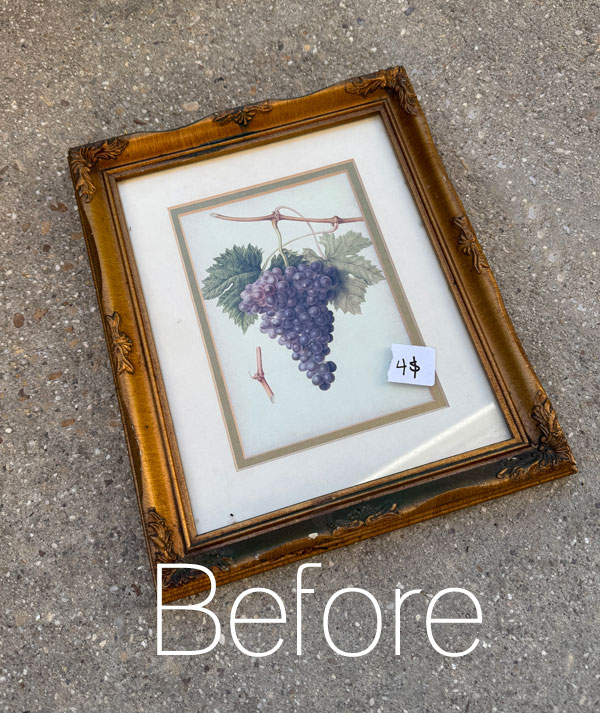
I loved this little gold frame I found a while ago at the thrift store for $2.58:
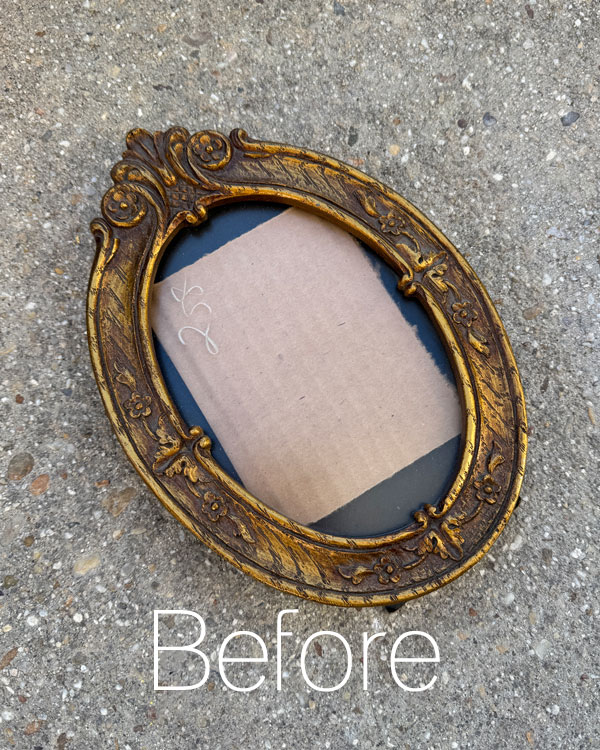
And I actually loved it as is, so all I did was add this pretty little vintage girl:
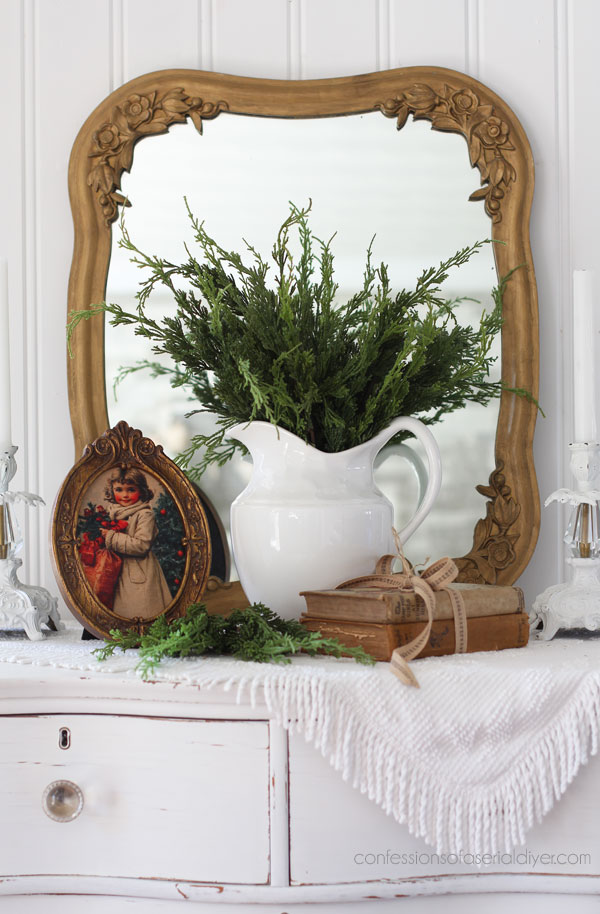
She is the second image in the Vintage Tidings paper.
New Decoupage Holiday Art #4
At number four is this set of holiday prints I picked up for $3.99 each:
The frames were covered in some sort of plastic that was peeling off of one of them and it ended up not being usable. I was able to paint the other to update it though.
I had this mat left over from an old frame and it paired perfectly with it and with this Cozy Barn Blessings Paper!
I love this paper!
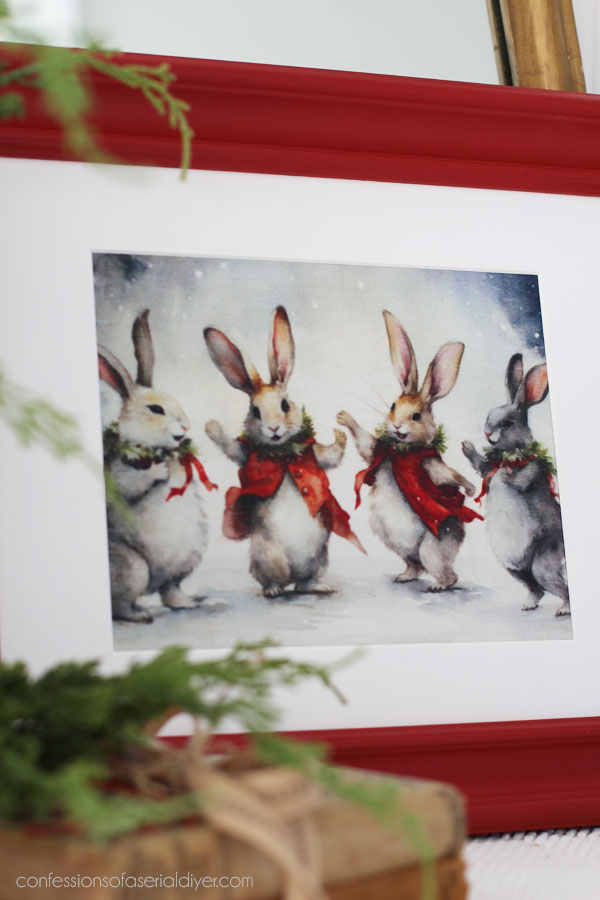
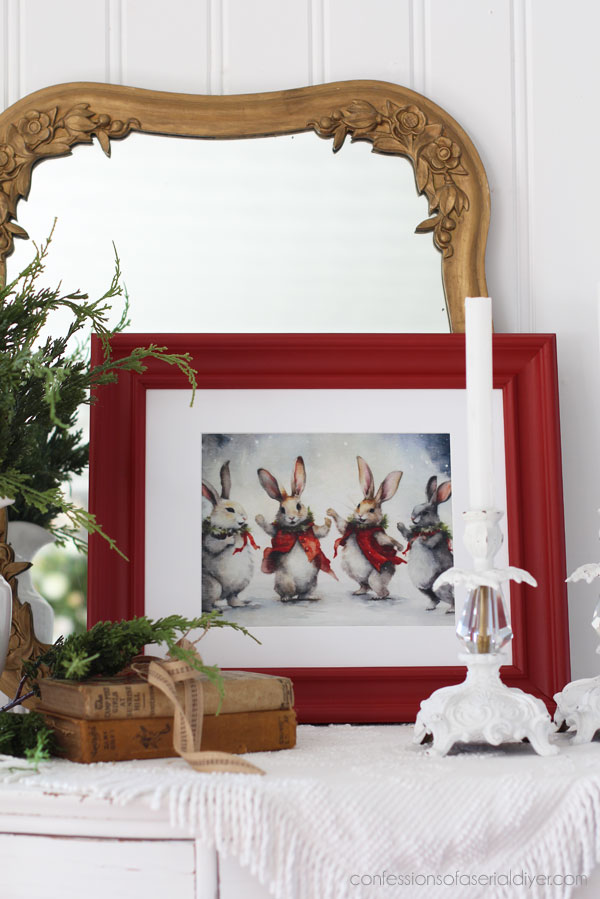
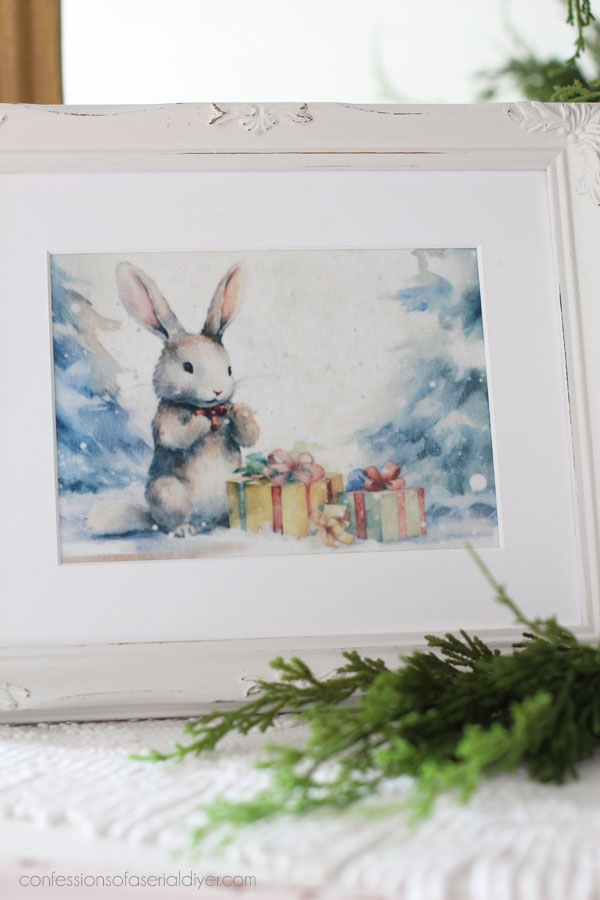
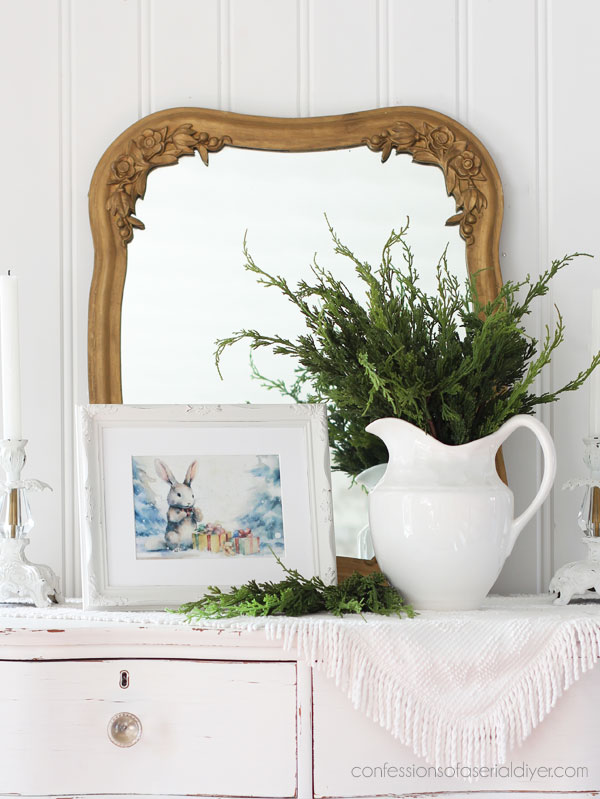
New Decoupage Holiday Art #5
Next up is this frame that I already had on hand that has been hanging around my garage for ages. I swapped the metal lace one for it at the last minute and forgot to get a before photo!
Here is the after:
So festive and fun! Don’t they have the sweetest faces?
New Decoupage Holiday Art #6
Number six is the only frame that actually came from my current haul:
I actually decided not to paint this one either, but it had been banged around a bit. I fixed it right up with some Antique Gold Gilding wax:
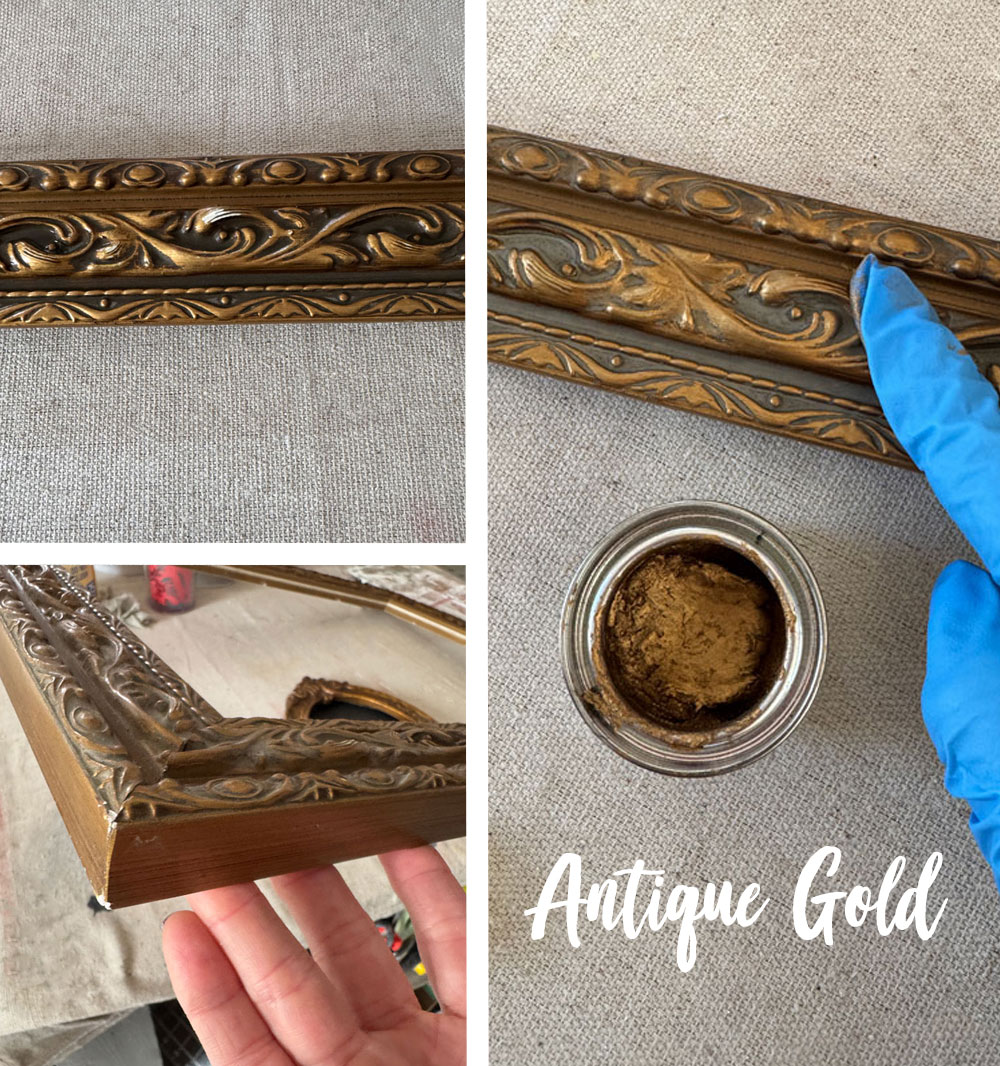
And here it is!
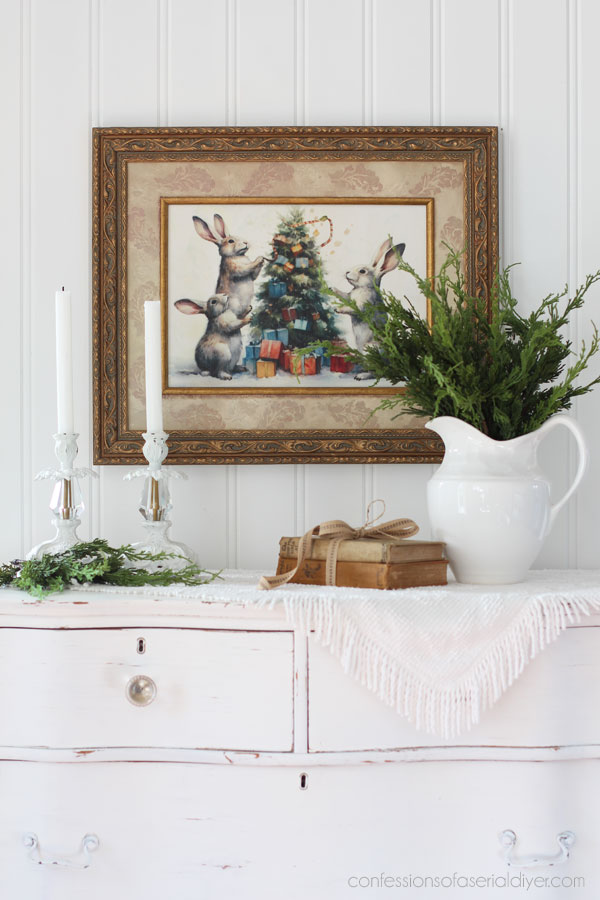
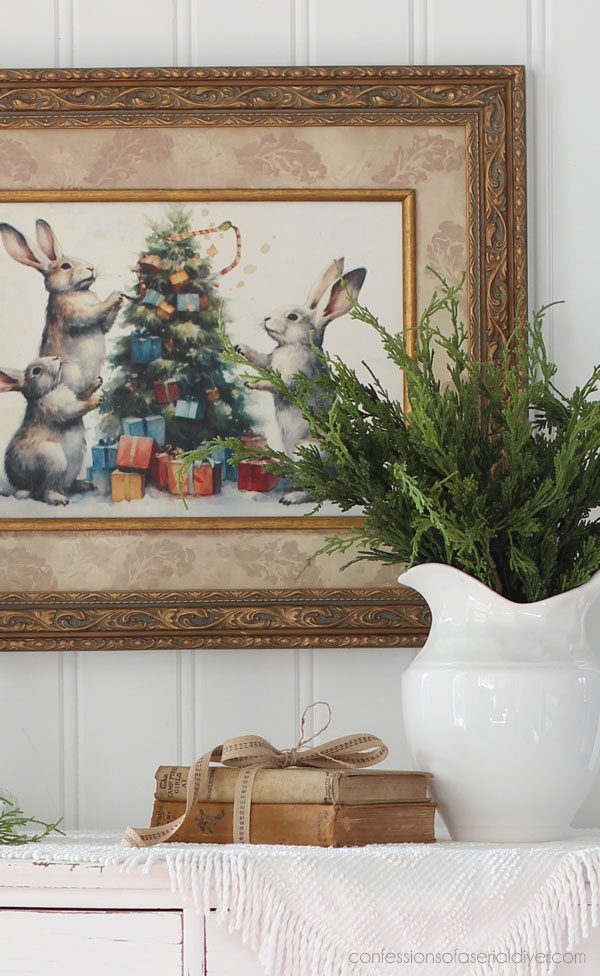
I kept the mat too. I love it with this bunny family!

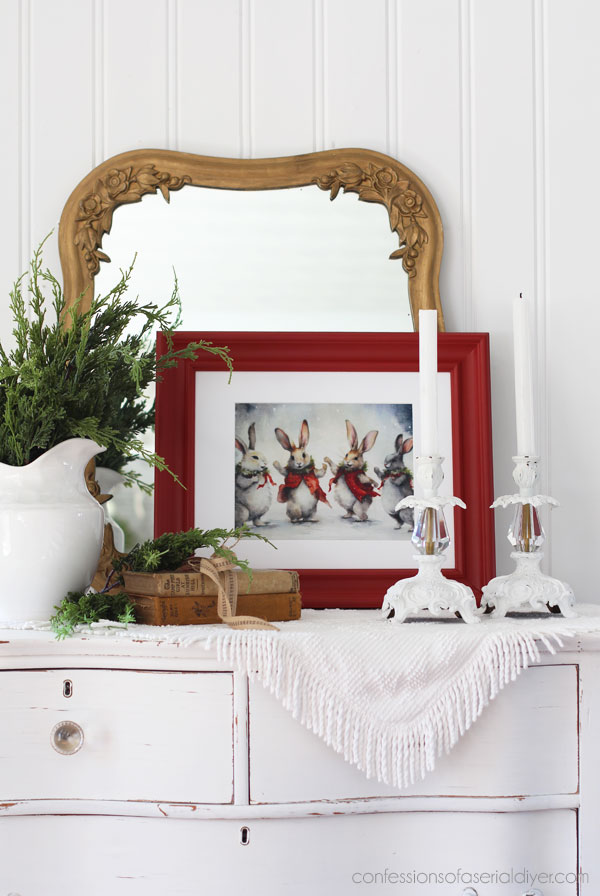
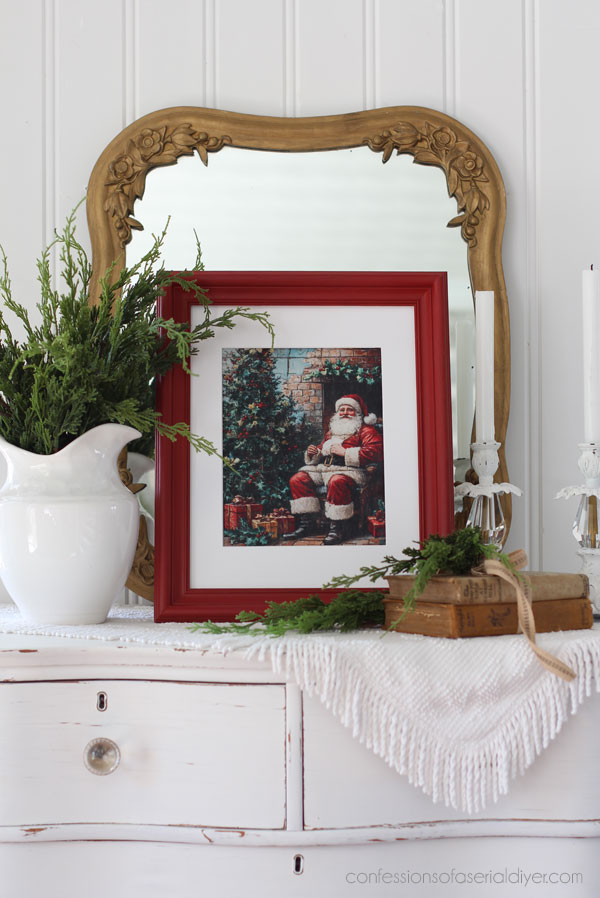
New Decoupage Holiday Art #7
This next one started out like this…it was a $4 yard sale find. I ended up getting it for $2 though when I combined it with a few other things:
This one got another sweet bunny:
New Decoupage Holiday Art #8
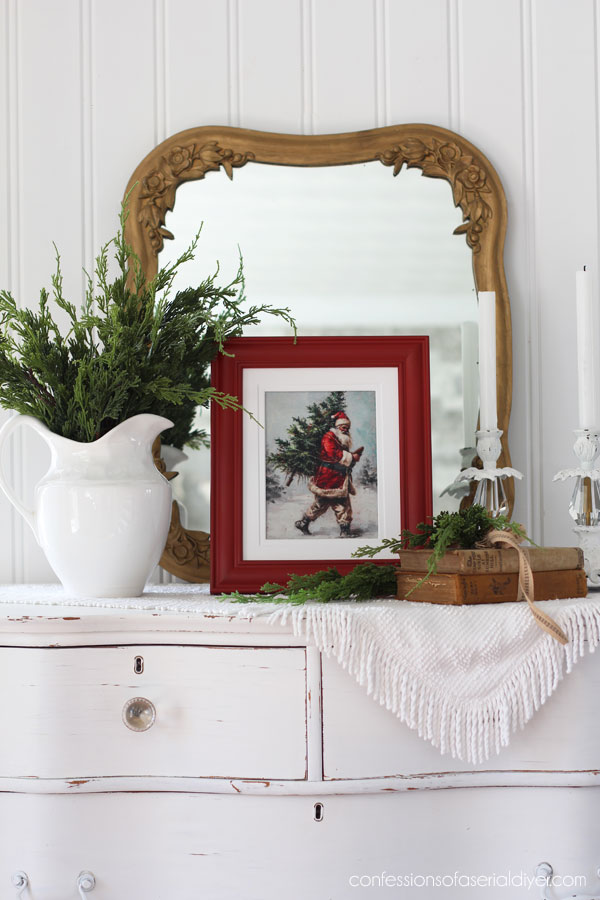
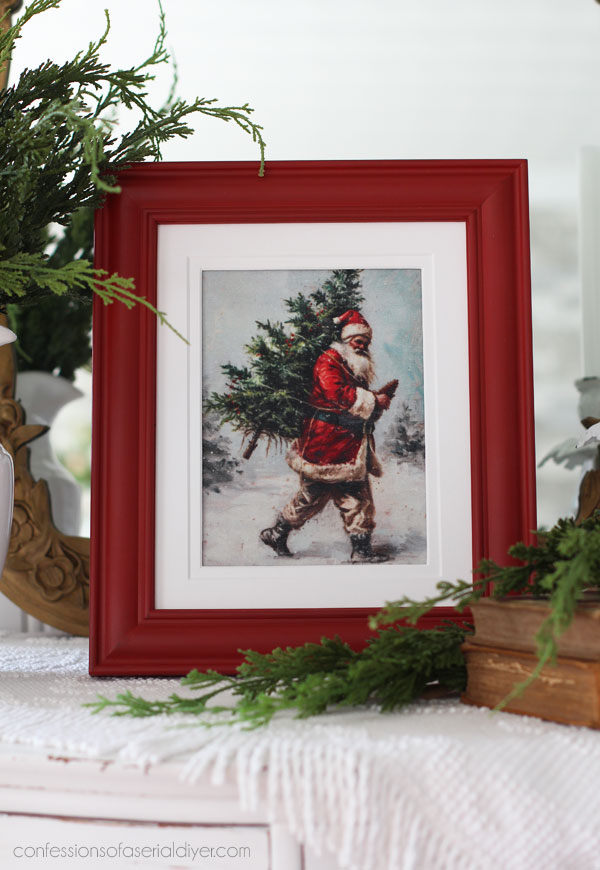
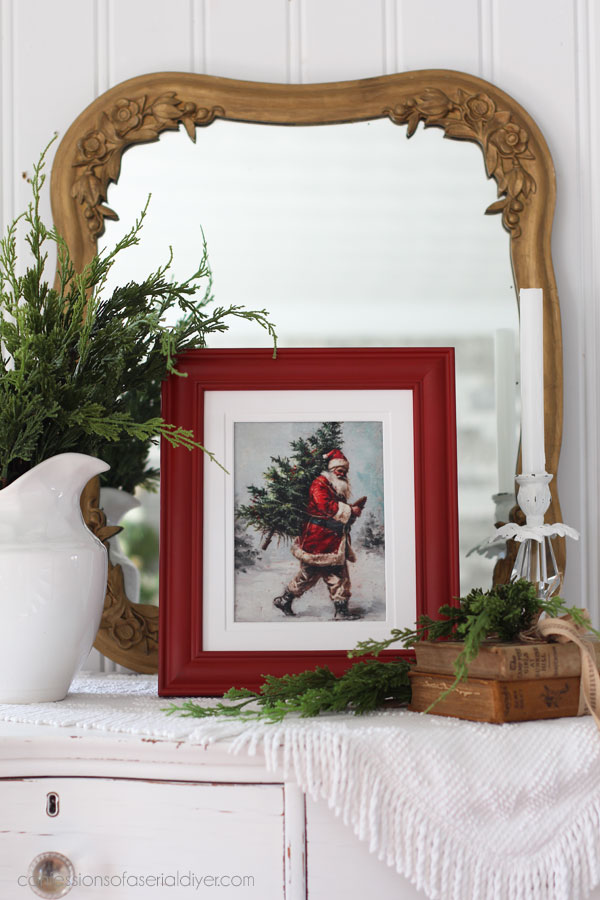
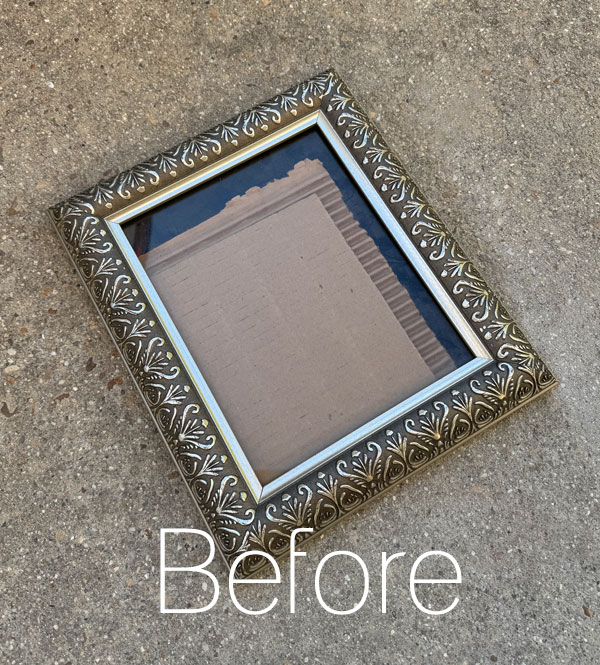
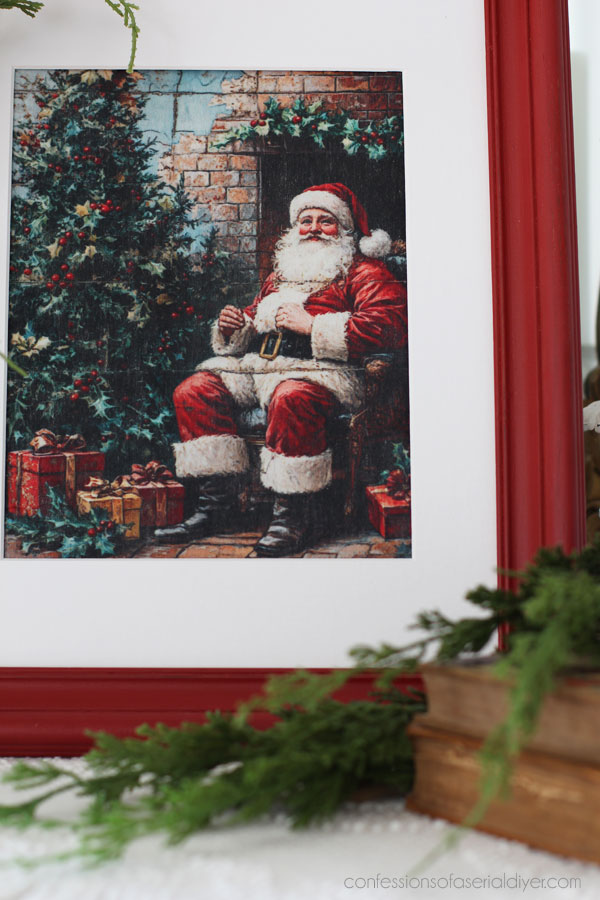
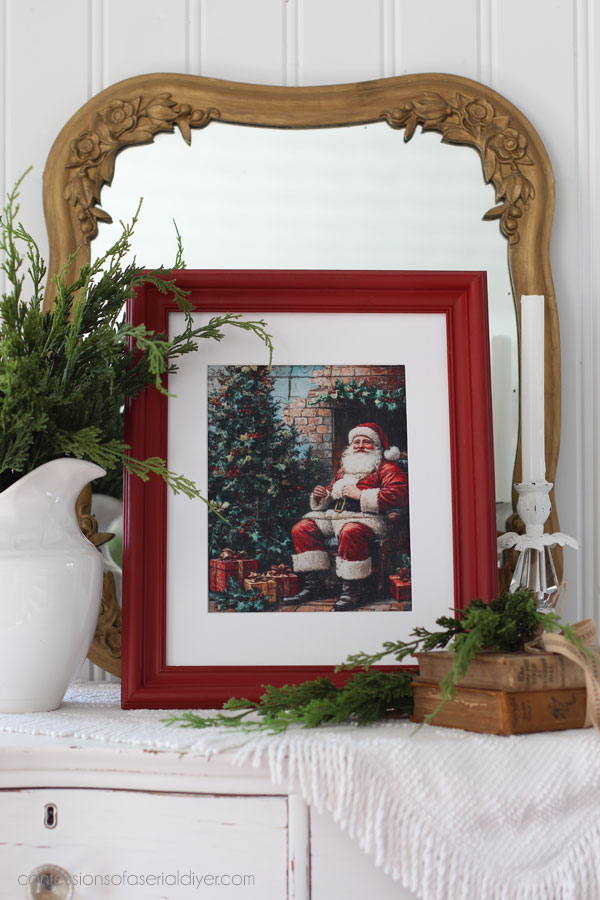
Next up is this super old frame that has been collecting dust in the garage for as long as I can remember! I paired it with the other, newer frame on top in the photo below because I plan to use the glass from that one:
This one got this handsome Santa from the Cozy Claus Corner Paper:
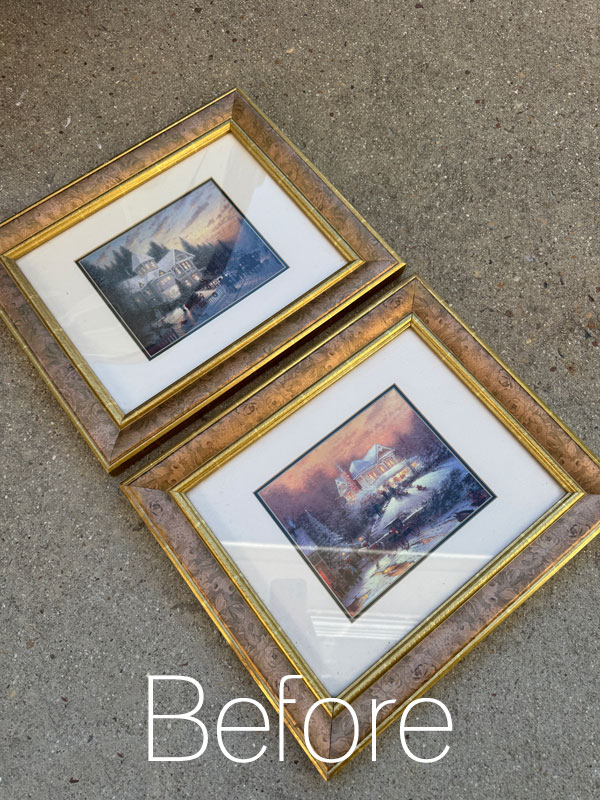
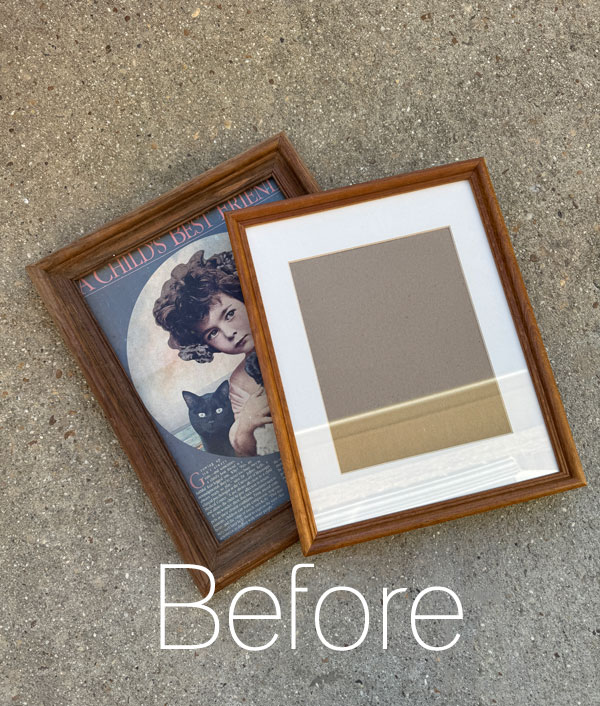
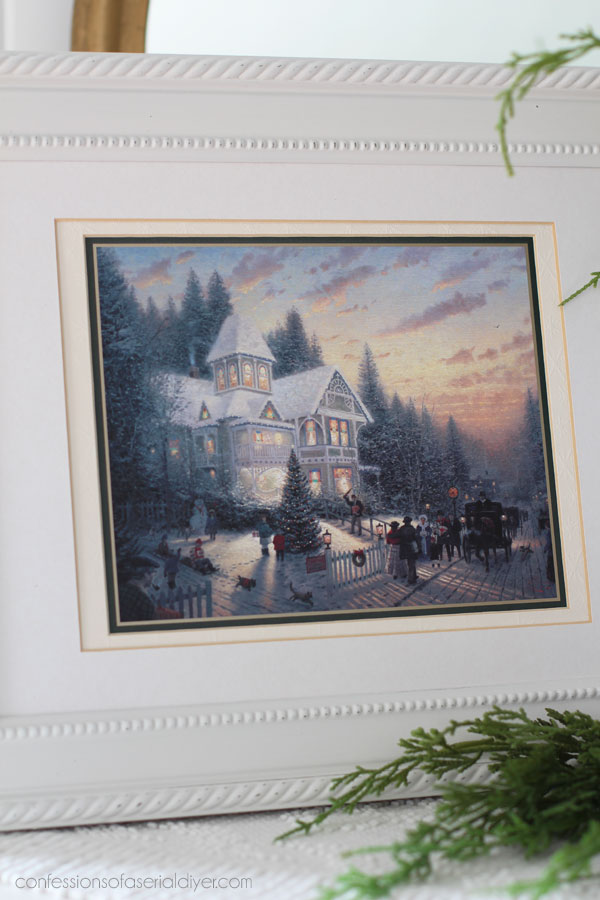
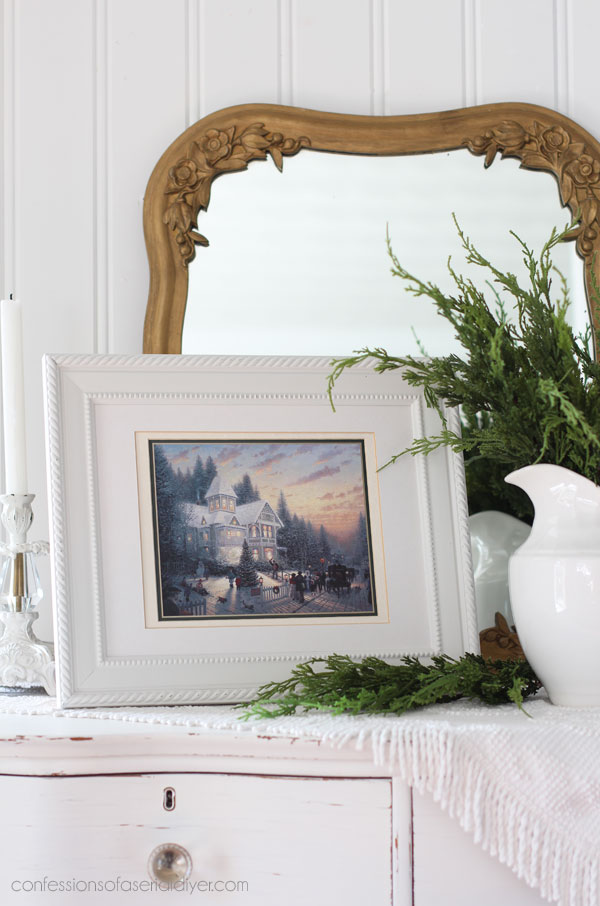
Bonus Holiday Art #9
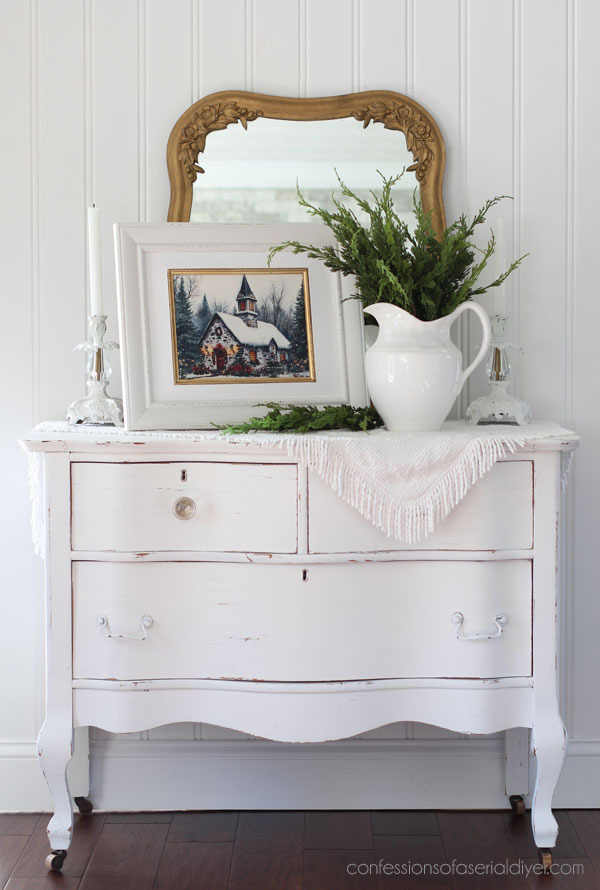
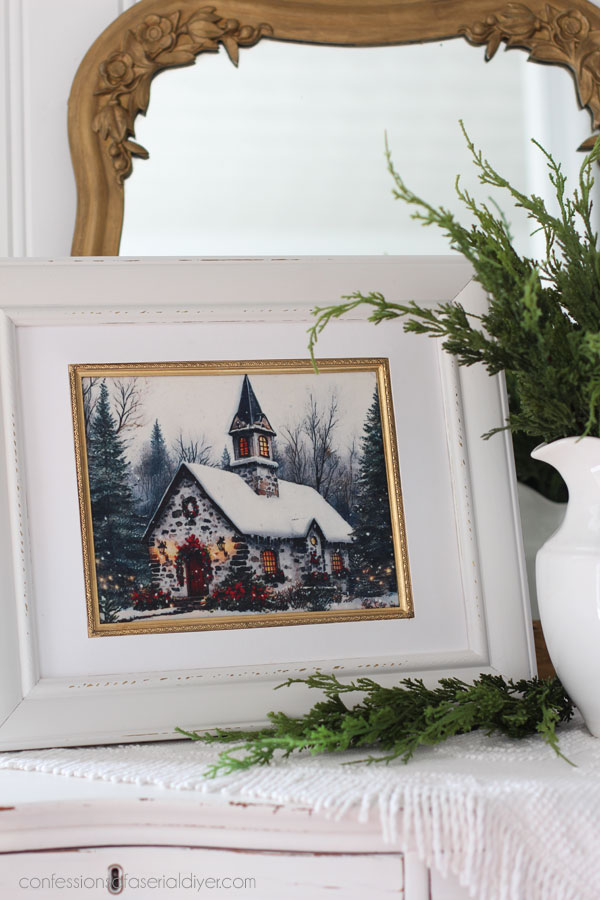
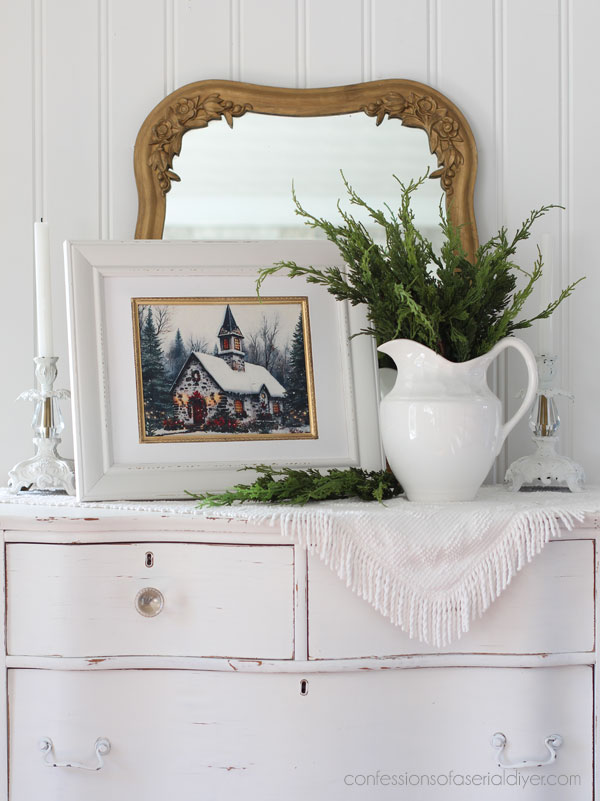
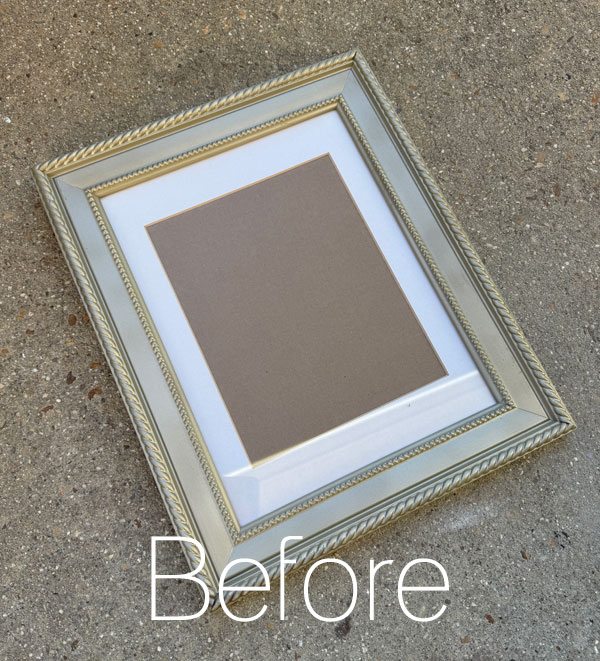
I didn’t use decoupage paper on this final one. I shared this set of Thomas Kinkade holiday pictures earlier:
I shared how I used one of the frames for another piece of holiday art. The other one wasn’t really usable. However, this art was really pretty!
Unfortunately, on the bottom one, the art had gotten wet or something and the paper was rippled. I still wanted to use the other art and paired it with this $1.99 frame I picked up with the others on Friday:
It looks great paired with this lovely holiday print:
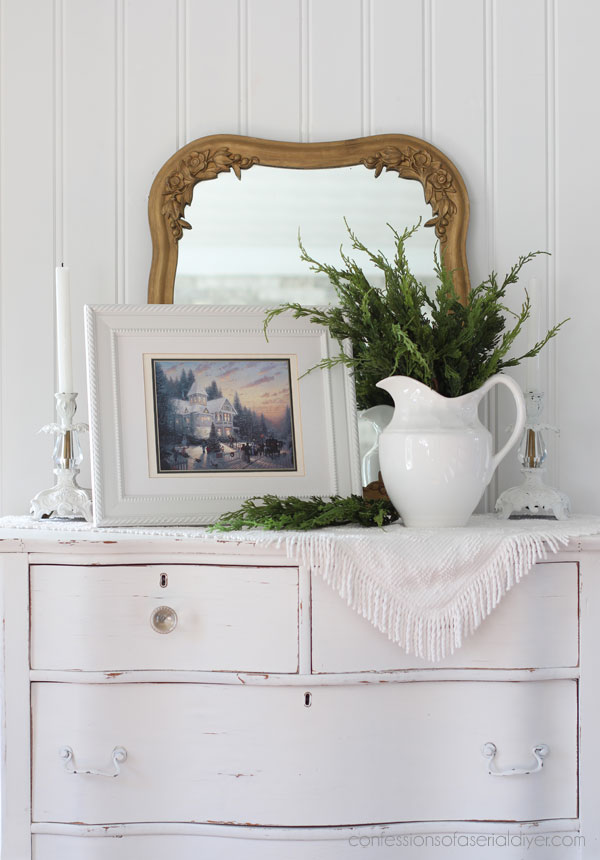
I added an extra mat to brighten it up a bit…
Now I have some holiday items for my booth!
I just need to add the glass back to them! Here’s hoping I don’t break any!
This was almost as good as a Painting the Smalls post, right??
I hope you enjoyed these fun new holiday art pieces!
Those unsuspecting frames had no idea they were going to be such fun holiday art!
And here are the frames I turned into holiday art last year:
They didn’t make it to my booth until mid December, but I sold every last one!
See how they turned out HERE!
See all the holiday items I have available in my Etsy shop HERE!
I’ll be back on Thursday with my Furniture Fixer Upper ladies sharing this table that got redo number TWO!
I’ll share why it’s getting a second makeover on Thursday. See ya then!
UPDATE: It’s done and ready for its second reveal HERE!
XOXO,

Don’t Miss a Thing!
If you like what you see, there are several ways to follow along!
EMAIL * INSTAGRAM * FACEBOOK * PINTEREST


Get FREE SHIPPING on all orders over $50. No code needed at checkout! Orders under $50 always enjoy $8 flat rate shipping! Most orders ship same or next business day!


Mary Kaiser says
Oh they turned out so cute, they will be a great addition to your booth! That is such a great way to use old frames, I see lots of them in the thrift stores! You are amazing!
Christy says
Thank you, my friend! I can’t wait to get them in there…hoping they add a little holiday feel! XOXO
Michele M. says
Oh, how CUTE!!!!! They all turned out so adorable, Christy! I absolutely love those vintage Christmas papers. They will give your booth area a wonderful touch of holiday cheer!
Christy says
Thanks so much, Michele! They were fun to put together…now to get them to my booth! XOXO
Jackie C says
These turned out just lovely. I really enjoy simple makeovers once in a while. They’re easy and quick for me to try my hand at.
You always inspire.
Christy says
Aww thank you, Jackie! I agree…sometimes it’s nice to have a few simple ones! XOXO
Mary Loveland says
There’s no way I can pick a favorite they’re all so pretty. Good save on those frames!
Christy says
Thank you, Mary! I just added the glass and nice paper to the backs, so they are ready for market! XOXO
p says
I DO think these count for smalls 😉 Very nice.
I’m not a huge red fan – but I do love a deep glorious red – This one is it !! The papers are so pretty. A great deco touch for the holidays. Geat choices.
The little girl in the gold frame is sweet. The Santa with the tree and red frame is perfection.
I know I must have some older frames stashed…. thanks for the inspiration.
Christy says
Thank you P! Funny…I don’t usually love red either, but I love to decorate with this red for the holidays! It is almost time to bring everything out! XOXO
Caye says
I just love those pictures, Christy! I haven’t dealt with mats before so that’ll be a learning curve. Those, plus the picture itself and the glass, makes for a nearly stuffed frame. The small one wih the little girl, is adorable, and I love the Thomas Kincaid ones, too. All in all, GOOD JOB! They’ll make your booth even more successful.
Christy says
Thank you so much, Caye! Only one frame was too shallow, so I painted the back of a piece of cardboard that came out of that frame for that one as a background for the paper, rather than using the foam core. I can’t wait to drop them off at my booth along with my gold tinsel tree! XOXO
Cecilia says
Great use for those old frames pairing them with the pretty holiday papers. I bet they will sell fast!
🥰Cecilia
Christy says
Thanks, Cecilia! I hope so! XOXO