It’s no surprise that I love these old flatware boxes! Dear friends, I have another flatware box upcycled with decoupage paper this time, to share with you today.
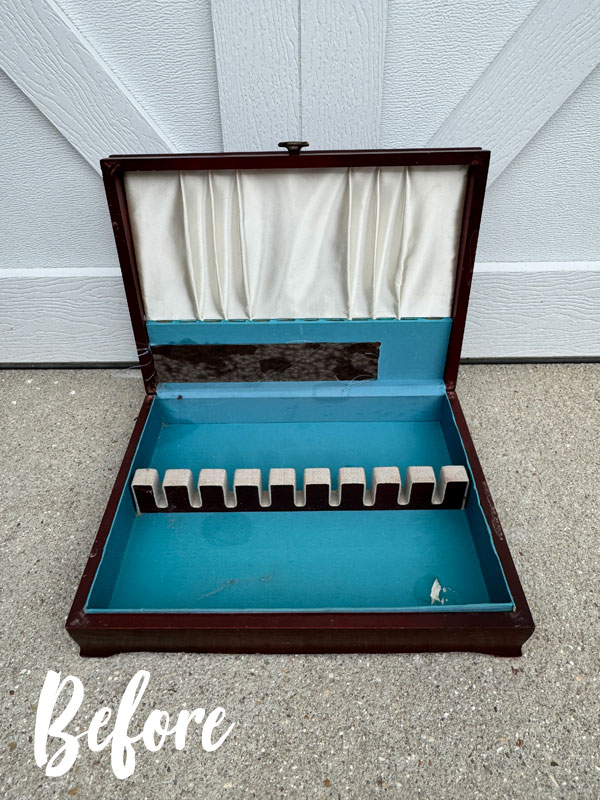
This one is as basic as it gets, and it was in pristine condition:

It was $5.99 at the thrift store.
Remove the innards
The first thing I always do is remove the interior lining. Here is how this one looked:

I told y’all it was pristine! I almost felt guilty about removing it. Luckily, I handed that job off to Jack! (I don’t know how long he’ll be assisting me, but I am REALLY enjoying it!!)
Clean
Once the insides were removed, I cleaned the whole box with White Lightning, mixing one TBSP with a half gallon of warm water. These applicator pads work great for this job.

Be sure to wear gloves and to swap out your water for clean water to remove any residue.
Paint
The finish on this box was intact and I was able to go straight to painting!
I chose Fluff which has amazing coverage! This is after just one coat:

And as you can see, I also painted the inside lip of the lid as well as the very top edge of the inside bottom.
Sand
Then I gave it a quick sanding with 220 grit sandpaper wrapped around an old sanding sponge:

Adding Decoupage Paper to the top
I just got in several new transfers and decoupage papers from Dixie Belle’s Belles and Whistles line in my Etsy shop, and I knew immediately that I wanted to use one of these gorgeous decoupage papers from the Chinoiserie set on this box!

I chose the pattern in the center with the birds:

To apply it, I used Clear Coat in Satin, applying it with the blue sponge applicator:

I’ve been enjoying using Redesign’s Decoupage Gel for my decoupage paper projects lately, but this paper is a thinner, rice paper, and so you can also use the Clear Coat to apply it.
I applied that coat liberally and then placed my paper, using the transfer tool to smooth it out:

I prefer this tool for this purpose over applying transfers.
Once I had it all smoothed out, I sanded the edges with 220 grit sandpaper to easily remove the excess around the edges:

Seal
To seal this box and protect both the paint and the decoupage paper, I used Clear Coat in Satin, once again applying it with the blue sponge applicator:

Flatware Box Upcycled the After
Let’s jump to the after of this flatware box, shall we?


It was a dreary, rainy day for our photo shoot, but it didn’t deter this vibrant box from shining bright!

I did have to turn the birds sideways for it to fit the surface, but it still worked beautifully!

And of course that flat bottom was just begging for these fancy new feet:

They started out oil rubbed bronze, but a little gold gilding wax gave them what they needed:


I saved the pull from another piece, and it got some Gold Gilding Wax also:

What about the inside?
The inside got a new look too, of course.
Here is a reminder of how it looked before:

And here it is after Jack removed the interior:

To create a new lining for this box, I cut a piece to go all the way around the insides of the inside bottom and folded and ironed it across one edge to get a clean edge. Then, I just hot glued it in place:

Once that was secured, I cut two pieces of foam core, one to fit the top and one to fit the bottom:

Those were wrapped in the same fabric and glued in place.
You can see all the steps to lining boxes with fabric HERE.
Here is how the inside looks now:


One more done yay!!

See any you may have missed or want to revisit below:
Painting the Smalls #29
Painted Baskets
Chest on Chest Dresser
Step End Table Makeover
Yard Sale Game Table Makeover
Bench and Mirror Makeovers
I still have one more flatware box in this haul, but it has a drawer! I’m looking forward to that one!
Remember my last flatware box makeover back in March?
See the elegant outcome of that one HERE!
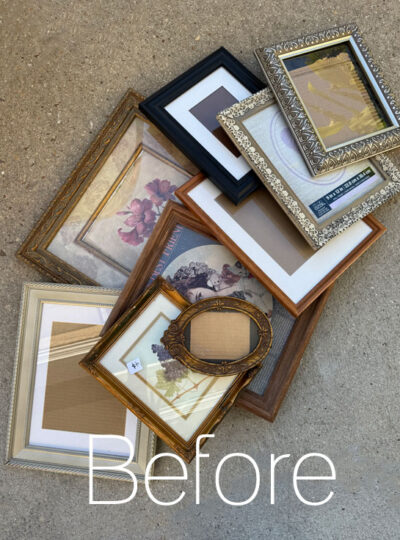
I’ve been replacing flooring in my parent’s home, so my project for Thursday may be small, but it’s still a brand new one! I’m sharing what I did with this framed picture:

And it’s NOT a chalkboard lol!
UPDATE: See what I did with it HERE now!
See ya then!
XOXO,

Don’t Miss a Thing!
If you like what you see, there are several ways to follow along!
EMAIL * INSTAGRAM * FACEBOOK * PINTEREST







Mary Kaiser says
Oh how beautiful that blue is!! My favorite part is always the feet and the fabric inside when you do these boxes. It is always fun to see what fabric you find to match the beautiful transfers and decoupage papers! The feet just are amazing and make it look so much better!
Christy says
Thank you, Mary! The feet really make it special for sure! And I was so excited to have this fabric in my stash that went along with the paper perfectly! Have a great week, my friend! XOXO
Pat Watson says
Loved the little feet on the flatware box. In the UK we call flatware cutlery as made by cutlers.
Christy says
Thank you, Pat! That’s so interesting! I love hearing the differences lol! XOXO.
Cecilia says
I always like to see the flatware boxes redone. Seems like blue and white are trending this year as well. Very pretty!
Christy says
Thank you so much, Cecilia! I love blue and white together! XO
Janice Holt says
This is now such a beautiful box. Inside matches the outside so well but I’m not surprised. You’ve never done a flatware box I didn’t like.
Christy says
Aww thank you, Janice! I just can’t pass up these boxes… So many possibilities! XOXO
Jackie C says
I love the way you did the inside. I couldn’t help but notice your doily, which matches my bedspread!
Christy says
Thank you, Jackie! I love chenille bedspreads! This was part of a vintage bedspread that had become damaged. I love it as a dresser scarf! XOXO.
Cyndi says
That is SO pretty! Blue and white is one of my favorite combos. P.S. I love that your lazy susan is painted your favorite aqua color. Heck yeah! May as well make our work areas as pretty as can be. I do the same. 🙂
Christy says
Thank you so much, Cyndi! Ha ha! I actually found that at the thrift store painted that color. Had to have it lol! XOXO
Cyndi says
That’s amazing. It’s like it was there waiting for YOU! 🙂
Christy says
Right?? ????
Marcie Lovett says
Another beauty, Christy. The fabric and paper are great together and the feet are fabulous!
Christy says
Thank you so much, Marcie! I was so excited to find that fabric in my stash… It worked so well with the paper! XOXO
Catharine Windmueller says
Your finished pieces always look so perfect. Attention to detail seems to be second nature to you. Each of your projects shows your talent and love for what you do.
Christy says
I appreciate that so much, Catharine, thank you! XOXO
Debra Hubbs says
This came out so pretty! I love how you finish the insides of boxes with foam and fabric. Really finishes it off nice. You always add that extra touch.
Christy says
Thank you, Debra! The foam core really makes lining these boxes so much easier for sure, and then you don’t have to get every last piece of paper and glue off of the top and the bottom. I was so lucky to have this fabric in my stash that matches the paper perfectly! XOXO.
Mary Loveland says
Excellent project, looks gorgeous!
Christy says
Thank you so much, Mary! XOXO
Cyndy Cook says
Wow! Another amazing transformation! Your gift is that you can look at ugly brown junk & see something pretty and useful. It’s like a magic trick and even after you show me how you did it, I still don’t get it! ????
Christy says
Ha ha! Thank you so much, Cyndy! It’s amazing what a few changes can do! XOXO
Michele M. says
She’s a true beauty, Christy.
And, um, what??!! You are doing your parents flooring? Are you truly a real live Super Woman? You astound me on so many levels. Just amazing you do so much. That’s awesome. (And so is Jack!) ♥
Christy says
Thank you, Michele! Ha ha! It’s just their bathroom. They had hardwood floors in there and had a leak and so they all need to be replaced. We replaced them with luxury vinyl flooring. I really tried to make them hire it out lol, but they wanted a crazy amount to do it! XOXO.
https://oldnewgreenredoblog.blogspot.com/ says
Totally in love with your lining idea, such a simple way to get a great crisp, and snug even finish by using the foam core. Super results, Sandi
Christy says
Thank you, Sandi! It sure does make it easier to get a nice finish for sure, and you don’t have to worry about getting every last bit of glue and paper off the top and bottom. XOXO.
p says
All the details are sweet !
I especially Looove the inside paper 🙂
Christy says
Thank you so much, P! I was so happy to have a lining that matched the paper on top so well! XOXO