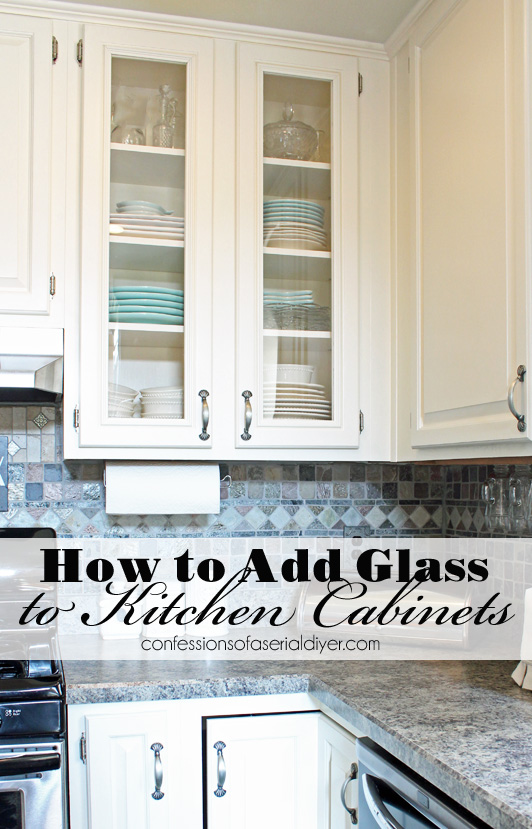
Hi friends! I recently shared my kitchen makeover, and I had several requests to share how I replaced the raised panels on my kitchen cabinets with glass. This post contains some affiliate links for your convenience. Click here to read my full disclosure policy.
Adding glass to just one set of cabinets had the biggest impact in my kitchen. This project was a lot easier than I expected, but I have to admit that cutting out those panels requires a little bit of guts.
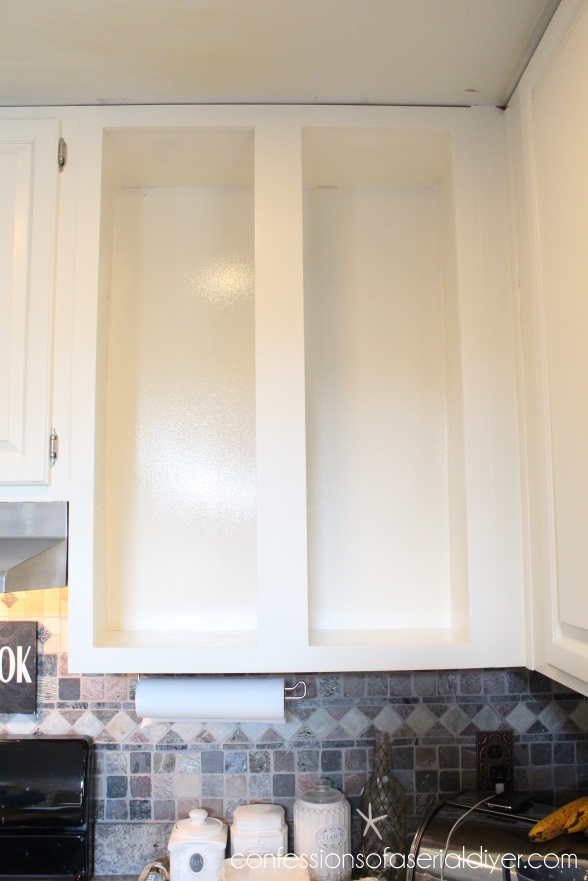
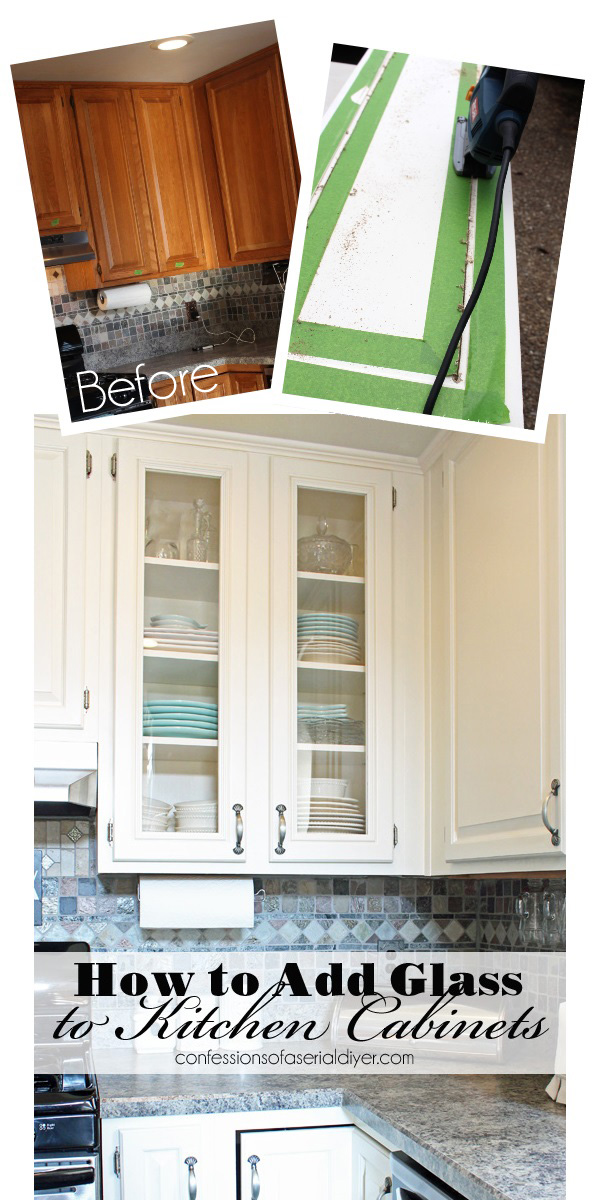
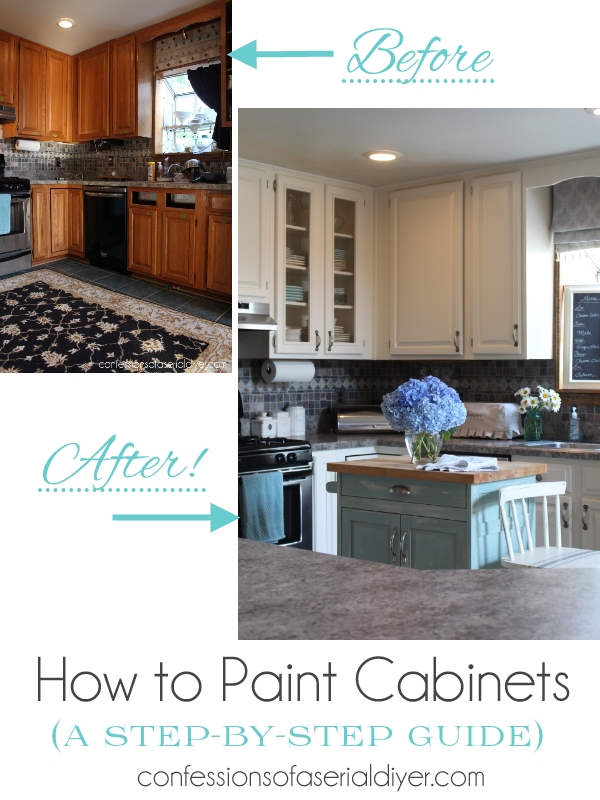
Here is the cabinet I added glass to before:
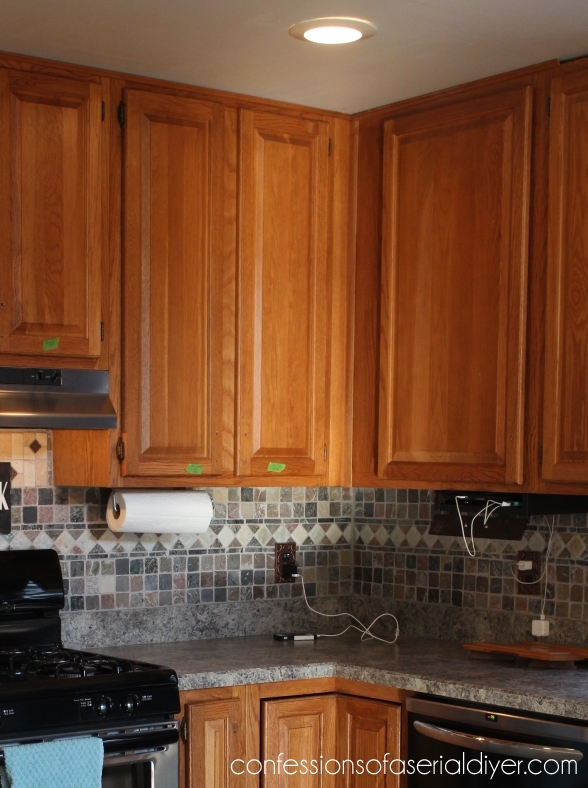
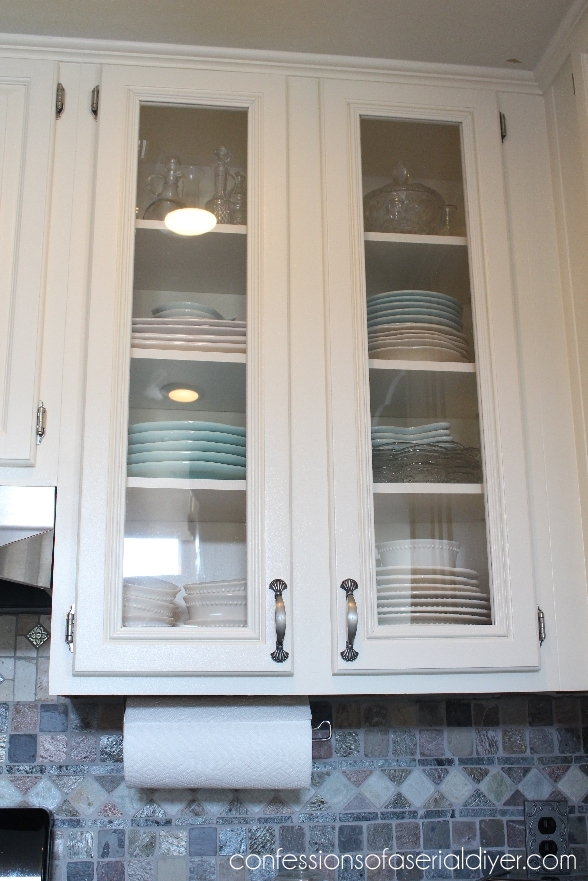
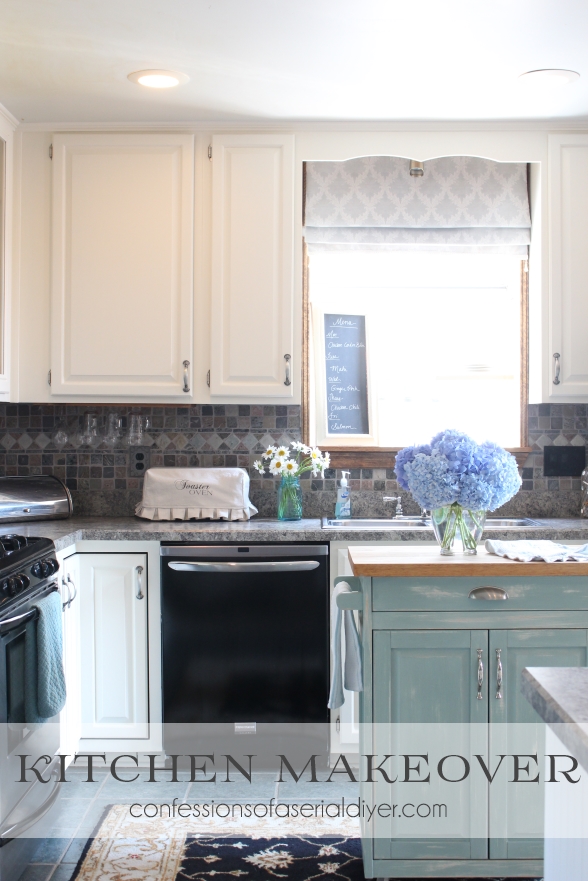
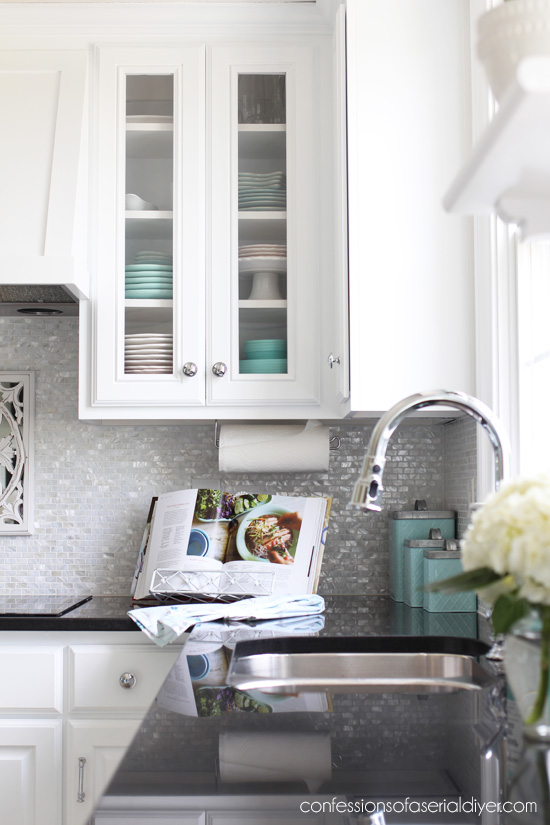
It’s hard to look back at those dark, dull pictures! Here is the after!
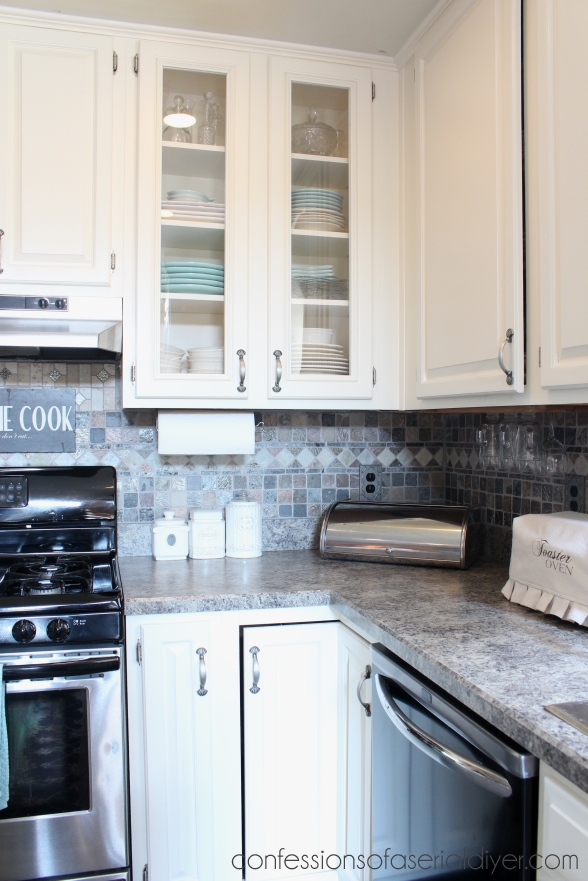
Can I get an Amen??! The paint alone did wonders for my dark kitchen, but adding the glass to one set of doors made a huge impact.
I use the term “glass” loosely…I actually used plexiglass! I stopped in at a local glass company and the girl behind the counter wasn’t able to give me an exact quote (odd?), so when I asked her to give me a rough idea, she said, “It shouldn’t be more than $50.” Gulp! That was for one clear glass panel. Are you serious? Now I am certain it will not cost that much if you have it cut for you, but that was enough for me to seek out a DIY alternative. This will work whether you choose to use real glass or plexiglass.
Removing the Center Panel
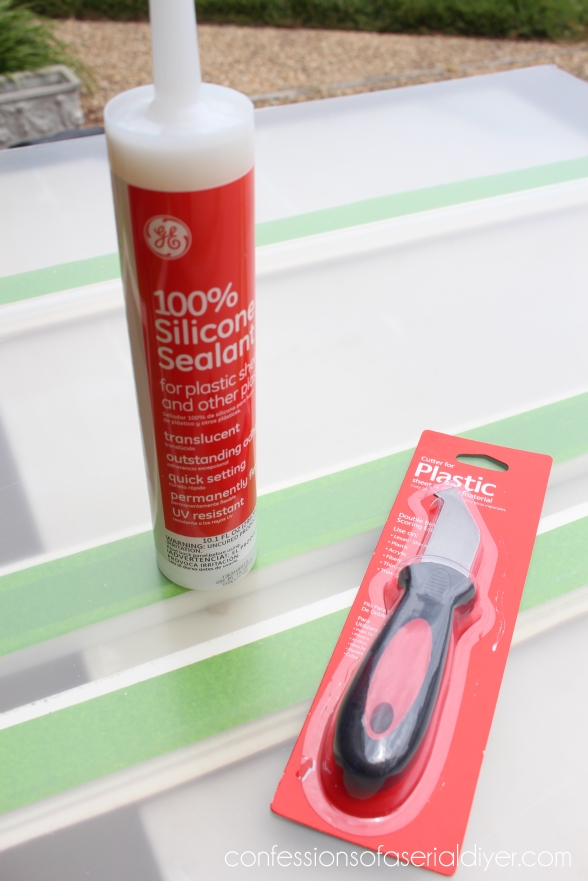
The first thing I had to get the nerve up to do was cut out the center raised panel of my cabinet doors. For this step I used the following tools:
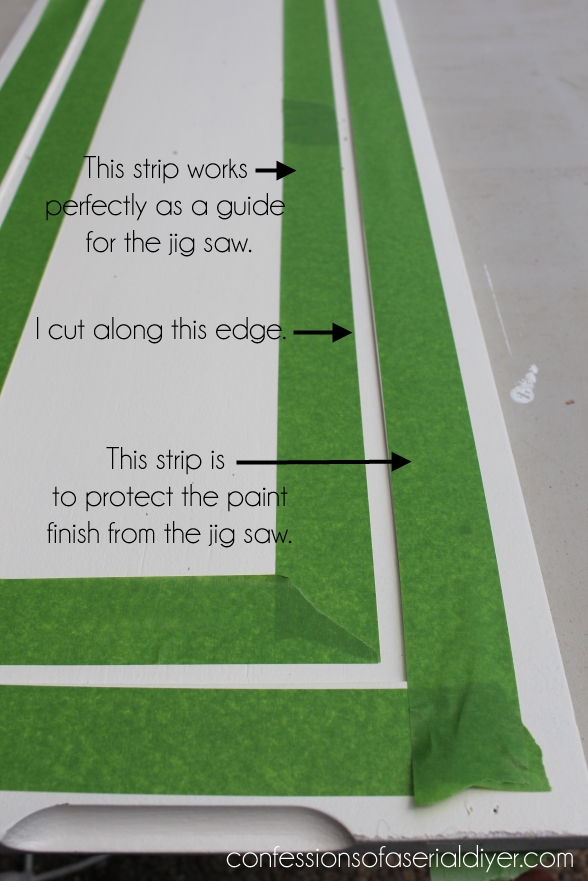
First I taped off the area to be cut. This served as my guide when cutting also.
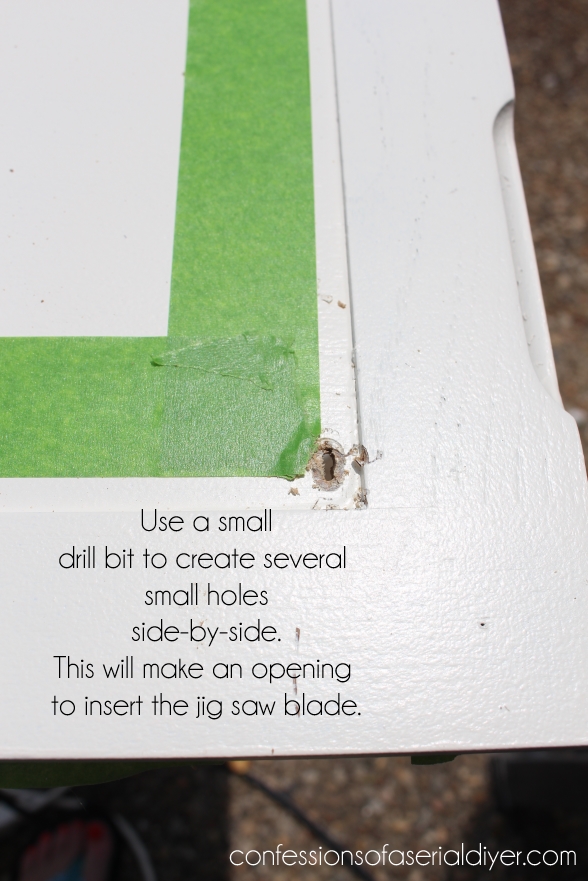
Then I used a drill and a small drill bit to drill a hole in the corner. I don’t have a specific size for you, it just needs to be big enough to fit your jig saw blade in after drilling a few side-by-side.
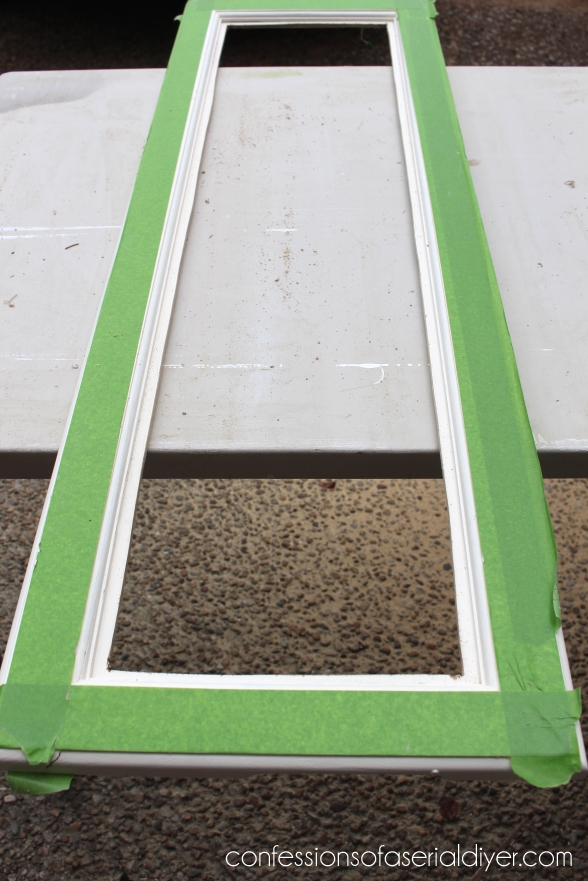
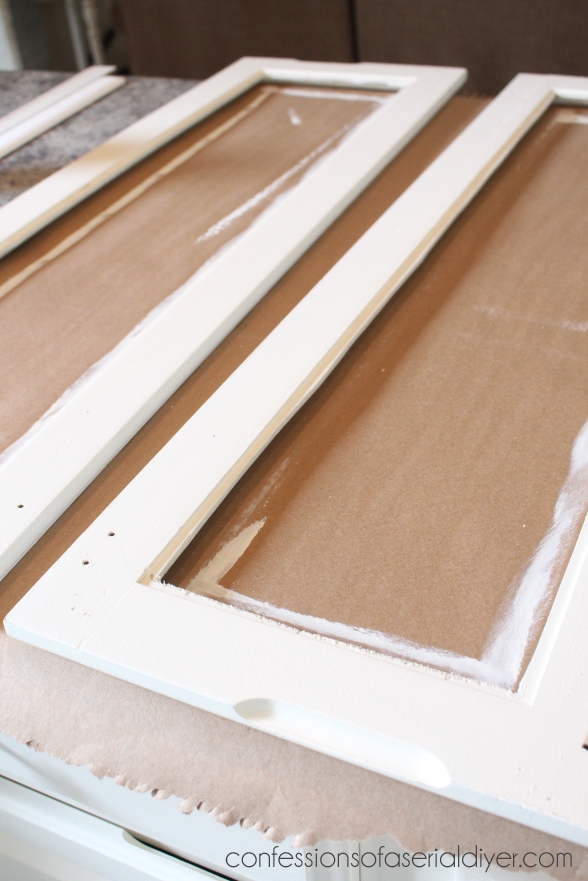
Goodbye, center panel!!
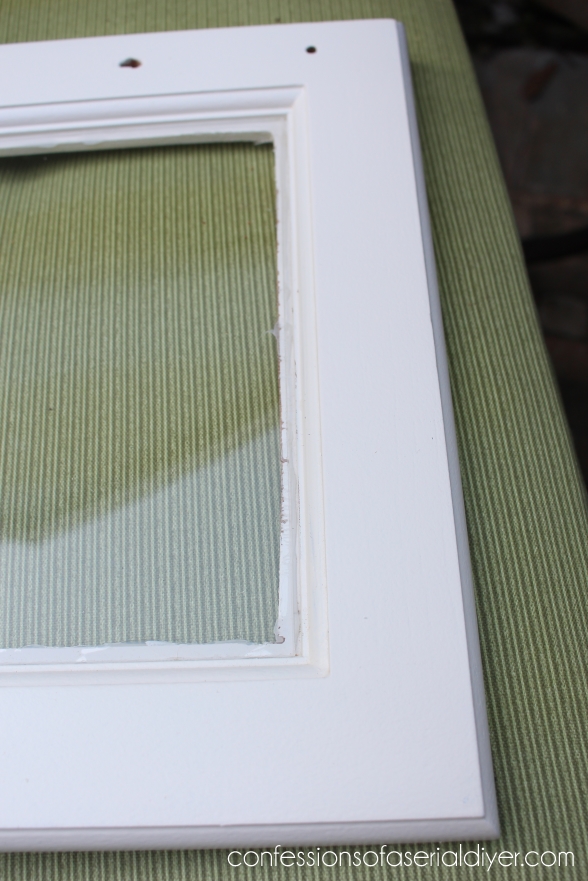
Once the center panels were cut, I touched up the edges with fresh paint. The raw edges will be covered, but the doors suffered a few minor bumps and bruises.
Cutting the Plexiglass
If you are using real glass, skip to the installation. I loved the idea of using plexiglass, also known as Acrylic Plastic Sheeting. It looks just like real glass and the best part is, I could cut it myself! I found a 30″ X 36″sheet of it at Home Depot for $24. My kind of price tag. I also purchased clear silicone for plastic ($8), and a plexiglass cutting tool
for $5.
After I got my measurements, I cut the plexiglass using the plastic sheet cutter, and a yard stick as a straight edge. Just score the sheeting the appropriate number of times for the depth of the sheeting. My magic number was 5, but I did 8.
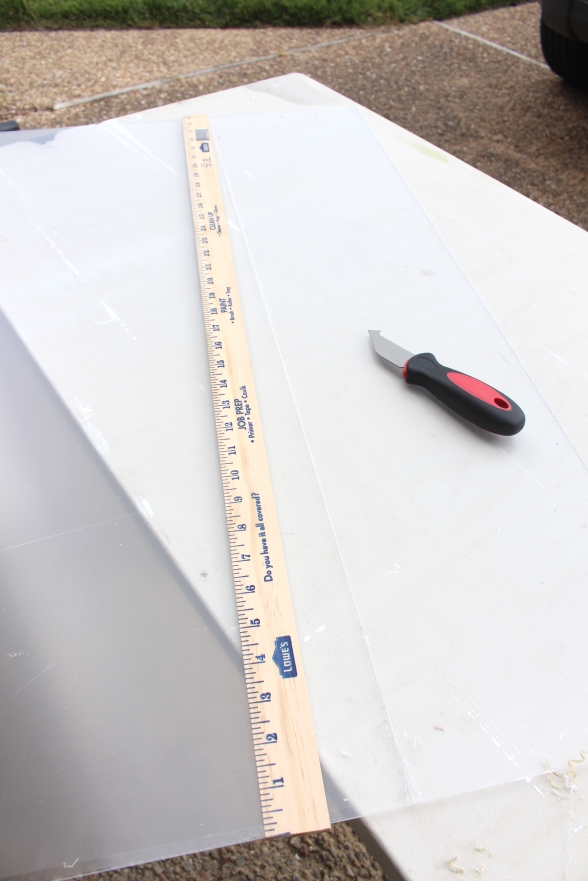
Then I just lined it up against the edge of my table and snapped it right off. Perfect.
Installing Glass/Plexiglass
For glass, you will need a silicone for glass as the one I purchased specified “plastic”. Who knows what the difference is.
Add a bead of silicone along the inside edge on the front side of the cabinet door:
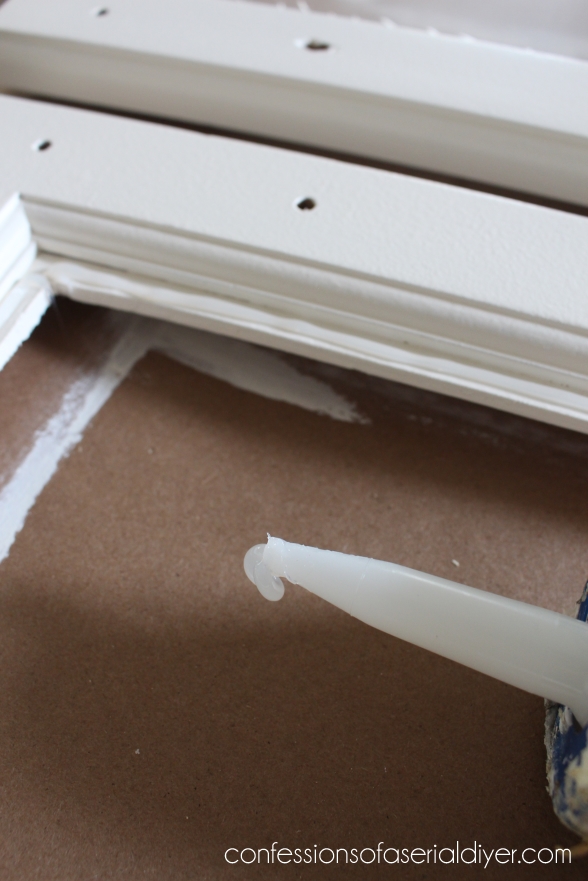
Drop the glass/plexi in place on top…
Adding Trim Molding
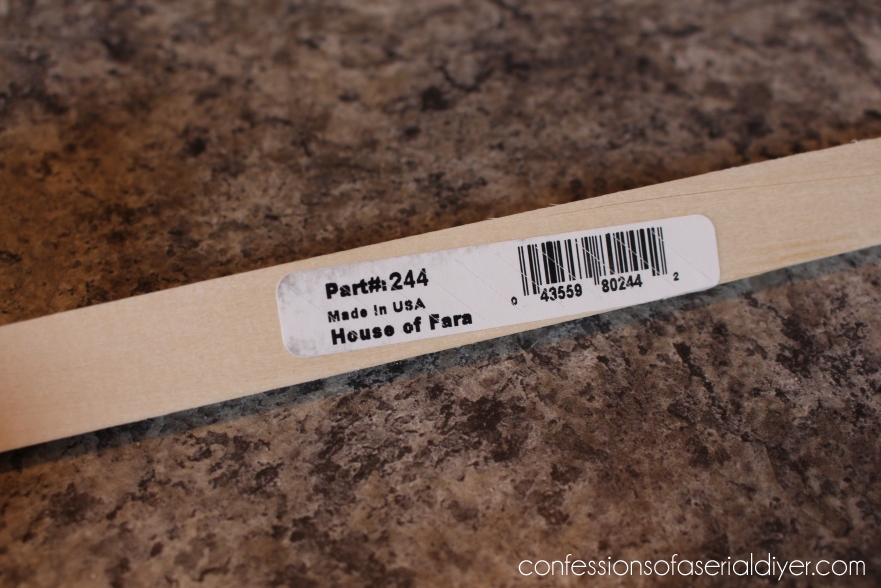
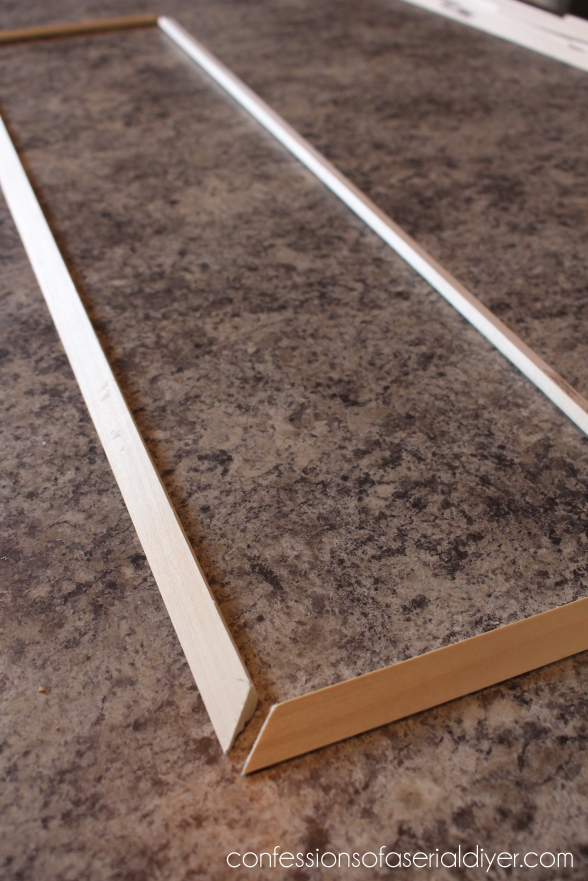
This is the molding I used to hide the raw edges:
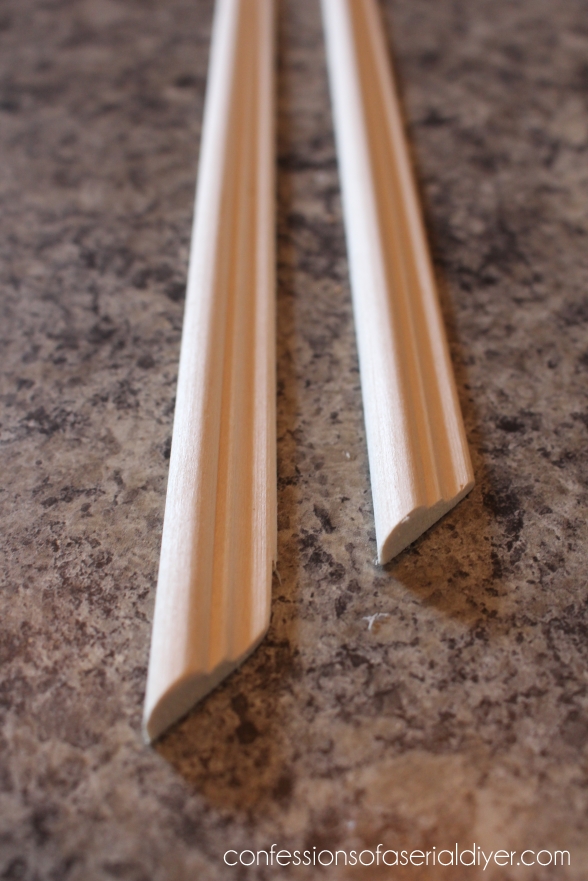
I purchased it at Home Depot.
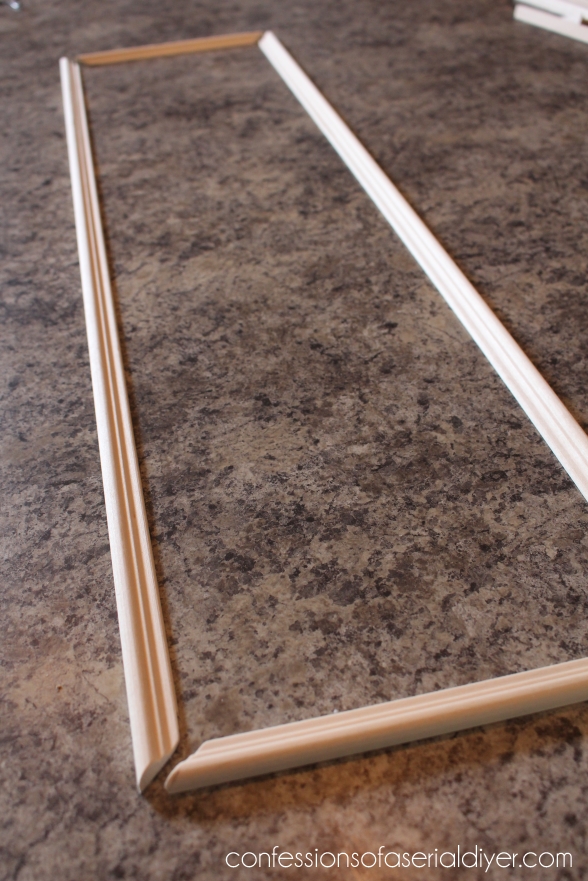
It took four 5/16″ X 11/16″ X 8′ pieces at $4.48 a piece to complete both door panels. I cut my trim pieces to frame the glass panel al the way around the inside of the cabinet opening:
For the back side of the cabinet door, I cut another set in the reverse:
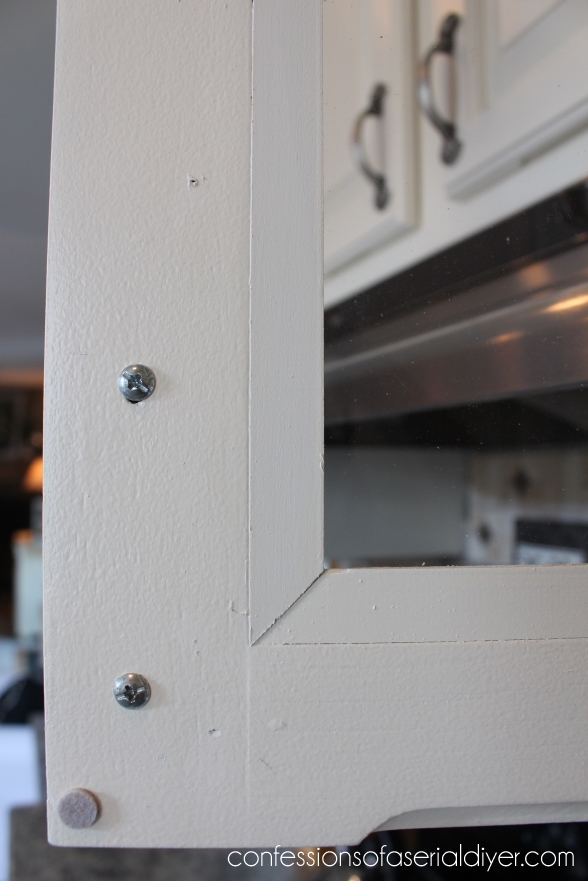
I primed and painted all pieces, making sure to paint the sides of all pieces as well, since they will be seen through the glass. Then I used a bead of silicone to attach the front pieces:

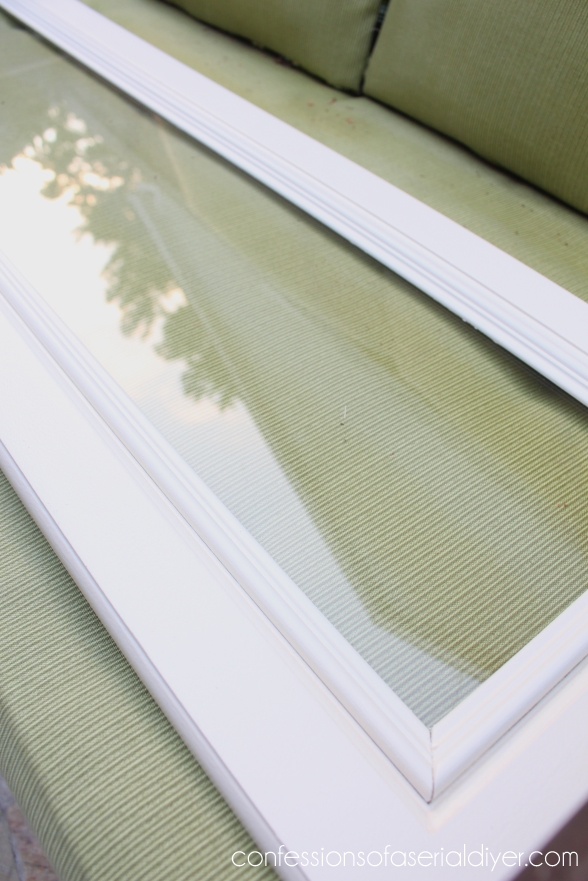
After letting it set a few minutes, I flipped the panel over and added the trim pieces to the back: 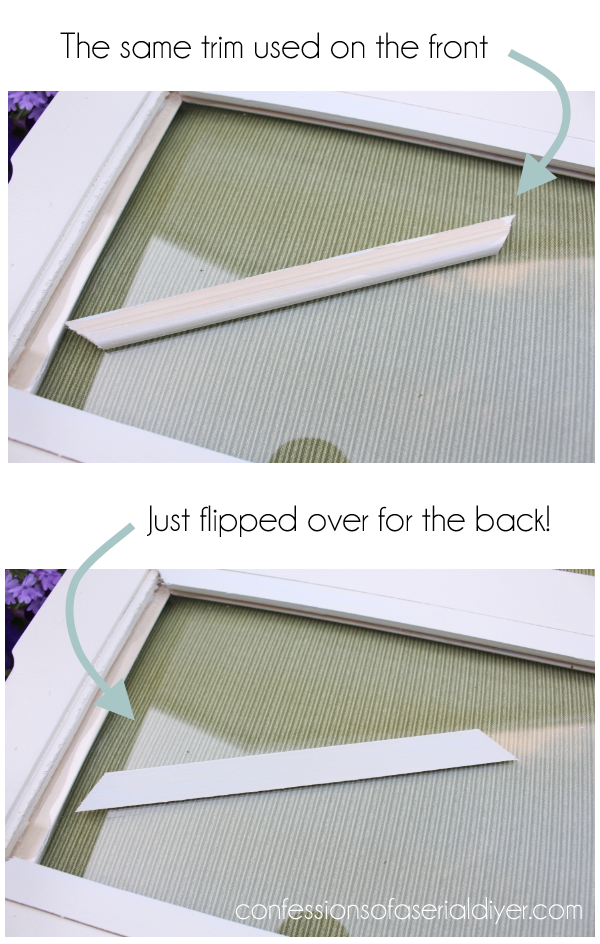
The raised edge on the trim, when flipped over, fits perfectly over the “hump” caused by the remaining edge of the door panel.
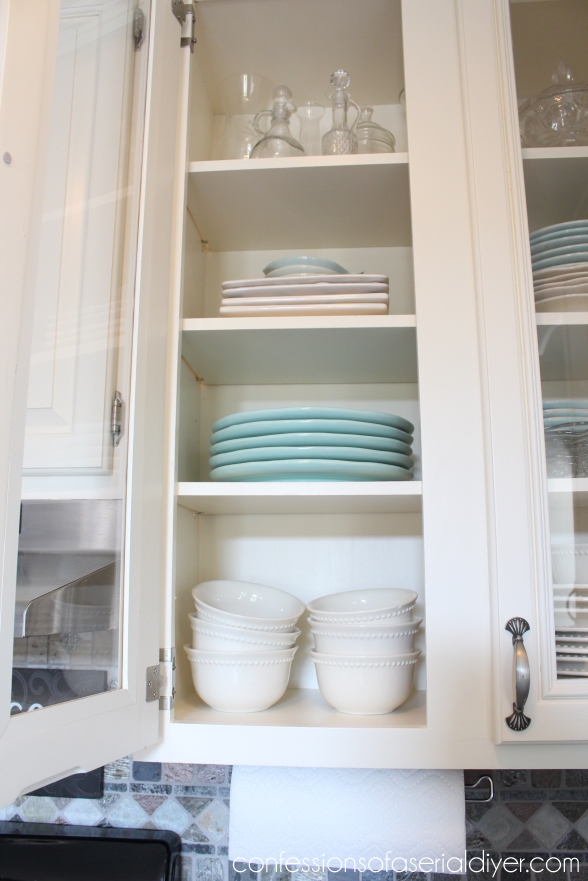
I love it when ideas just work out. I was high fivin’ myself all over the place when this actually worked! I let them lay flat on their backs on my dining room table overnight. Then I couldn’t wait to come downstairs the next morning and hang them!! I had already primed and painted the interior of the cabinet:
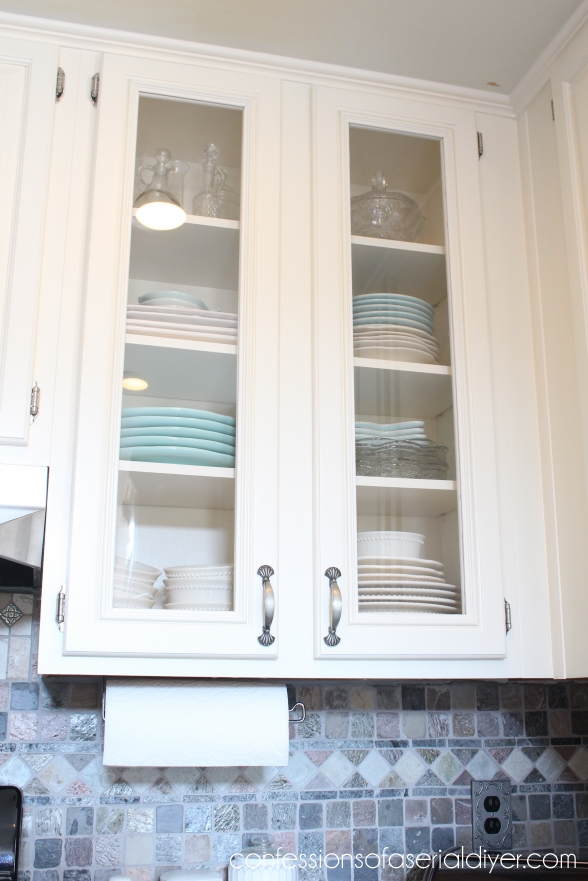
I also replaced the previous shelves that were sagging and drilled new holes for my new shelf pegs, so it would all be fresh and new! I LOVE the result:
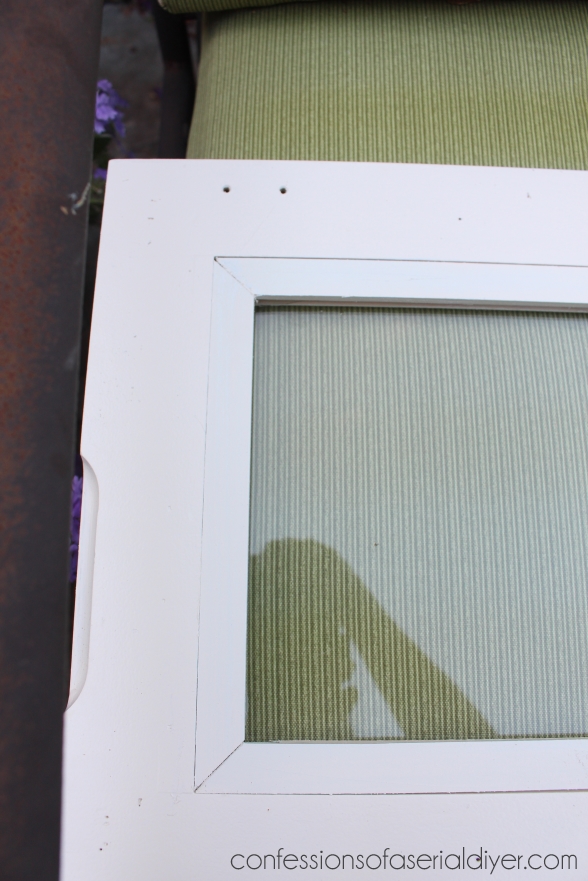
I touched up the corners of the trim with a little paintable window and door caulk. You can also see the trim that’s on the back side through the glass. (That’s why it is important to paint the sides.):
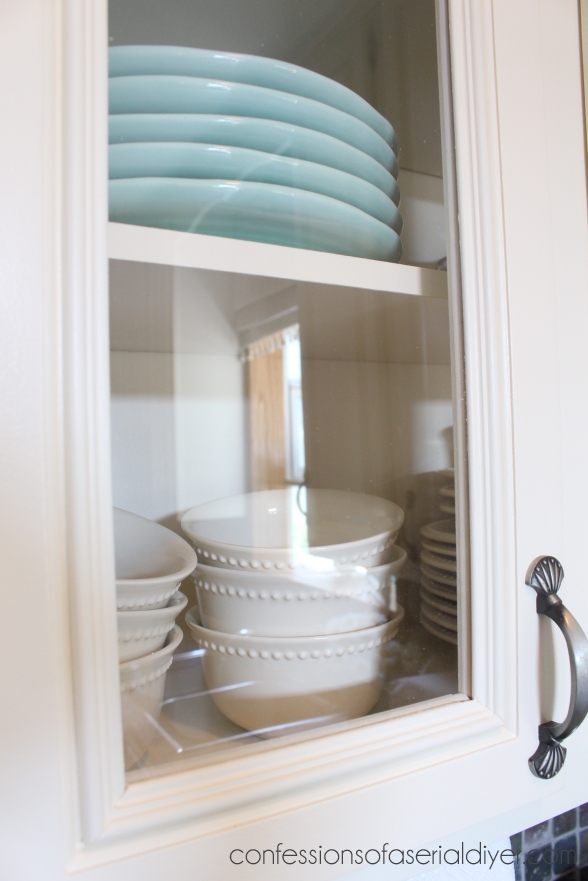
Can you tell it’s plexiglass? I can’t until I tap my fingers on it.
The back side got a touch up with some caulk too to fill in the very tiny seam that was there:
I love how the trim on both sides completely hides the raw edge that was left by the jig saw.
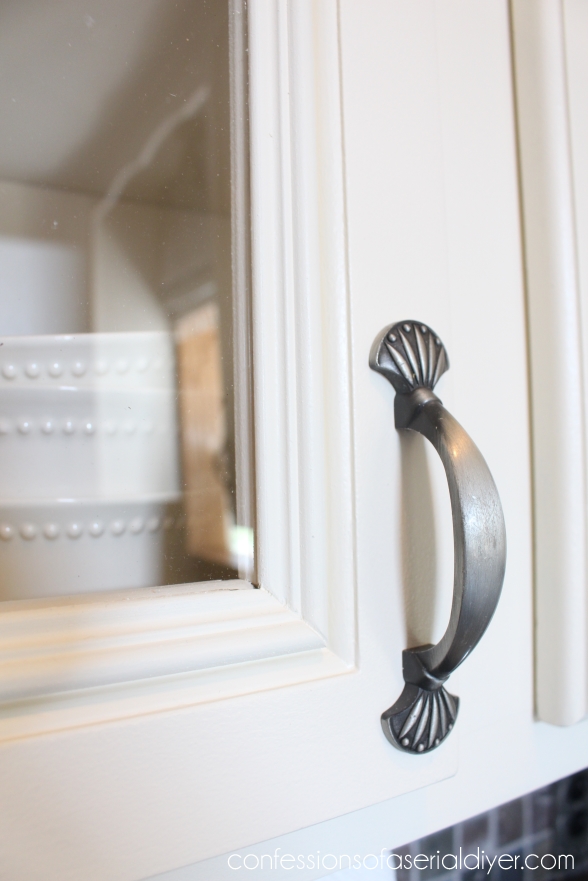
In some of these close-ups, you can see a bunch of tiny white dust particles. That is what was left from when I removed the protective covering from the plexiglass. I hadn’t taken a minute to clean it yet, but it cleans up perfectly with a little glass cleaner.
What do you think?
Do you think this is something you might be brave enough to tackle? I say go for it!
If want to see more of my kitchen update, you can see it here:
For a full step-by-step on how I painted my kitchen cabinets, check it out here:
UPDATE: I added “glass” to a cabinet in my next ktichen too!!
See the entire makeover and all the projects we did ourselves HERE!
When I was originally planning my kitchen makeover, I looked online at my style of cabinet with glass panels. The best I found was around $150 per cabinet for the size I needed as mine are pretty tall cabinets. Replacing the center myself cost me $59.10. That’s a huge savings, and I love the end result. I hope you found this helpful, and if I missed anything, please feel free to ask any questions in the comments. 🙂
XOXO,

Don’t Miss a Thing!
If you like what you see, there are several ways to follow along!
EMAIL * INSTAGRAM * FACEBOOK * PINTEREST


Get FREE SHIPPING on all orders over $50. No code needed at checkout! Orders under $50 always enjoy $8 flat rate shipping! Most orders ship same or next business day!


Chrissy @ Adventures in DIY says
Brilliant! Looks great!
Christy K. James says
Thanks, Chrissy!
Emily says
You. Are. Awesome. It looks SO GOOD!
Christy K. James says
Thanks, Emily! I tell myself I’m awesome all the time when a project actually works out, but it sounds so much nicer coming from someone else lol. You are too sweet. 🙂
Rebecca says
Girl, you are awesome! You had my full attention when you covered your toaster oven! I have wanted to do the same with my small microwave I use in my camper but I am not a good seamstress. At. All.
Great job on your “glass” cabinets. I know you are proud! Thanks for sharing all of your cool projects.
Christy K. James says
Thanks so much, Rebecca! You could totally make a cover for your microwave! It wasn’t very difficult at all! SO glad you stopped by to make my day with your sweet words! 🙂
Carolyn Price says
As ever … you are AMAZING and do a fabulous job, Christy! And you didn’t drag it out. What? Less than a month went by … start to finish?
So impressive, girl!! : )
Christy K. James says
Thanks so much, Carolyn! I don’t mess around ha ha! I started Memorial Day weekend, so about a month. So glad it’s finished 🙂
Lori says
This is AWESOME! I’m re-doing my plain-jane kitchen cabinets by adding re-claimed wood trim, and wanted one set to be glass-fronts. Thanks to you, now I know I can! Huge thanks!!!!
Christy K. James says
Oh yay!! I’m so glad you found this, Lori! I hope you find it to be helpful. I’d love your feedback if you decide to do it. 🙂
Nancy @ Artsy Chicks Rule says
Wonderful tutorial Christy!! They look amazing!! Seamless and perfect!! You are so smart to go with the plexiglass….can not tell the difference at all! 🙂
Nancy
Christy K. James says
Thanks, Nancy! You really cannot tell it isn’t glass! I was more comfortable working with this anyway. It’s reading 104 here?! Hope you are keeping cool today 🙂
Beverley Leonie says
Gosh, that was one gutsy project. Hopefully, I will take inspiration from you and muster up the courage to do this soon. Great step-by-step tutorial. Thanks. And congratulations. Your kitchen looks fabulous down to the last detail. Nice, nice job.
Christy K. James says
Thanks so much, Beverley! This was the very last thing on my list. I think I kept pushing it back because it seemed so daunting. It wasn’t so bad after all. 🙂
Becky says
Great inspiration, going to do this for my mothers cabinets, since glass can be expensive, can you tell me where you got your blue dishes , would love to have some
Christy K. James says
Thanks, Becky! I found my dishes at Homegoods/TJ Max a couple of years ago, but they often have beautiful aqua dishes in stock.:)
Juju@ Journeys With Juju says
Christy~
The transformation is awesome! You did a great job, and congrats on getting that first cut for the plexiglass, I know how scary it must have been!
When we first moved into our home in Texas, the previous owners had done 99% of the kitchen makeover, but had neglected to put the glass inserts into the cabinet doors. Like you, we chose plexiglass, and no one could ever tell it wasn’t glass.
Christy K. James says
I actually cut it a bit too big on one side at first, but it was an easy fix. It looks just like glass. Glad to know I’m not the only one who thought it was a good idea. Thanks for stopping by 🙂
Julie V. says
Thanks for the tutorial! The cabinets look really great and now I feel more confident about one day doing something like that (right now I’m renting, so not right now.)
Christy K. James says
That’s great to hear, Julie. 🙂
Oliva Ohlson says
Your kitchen looks great! Thank you for the tutorial. I’m going to give it a try…I hope it turns out as good as yours!
Christy K. James says
Great! Good luck with yours! 🙂
Nif @ Call*Me*Nif says
This is so awesome! I LOVE the difference it makes in your kitchen! I would love to do this in my kitchen… maybe one day. You have definitely inspired me. Thanks for sharing!
Christy K. James says
Thanks, Nif! It really does make a huge difference and adds a bit of charm. So glad you stopped by 🙂
Andi says
You are a brave, handy soul. Thankfully, I ordered one set of doors without the panels so I could add glass WITHOUT breaking out the jigsaw. 😛
Forward thinking at its best. 😀
But, again….if I’d discovered all this cool blog stuff a few years earlier, I would have totally done this in my old house too!!! (Or I would have made you come over and do it.)
-andi
Luisa says
Your cabinets look sooooo pretty Christy!
Christy K. James says
Thanks, Luisa! I be that baby boy is getting big! 😉
ChrisJ says
I am so glad I came upon this tutorial. It’s the “girl way” – the way I saw to do it too. But all the guys I asked told me to use a palm router and cut a thin strip all along the inside edges of the retaining rails on the back of the door, then pop (or score, cut and knock depending on the amount of previous paint on the door) out the panel. There would be an edge from the front molding to adhere the glass to with a molding piece around the edge on the back to secure it. Have you heard of this method? Not having a palm router, I saw the way you did it as THE way to go before your pictures which cemented my thoughts. Men and women don’t think alike…in anything LOL
Christy K. James says
That method would be perfect…if you had a router. I don’t have one either, and found this to work out perfectly. I had a guy tell me it wasn’t worth trying to remove a panel and that I’d be better off just buying a new door! Sometimes we girls just have to plow ahead and show them how it’s done. I even surprised my husband. Go for it and good luck! 🙂
FK says
Hello, I found your site today. Everything is so pretty and wonderful. “Charming” I even should say. Thanks for sharing so many ideas that inspired me to do something in my own house :)))
Christy K. James says
Thank you!! 🙂
Apryl says
Hi! Great post!! Wondering if you know what width of plexi glass you used?
Christy K. James says
Thanks, Apryl! I don’t recall, but I know I purchased one piece that did both cabinets with a couple of inches left over. I cut the plexi glass to fit each door panel.
Apryl says
Oops, I guess I meant the thickness of the plexi glass not the width. Oh my…. Mommy brain!!
Christy K. James says
Oh I thought that was an odd question ha ha. I believe this is what I purchased from Home Depot: http://www.homedepot.com/p/OPTIX-36-in-x-30-in-x-093-in-Acrylic-Sheet-MC-06/202038044?MERCH=REC-_-PIPHorizontal1_rr-_-202038045-_-202038044-_-N You can’t tell it is not real glass at all unless you tap on it. 🙂
Apryl says
Thank you so much!! You’re awesome!!
Christy K. James says
You’re welcome, glad I could help!
Diena Cameron says
Hi Christy, Love your cabinets and the plexiglass addition. You have the exact same ones as I do, so maybe now I will have the nerve to do at least one, if not all ! I just hate mine, so dark and outdated. Also love your counters and back splash, did you paint your counters or is that granite ? Will definitely be pinning this one. Thanks for sharing. Sincerely, Diena.
Christy K. James says
Hi Diena! The counters are actually laminate. I wanted to replace those but it just wasn’t in the budget. After painting the cabinets I think they look just fine. Adding glass to the cabinet doors was simpler than I thought it would be! XO
Diena Cameron says
Hi Christy, I went back and looked at your counters again and now I can tell they are laminate but if you hadn’t told me I wouldn’t have known. They look great with your cabinets and the back splash is so spot on. How do you like having the inside of your cabinets painted ? Is the paint holding up ? I love that freshly painted “clean” look and it’s so beautifully bright. ( : Wonderful job. I’m glad I found you. <3 Diena
Christy K. James says
Ha ha…I better not mention what you said about the counters to my hubby, I’d get a big fat “told you so”! They do look better with the lighter cabinets and the backsplash works better with the lighter cabinets too I think. I only painted the inside of the cabinet with the glass doors and it has held up great. But to be fair, I only pull the items off the top to use, so it hasn’t experienced a lot of wear. As long as they are good and dry before loading dishes back in, I think they’d be fine. Hope you come back and visit soon! 🙂
Tatyana says
I would have never thought of using plexi glass! What an awesome idea! My only problem is how to do this on a cathedral top door =(
Christy K. James says
Ooh that might be tricky! I wonder if you could cut a piece of wood into the shape of the top of your cabinet and clamp the plexi glass to it and score around it? I bet that could work. Good luck!
Tatyana says
That actually might work, thanks!
Christy K. James says
Good luck and let me know how it goes!
Todd says
Scoring works great for straight cuts on plastic, when you have a curved cut use the same jig saw with a fine blade that you used to cut the cabinet with, just make sure to sandwich and clamp the plastic between two pieces of scrap wood so that it doesn’t vibrate and splinter with the blade motion.
Good luck and have fun!
Todd
Todd says
FYI for the DIY, plexiglass is a great alternative, safer and less likely to break. It wont cut you up if it does break but note one major difference: Don’t use cleaners (glass cleaners) with ammonia in them as they make plastic (acrylic; plexiglass) hazy over time. Dish soap works great for cleaning plexi and keeping it clear. Great job. Todd
Christy K. James says
That’s great to know, Todd! Thank you for sharing!
patti says
How absolutely beautiful. What a gorgeous job you did. You have inspired me to do my cabinets myself … wow they are so $$$ if bought finished. you are smart and taught me not to pay top dollar for the look I want. Thanks for taking time to make this journal!
Christy K. James says
Thank you, Patti! They are pricey to buy that’s for sure. Mine still look great and for a fraction of what they would have cost new. Good luck! 🙂
Carla M says
Thank you! We just bought a house with a very boring, construction grade kitchen and I can’t wait to get my hands on it! Your painting cabinets and this ‘glass’ diy was the perfect tutorial I needed!
Quick question for the guy that said ammonia with haze the plexiglass over time. Will vinegar too?
Christy K. James says
Awesome, Carla! Congratulations on your new house! I’ll be honest, mine have never gotten “dirty”, just dusty, and all I’ve done is wipe them with a clean dry dishtowel to remove the dust. I’m not sure how the windex or vinegar will work. I do love my “glass” doors though, they still look fantastic. Good luck! 🙂
Marquis Dennis says
Hello Christy! So did you paint the entire kitchen cabinet yourself? What kind of paint did you use if you don’t mind me asking.
Christy K. James says
I did! You can see the full how-to, including the products I used here: https://www.confessionsofaserialdiyer.com/how-to-paint-kitchen-cabinets-a-step-by-step-guide/
Johnny Shi says
This was great. Thanks for sharing. Your glass cabinets look amazing. I think you made this a very simple process for us to follow but, I am still afraid that it will not turn out as good as yours did. There is only one way to find out, and that is to try. Thanks again.
sugarcreeknbear says
Ms Christy our kitchens are almost identical. Mine also is way to dark with very little natural light. Like you my wish list was very expensive. yet after seeing your kitchen I am actually excited to start out with just simple white paint for my dark cabinets. The glass opening up just one set of doors made all the difference, so lovely and light !! You have truely made me excited to get started without feeling its a waste of time without all the exspensive extras!!! You have made my day ! I will keep your insructions close by and let you know how its going. Many smiles and Blessings just for you. Sassysugarcreek
Christy K. James says
Oh yes, just painting alone did WONDERS! I really did not think it would make as big of a difference as it did, and adding the glass to one door really added a pretty touch for not a lot of money! 🙂
Lisa @ Ruthie Bell Home says
I am definitely thinking about this for my kitchen renovation! Now, just to figure out which cabinet doors it would look best on. My doors are much wider than yours. I would love to know your input. http://ruthiebellhome.com/a-farmhouse-kitchen-renovation-part-1/ I am also planning to paint the cabinets gray.
Christy K. James says
Your kitchen already has so much charm and I love the changes you are planning to make! It looks like the set of cabinets to the left of your sink would work best. Also, I think yours will be even easier to do since you don’t have the awkward recessed area around the edge. It’s going to look amazing! I hope you’ll share the results with me when you’re done! 🙂
Heather says
I do tons of kitchen renovations and am always looking for ideas. I ha only attempted to add glass inserts for my kitchen because my jigsaw skills aren’t perfect. But your use of trim is perfect. Thank you very much. The kitchen is beautiful
Christy says
Thanks, Heather! This method worked like a charm! ????
Eric says
I recently found your site and am already a fan! Wanted to see if you would be open to test out my glass etching supplies for free in exchange for feedback. Would you be interested? Please let me know via email if possible. These will be shipped directly to you at no cost. I am looking forward to your reply. Thank you Eric
Christy says
Thank you, Eric. I don’t think I have a need for etching supplies, but thanks for the offer.
Juliet Fernandez says
Hello, just saw this and looks great. I was wondering when you insert the plexiglass, was it placed on the front or back of the cabinet? I want to insert real glass and it might be heavier so just maybe the back would be more secure with clips added. Does it make a difference with the look?
Christy says
Hi Juliet! I added mine to the front. The trim pieces wouldn’t be flush to the glass if you inserted it from the back. On the back side of the cabinet, I placed the trim pieces face down to fill the gap so they just look like flat trim pieces. They are fine on the inside like that, but not a pretty look for the outside. Hope that makes sense. Good luck!