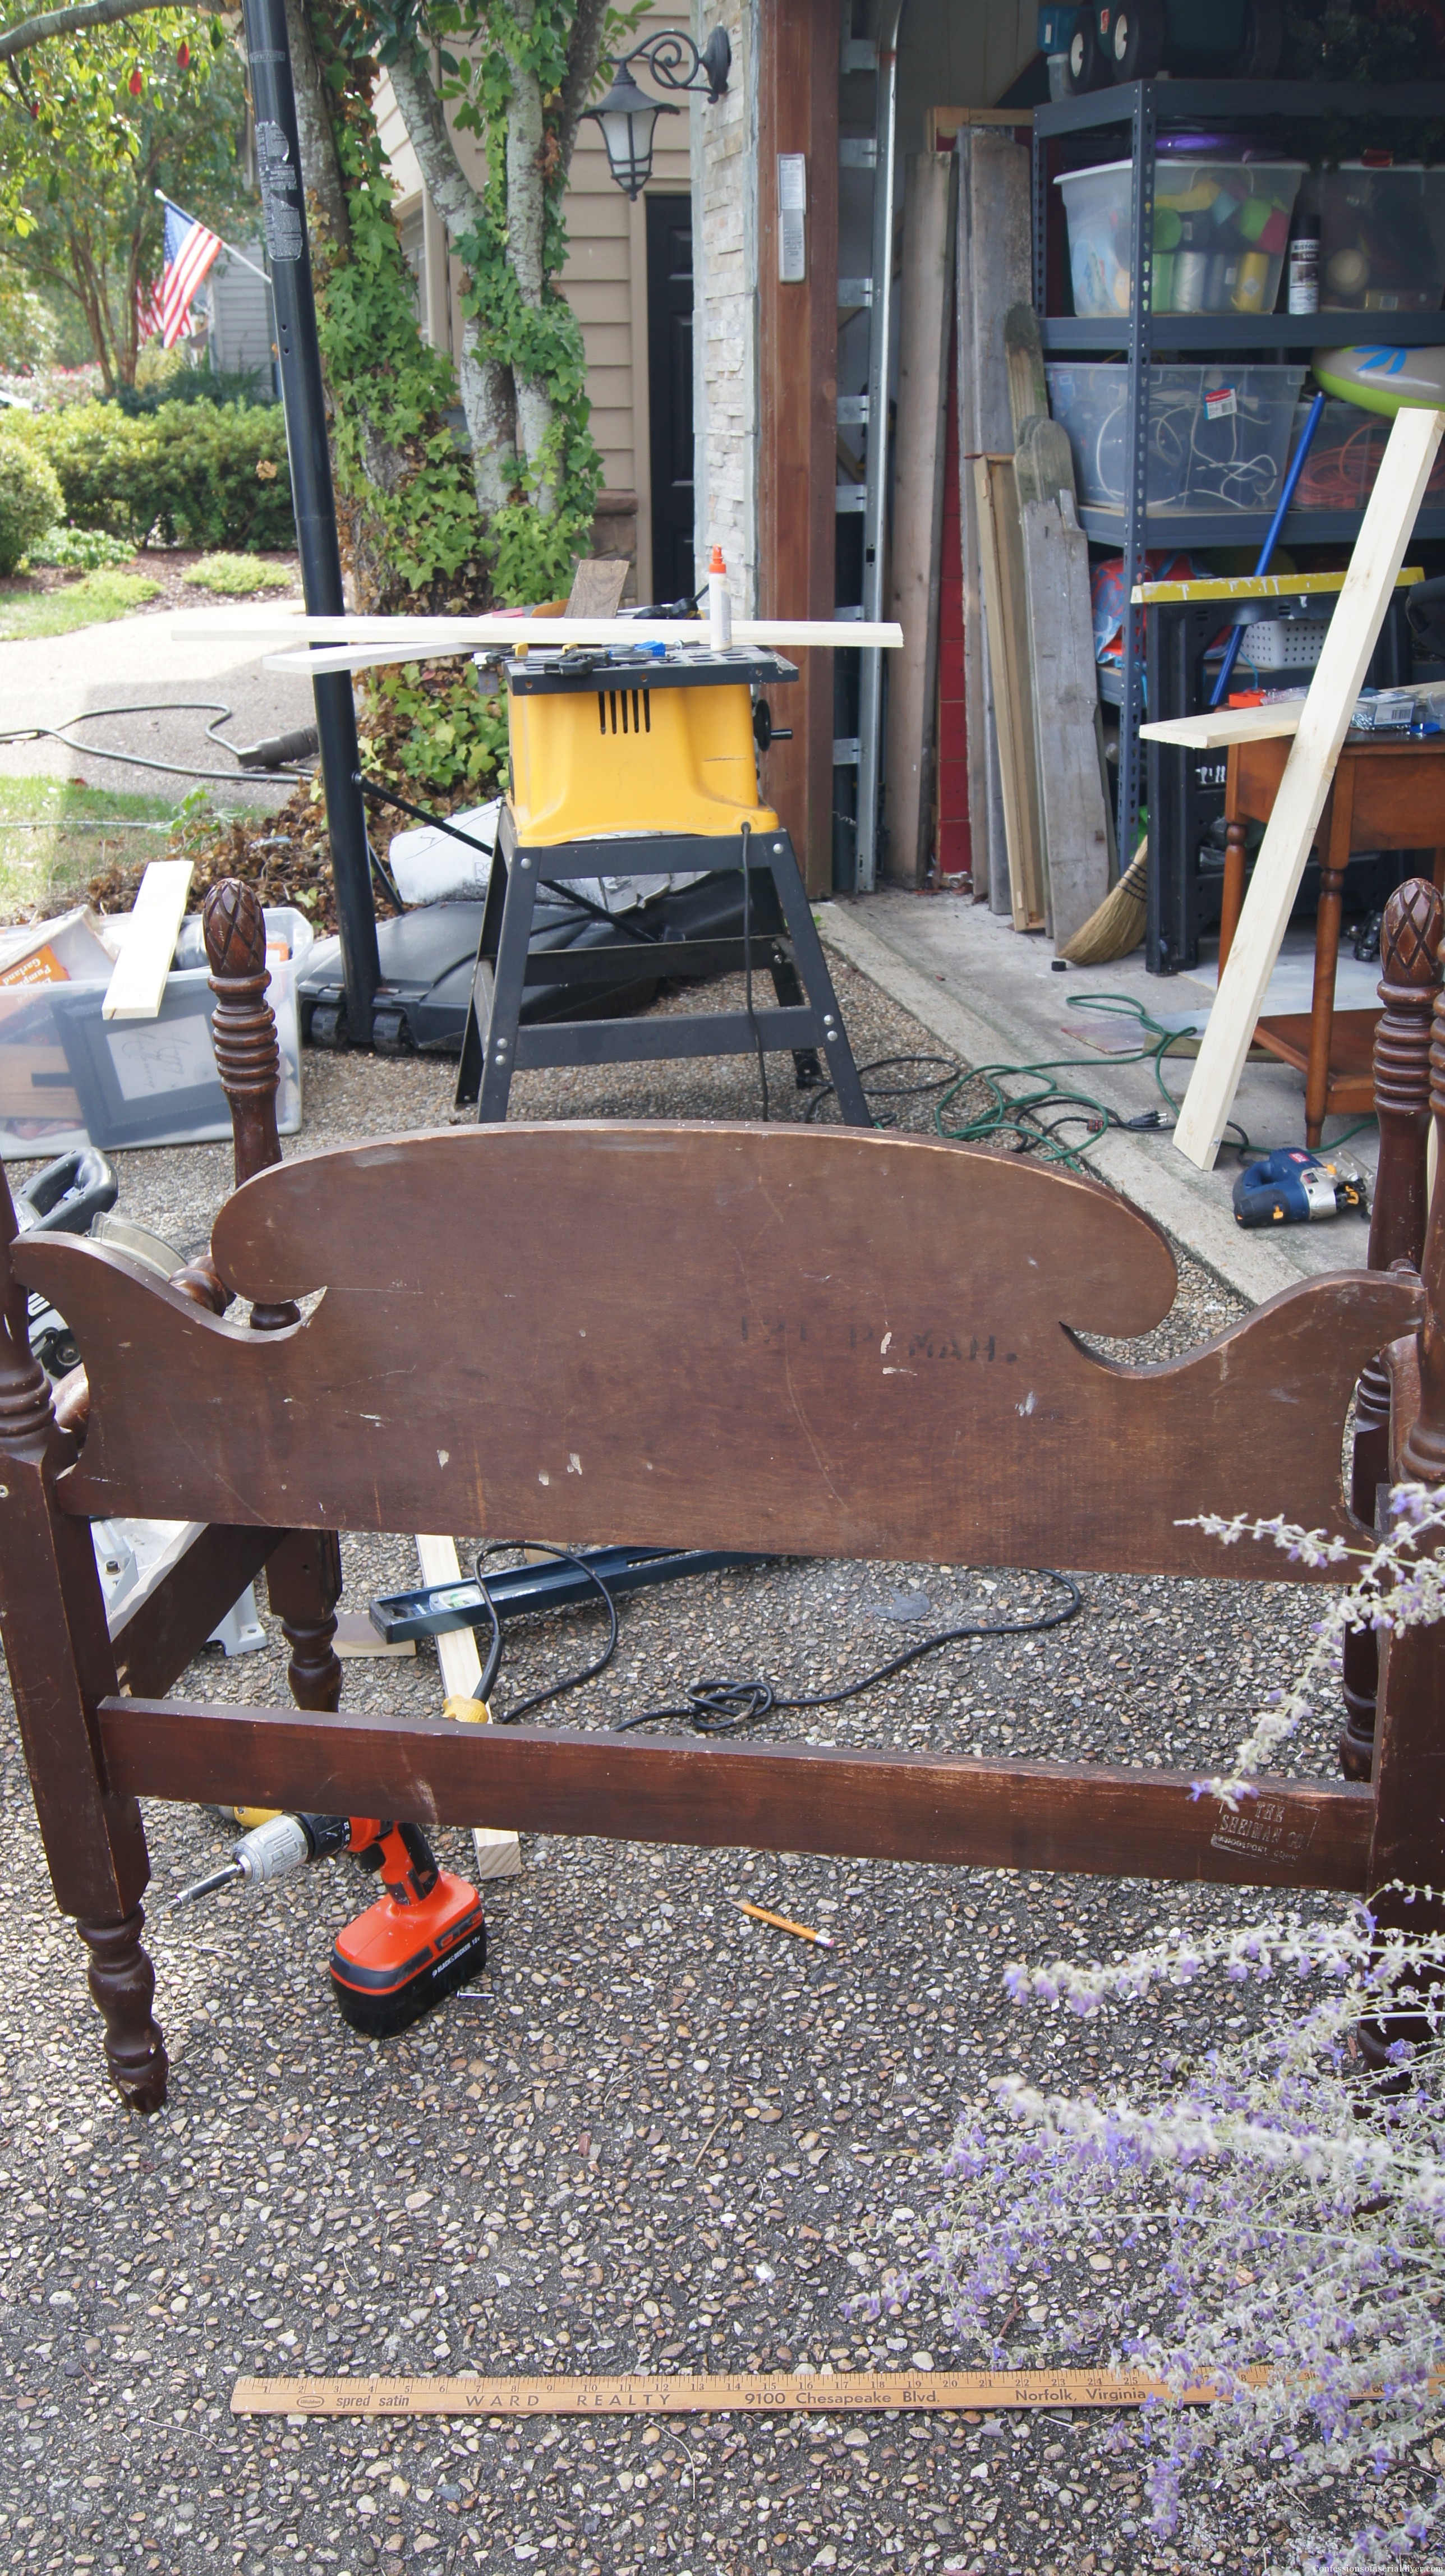
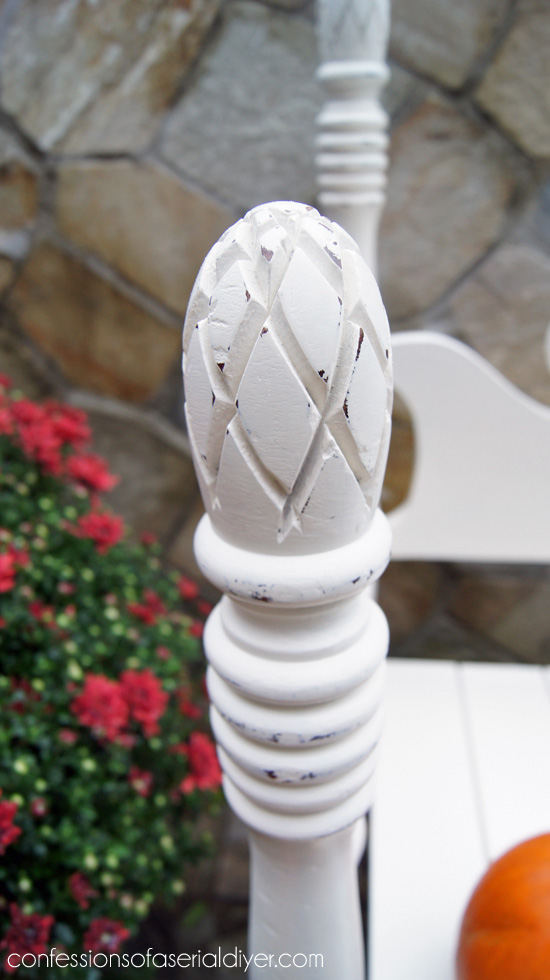
Hello lovelies! Today I’m going to share with you what I did to my pineapple bed I found at Lucketts this Spring. You may remember it looking like this:

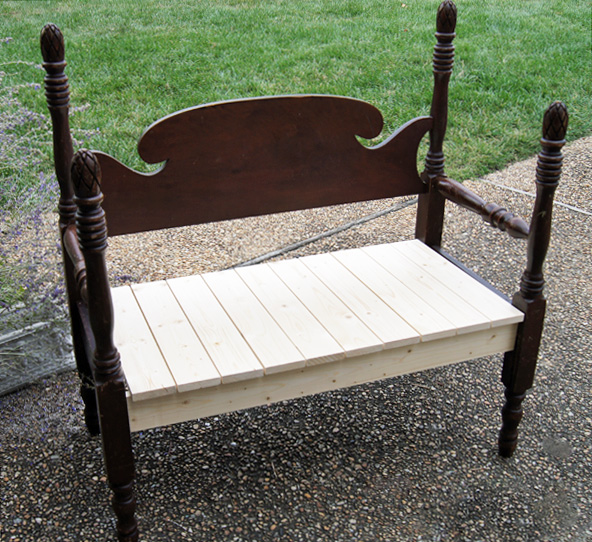
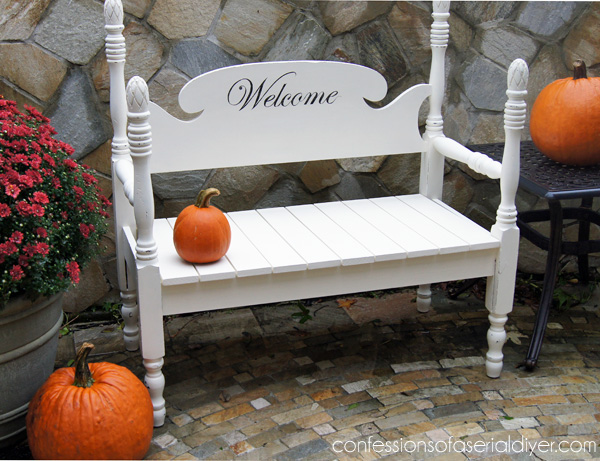
Both the headboard and my garden look much different these days! Here’s what that headboard is looking like these days…
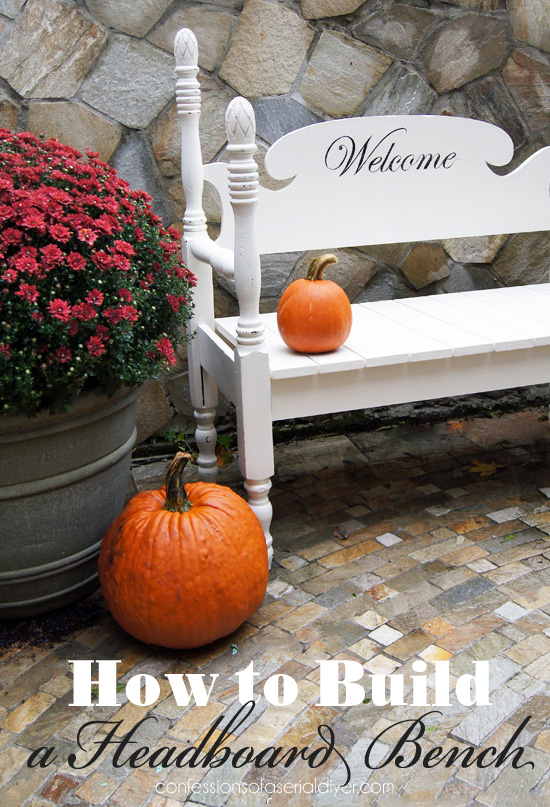
I knew when I bought it that I wanted to make it into a bench! If you look closely at the before photo, it was in pretty rough shape with several gouges and scratches, so I also knew it needed to be painted.
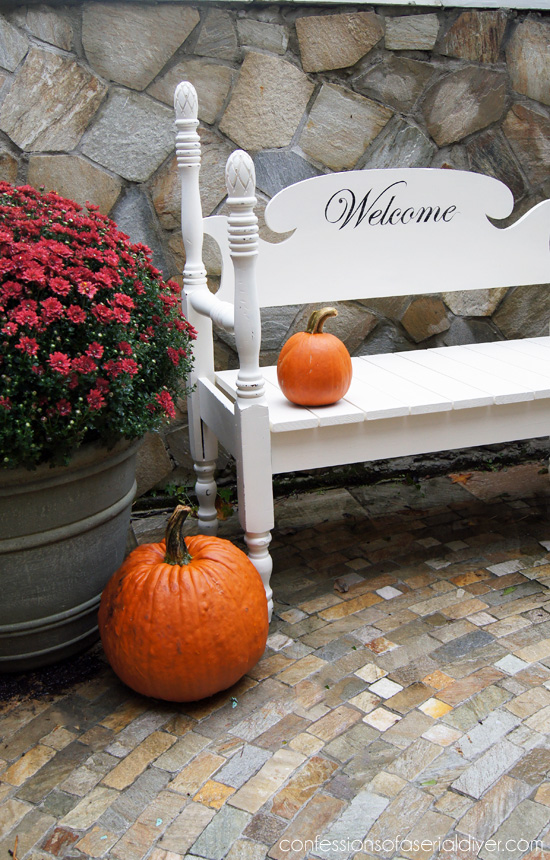
Well I finally did it, and I love her in her new life as a bench.

It’s been raining for four days straight here, so I finally had a few minutes to take some pictures as the rain was taking a break. I am so pleased with how it turned out!
I’d love to show you how easy it was to do…that is if you have an assistant to help you. My little assistant didn’t get off the school bus till after 4:00. I was too impatient to wait. He did arrive just in time to hold the final piece in place for me while I attached it…BIG help!
I have included some affiliate links for your convenience. Click here to read my full disclosure policy.
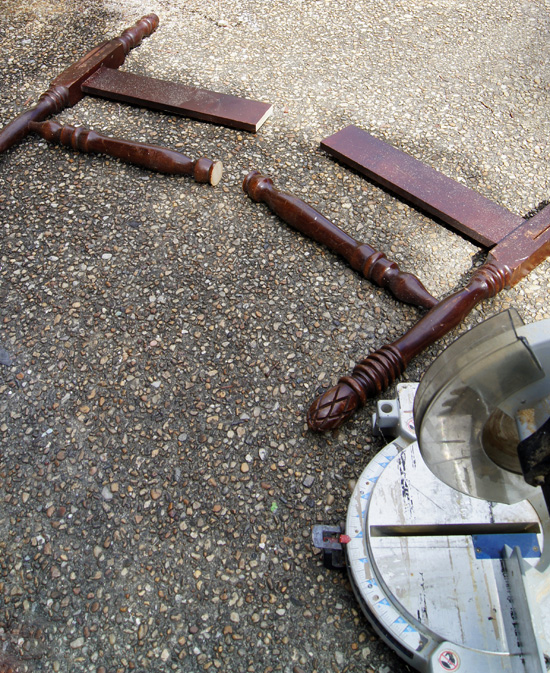
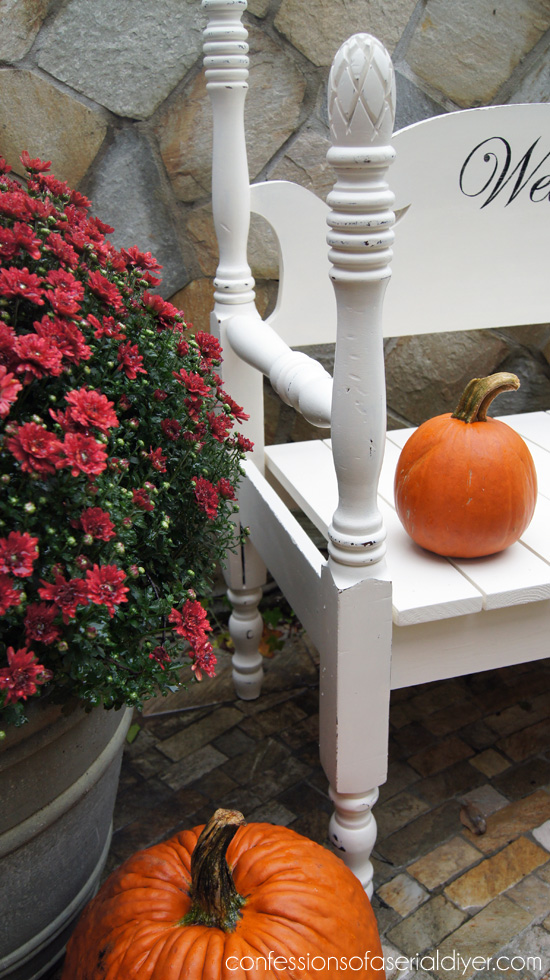
First I cut my footboard in two. These pieces will become the arms and side supports. I removed about another two inches from each side so my seat wouldn’t be too deep. I was aiming for 18″ deep.
Next, I needed to attach the side pieces to the back. For this part, I knew I wanted to use a Kreg Jr. Pocket Hole Jig System aka Kreg Jig. A Kreg Jig is a tool that helps to make pocket holes, perfect for attaching things at ninety degree angles. This mini version works perfectly. (I recommend investing in one of their clamps
[I eventually did] which is made to fit the Kreg Jig perfectly.) Meet the Kreg Jig Jr:


Here’s a quick recap of how it works:
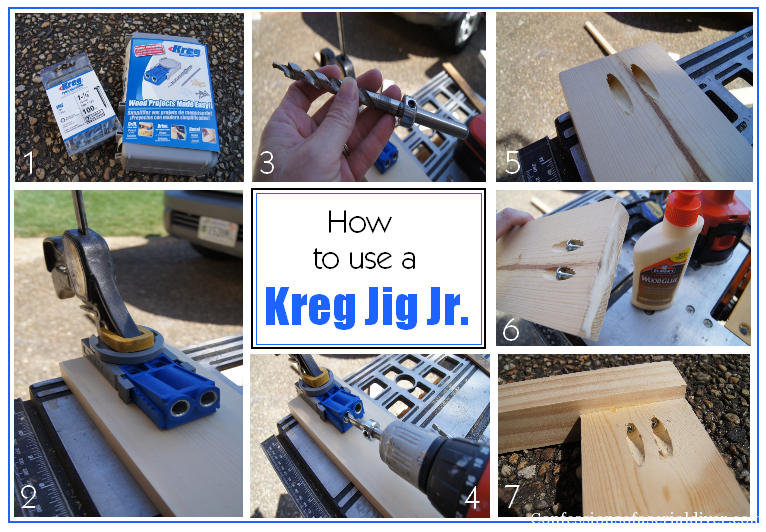
- Kreg Jig Jr and screws that work perfectly with this system, although not required.
- Set your Kreg Jig to the proper depth buy moving the gray sliding piece on the side to the thickness of the wood. Mine is set at 3/4″. Clamp in place to the edge of your wood. (This is my clamp, their clamp is round to fit perfectly in the top of the Kreg Jig.
- This is the drill bit that comes in the kit, which you attach to your drill. Set the guide (the round thing) on the bit to the proper depth according to the instructions. This will stop you from drilling too deep.
- Drill your hole/holes.
- Tada!
- Add wood glue to the edge.
- Screw in place.
The big difference between this and the $100 version is this requires that you clamp it in place, while the other one has a clamp built in.
After drilling my pocket holes, I attached the side pieces to the back, using my level as I went: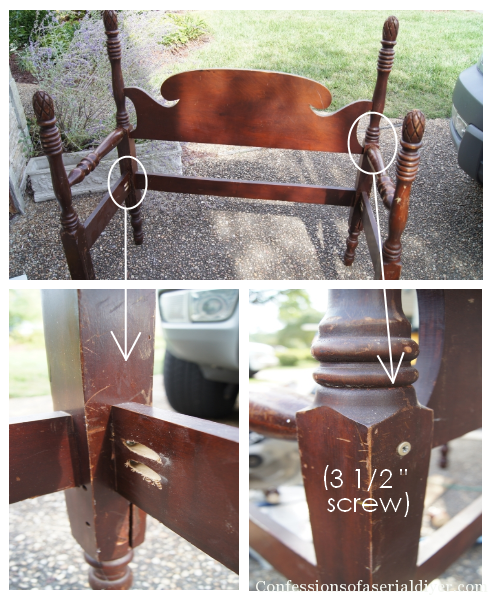
I wasn’t able to use the Kreg Jig on the top because my arms are rounded, so I used a 3 1/2 inch screw and secured it from behind (using wood glue also).
I added the piece across the front using the same method as the bottom, side pieces. That’s when my assistant showed up, so helpful to have a helper!
Then I cut my seat pieces from 1 x 4 pieces of pine
I waited to attach them since I was planning to paint something on the back.
Looking all Sanford and Son…bomp bomp bonna…bomp bomp bonna bonna bonna…
My neighbors love me. 🙂
Next, time to paint. I planned on using my DIY chalk paint in Behr’s Cottage White, but because this was mahogany and the varnish had worn off in several places, I sealed the entire piece with a coat of shellac first to prevent bleed-through. See my tutorial for How to Paint using Chalk Paint HERE for more details!
I primed the bare wood before painting with a spray-on Rustoleum Primer. I wish I had stained or spray painted those pieces dark before painting so that when I sanded, some dark edges would show through. Honestly, though, I think my family was ready to get the kitchen back. Remember all the rain I mentioned?
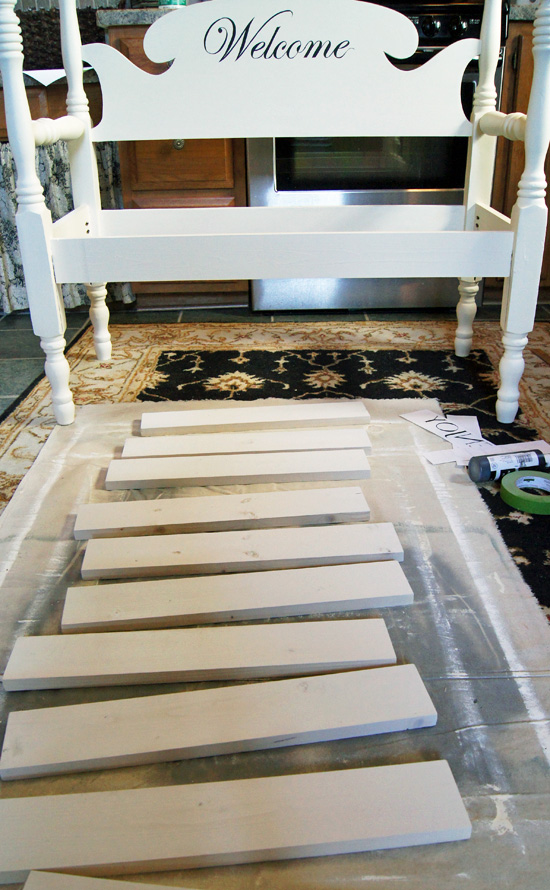
The final detail was to add something to the back. I chose a simple, “Welcome” in one of my favorite fonts, Edwardian Script. Here’s a quick pictorial, but see HERE for more details on transferring graphics.
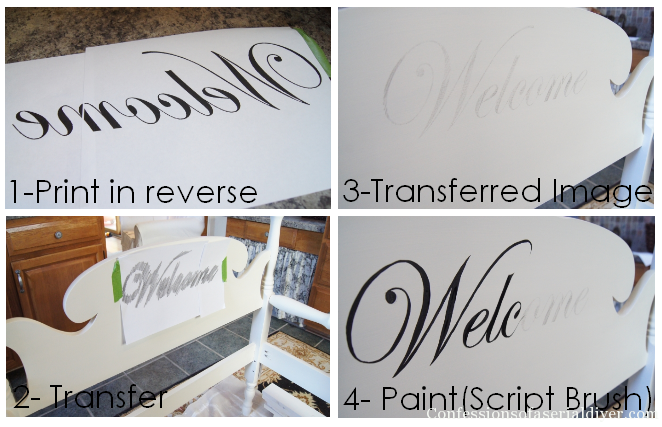
Voila! Simple, but perfect:

I nailed the seat slats in place with finishing nails, spacing them apart evenly. They rested on the front bottom piece of the original headboard and the piece I added across the front.
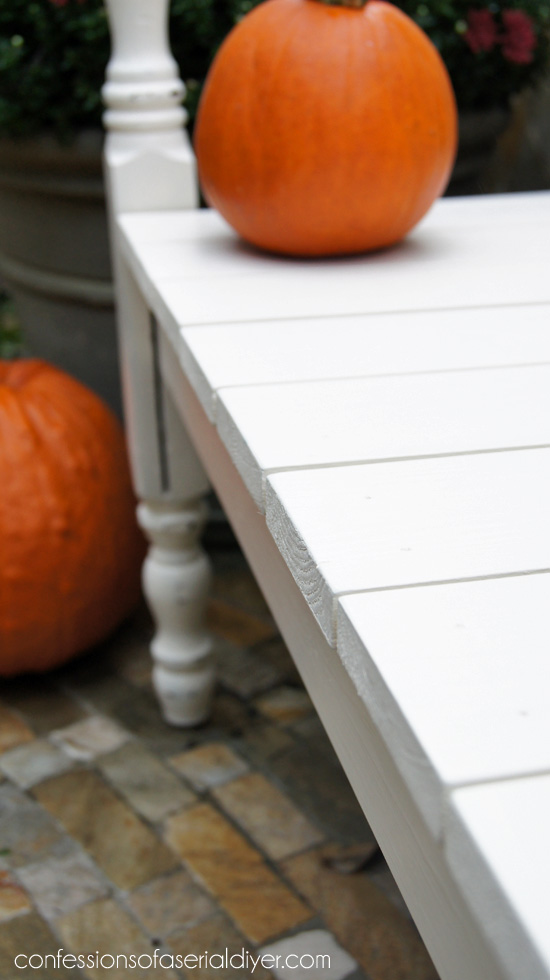
After sanding the edges just a bit to bring out some detail, I gave the entire piece a coat of clear wax.
*Its important to note that if you plan to use a bench like this outside, I would use a polycrylic to seal as the wax can melt with the heat of the sun!
I wasn’t able to rough it up too much since I couldn’t really sand the seat part. I really wish I had stained it or painted it dark first. Boo…

I’m still loving how it turned out. Did I mention I only paid $15 for the headboard? What a steal!
If you liked this headboard bench, there are two more in this round-up of ten awesome Upcycled headboards…click the image or the link below to see them all!

How about you? Have you ever tackled a headboard bench?
XO,
![]()
Don’t Miss a Thing!
If you like what you see, there are several ways to follow along!
Email * Facebook * Pinterest * Twitter * Instagram


Sandra says
You did a wonderful job on that bench. Your Welcome is impeccable. My son was making benches from bed frames and other pieces of repurposed furniture summer. He made glider benches, rocker benches and storage benches. He was so creative and had so much fun doing it. I can’t wait to show him yours, he’ll love it!!
Sandra
Christy K. James says
Thanks, Sandra! Your son must be very talented to create glider benches and rockers. Hopefully you benefited from his hobby 🙂
Sandra says
Christy,
I claimed the very first one, but it wasn’t a rocker or glider, it’s just beautiful. He loved your bench by-the-way. He wishes he could think of unique things like the “Welcome” sign on the back.
Christy K. James says
I’m glad he liked my bench…I chose the “welcome” to go with the pineapple style since the pineapple means “Welcome” 🙂
Emily Maldonado says
Wow! It’s awesome! I can’t tell you how often I pass by old headboards while thrifting because I don’t know what to do with them. Thanks for some inspiration!!
Christy K. James says
Thanks, Emily! This is my first bench from a headboard and it wasn’t too bad. I need to look out for more now 🙂 Thanks for visiting! XO
Krista @ the happy housie says
It looks amazing Christy! I love how perfect the little pineapples are for a “welcome” bench – so symbolic!! Amazing work, as always!
Christy K. James says
Yes, Krista! I thought welcome was perfect for a pineapple bench too 🙂 Thanks for taking a minute to come visit! XO
Dee says
Hi Christy,
This is awesome! I don’t know anyone in real life who repurposes things, so I love reading posts like this. Keep up the great work!
Dee 🙂
Christy K. James says
Thanks, Dee! I don’t know anyone else who repurposes things either ha ha. That’s probably why we enjoy each other’s blogs so much! 🙂
Cindy Eikenberg says
Christy – that bench is absolutely amazing!!! I LOVE it and what a fantastic job you did. Wish you could make one for me! 😉 I especially love the pineapples, because Krista said, they symbolize welcome which is just perfect. Pinning and sharing! Have a happy Sunday and a wonderful week!
Christy K. James says
Thanks so much, Cindy! I made this to sell at the Christmas Market I’m doing this November, but I’d like to keep it for myself lol! Thanks for your sweet words and have a great week! XO
JP says
These are just the cutest things that are being seen all over the place…it’s so great that you made such a nice tutorial for those that would like to make one. I am pinning it to spread your great post!
Christy K. James says
You are awesome, JP…thanks! This was my first try and it wasn’t too bad. The Kreg Jig really helped!:)
Terry says
Thanks for the tutorial, I want to make one of these someday!
Christy K. James says
This was my first, Terry, but it wasn’t too bad. The Kreg Jig really helped, worth every penny 🙂
Holly says
So cute! We found you from That DIY party. Pinning! Thanks for sharing!
Terri Cote says
Could I ask, how would you assemble if you didn’t have the jig? I can’t afford one and dream of completing my own bed to bench.
Christy K. James says
Hi Terri, you could screw through the back of the headboard post into the side pieces, like I did with the top pieces of each side. You would need to pre-drill your holes to avoid splitting the wood. Since I am selling this piece, I was trying to avoid a bunch of screws at the back. If I were making it for myself, it wouldn’t matter as much. For $40, it was worth it to me and I know I’ll use it again. (Plus I was looking for an excuse to buy one ha ha!) Hope this helps! 🙂
terri cote says
Thank you so much for having this site. I follow and enjoy it very much. And thank you for answering. I lack only the seat on a twin sleigh headboard bench. I filled all the holes and have sanded and primed. Am gonna give making a paint booth next. Any tips on the transferring for signs. I cannot get the hang of it. Well truth is I can’t find a good site to use. I am gonna try yours mentioned above.
Christy K. James says
I use this method to transfer my image/letters, then paint them in. You can see it here also: https://www.confessionsofaserialdiyer.com/how-to-transfer-letters-old-school-style/
Hope you find this helpful 🙂
Jeanine Okio B Designs says
Stunning makeover! I can’t believe you only paid $15 for the headboard. What a steal! Coming over from Between Naps on the Porch and so glad I did!
Jeanine
Christy K. James says
Thanks again, Jeanine! I agree, this was as steal at $15! I think the vendor was just looking to unload, so I was the lucky beneficiary 🙂
Kathy @ Creative Home Expressions says
Beautiful, Christy! I will never look at another twin bed the same way again! : )
Christy K. James says
Thanks, Kathy! Now that I’ve tackled one, I’ll be keeping my eye out for more. Thanks for visiting! 🙂
Michele says
Hi Christ,
Love your bench! I have a child’s head board in que for a refinish. A bench would be so cool, but I’ll have to get creative as I don’t have the foot:( Pinned
Christy K. James says
Thanks, Michele! I have another headboard that I started with that was missing the headboard. I got the whole frame built, then realized, the headboard was warped! It wouldn’t have sat straight. I’ll find something to do with it. Good luck with yours:)
Michele says
I see in my comment I left the y off Christy, lol:)
Christy K. James says
Lol…that’s okay, better than spelling my name with a “K”!
Andi says
Freakin Sweet! I love the Sanford and Sons reference. I can’t wait till we get all settled in and I get to use my pickup truck to go curb shopping and bring home lots of crap Phil won’t want in his garage. 🙂
Love the bench!!!
-andi
Christy K. James says
Oh…it would be so nice to start with a clean garage…so jealous!!!
Helen says
Christy, what a terrific idea you had. It’s really lovely! I’m over from Met Monday, and hope you visit my post.
Thanks,
Helen
Christy K. James says
Thanks, Helen! I’m so glad you stopped by for a visit 🙂
pam says
I love it! A couple of years ago I mentioned to my husband that I wanted one of these and that I was going to hire a carpenter to make one for me. He insisted on doing it himself! It came out great. I just love it so much. It’s on the pretty little (what I call) service porch that is to the left of our main, front door porch. I made throw pillows for it that I change with the seasons. I like it so much I think I might want another one. 😉 Thanks for sharing.
Christy K. James says
Thanks, Pam! I wish I had a covered area to put mine! Unfortunately if I want anything like this made for me, my husband would say, “You can do that yourself!” I still try to make him think there are things I can’t do, so he will do them ha ha…”honey, I always mess up when I mow the grass…” 🙂
pam ~ crumpety cottage says
Well I’m proud of you for doing stuff like that, yourself. But I must say, I’m glad my hubby will do it for me. I used to be more adventurous, but now I’m all thumbs and butterfingers. Saws and power tools are better in his hands, lol! Thanks for responding. It really did come out so pretty. 🙂
Mandy Hank says
Girlfriend this is amazing!! You did a beautiful job. OMG !!!
Christy K. James says
Well, thank you! 🙂
Marty@A Stroll Thru Life says
Love this bench, it turned out so beautifully. Thanks tons for linking to Inspire Me. Hugs, Marty
Cindy Eikenberg says
Hi Kristy! Just popping in (again!) 🙂 to thank you for sharing this fabulous project at Best of the Weekend and I wanted to let you know that I’ll be featuring it at tomorrow night’s party! Hope you have a happy Thursday!
Christy K. James says
Yay! Thanks so much, Cindy! Have a great day, too 🙂
Suzie @ Dorothy Sue and Millie Bs too says
You did an amazing job! I have been wanting to make one of these but haven’t really found any good tutorials until now. This is perfect! You should be EXTERMLY proud of it….. Pinning so I can attempt in the spring…
Christy K. James says
Thanks so much, Suzie! This was my first attempt and I’ll definitely try it again. I was kind of dreading it, but it wasn’t that bad! Good luck with yours 🙂
Nancy @ Artsy Chicks Rule says
I love that! I have a twin headboard that’s been in my garage for over a year (collecting dust!)….for this purpose. 😉 Haven’t gotten around to it yet…one day!! I love how you put the “Welcome” on the back…so perfect!
And oh yes, the rain….SO glad the sun decided to come back out finally!
Hope you have a great weekend Christy!
xo
Nancy
Christy K. James says
Thanks, Nancy! I’ve been dreading doing this one because I thought it was going to be harder. It wasn’t too bad after all! Have a great weekend 🙂 XO
Becca says
Great idea! I love this and you can always find cheap… AFFORDABLE headboards at Goodwill. Thanks for sharing! Stop by my Friday’s Five Features tomorrow and link up this post (and others)! http://diy-vintage-chic.blogspot.com
Christy K. James says
Thanks, Becca! 🙂
Heidi From momprojects says
Wow, this is great clever lady! I love anything you can use the old Kreg jig on, it’s my new best friend! I made this storage bench window seat with it http://momprojects.com/diy-storage-bench/and have about 100 more things I want to try. I am going tp add this bench to my list!
Christy K. James says
Thanks, Heidi! Did you invite your mom just to put her to work? Lol! It turned out terrific 🙂
Ashley Rane Sparks says
Hi, I found you on hometalk. This is exactly the tutorial that I’ve been looking for! I have an old head and foot board that was my husbands when he was little. I also have the side rails and have tried to make it work in one of my kids rooms but it’s just not a standard size (and I really don’t want to pay to have a mattress made!) I’m wondering if you think it will be weather proof? Does the wax work for that?
I’m going to pin your cute bench so I can remember where it is when I get time to do this project and to share with all of my followers how clever you are!
Thanks for sharing,
Ashley Rane Sparks
Christy K. James says
Hi, Ashley…I’m so glad you found this post helpful! Thanks so much for visiting to check it out. I think this would work fine under a covered porch outside. I’m not sure about leaving it exposed and if it’s going to be in really hot conditions or direct sunlight, I would use a polyacrylic to seal instead of the wax. (It may melt.) Hope I answered your question 🙂 XO
Laura Strack says
Hello Christy, So glad I saw Miss Mustard Seed Blog today and noticed your darling bench. This was your first bench? Great job!! I have a bed that I received from my neighbor, for free! Lucky me. I too want to turn it into a bench and you have motivated me to go for it! There’s a matching mirror, as well. I’m stoked to get started. Thanks so much for the inspiration 🙂 XOX Laura
Christy K. James says
Awesome!! Inspiring others is my absolute favorite! Just make sure you have a helper to hold the pieces while you attach them and you’ll have no problem. Good luck! 🙂
cristina says
Hy Christy! I love your bench. I would never had thought a woman can do this kind of job.. Hugs, Cristina
Christy K. James says
Thanks, Cristina! A woman can totally do this. What I was really crazy for building was my gate lol! Here’s a link and I think you’ll agree! Thanks so much for visiting! XO
https://www.confessionsofaserialdiyer.com/how-a-girl-built-a-gate/
cristina says
After writing the comment I read your gate post and I realised mine it was a silly question what a woman can do talking about the headboard bench.. Hugs, Cristina
Christy K. James says
That’s okay…I never would have imagined I could build a gate. It’s amazing what we can do 🙂 have a great weekend! XO
Danita Courtney says
Hi Christy,
I have been wanting to try this project for a while now. My husband who has all the power tools says it’s a “big” job, but I think the job is well worth the effort as a Welcome bench is what I want and do not has it in my budget to purchase a $300 one. I will show him how you did it in the hopes that he will SEE it’s not so hard! Thank you for the inspiration AND the awesome tutorial! I love learning new things! I usually do stuff inside and much smaller to be truthful! So I need his help and you provide just the right motivation! Thanks for sharing!!! If it happens….WHEN it happens I’ll share back!
Danita
Christy K. James says
Oh I hope you go for it, Danita! I’ll be honest, I thought it was going to be way more difficult than it was. But when I got started, it wasn’t bad at all! Please share WHEN it happens 🙂
Christy K. James says
Gina, I am truly honored to be a part of your final features! Thanks so much. Like many, I will certainly miss your party! Have a wonderful weekend :)XO
Christy K. James says
Thanks so much for featuring my bench!! It’s a great way to start my weekend! Have a good one! 🙂