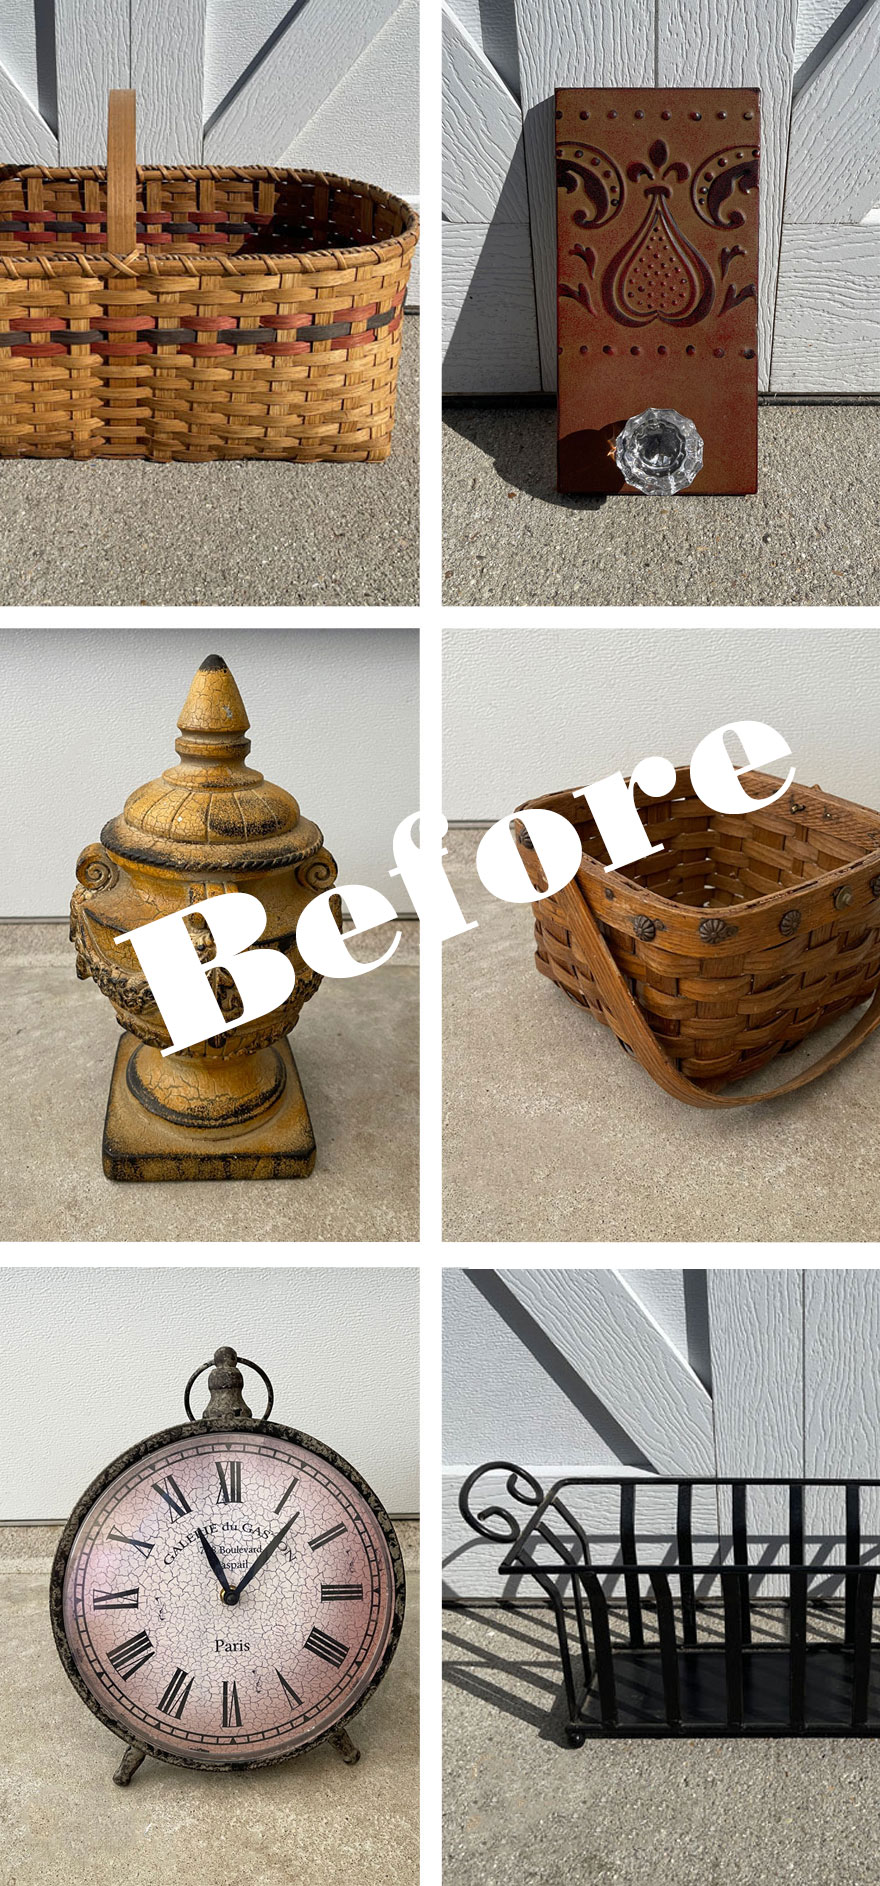
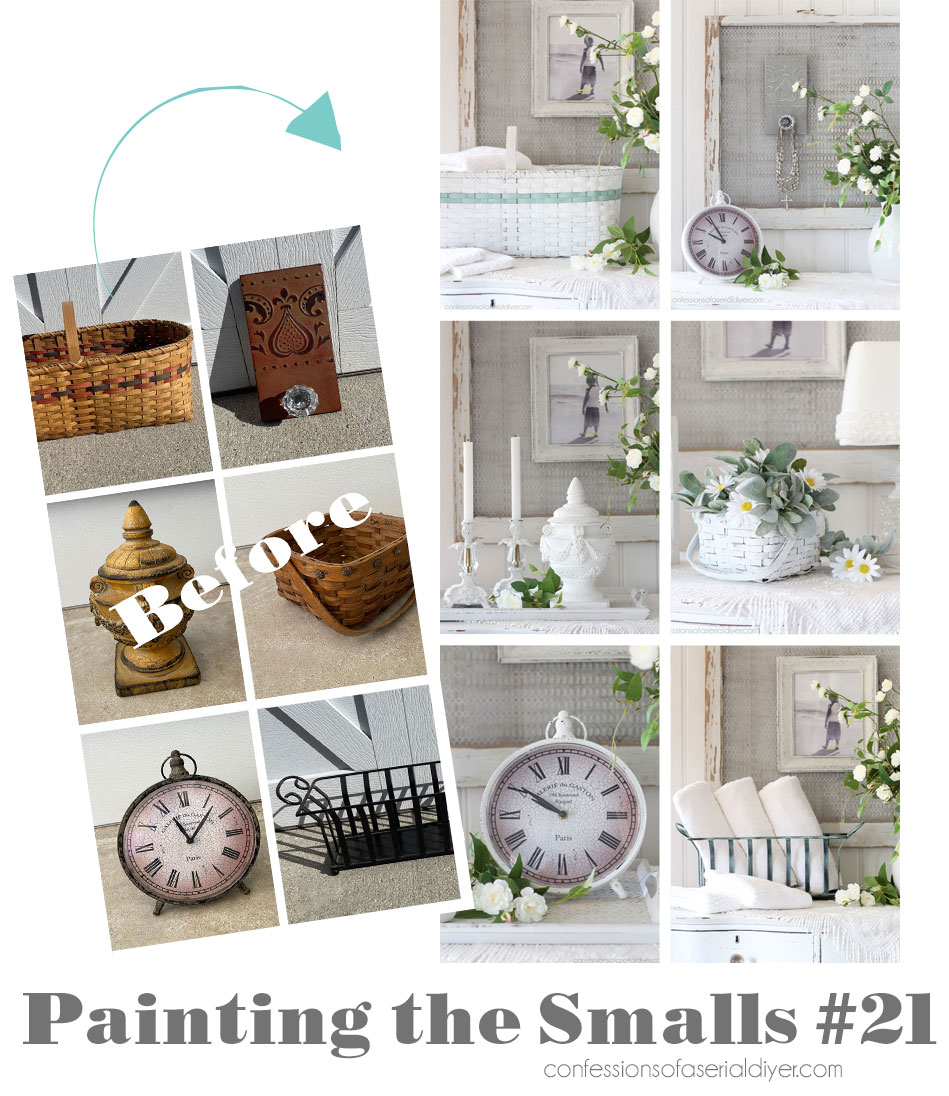
Hello, sweet friends! I’ve got another round of smalls for y’all today!
Before I started selling paint in my booth, these smaller makeovers were what kept me afloat some months. They are also what sell the quickest in my booth, so I am always on the lookout for them.
Grouping these smaller pieces together into one post helps me to get several done quickly. Most of them just need a simple makeover, and y’all seem to enjoy them too!
Here’s what I’ve got today:
I’ve included a few affiliate links so you can find the products I love.
I’ll warn you ahead of time that most of these are white. I like to add a lot of white to my booth and that is what sells for me. Plus, a simple white makeover always does wonders!
And here we go!
Mini Makeover #1
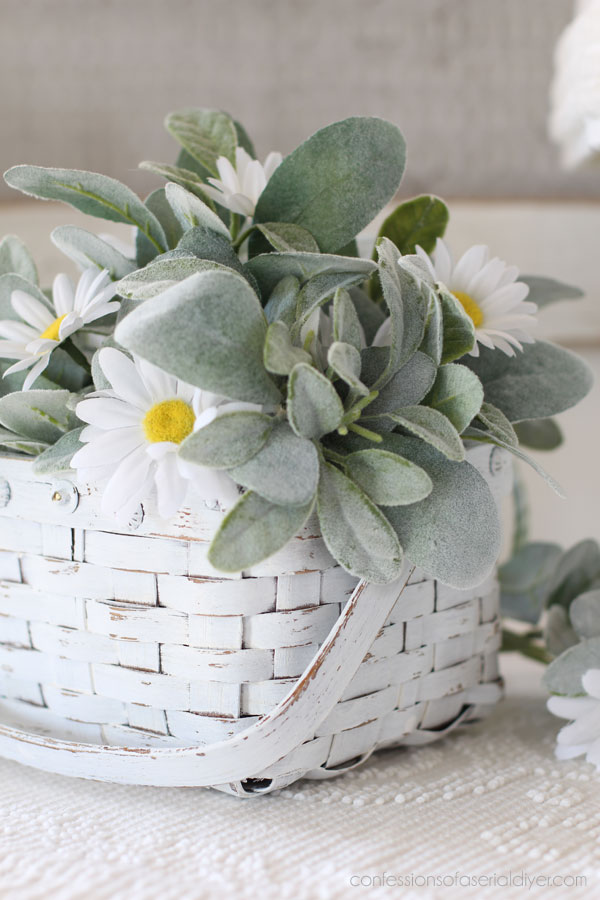
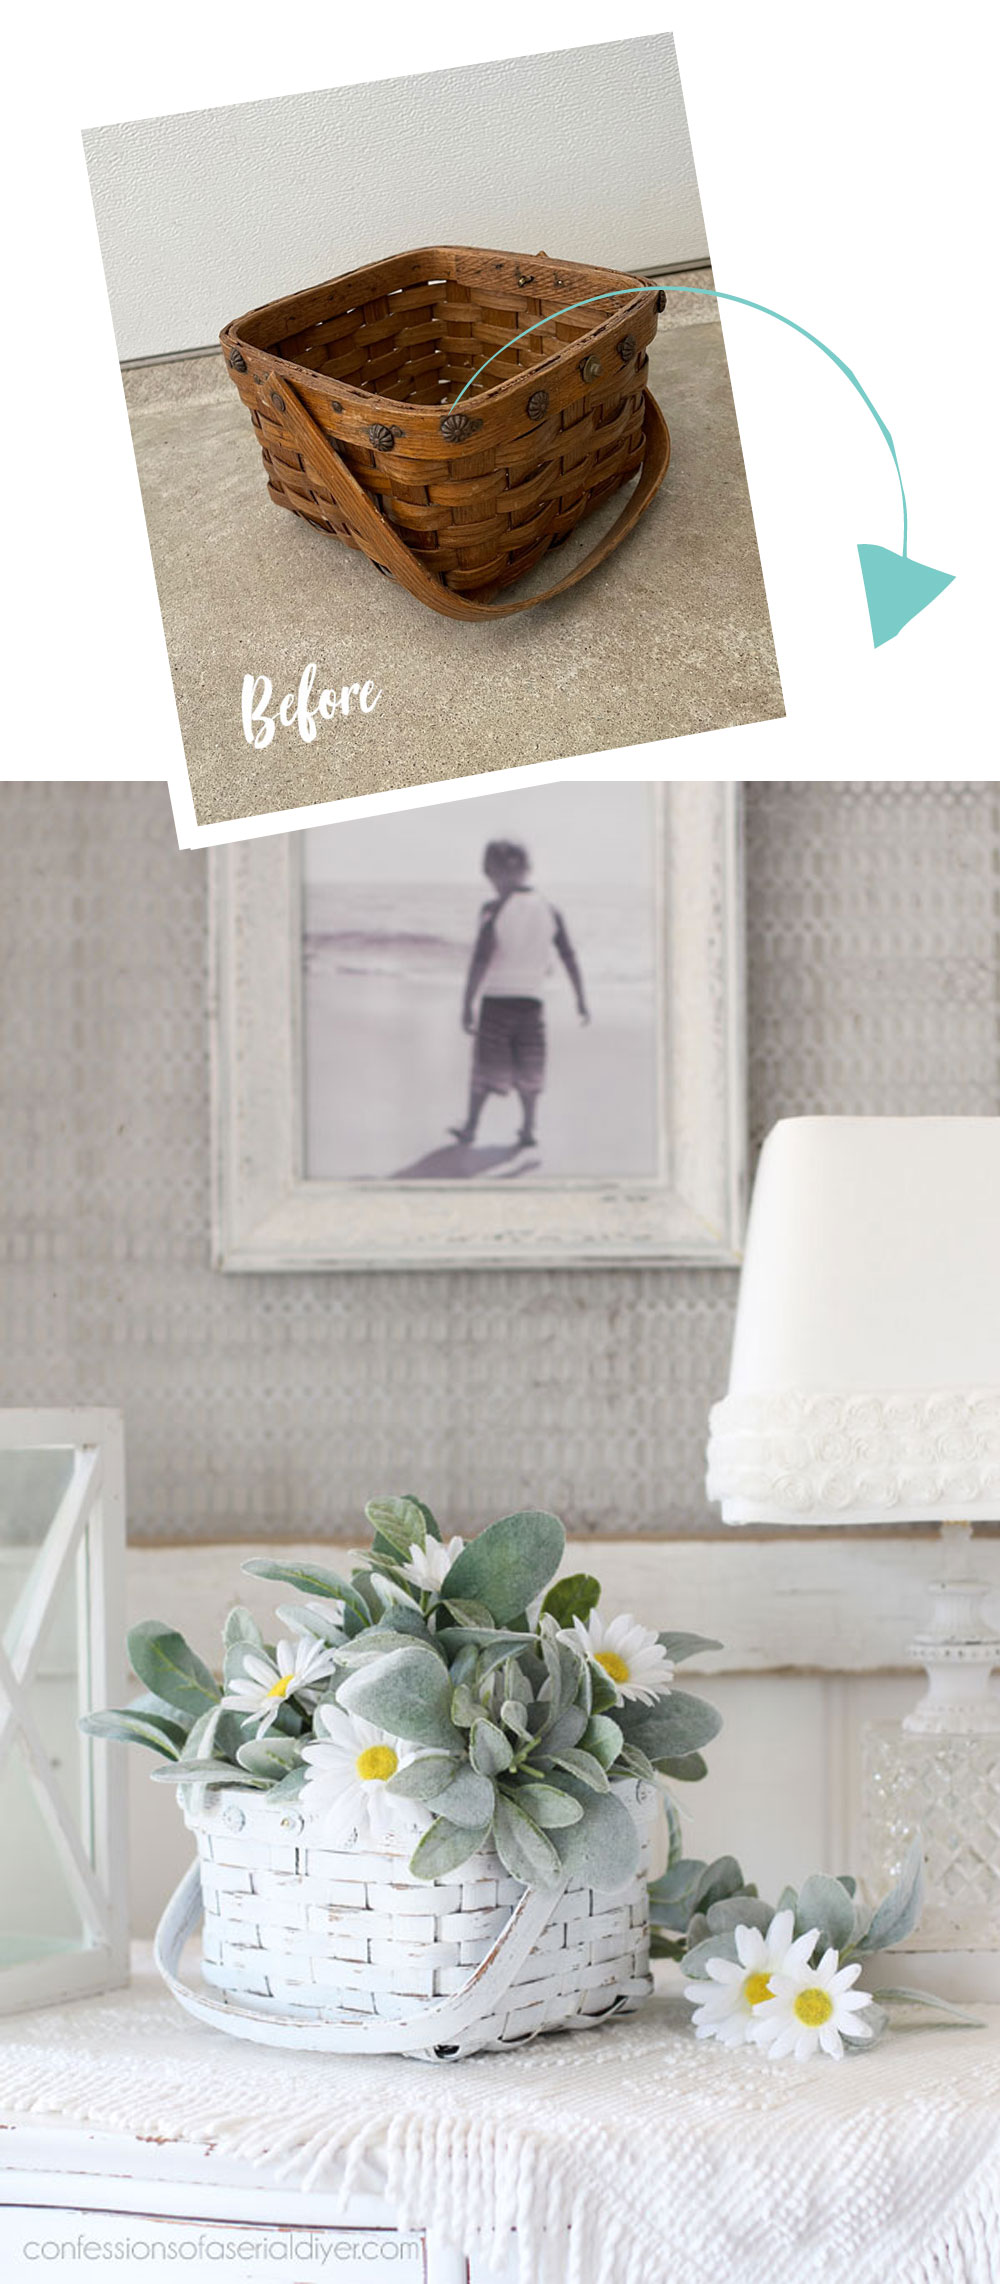
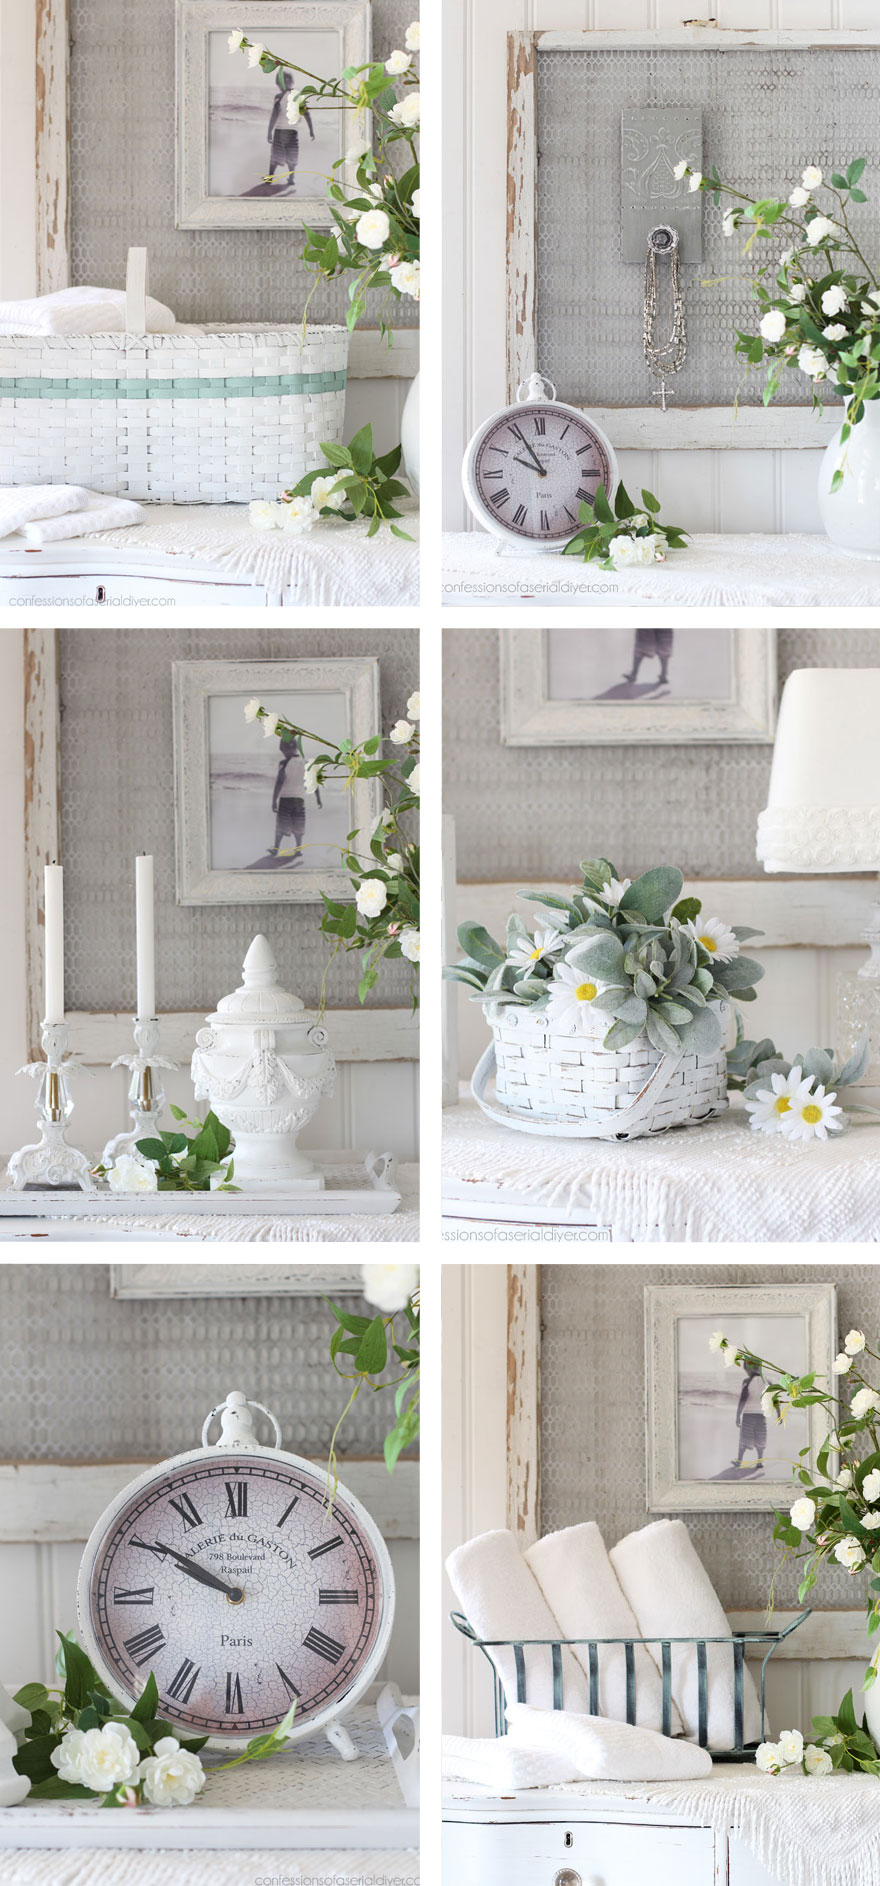
Up first is this mini basket I picked up ages ago for 99¢ at the thrift store. It’s just been hanging around ever since, so I grabbed it to throw in with this bunch:
I was attracted to the doodads all around the top of it.
For its makeover, I started with a quick coat of Rustoleum spray primer just to get a fast first coat on:
Then, I used my Best Dang Brush to give it a coat of Cotton:
The Belle brush works great for this too! Their round heads give better coverage for surfaces like this.
I sanded lightly all over once it was dry and then decided it was the perfect size for a small arrangement!
I still had my bin of random leftover floral pieces out that I was using for the tea cup floral arrangements I shared last week.
So, I added floral foam to the bottom:
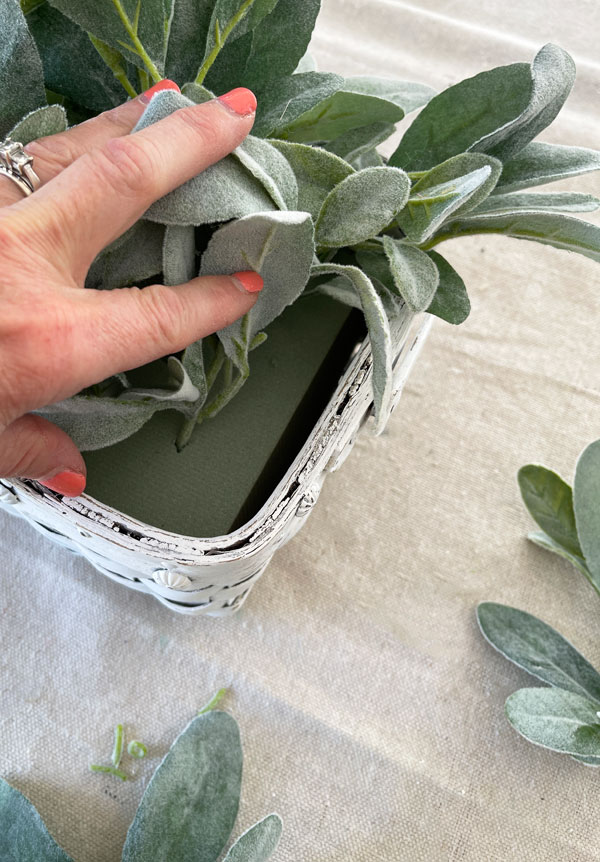
And then I filled it with lamb’s ear…

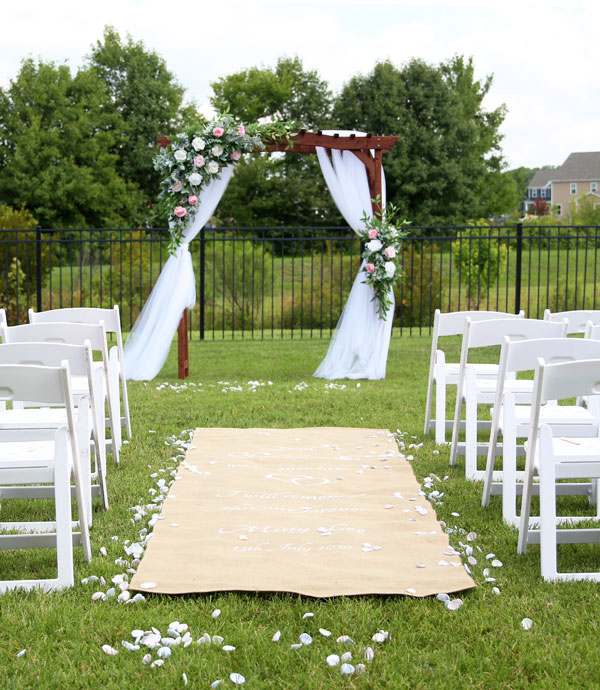
I had several pieces left over from my brother’s wedding arch I did for his intimate wedding in our back yard a few years ago:
I tucked a few daisies in there too and got a sweet and simple arrangement out of it:
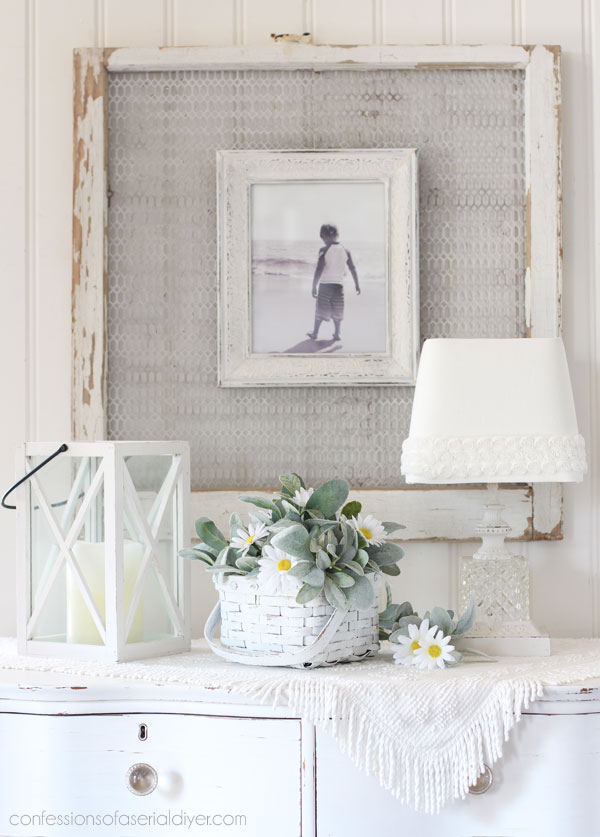
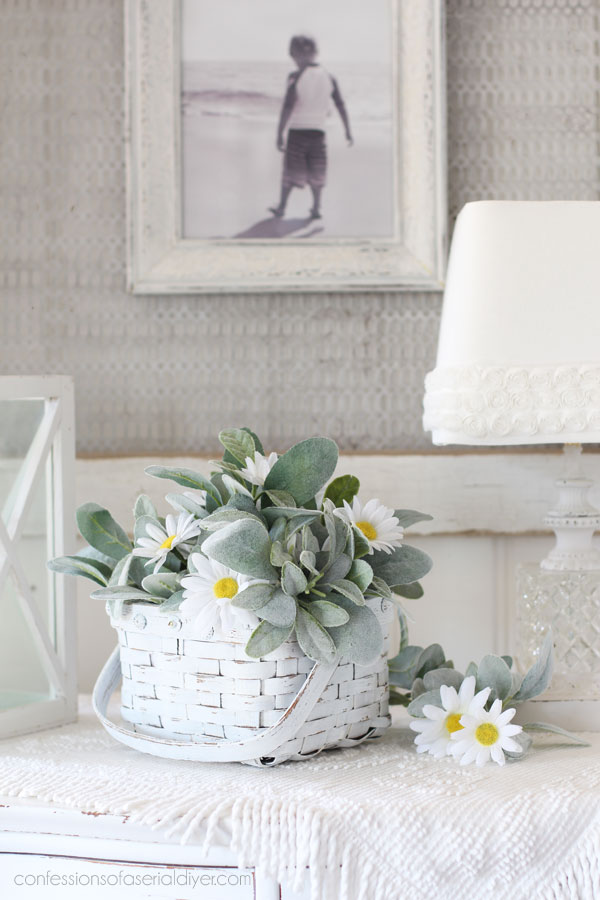
I just love how darker baskets painted white distress…
Mini Makeover #2
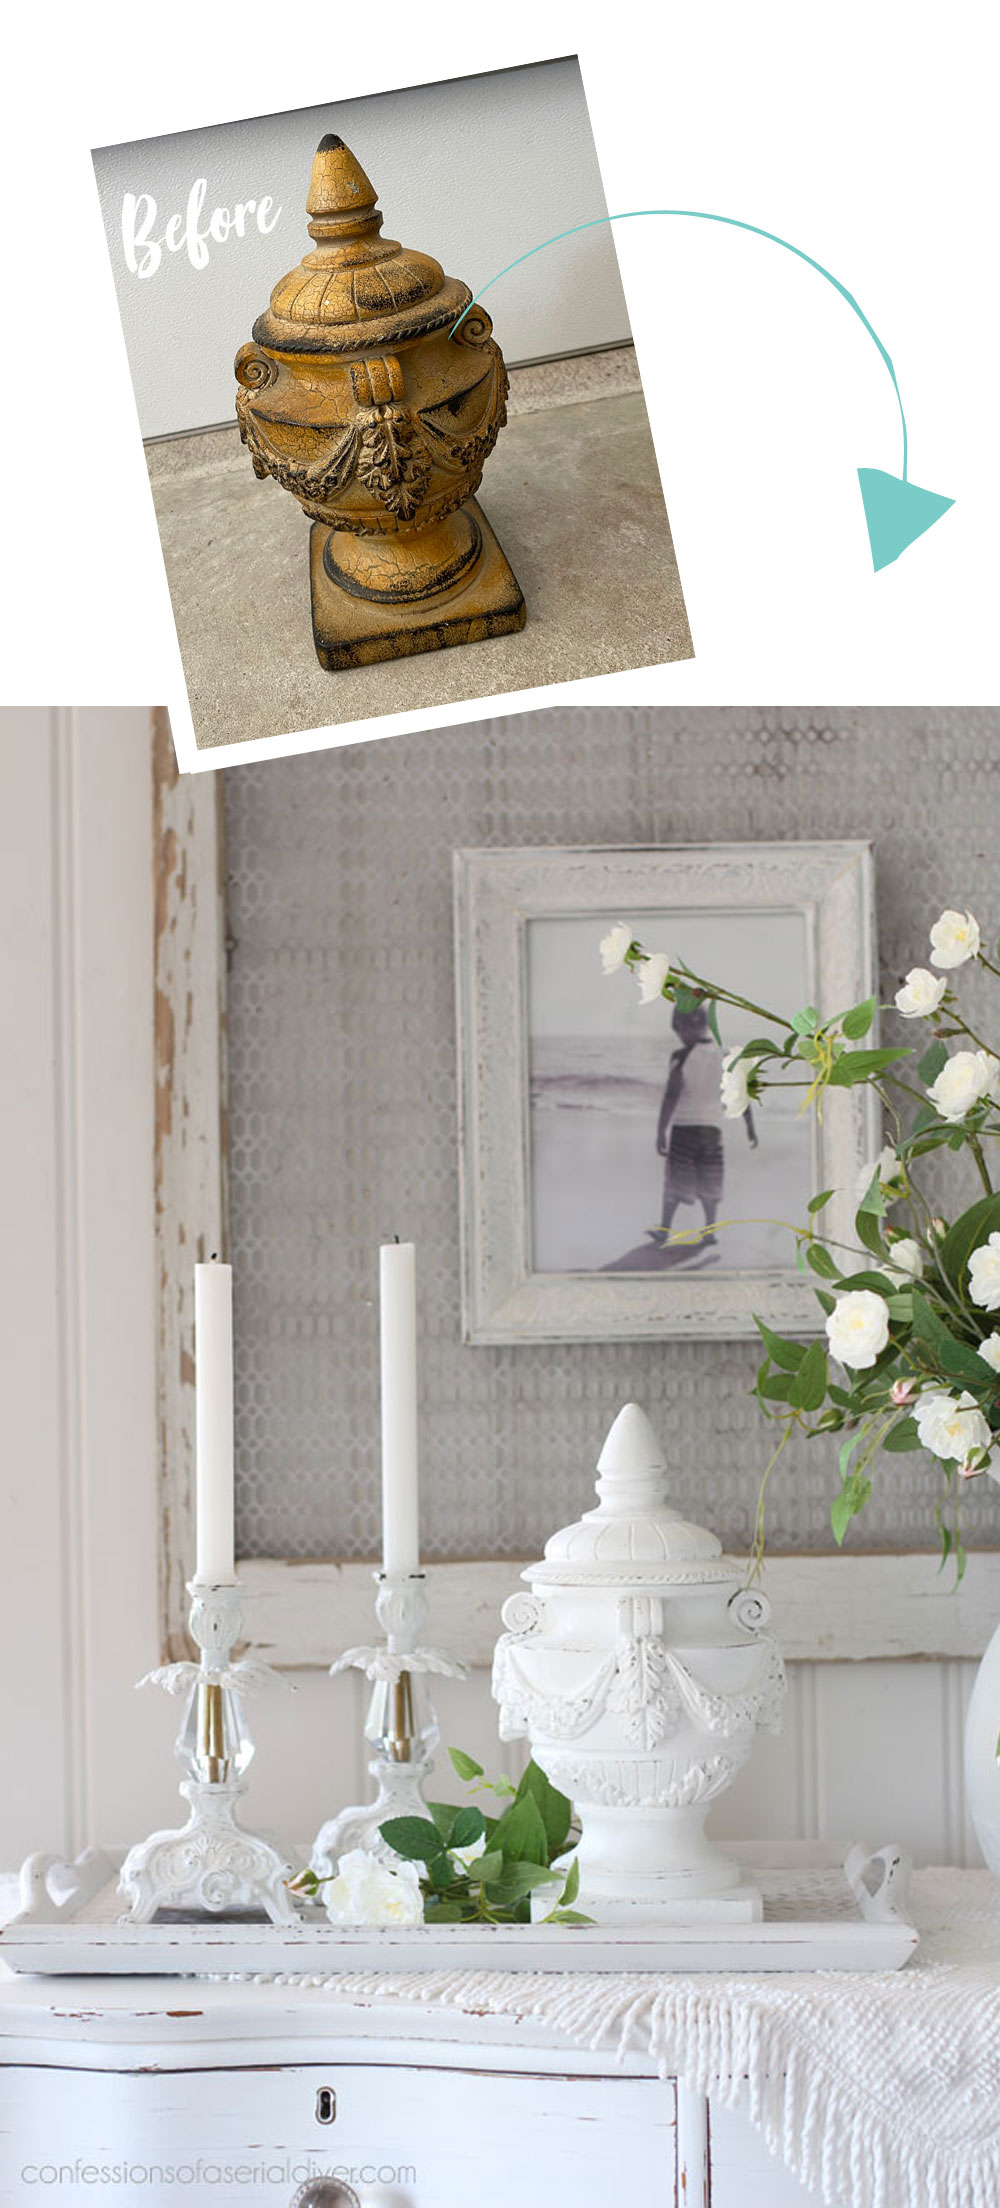
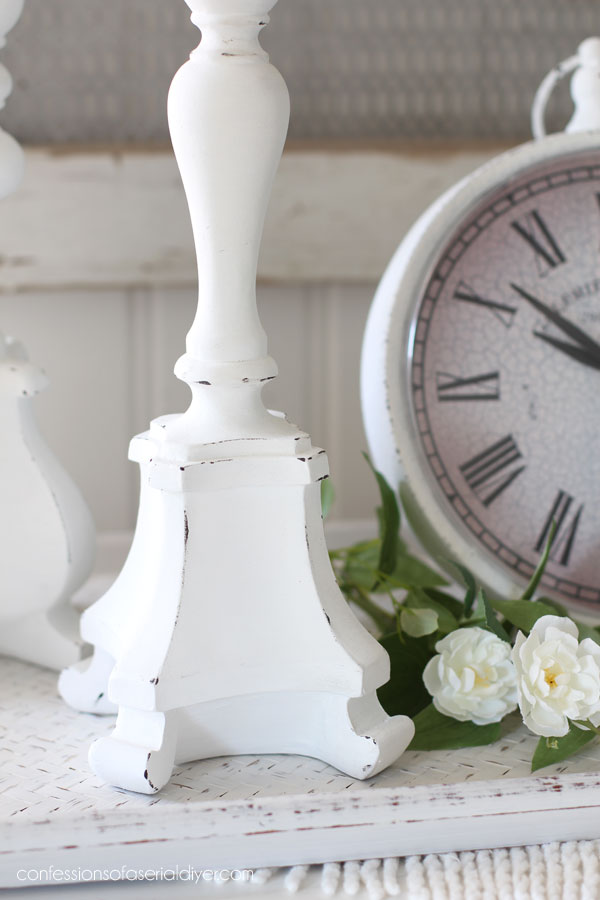
Up next is this thing…I don’t even know what to call it, but I liked the shape and it was a good size for $6.95 at the thrift store:
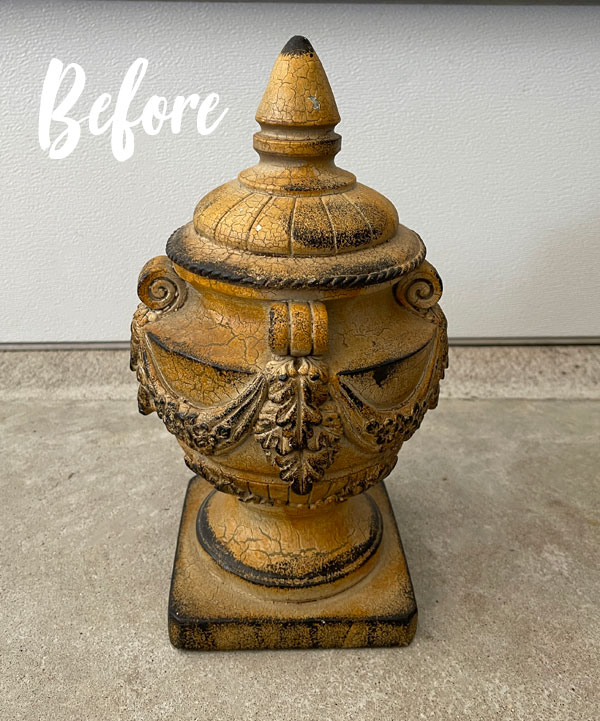
I knew it would paint up so pretty, and in its current yellow state, it really needed some help!
This too got a quick spray of primer first, followed by a couple of coats of Cotton. Once it was dry, I used a sanding sponge to distress:
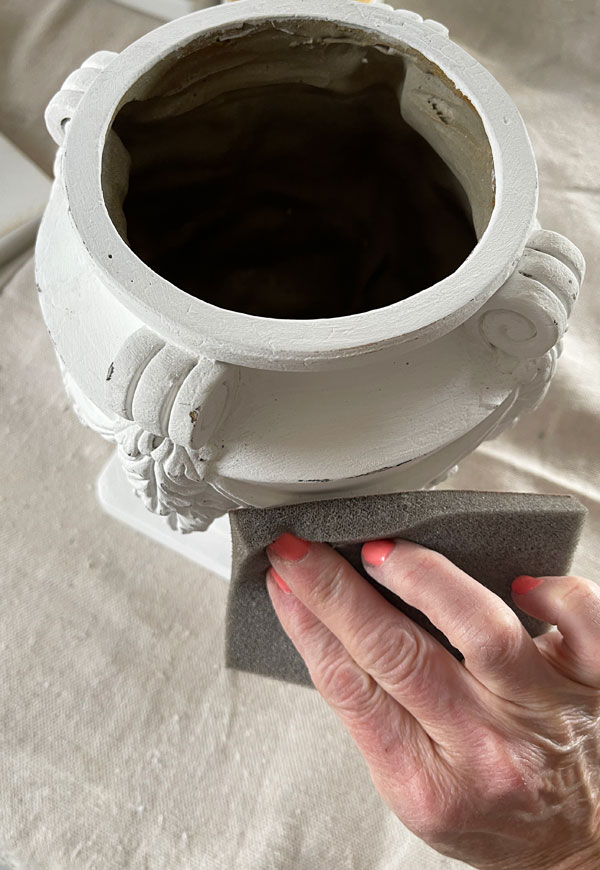
You could also wet distress like I did here instead so you don’t take it down too far to the white layer beneath the paint.
Instead of reaching for my usual sealer favorites, I just gave this a quick spray with Rustoleum clear matte spray to seal. I would not use that on furniture, metal pieces, or potential bleeders, but for something like this with all those nooks and crannies, it is the easiest way.
And voila:
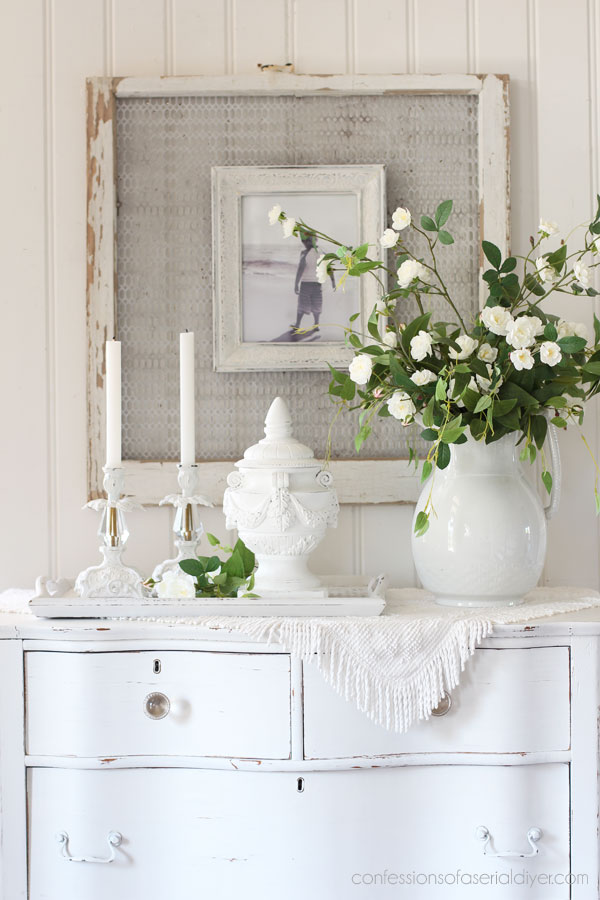
I guess it would be called an urn? That sounds so morbid.
It’s a pretty urn though.
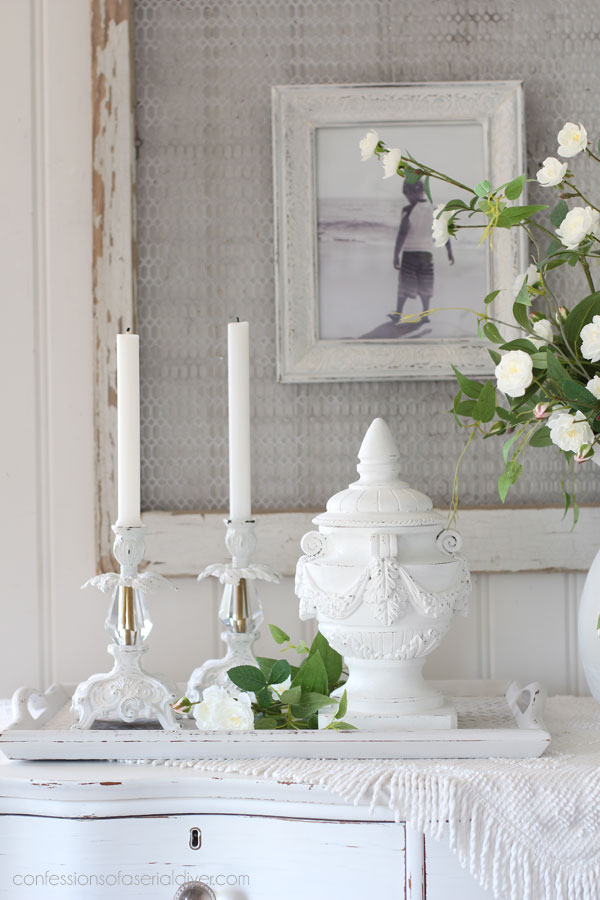
And a little closer…
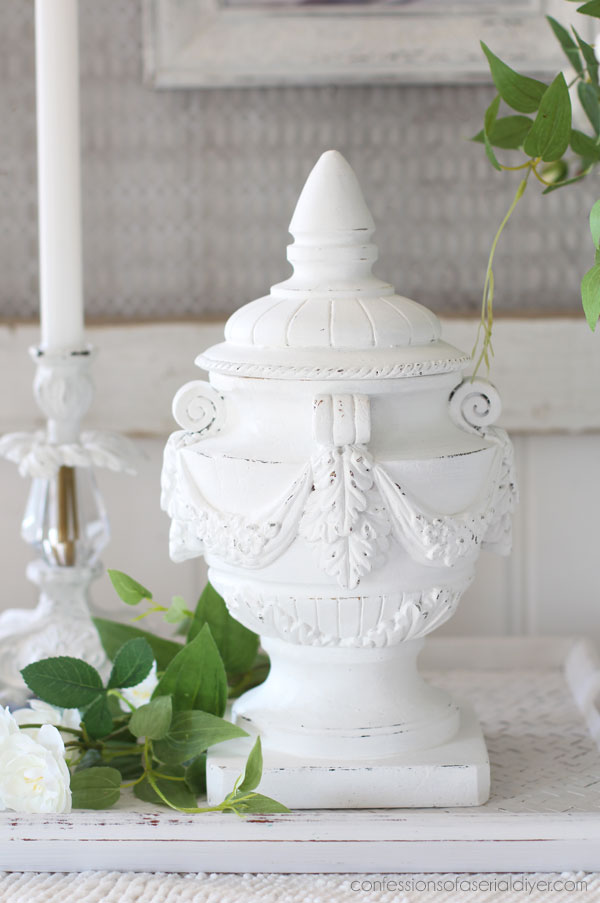
Much better!
Sometimes a simple paint job is all you need!
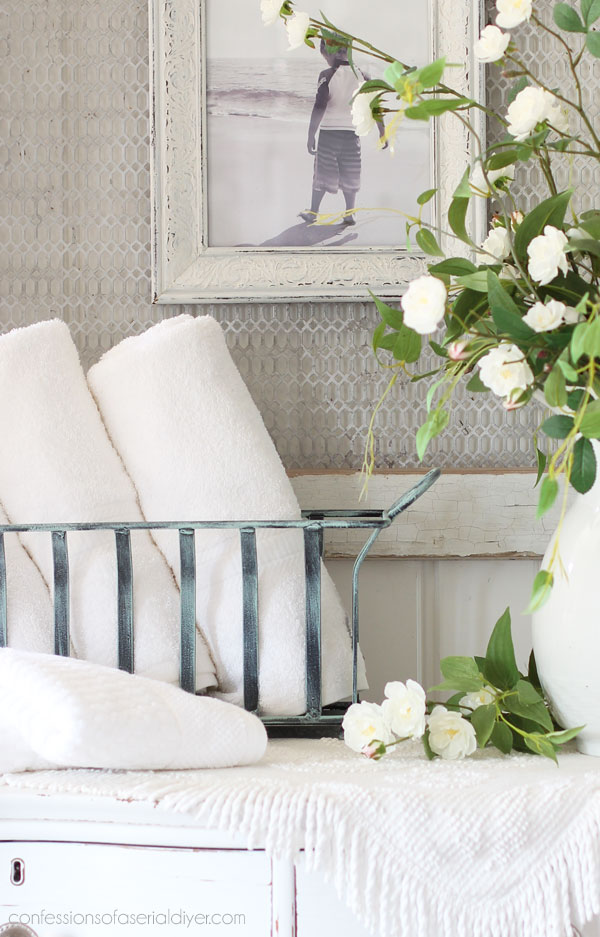
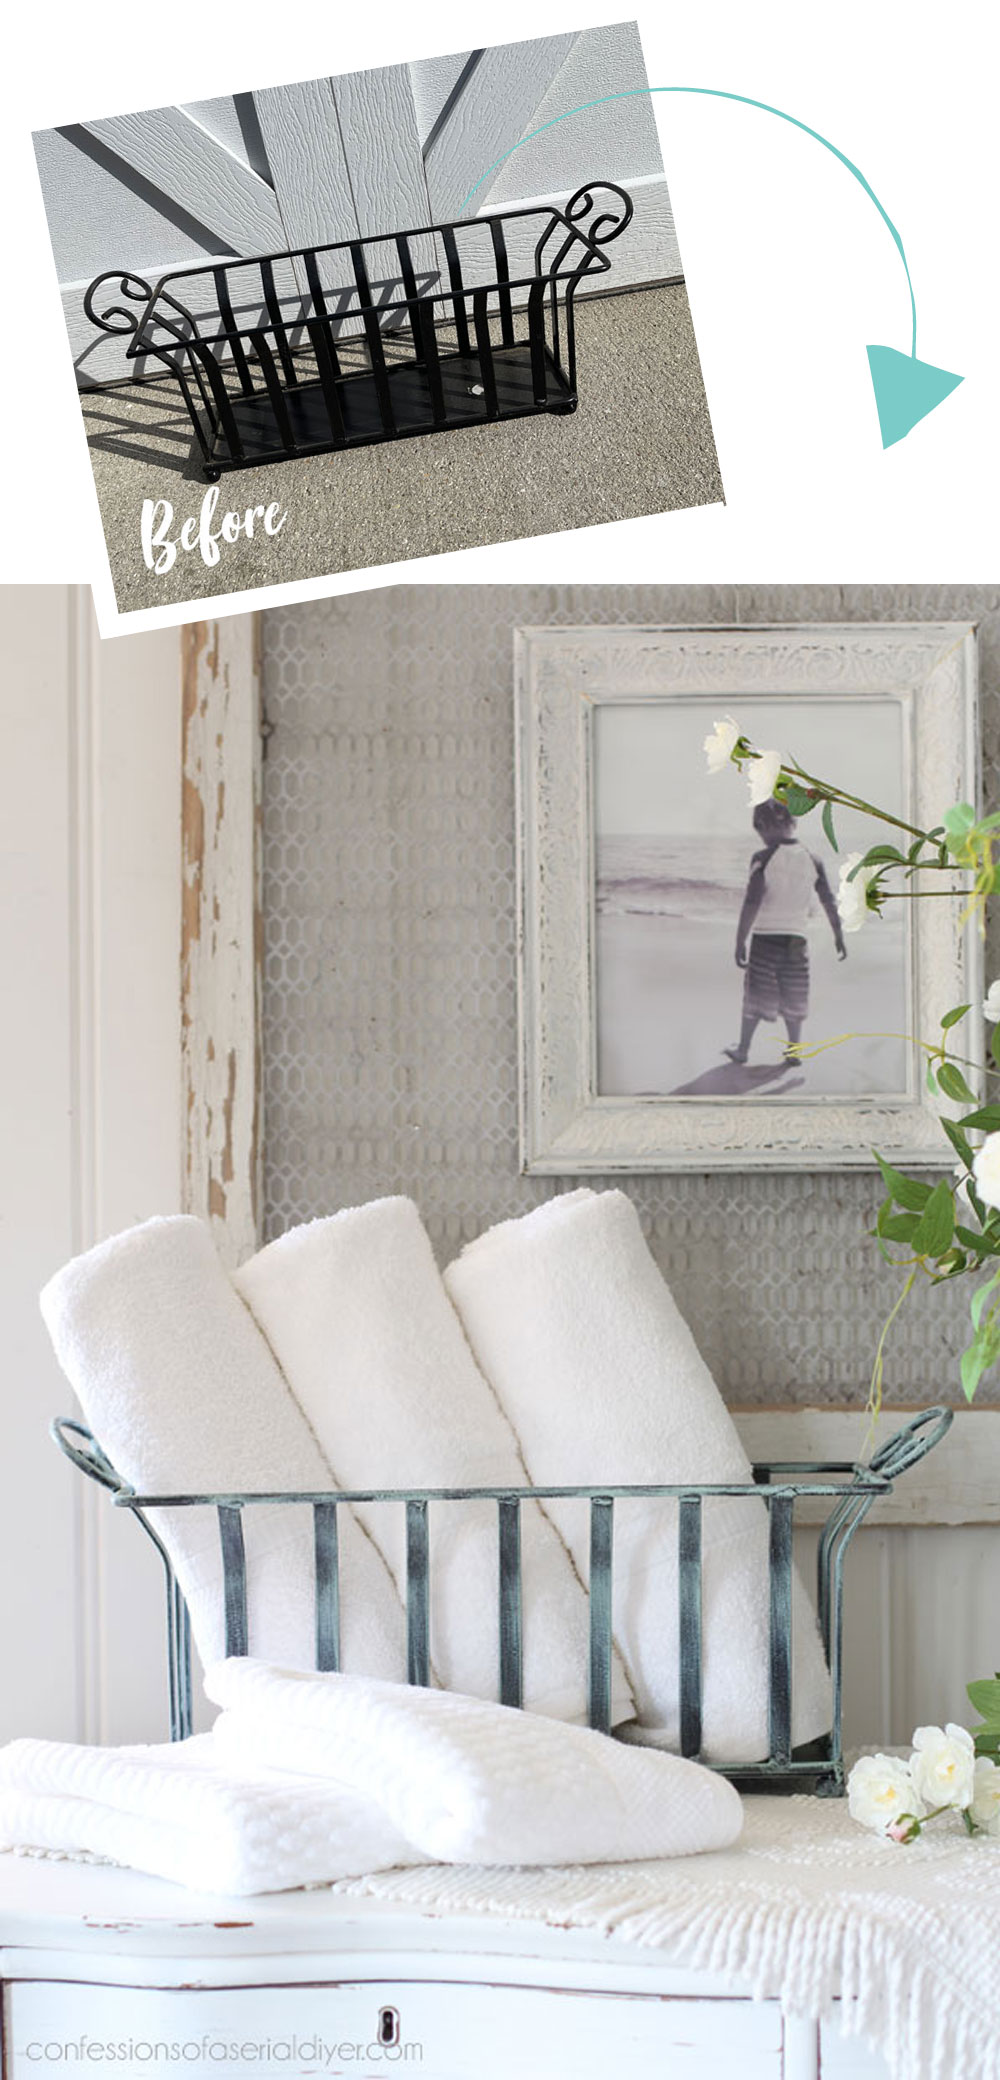
Mini Makeover #3
I believe this next piece, a $6.98 thrift store find, was intended to be an outdoor piece, but I had another idea for it:
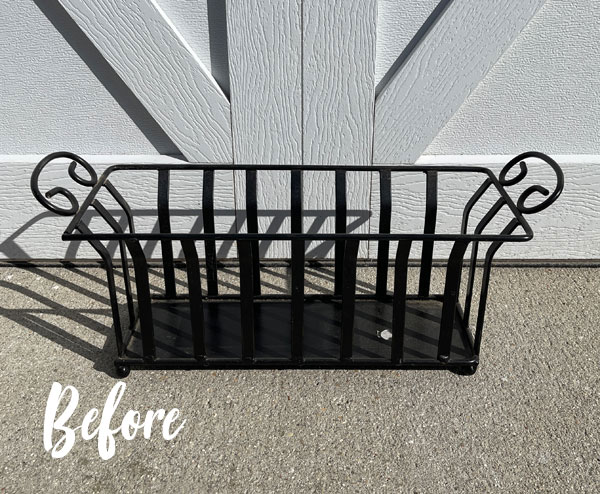
I often take a very dry brush with a little Sea Glass on it…
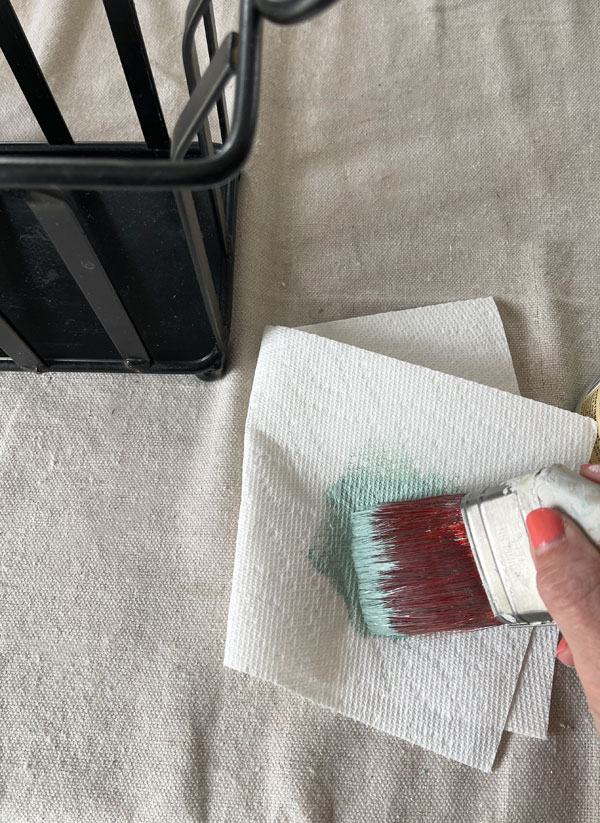
and add that to these black pieces to create a bit of a vert-de-gris look:
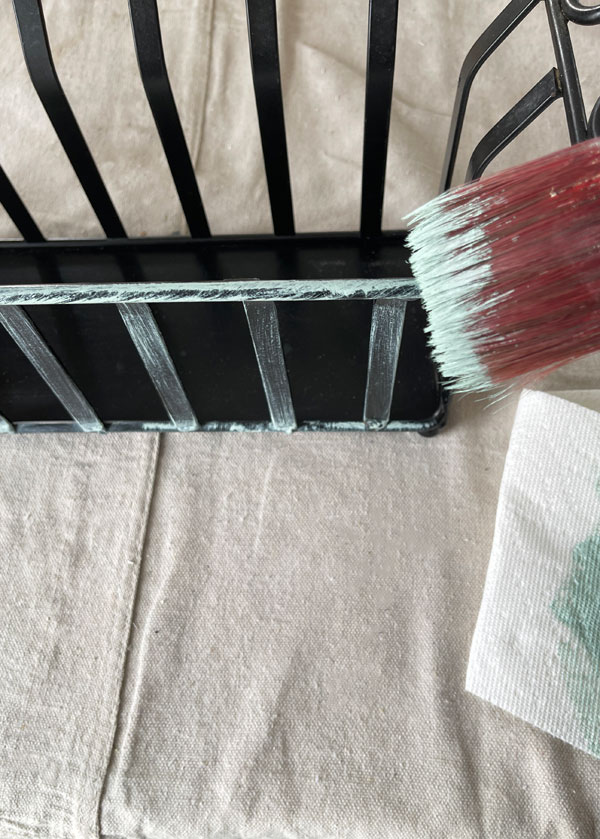
No need to seal, so this is such an easy way to give these pieces a new look!
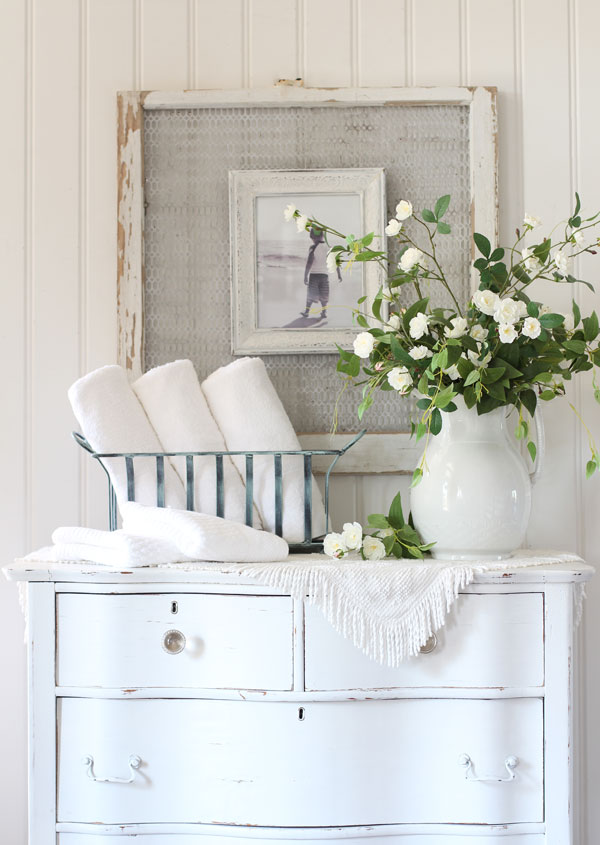
Maybe in a guest bath holding extra towels?
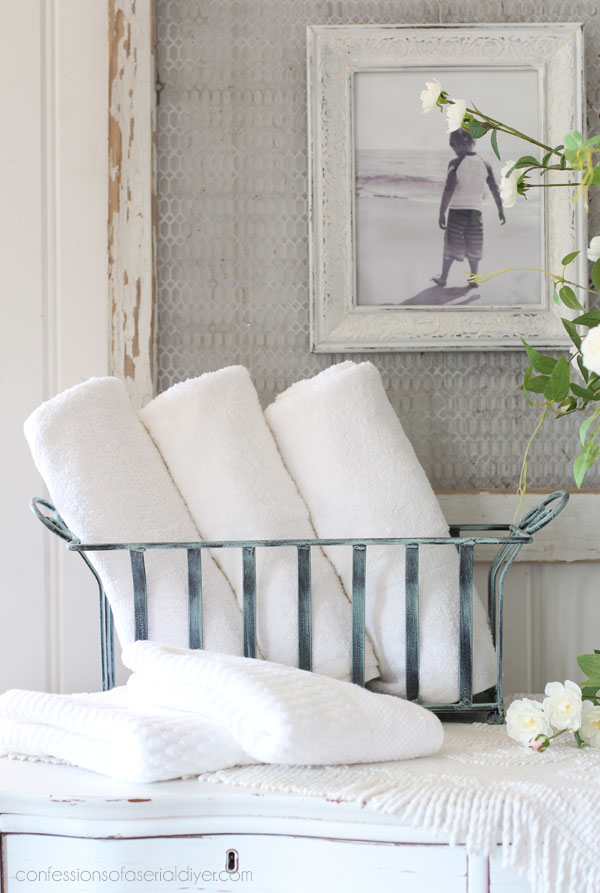
Or holding extra TP on the back of the toilet? It’s the perfect size!
Mini Makeover #4
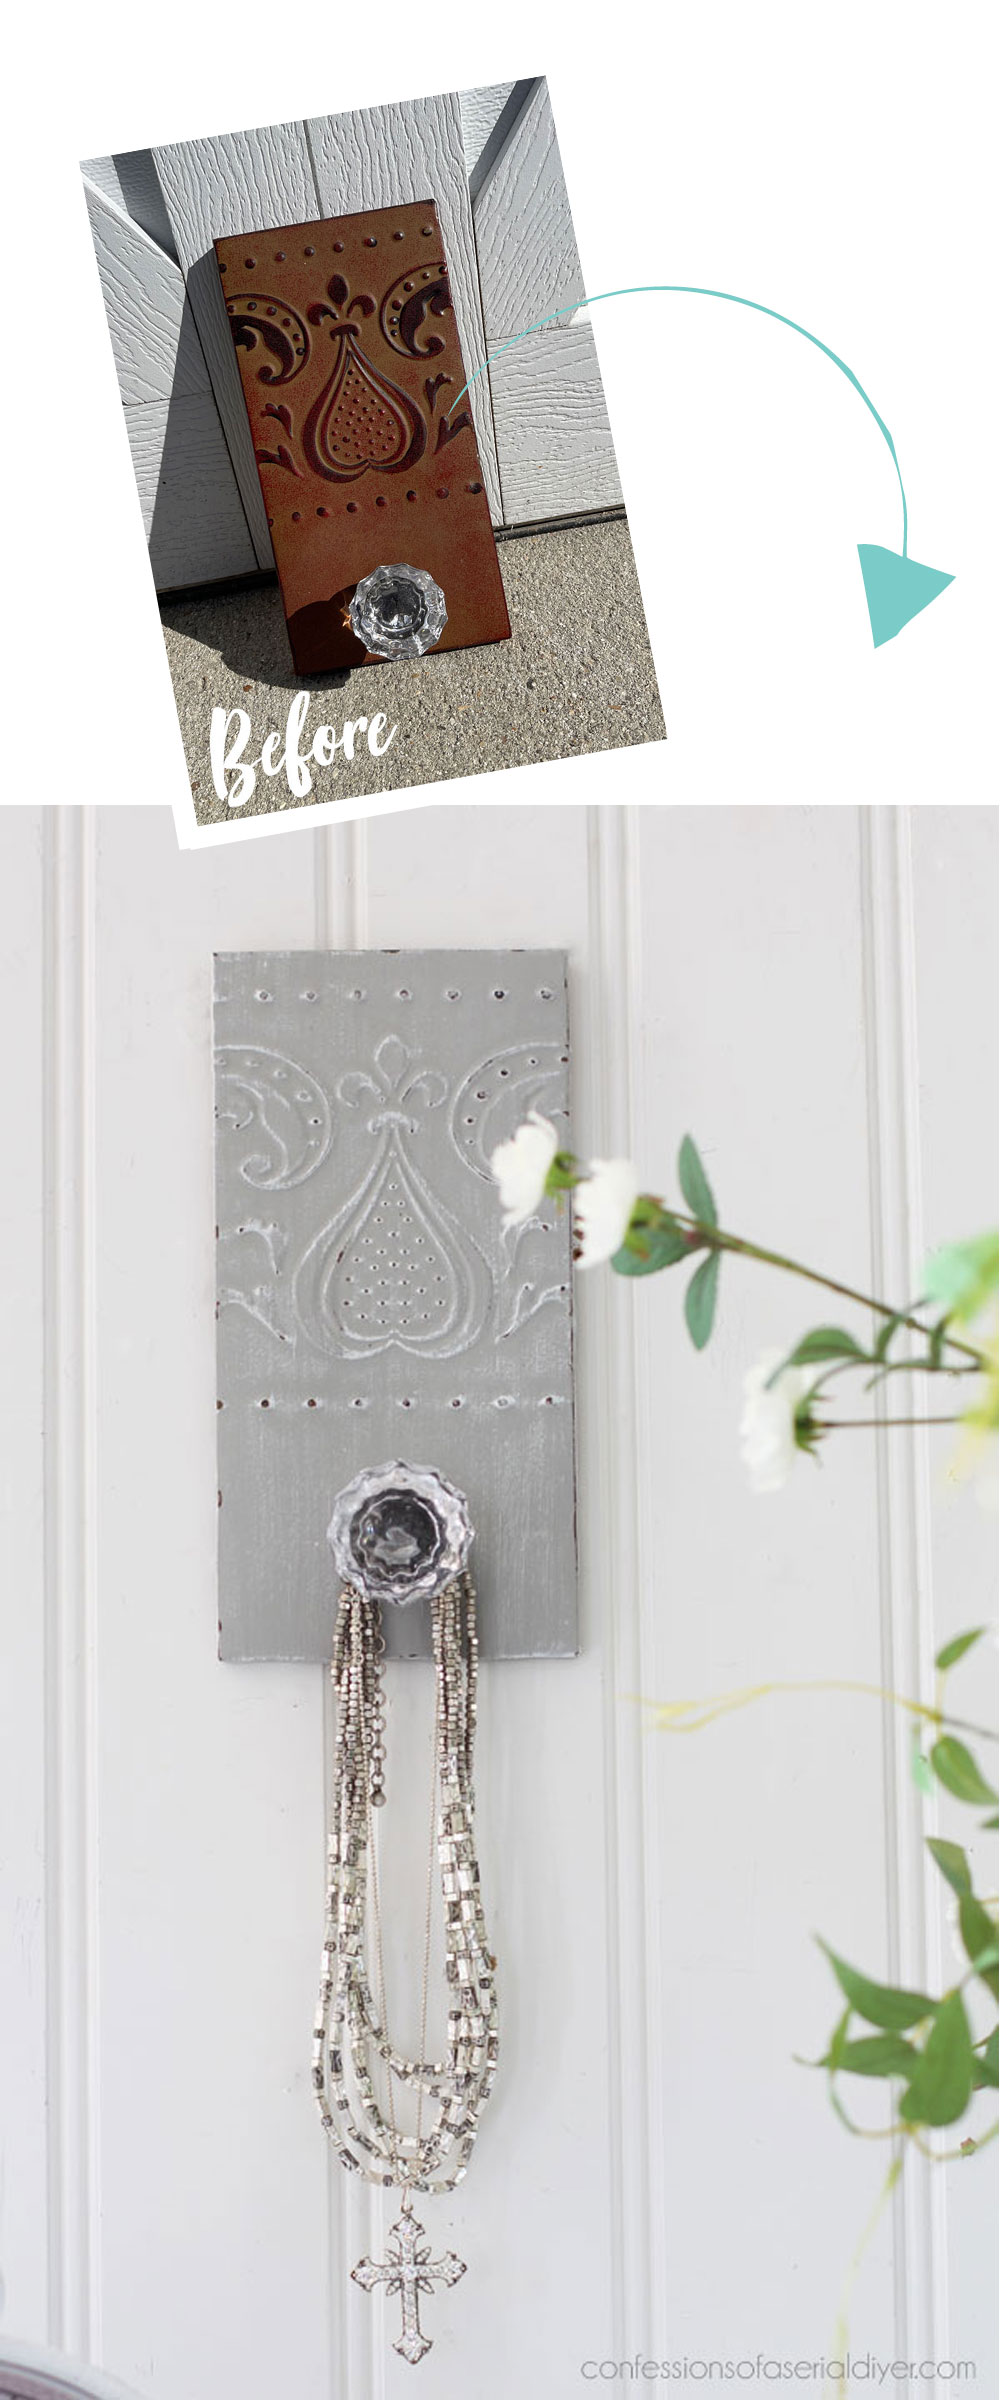
Next up is this small wall hanger I found for $3:
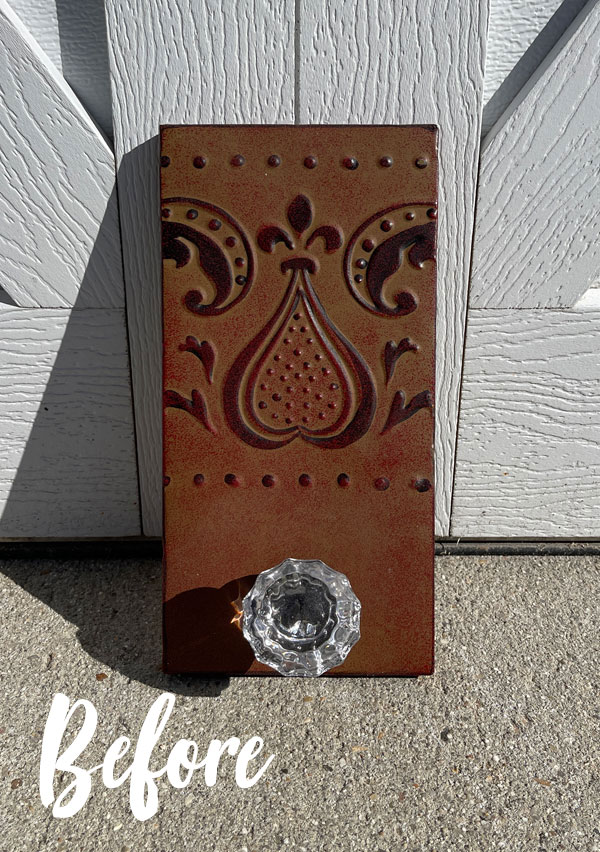
That huge glass knob drew me to this one!
It got a couple of coats of one of my favorite neutrals, Driftwood:
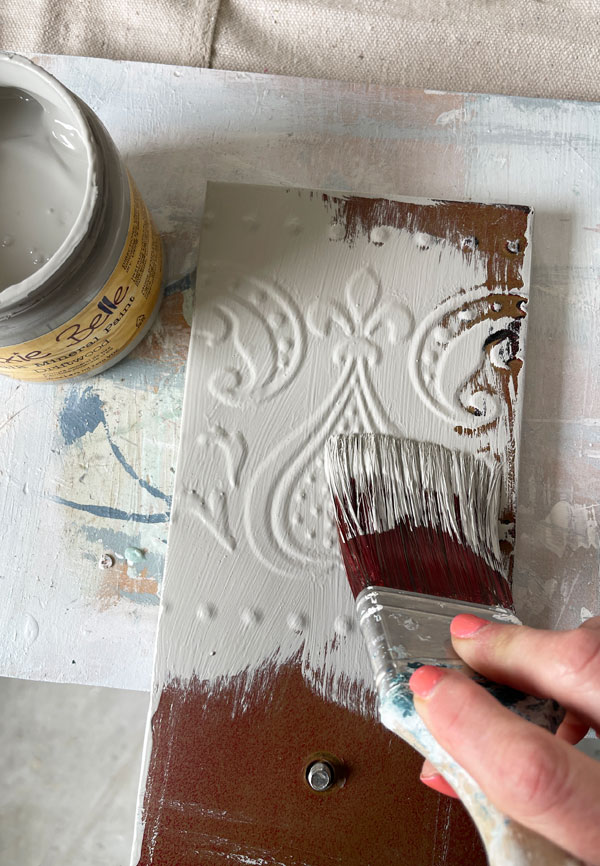
Then, I went back over that with a very dry brush and a little Cotton on it to highlight the raised pattern…
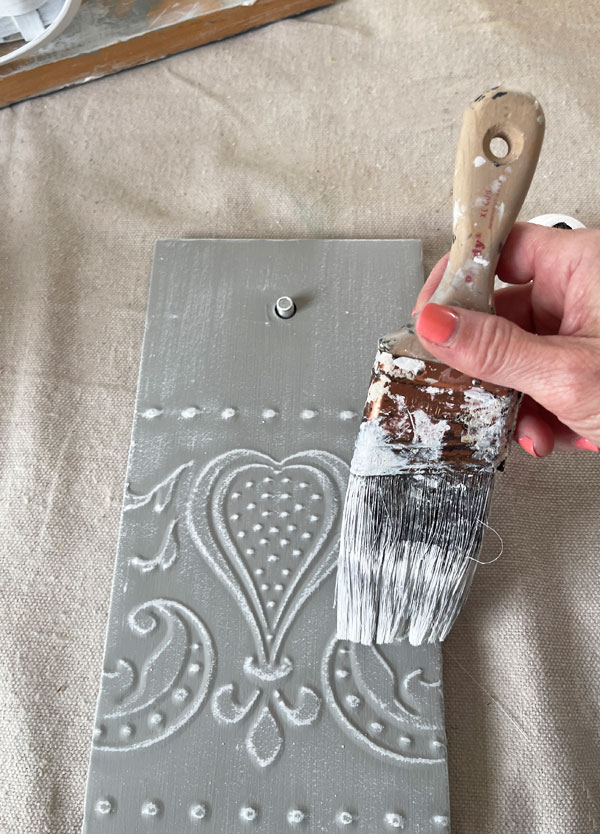
I sanded a little over that and then sealed it with Best Dang Wax in Clear. (This was metal and using a liquid sealer over metal can often pull out pink splotches. Wax won’t do that.)
Here is how this little piece looks now:
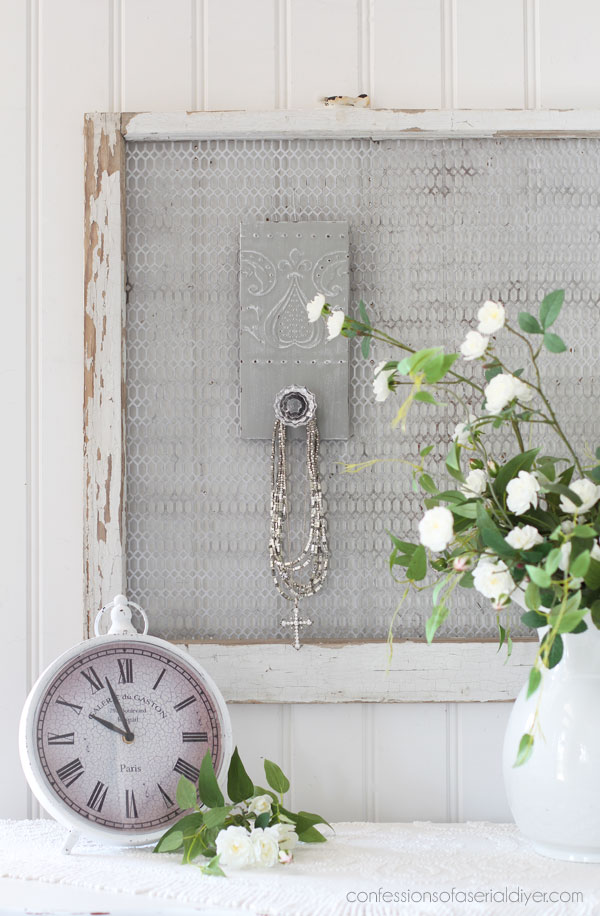
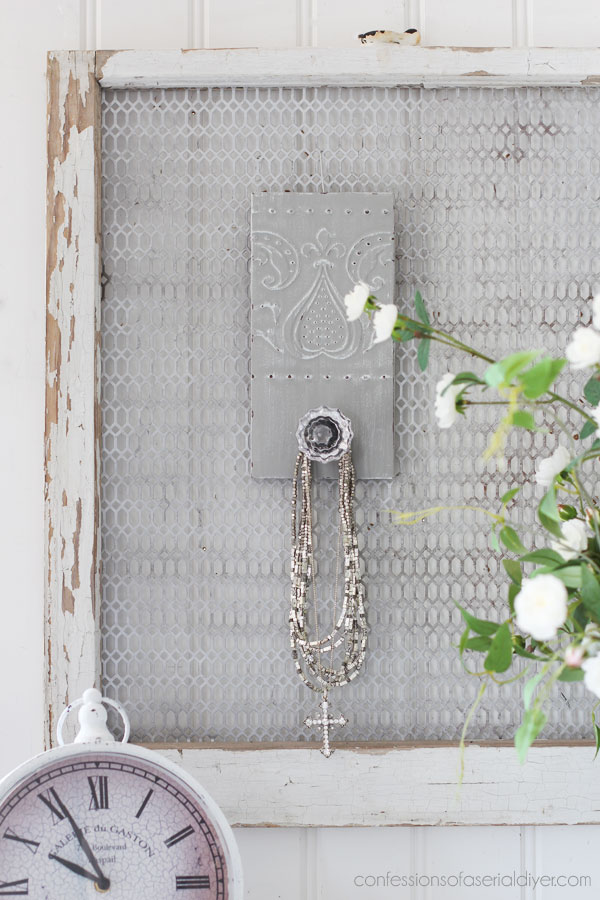
And a better view on a white background…
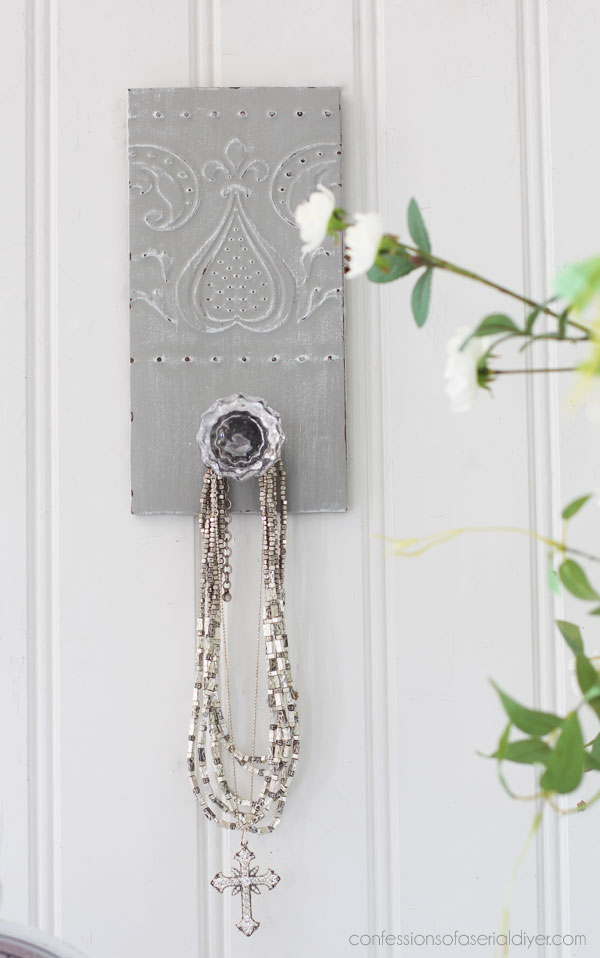
Easy!
Mini Makeover #5
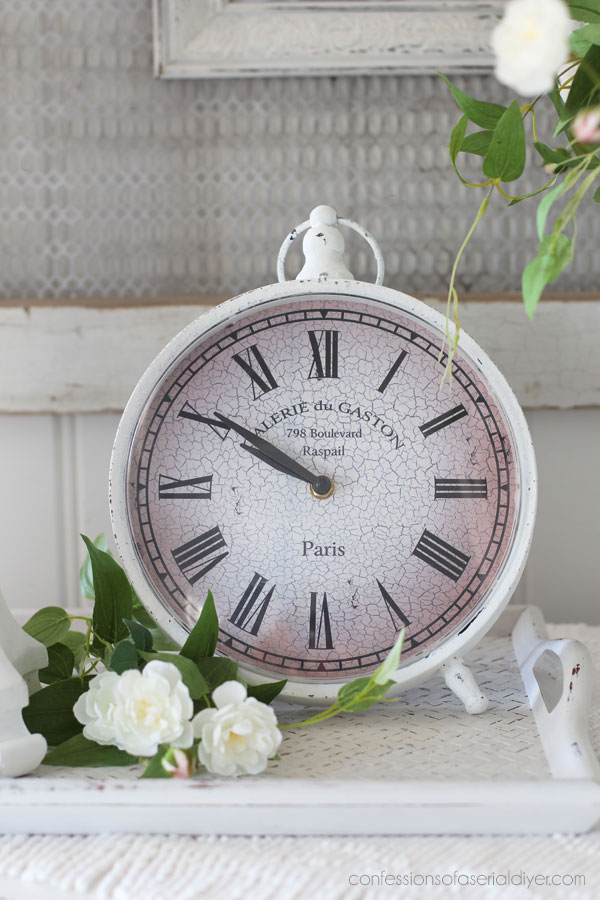
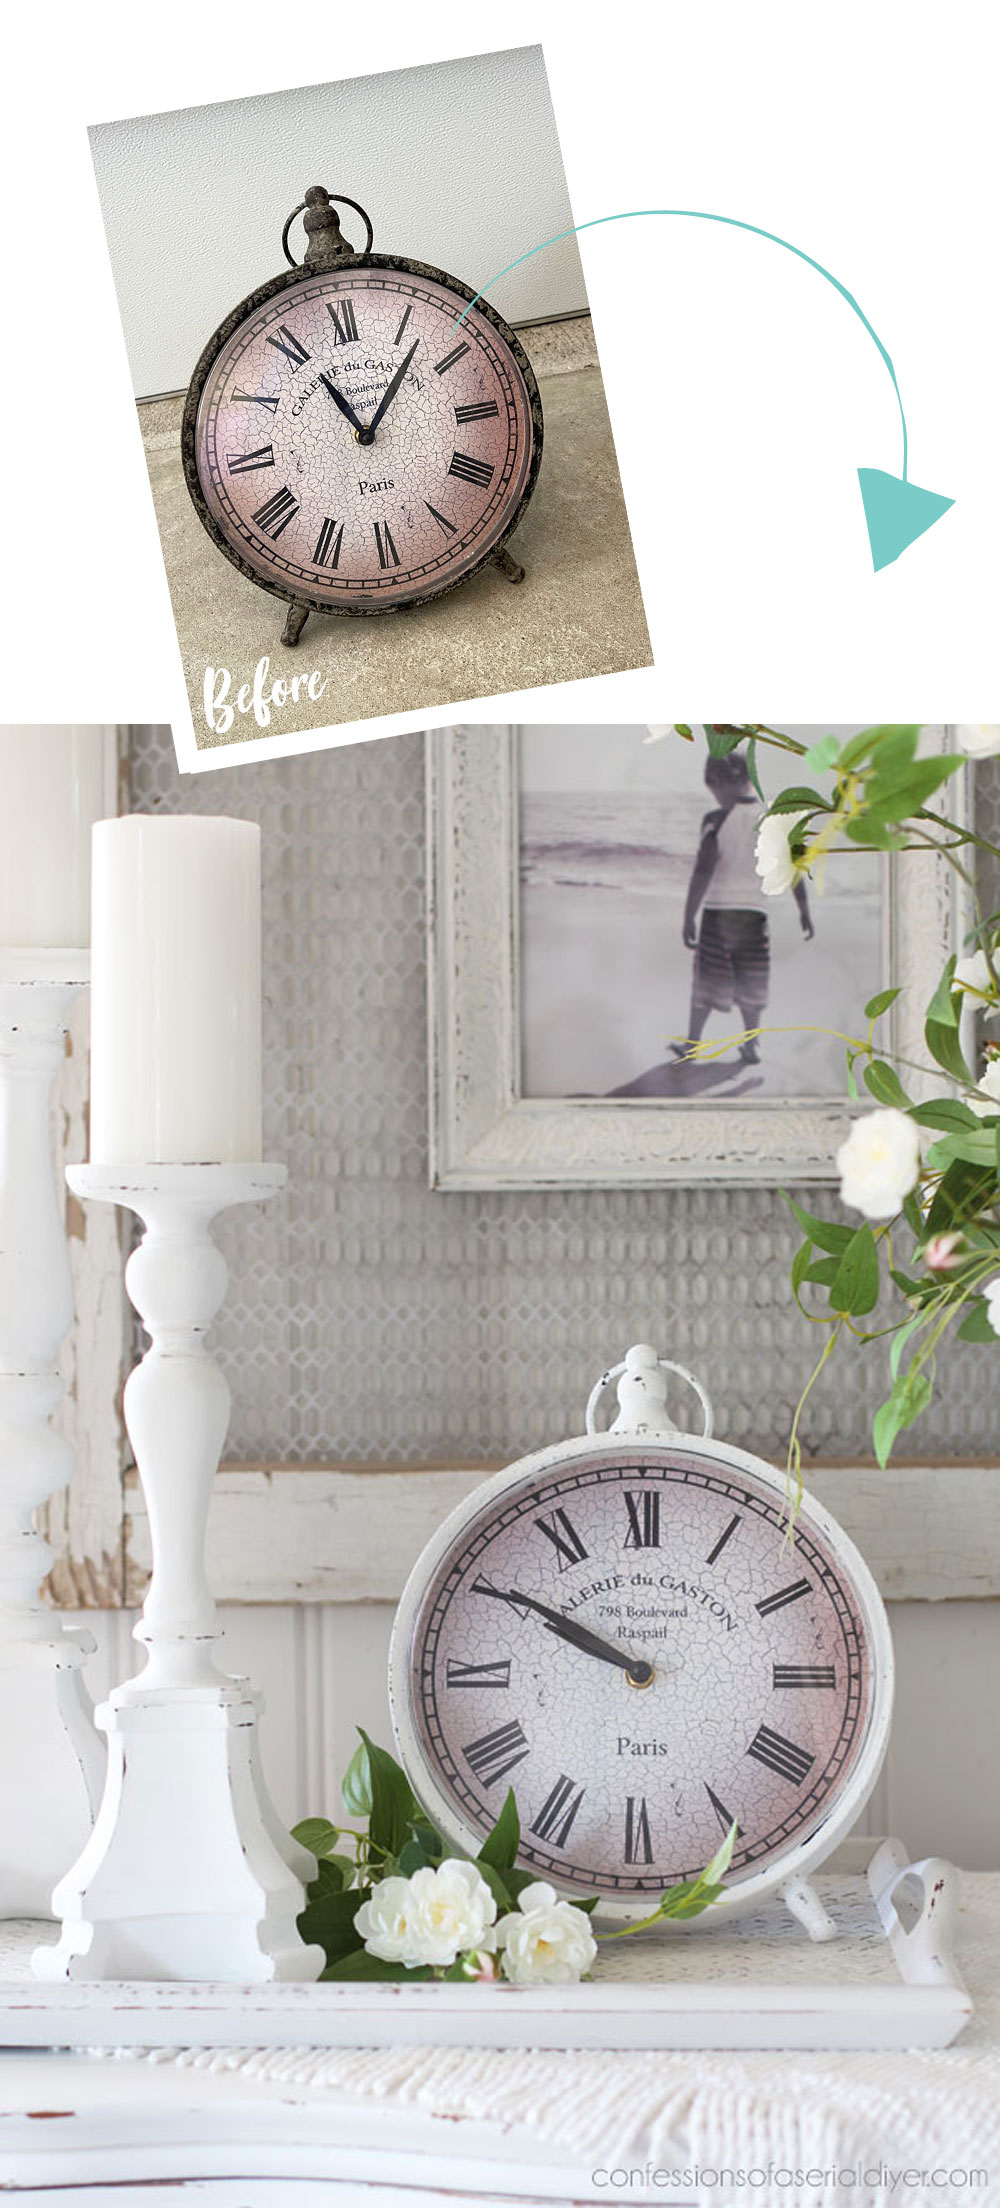
This next one was a recent find. I found this clock for $4.99:
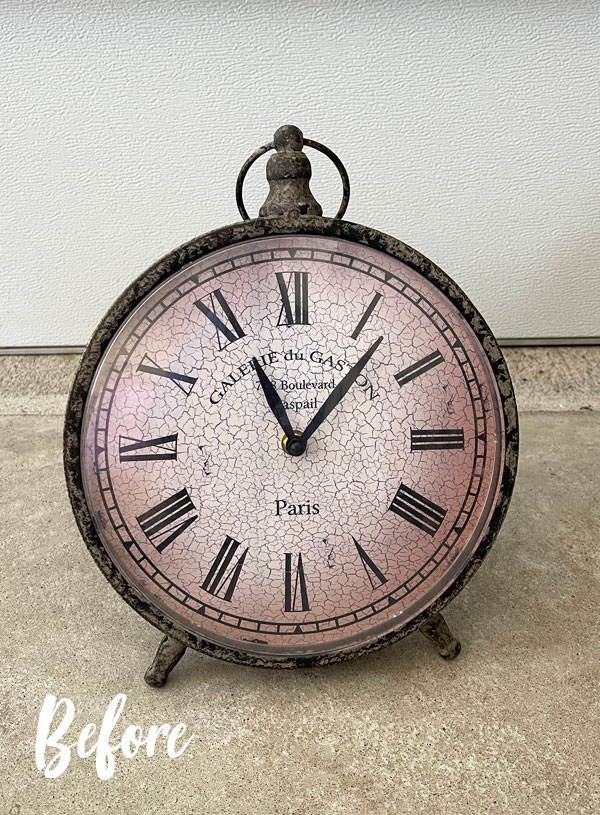
Clocks sell in my booth, so when I find one, I cross my fingers it keeps good time and throw it in the cart.
This one also got a very simple cotton makeover and sealed with Best Dang Wax in clear. I hadn’t planned to share this one since it was so simple, so I didn’t even take any progress shots:
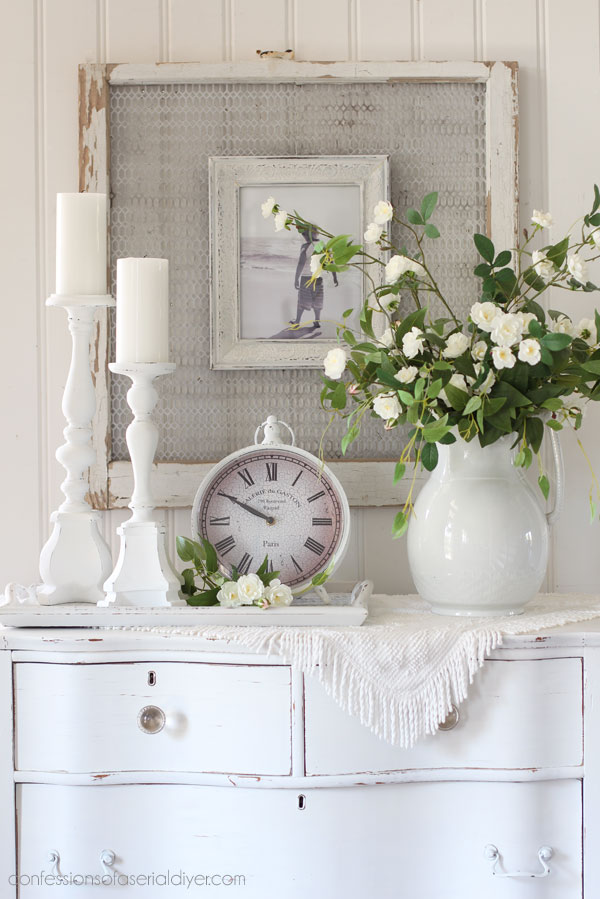
Cute, eh?
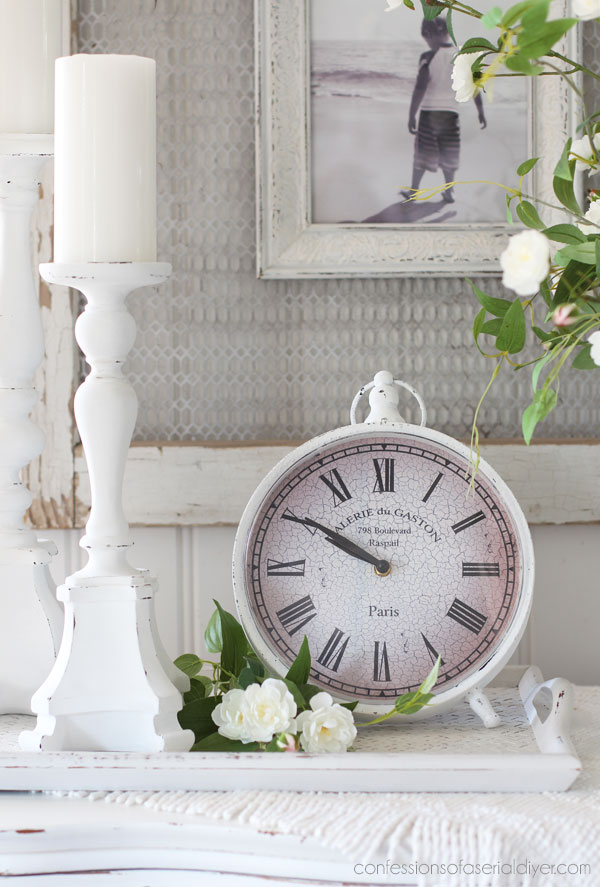
The white even makes the face of it look better!
Mini Makeover #6
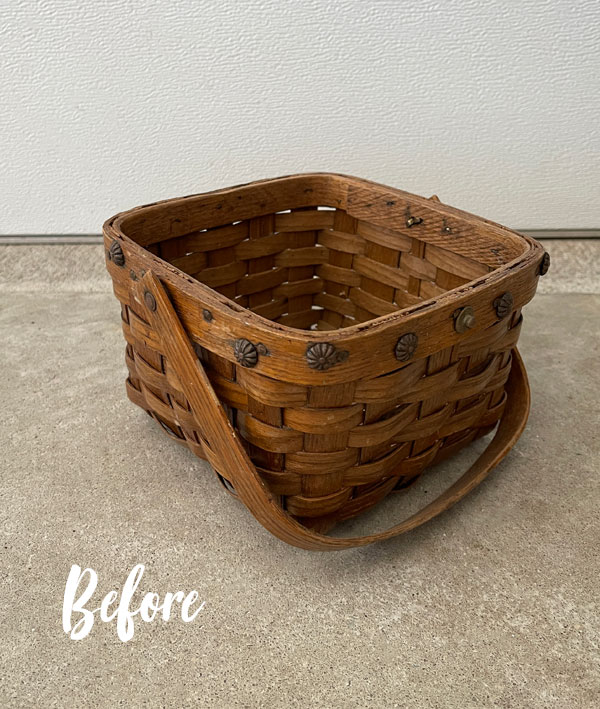
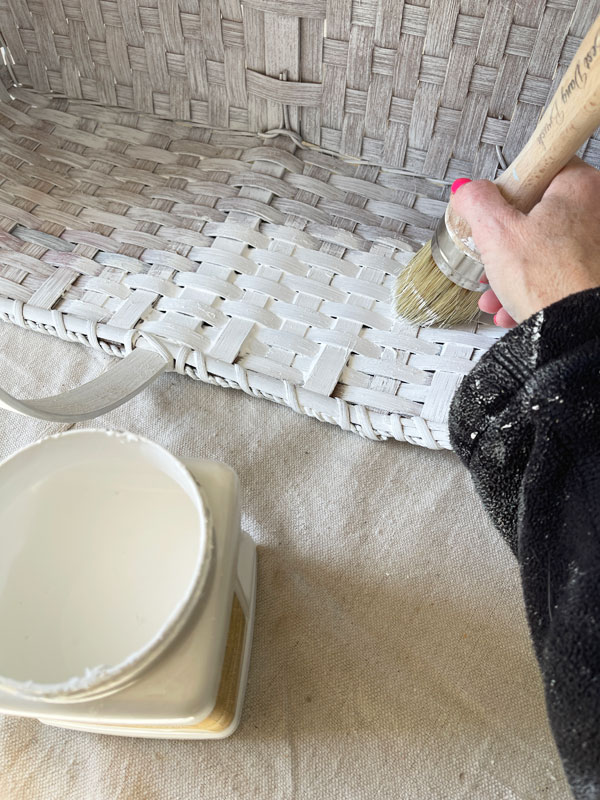
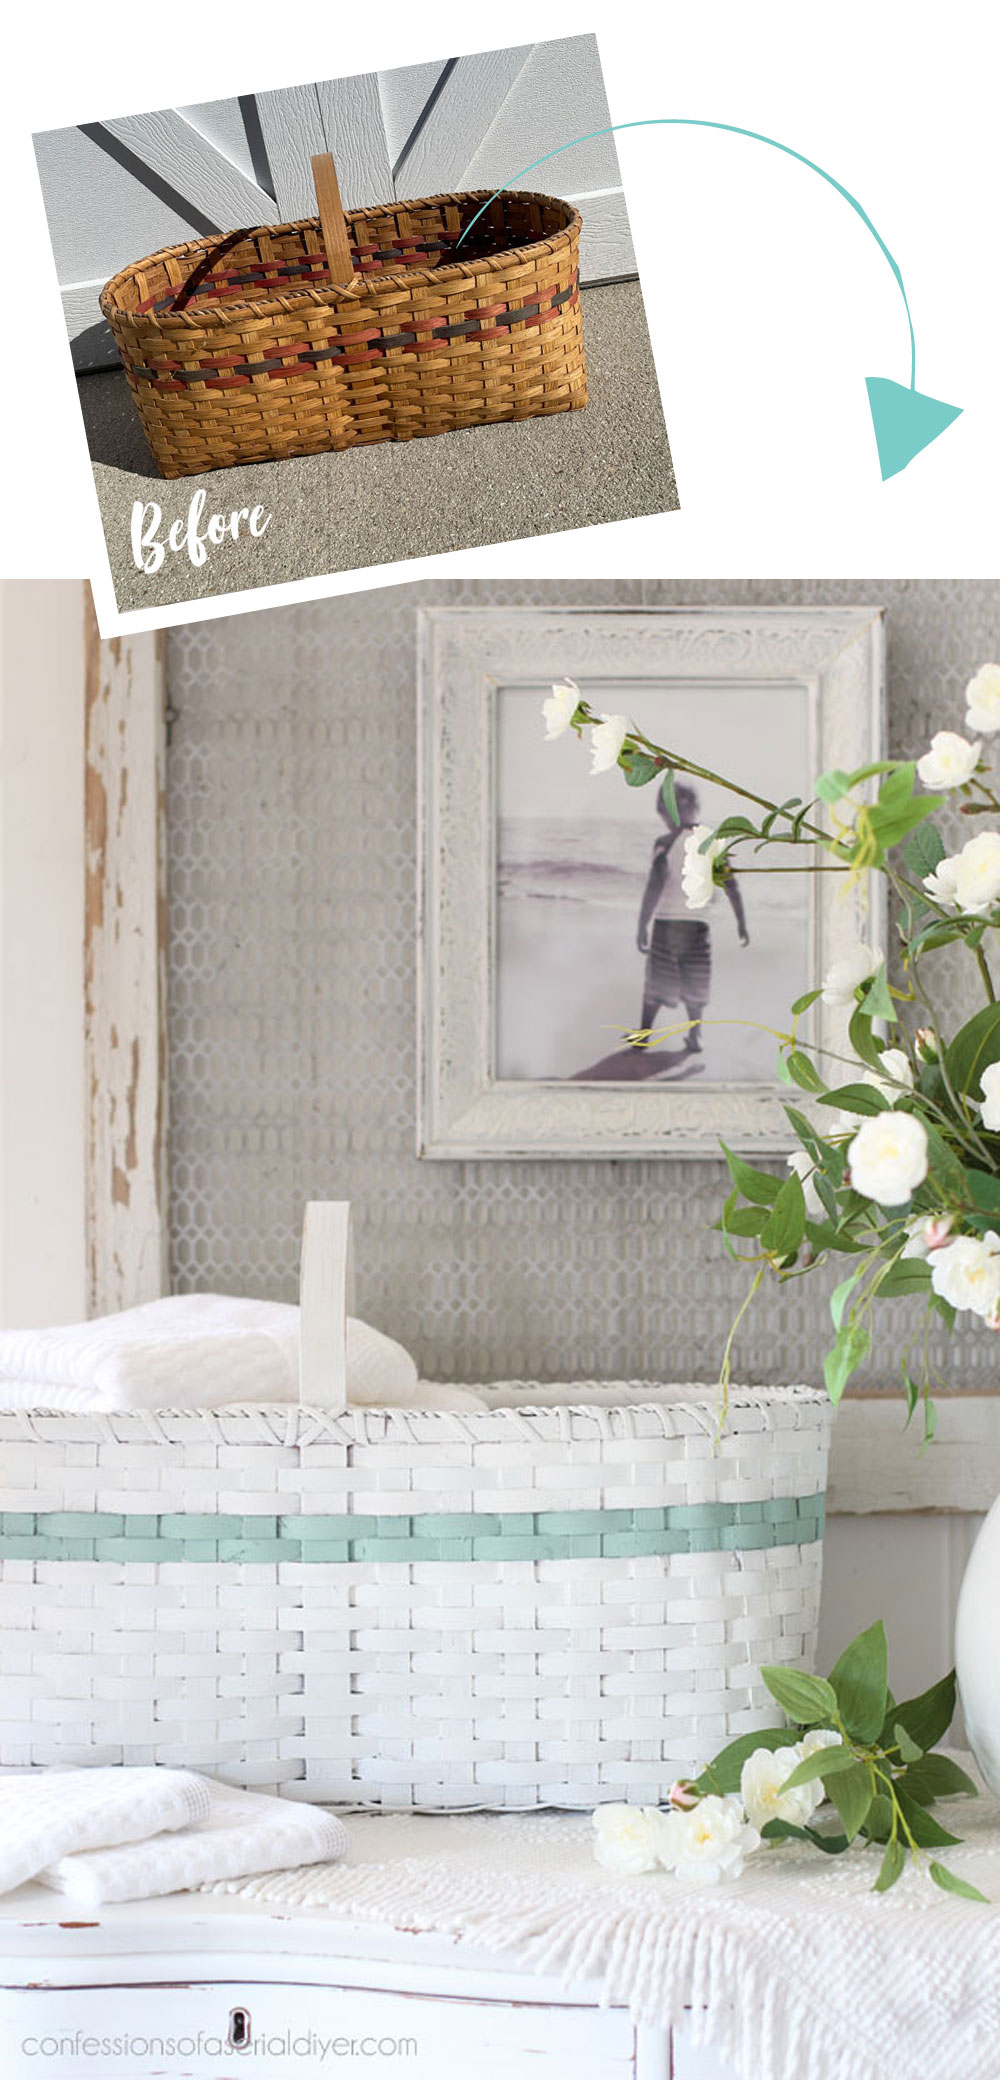
And finally, number 6 is this basket that I have had since the 1900s!
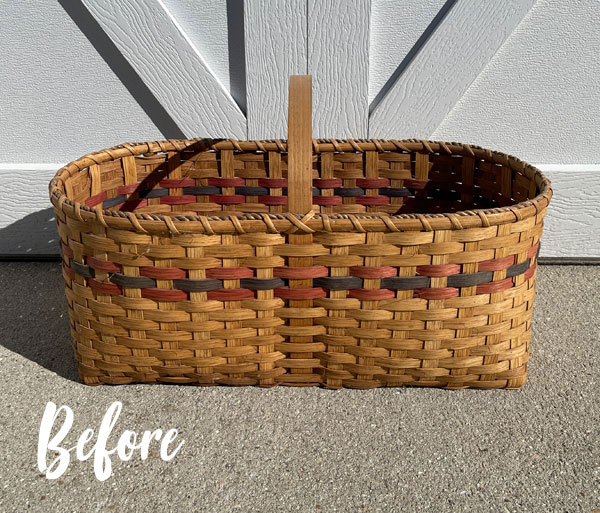
I bought it from a basket vendor at a craft market, and those were my colors! I had a patriotic thing going on at the time. It was awesome.
I had been using it to store fabric scraps, but I finally sorted them and moved them to where I have all the rest of my fabric stored, so I decided it was time to paint it.
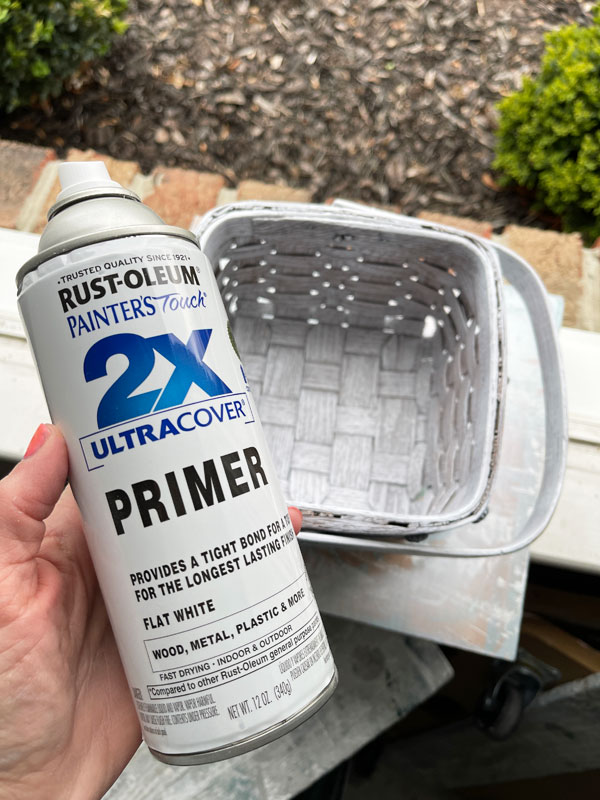
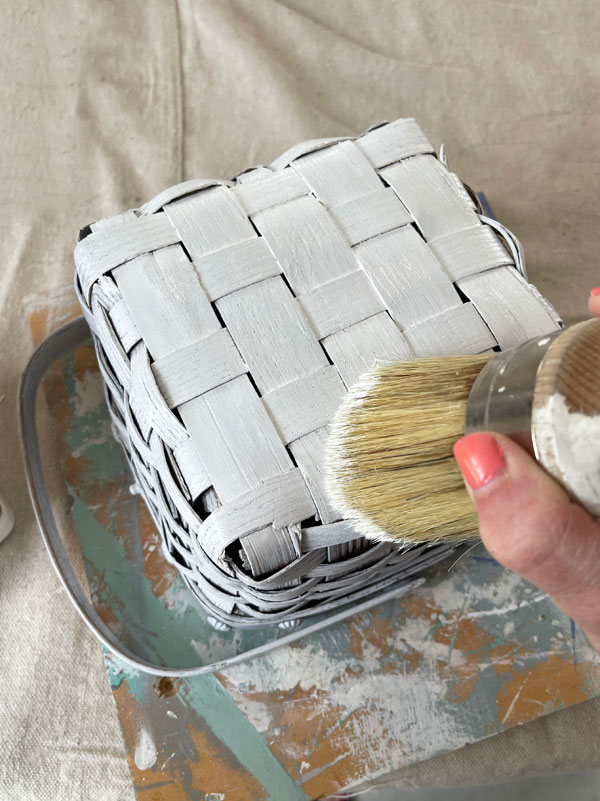
After a quick spray of Rustloeum spray primer, it too got a couple of coats of Cotton using my Best Dang Brush:
Then, I taped it off with may favorite painter’s tape, FrogTape, and added a stripe, first in Vintage Duck Egg Blue:
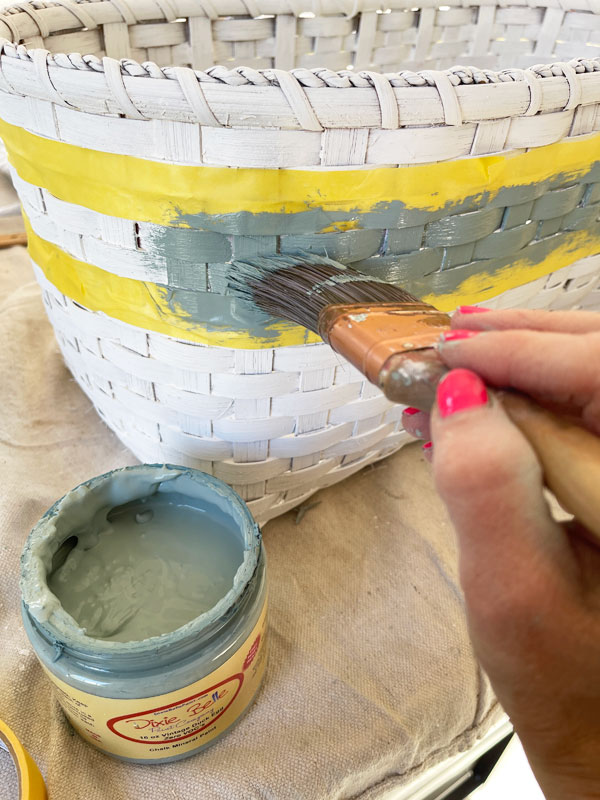
Then, I ended up going over it in Sea Glass for a bit lighter color.
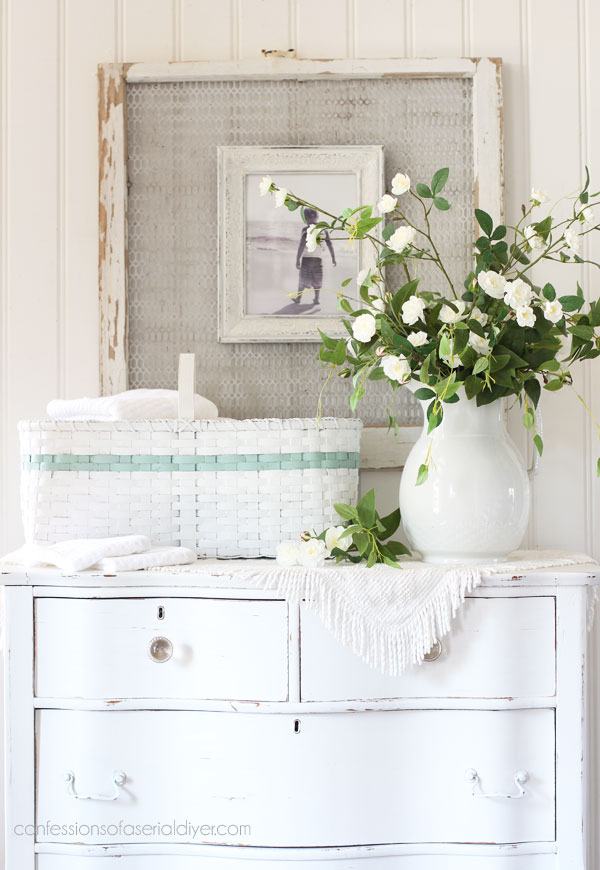
It’s so fresh and clean now!
“Why wouldn’t you just spray paint it?”
I just love the texture that chalk paint adds.
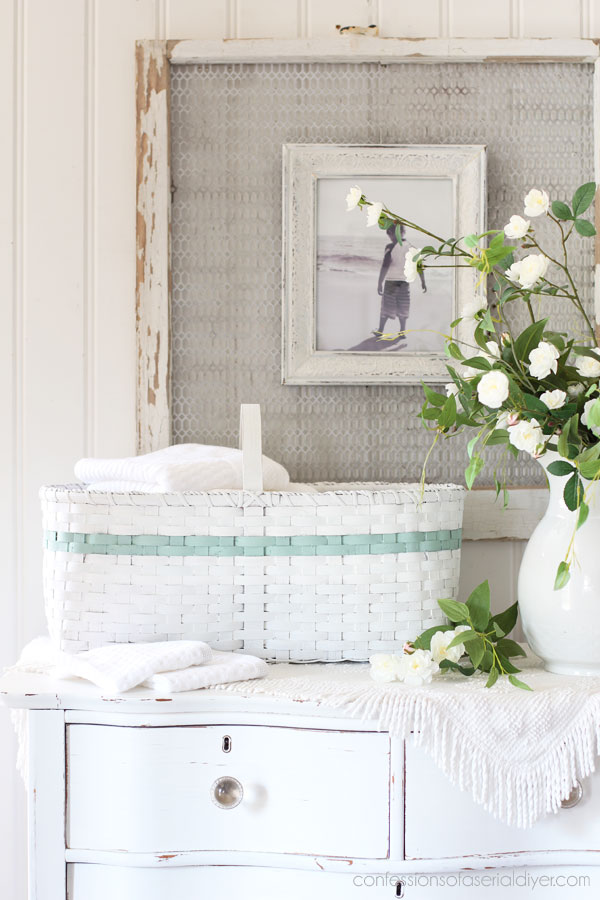
I did distress the handle, but I left the rest clean.
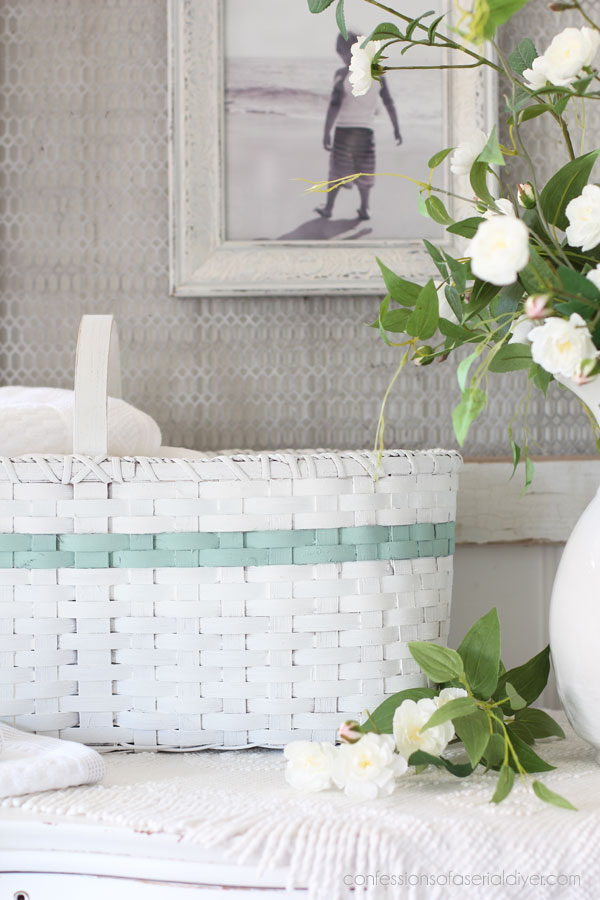
I left it unsealed as I often do with baskets. If you wanted to add a sealer, Rustoleum Clear Matte Spray would be the easiest way.
Bonus Mini Makeover
How about a bonus makeover? I already shared these with the clock above, but I picked up this pair of candlesticks for $8:
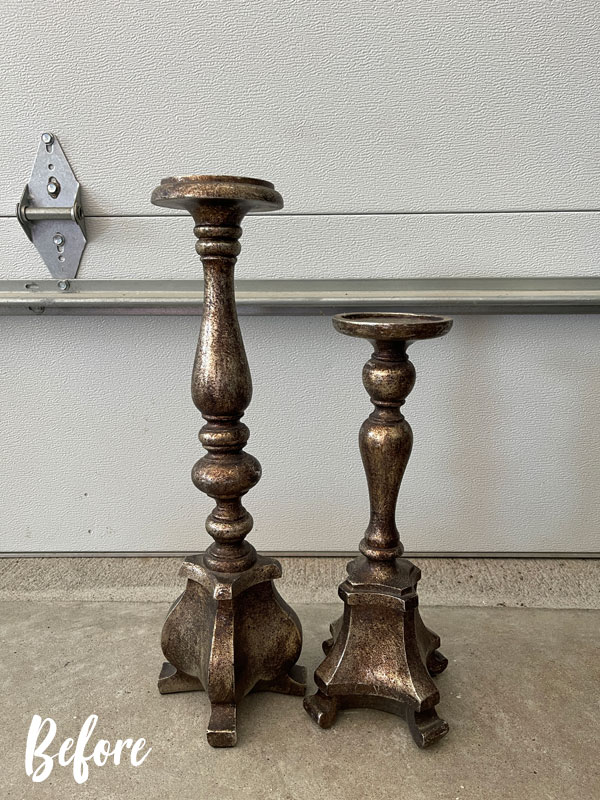
They too were painted in Cotton, but when I went to distress them, the color beneath that was coming through was way too shiny.
Instead, I opted to faux distress them with my distressing block and some dark brown Coffee Bean paint:

I just add a little paint to my block and dab it off with a paper towel. Then I drag it across my surface. If you don’t like how it looks, you can wipe it back off right away with a wet rag.
You can see a lovely video of me in my braces sharing how I do it below 🙂
How to Cheat a Distressed Finish
If you have any trouble viewing, you can see it on YouTube HERE.
It does the trick when your base color is a color you don’t want showing through.
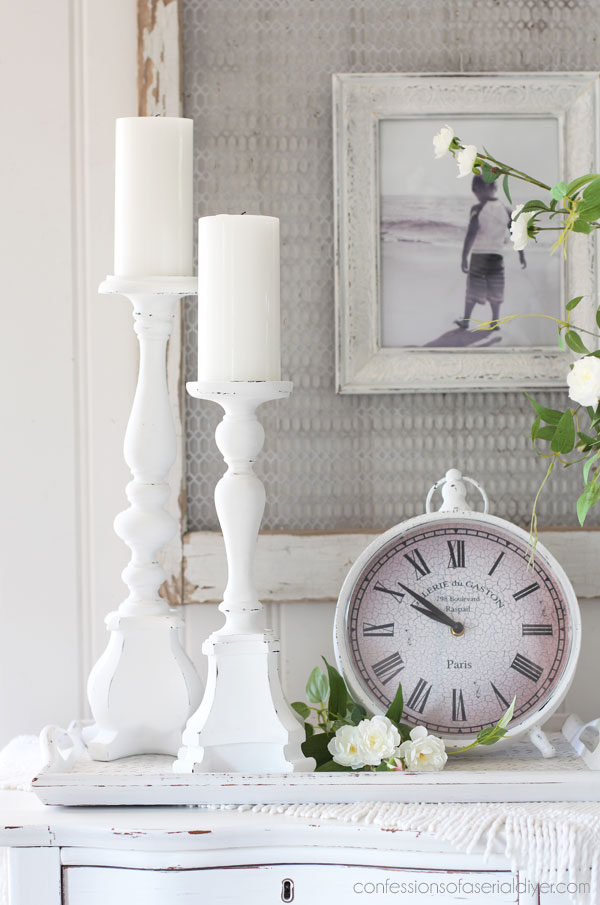
I try to hit the edges that might naturally distress over time…

And that’s six seven more mini makeovers complete!!
I always enjoy dropping off my new goodies to my booth!
And that’s three more pieces I can cross off the list!

See them all so far at the links below:
Update an Old DIY Toolbox
How to Make a Tray from a Picture Frame (Super Easy!)
Freebie Chair Makeover
Vintage Stool Makeover with Terra Clay Paint
Mini Basket Box Makeover
Mirrored Wall Shelf Makeover
Rolling Buffet Makeover
Painted Antique Side Table
Pretty in Blue Box Makeover
A Great way to Repurpose a Chair
Painting the Smalls #20 (Six mini makeovers!)
White Painted Desk with Transfer
And if you really like the smalls, here are 23 more for ya!
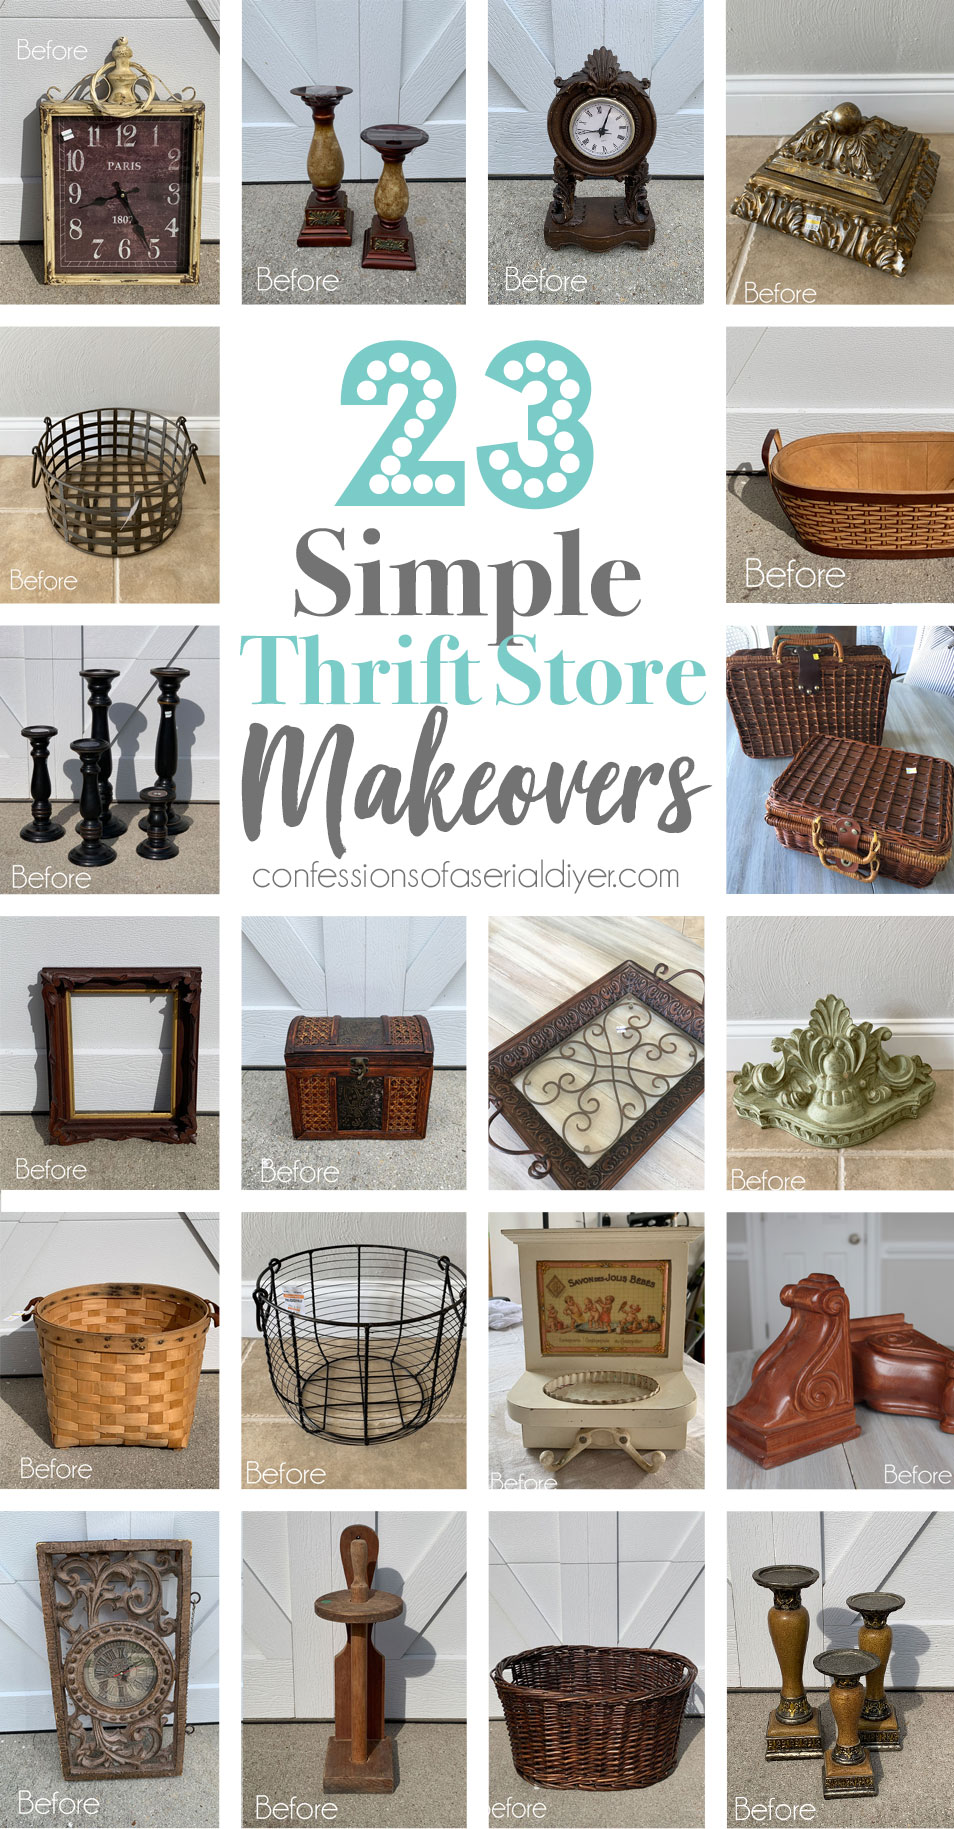
See all the before and afters in one post HERE!
Maybe this post has you looking around your own house to see what you can paint??
I’ll be back on Tuesday with my Trash-to-Treasure girls sharing what I did with this interesting piece:

I hope you’ll come by and visit!
UPDATE: See how sophisticated this little piece looks now HERE!!
XOXO,

Don’t Miss a Thing!
If you like what you see, there are several ways to follow along!
EMAIL * INSTAGRAM * FACEBOOK * PINTEREST


Get FREE SHIPPING on all orders over $50. No code needed at checkout! Orders under $50 always enjoy $8 flat rate shipping! Most orders ship same or next business day!


Mary Kaiser says
Oh how I love the smalls, and the white! Smalls and white go together so well! Oh how much I love the basket with the flower arrangement, it is so cute and fresh! Your booth will come to life with the smalls added to it. I hope you have a good spring break with your family, and I will look forward to your return and what you do with that intresting table. Have a good time!
Christy says
Thank you, Mary! I love the ease of the smalls…lots of small wins at once! We’re really looking forward to our trip and looks like good weather so far yay! Have a fantastic weekend! XOXO
Vicki Lombar says
Hi Christy! I love the smalls…. But actually pretty much love all your projects!! Learned a new trick today – the very dry brush with Seaglass on black metal. Can’t wait to try! Wishing you and your family a relaxing blessed Easter!!
Christy says
Thank you so much, Vicki! I rally appreciate that! The dry brush of Sea Glass works so well on all those black wire baskets, etc too! Happy Easter! XOXO
Janice Holt says
I always love the smalls (not that I don’t all the others). Great job but I love that little picture of one of the boys (think Jack but could be Brennan–hope I spelled that right). Such a sweet picture and oh how fast they grow up. Have a great vacation and hope the weather is good.
Christy says
Aww thank you, Janice! The smalls are fun for me too for sure…just simple and easy! That is Brennan in the photo. He is almost 13 now officially taller than me lol! (And yes, you spelled it right yay!) Looks like the weather is lovely where we’re going so far. Have a great weekend! XOXO
Cecilia says
All of the pieces look so much nicer now. The clock face actually looks clean instead of dirty…amazing how just painting the body of it could do that. It’s always fun to see how those small pieces transform with just a simple makeover. Hope you have a very restful and enjoyable vacation. ❤️
Cecilia
Christy says
Thank you, Cecilia! Right? The lighter paint on that clock did wonders. I’ll try not to think about you guys too much while I’m away, but I know that will be impossible lol! XOXO
Kathy says
Christy – love your smalls. Since I am new to updating FB Marketplace finds, I realize working on smaller items is a good way to learn instead of making mistakes with larger items. All the information you provide is extremely jelpful!! Thank you so much!!!!
Christy says
You are so welcome, Kathy! Thank you! Absolutely…getting your practice in with those smaller pieces is a great idea! XOXO
Susan M Van Dyke says
LOVE the smalls! Got some great ideas and inspiration.
Christy says
Oh awesome! Thank you, Susan! XOXO
Cyndi says
Thanks, Christy! These were a lot of fun to see, and your tips and tricks are always helpful. I am keeping a running list of those to refer back to when working on my own things. 🙂 Do you have a video on your website of the distressing block “in action”? I’ve always thought you just touched the surface with it, but here you mention dragging it across.
Christy says
You’re welcome, Cyndi! I’m so glad you enjoyed them! I do have a video of the block and you can see that on YouTube here: https://youtu.be/60jnrQIA6-M It’s a lovely one where I still had my braces ha ha! XOXO
Michele M. says
WOW!!! You breathed new life into so many dated pieces – what a great job some paint can do! I think my fav is the cute door knob wall hanger –
really love that driftwood color against the white. Well done for those smalls, Christy. Have a great vacay and very happy Easter.
Christy says
Thank you, Michele! Would you believe that when dropped that off at my booth yesterday, I had it propped up on top of a bookcase and I later bumped it, knocking it over and the glass knob broke off? Dang! I’m going to put my trusty E6000 glue to work on it lol! Happy Easter!! XOXO
Jackie C says
These quick small makeovers are SO awesome. They look fantastic. I love these makeovers. I love the tip about “liquid sealer over metal,” I had no idea! Quick story… I had a side gig working in a thrift store. Unpacking donations, I found 2 very small metal urns with screw tops. Maybe 2 or 3 inches tall, yep, filled with someone’s loved one. We didn’t sell them. Not sure what the owner did with them. I didn’t ask. ????
Christy says
Thank you so much, Jackie! Oh no!! Who would donate those?? That is crazy, but kind of funny, but still crazy lol! XOXO
Gayle says
No way you are old enough to have a basket since the 1900’s! Lol! Looks like what my kids call one of my infamous typos!
I actually have a question about the metal “basket”. I recently started working on a two tier storage piece that is almost identical in fabrication. When I attempted to prime it with white primer , the primer just kind of “rolled” off the metal in places. I had prescrubbed it with a mild dawn solution and rinsed it well. Any suggestions as to what I might have done wrong?
Christy says
Ha ha true story…I got it in 1995 or so. My kids call anything that happened before 2000, the 1900s lol. As for the metal basket, it sounds like it had something on it that was resisting the primer. I wonder if you sanded it lightly in those areas if it would take the primer better?
Sue says
I love your smalls, I could hear the ocean breeze just looking at them!
I am working on smalls for my new classroom next school year, thank you for the inspiration. Have a lovely Easter!
Christy says
Thanks so much, Sue! Ooh I bet you could find some really cute stuff for a classroom. Enjoy and Happy Easter to you as well! XOXO
Lizzy says
These are so pretty! It’s amazing what a little paint can do when you choose the right colors.
Christy says
Thanks, Lizzy! Right? Magic!! XOXO
Shirley McGovern says
I just love your work! You make everything look so effortless, and I know it’s not but the way you stage everything is awesome and just makes every piece pop! Have a great vacation and relax!
Christy says
Aww I appreciate that so much, Shirley, thank you! I really enjoy the staging part…it does bring each piece to life! Thank you!! XOXO
Addie says
Your “URN thing” would look great on a fence post or gate post. Could be with a brick pile up post!!! It would be great!!! I have been looking for matching ones. Very old school cottage-y.
Happy Blessed Easter!!!! HE has Risen indeed!!!……………/add
Christy says
Ooh yes, it would!! I just love anything ornate like that! Thank you, Addie! Easter blessings to you, my friend! XOXO
Rebecca says
Everything is fabulous done. GORGEOUS!
Christy says
Aww thank you, Rebecca! XOXO
Bev says
I love the smalls! You just inspire me so much- especially this time of year when we northerners can finally get outside to do fun stuff. Thank you! Happy Easter
Christy says
I love that so much, Bev! Thank you! Glad to hear it is starting to warm up up there. Happy Easter! XOXO
Heidy says
Hi Christy,
I love the vase urn, it’s so beautiful!
I have a similar larger one I keep outside but not as pretty and no top/lid. May I ask what it is made of?
I also love those candlestick holders. Also curious what they are made of. And that basket so simple but so beautiful with the stripe gives it personality in a way. I love all you work as usual and always talk about your work to friends.
Wishing you and yours a wonderful Easter Holiday!❤️
Heidy
Christy says
I appreciate that so much, Heidy, thank you! I’m not too sure what the urn is made out of. It’s quite heavy though. I believe the candlesticks are some sort of resin. Again, thank you! XOXO
Marietta Walker says
Sometimes, I do not even know what to say! You took an ugly urn and an ugly basket and made them beautiful. You make EVERYTHING beautiful!!!
Christy says
You are always the sweetest, Marietta, thank you so much, my friend! I have to give all the credit to the paint… magical lol! Have a great week! XOXO