Hello sweet friends! I’m back today with an upcycled picnic basket and a quick NO SEW liner tutorial, but it was almost a big fat FAIL!
You’ll see what I mean in a bit.
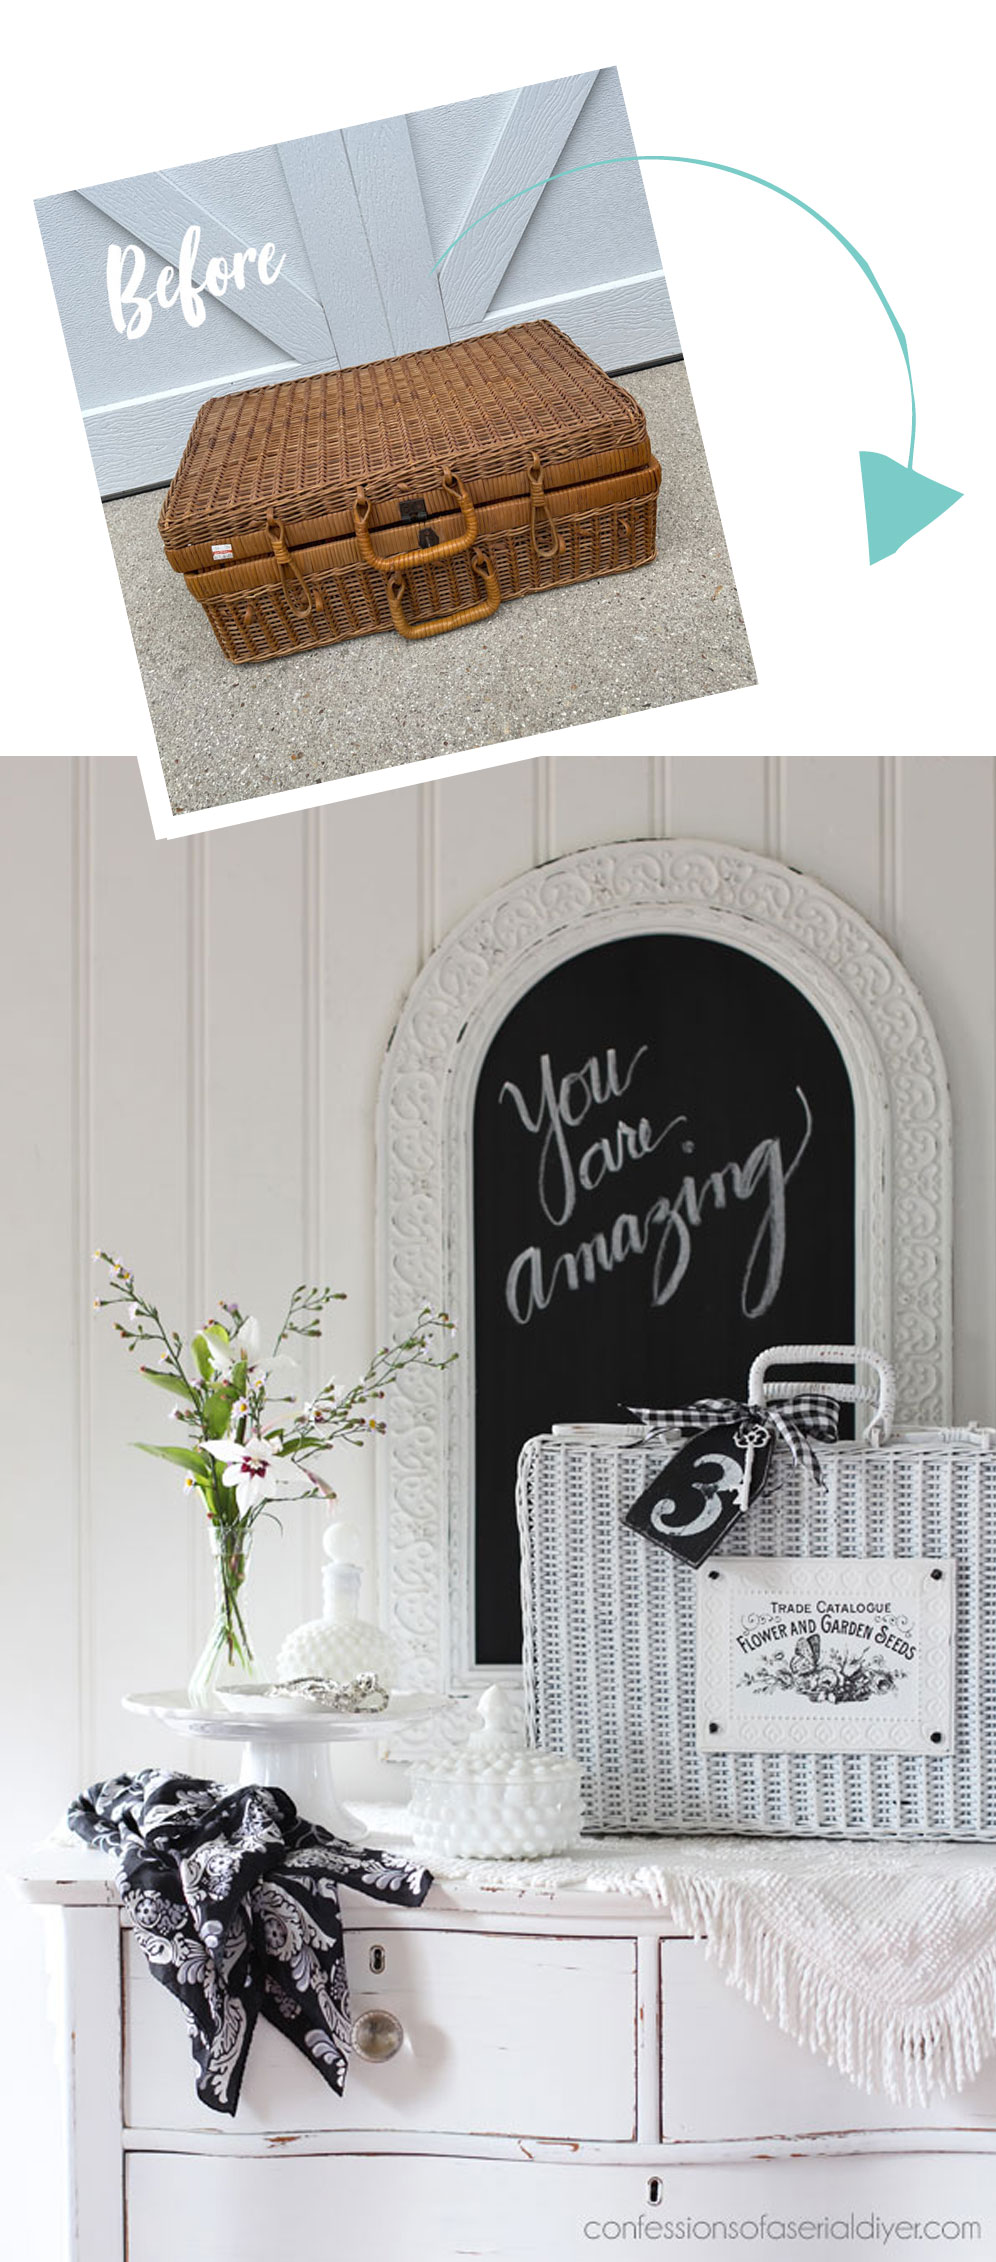
Here is said picnic basket:
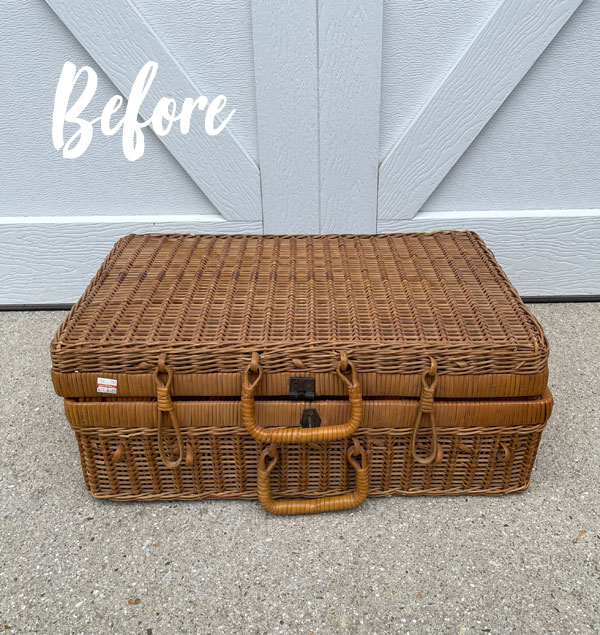
It was $6.25 and all orange tags were half off, so I got it for just over $3.
I had an idea for this one and set out to make my vision come to life.
I’ve included a few affiliate links so you can find the products I love.
Spray Prime
I started with a good coat of my favorite spray primer:
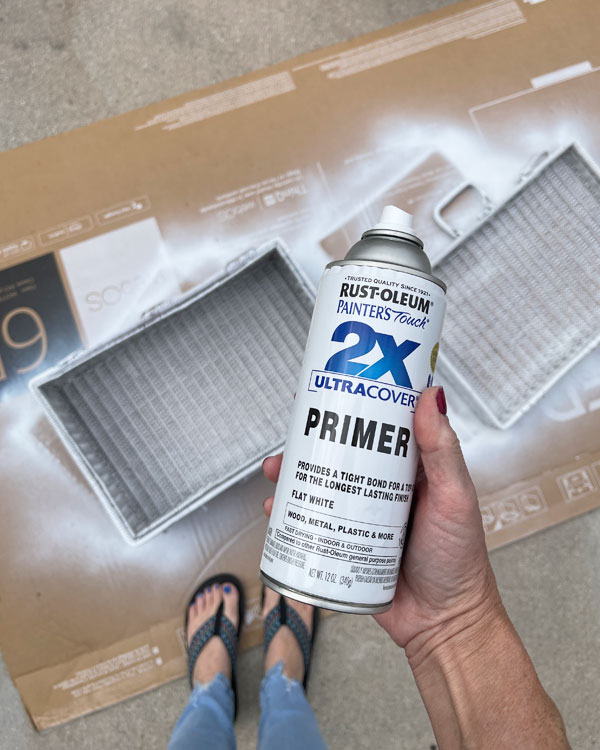
(The lid and the base were rigged with wire holding them together, so I removed that and was able to separate them.)
Chalk paint
Once I had a good coat of primer on, I followed up with chalk paint in Cotton. The large flat head of the Best Dang Brush is fantastic for painting baskets quickly!
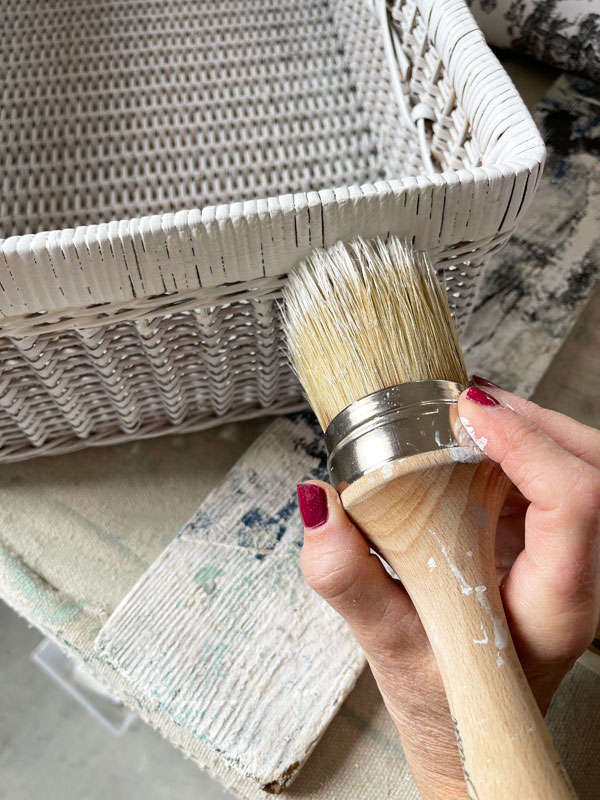
Since this brush has natural bristles, it will be easier to clean if you rinse out the paint as soon as you’re done painting.
Then, I started bringing my vision to life by adding a row of black stripes using FrogTape to tape them off:
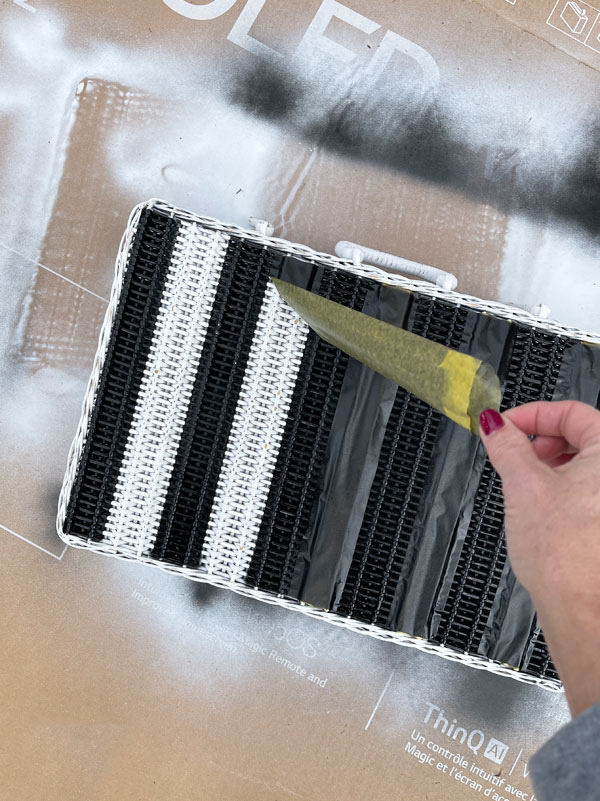
Perfect! So far, so good!
Then, I added stripes going the opposite direction:
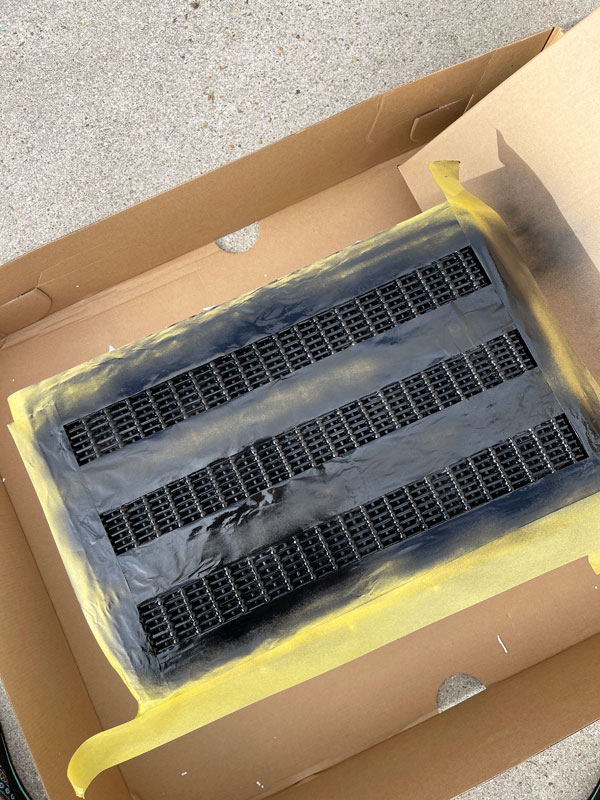
I forgot to get a picture because when I removed the tape, it didn’t look quite like what I was going for.
So, I used up a bunch of tape again and added some white squares back:
And, this is what I got:
If you are questioning how this is going to work out in the end, SO WAS I!!
Ha ha! I was going for a buffalo check…not a checkerboard!
FAIL!
Now I could have just shown y’all the first two steps and left out the hideous checkerboard reveal, but this was way more fun! And that is just how projects go sometimes!
I’m ten years into this makeover thing and I still have fails! But, I keep going!
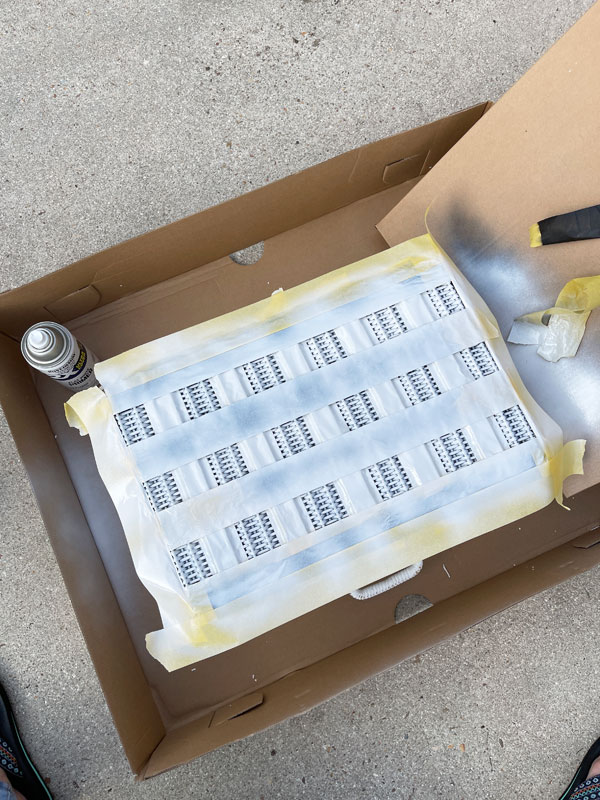
The save
I had no choice but to ditch the black altogether, and that is exactly what I did…
Good bye checkerboard!

After applying this coat of white primer, I added another coat of chalk paint over it and called it a day!
(I could have used spray paint instead of brushing on chalk paint, but I much prefer the texture that chalk paint adds.)
Then I started working on how I could embellish it a bit.
I found a little sign that I used on this Spring Floral Basket several years ago. I ended up doing something else with the basket, so I’ve had this sign just hanging around.
I painted it all white and added a mini transfer from one of my favorite transfers, the Classic Vintage Labels transfer set:
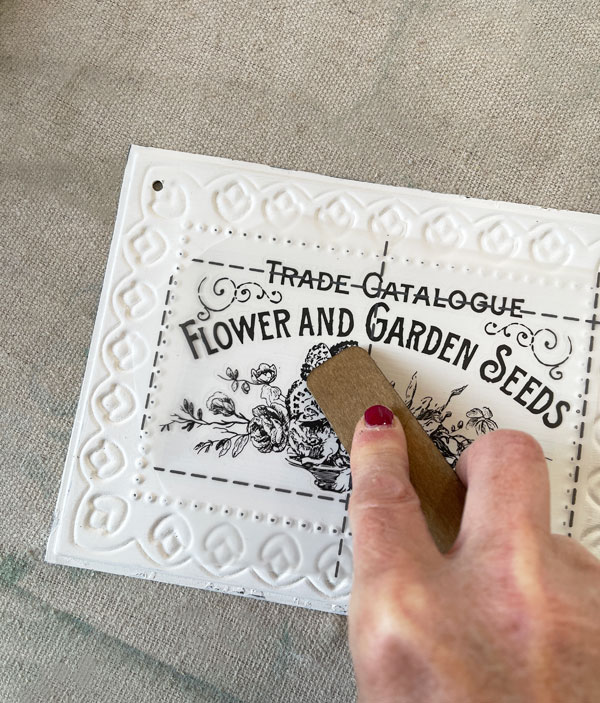
That and a cute tag I made from wood scraps gave this picnic basket a fresh new feel!
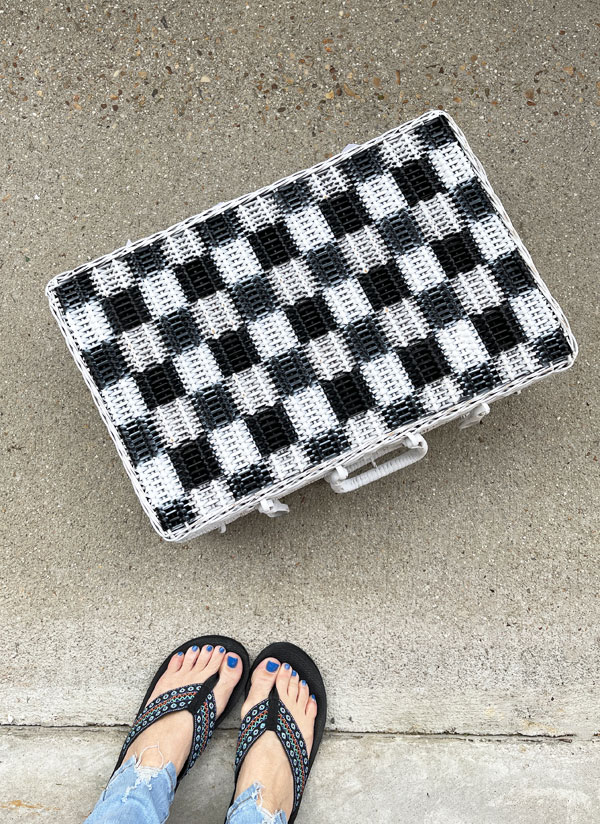
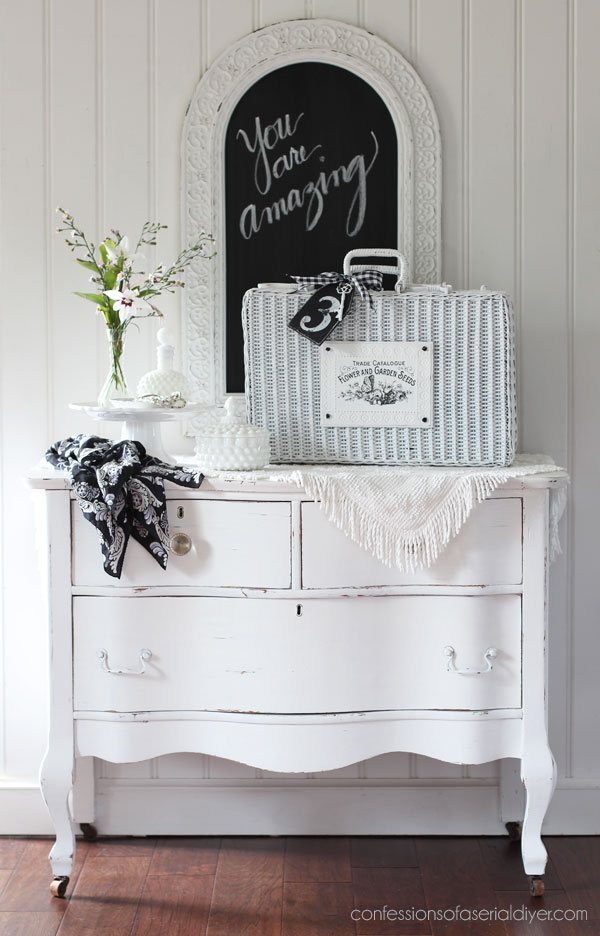
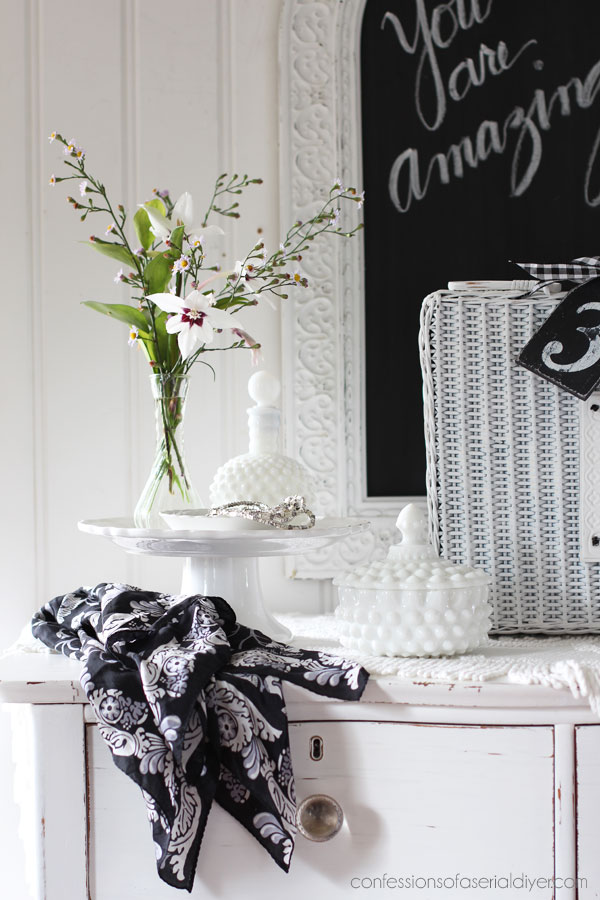
The After
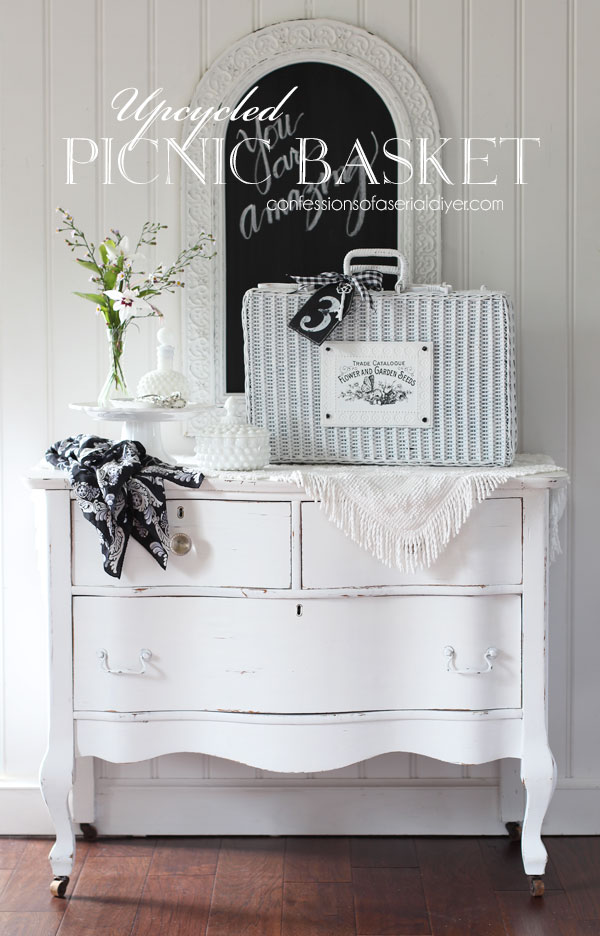
Kind of charming right?
I actually liked how the first set of black stripes looked, but I’m always game for a simple white basket.
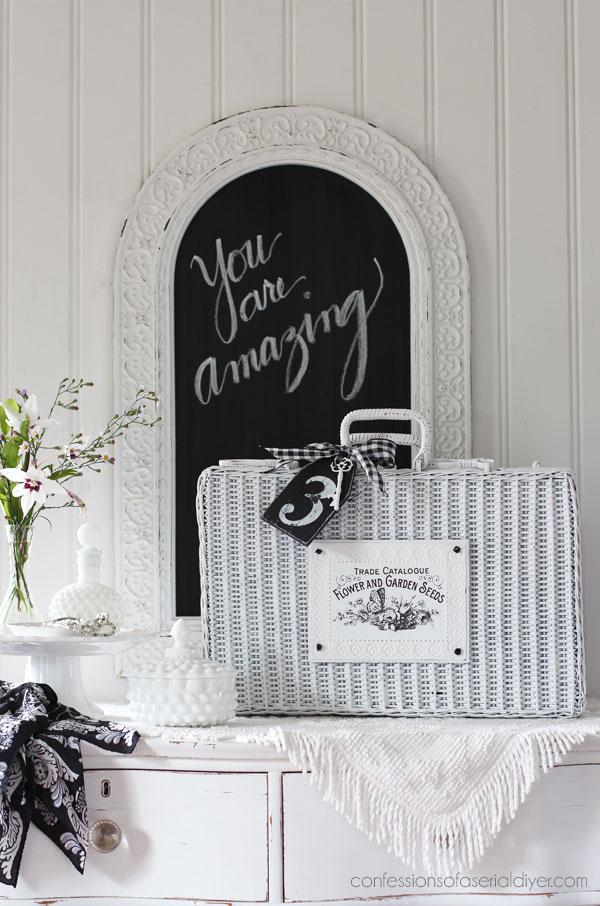
This little sign with the transfer added a little extra something to dress up this otherwise plain basket…

I get asked often how I attach my signs. You can see more details on that in THIS POST. (There are two basket makeovers in that post!)
Baskets like this are fantastic to use as extra storage that you can keep right out in the open!
How about that fun tag?
I cut it from scraps and gave it a base of black spray paint. Then I added the number using this stencil.
A good sanding to distress it and some clear wax to seal and it was ready to go.
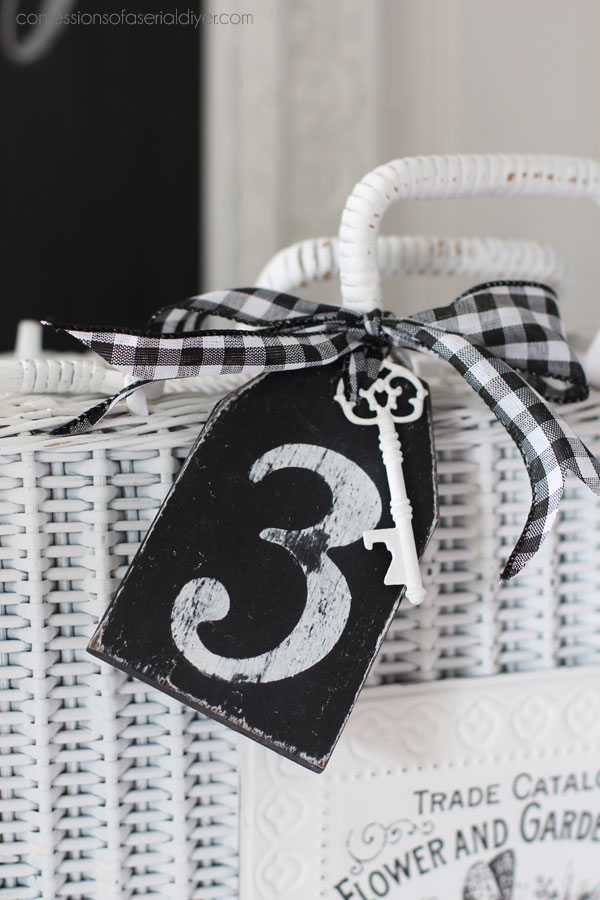
The little key started out silver and came in the mail with an ad from a local realtor. I immediately thought Ooh! I can use that on a basket!
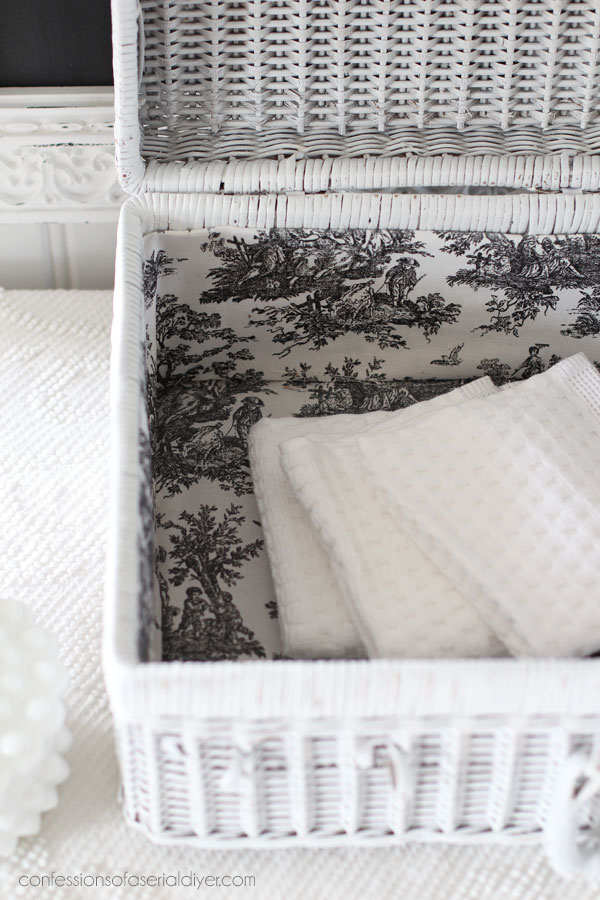
The Inside
The fabric I used inside was my inspiration for the black and white color theme. I found some black and white toile in my stash that I knew I wanted to use to line the inside:
No Sew Basket Liner
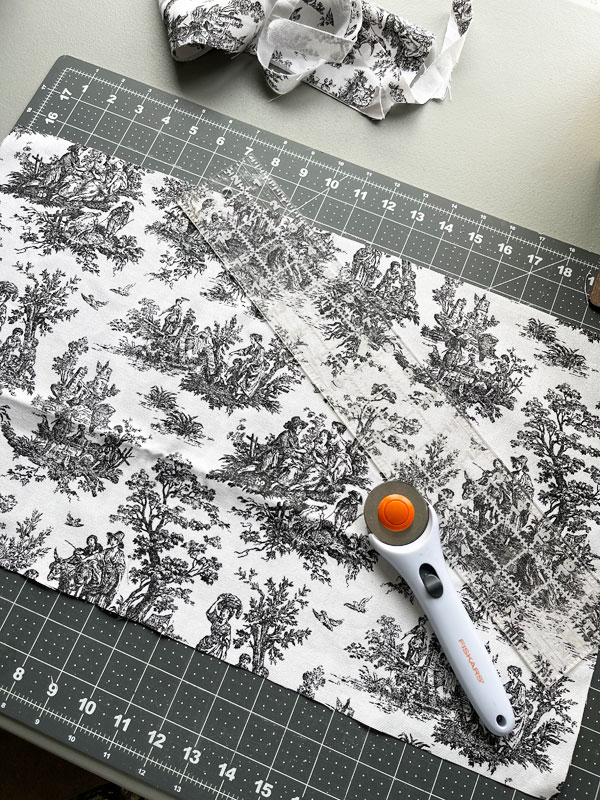
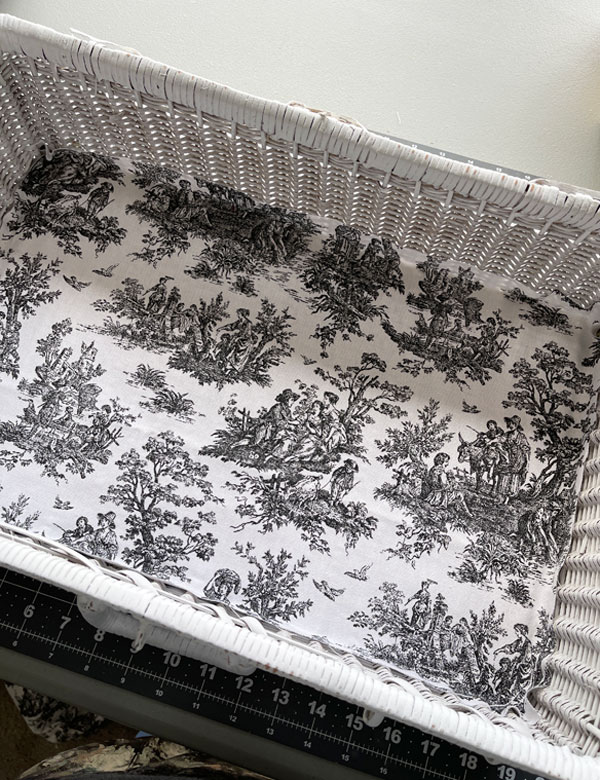
To make a no sew basket liner, I used my rotary cutting set to cut a piece of fabric just about a half inch or so larger than the bottom of the basket all the way around:
I used my hot glue gun to glue it in place by running a bead of glue all around the outside edge. You can see here that the fabric comes up the sides just a bit…
Then I cut the piece for the sides about and inch or so wider than the width of the side…
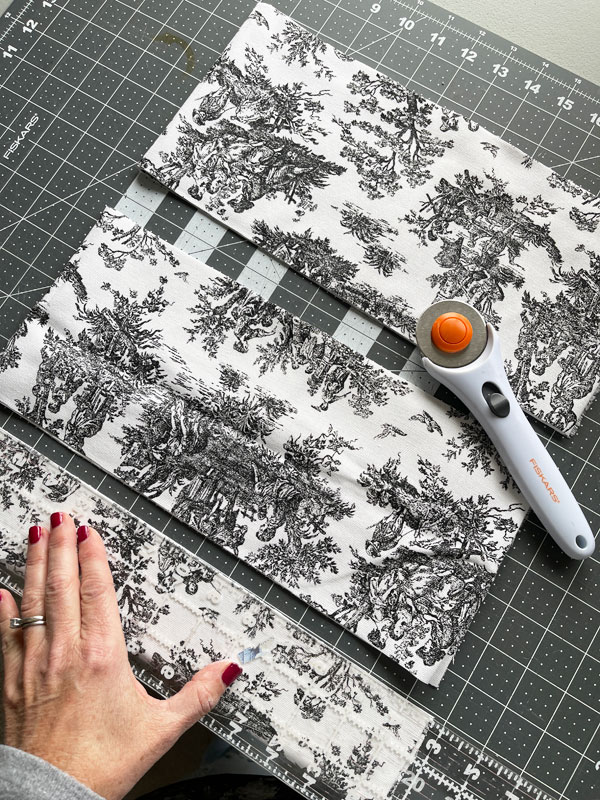
The rotary cutter and straight edge make perfectly straight cuts with minimal fraying.
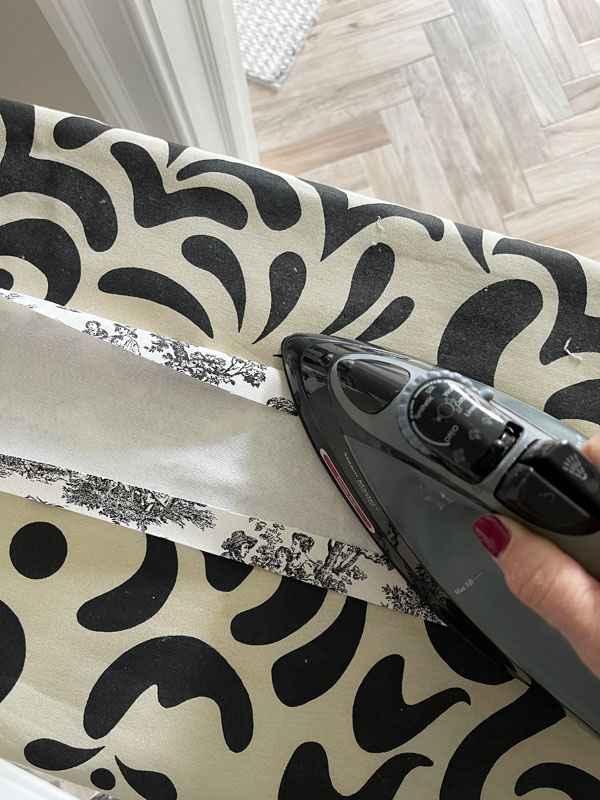
I folded the fabric over at the top and the bottom and ironed it to create nice finished edges on the top and bottom…
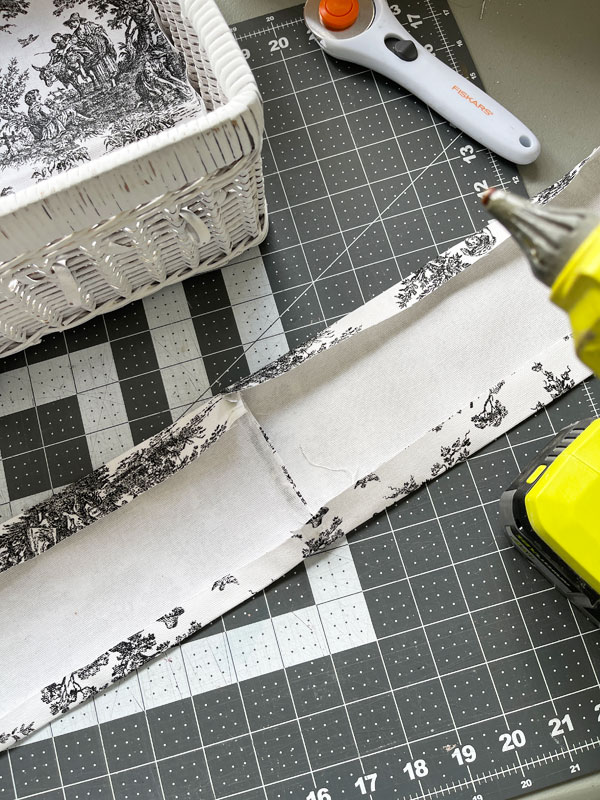
If your fabric needs to be pieced together to make it long enough to go all the way around in one piece, you can use hot glue to connect two ends together:
Then, I just glued it right into the basket, adding a bead of glue at the top and bottom of the side:
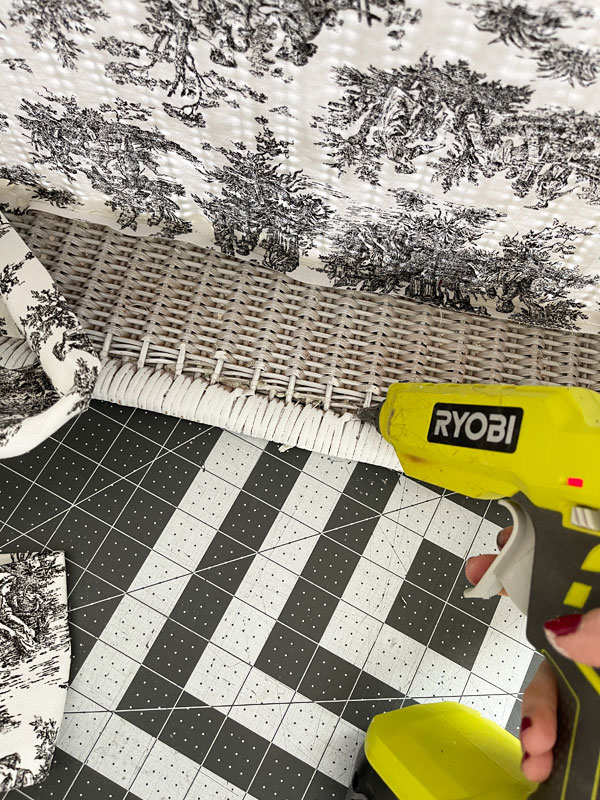
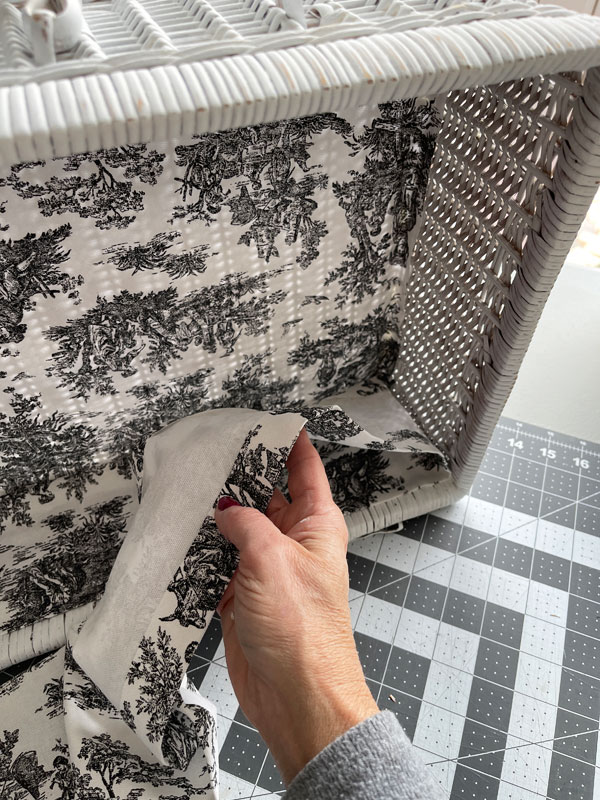
And that’s it! I try to end the fabric in a corner, so it is less noticeable.
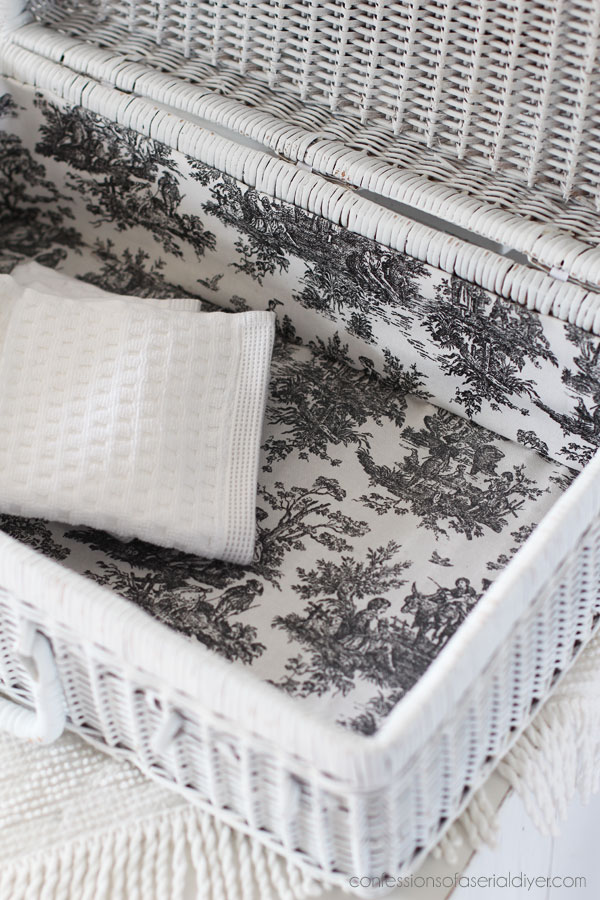
Oh, I almost forgot to mention that I reattached the top to the bottom with simple white ribbon…you can barely see it through the cracks in the photo above.
This picnic basket project was almost a big fail, but I think I got it back on track!

That’s another one from my biggest haul ever done!
See anything you might have missed at these links:
Painted Empire Dresser
Neutral Rocker Makeover
Pink Painted Night Table
Mass-Produced Shelf Makeover
Repurposed Cabinet Door
Oak Drop-Leaf Table Makeover
Child’s Rocker Makeover
Vintage Banker’s Chair Makeover
Terra Clay Paint Case Makeover
Tea Kettle Makeover
Tray Update with Stencils
Painting the Smalls #18
How to Turn a Spindle Bed into a Bench
Dated Shelf Makeover
80’s Clock Repurposed
Stenciled Demilune Table
DIY Fabric Lamp Shades & $5 Thrift Store Lamps
Thrift Store Dresser Makeover
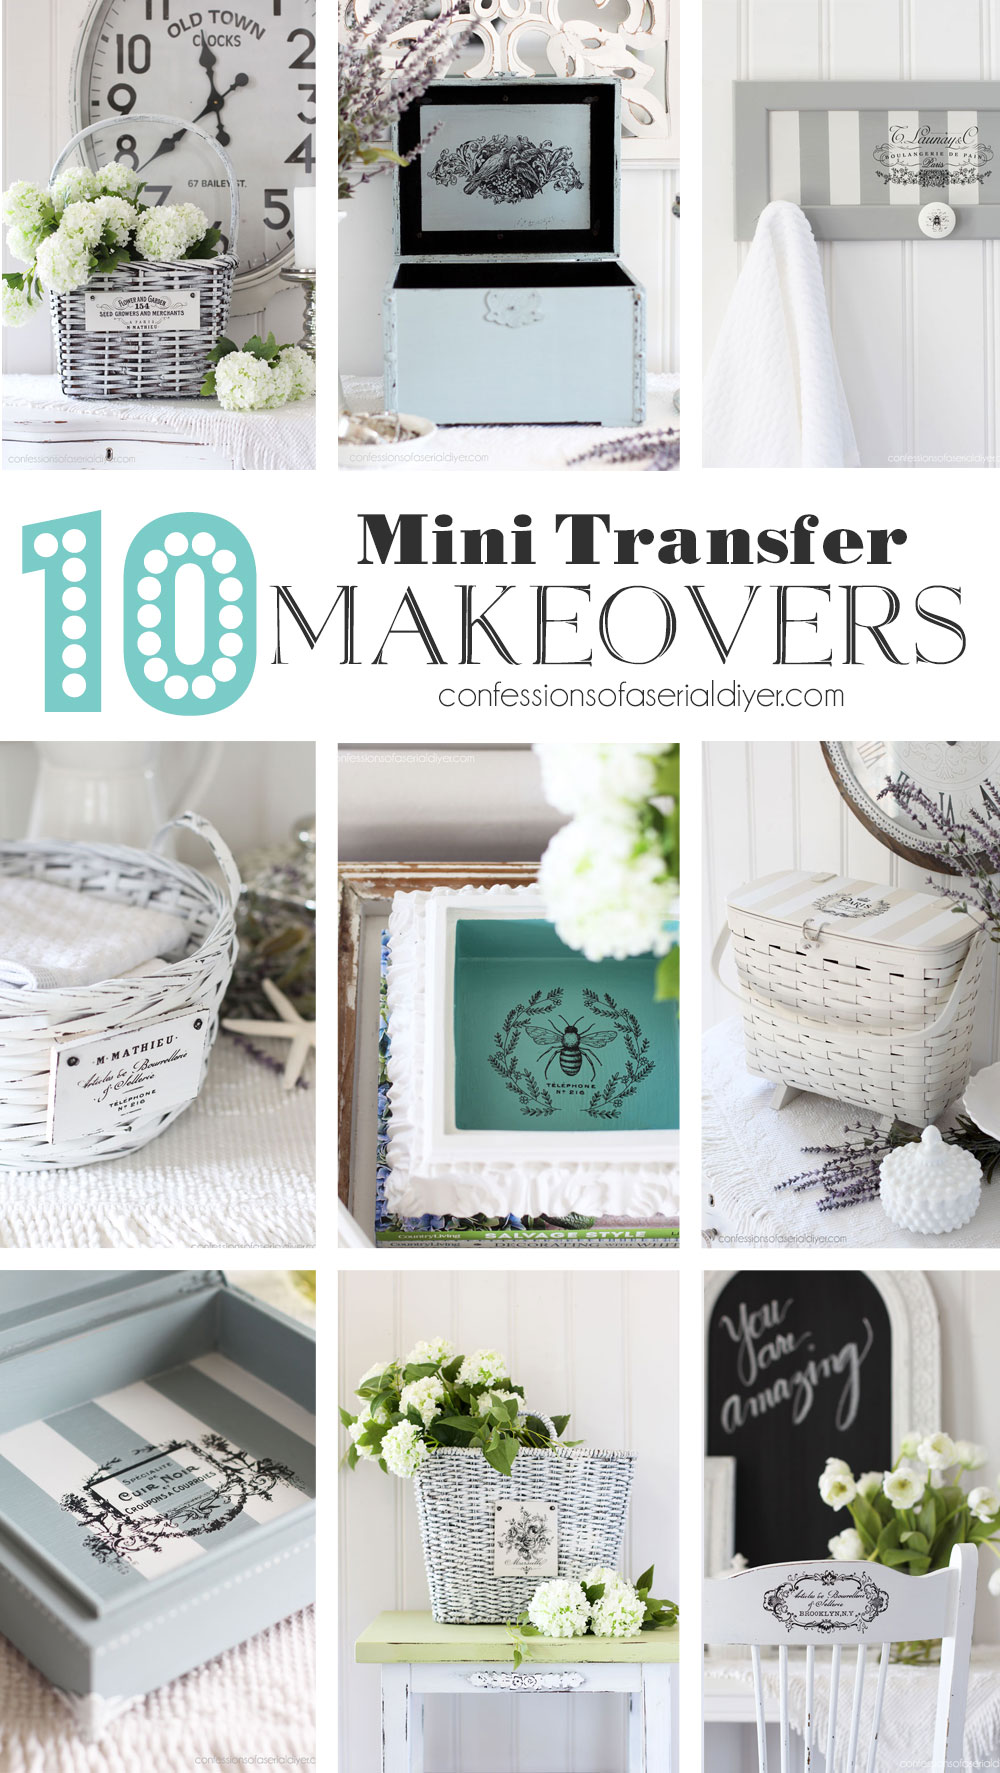
HERE are 10 more mini makeovers using the Classic Vintage Labels Transfer set:
I’ll be back here on Tuesday with my Trash-to-Treasure girls and this very plain flatware box:
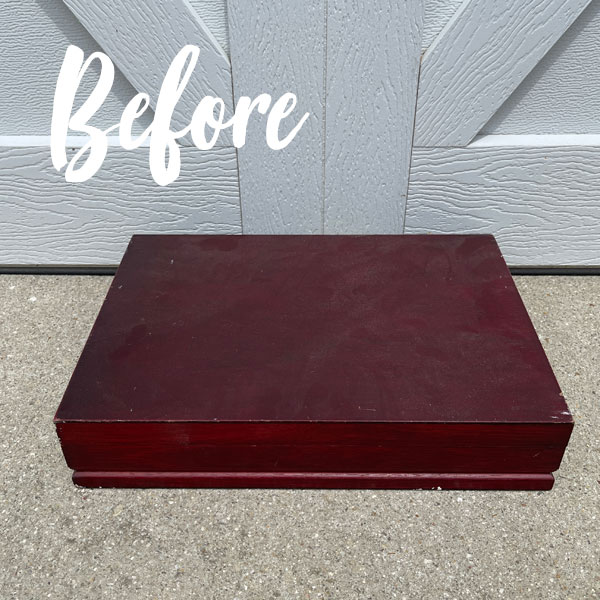
UPDATE: See how I glammed it up for the holidays HERE now!
I hope to see you then!
XOXO,

Don’t Miss a Thing!
If you like what you see, there are several ways to follow along!
EMAIL * INSTAGRAM * FACEBOOK * PINTEREST


Get FREE SHIPPING on all orders over $50. No code needed at checkout! Orders under $50 always enjoy $8 flat rate shipping! Most orders ship same or next business day!


Janette says
Another fab make-over, love how it turned out, we all make mistakes, heaven knows I do alot more than I admit :))
Thanks for sharing this beauty.xx
Christy says
Thank you, Janette! I had to share the fail…I actually laughed when I removed the last set of tape ha ha! XOXO
Mary Kaiser says
If any one can get a train back on the track it is you!! I love how the basket turned out. Black and white melts by butter!!! Great job saving it Christy!!
Christy says
Aww thank you so much, Mary! I too am a sucker for a simple black and white! XOXO
Janice Holt says
You definitely got back on track. The basket turned out so pretty and toile is my favorite fabric. Another great make-over. Have a great week-end.
Christy says
Thanks so much, my friend! I love toile too! Enjoy your weekend also! XOXO
Jackie C says
Great save. The tag on the front made this! Love it. Super cute! Honestly though, my eye was first drawn to your PERFECT handwriting on that chalkboard. I am always blown away by that. I’ve tried, it’s pitiful! Ever thought of doing a video tutorial of how you hold your chalk to get the line variations and tips for getting the size so perfect? Or is that just a natural talent you either have or you don’t? 😂
xoxo
Christy says
Aww thanks, Jackie! Funny you ask that as I did share a tip on how to get a prettier look when writing with chalk here: https://www.confessionsofaserialdiyer.com/thrift-store-frames-repurposed/ Maybe that will help! XOXO
Michele M. says
LOL at first looking at the stripes I thought it was my old faulty eyes. I like checkerboard but it had dizzying properties that at least on my moniter looked “alive,” Your save was fabulous and I absolutely adore that basket.
And wow – it is a very large basket….so many things someone will be able to do with it. Well done, Christy! The B &W toile fabric interior lining is perfect with it, too. Just lovely!!
Christy says
Ha ha yes! Thank you, Michele! It is a fantastic size for sure! XOXO
Cecilia says
Wow that’s a good sized basket! You definitely got it back on track – love the little sign you added and the liner. Great save!
😊Cecilia
Christy says
Thanks so much, Cecilia! It is a really nice size! XOXO
Sharon L Austin says
That turned out super. I honestly don’t know how you get your rotary tool cuts so straight. I’ve tried multiple rotary cutters and still don’t get nice clean cuts like yours. Sometimes not even straight, but I’m not sure I can blame the tool for that! LOL
Christy says
Thank you, Sharon! Oh no…you have to use it in conjunction with a straight edge. I run the blade right along the edge of my clear plastic ruler. XOXO
Sharon L Austin says
I do use a ruler/straight edge LMBO!! I STILL can’t seem to get it straight. Lord have mercy.
Christy says
Oh ha ha! 🤣
Charleen says
Great save! Love the black and white toile,one of my favorite fabrics. What if you had left the case in 2 pieces and had Open baskets?? Have a blessed day.
Christy says
Thank you, Charleen! I’m a huge fan of toile also! Hmmm…never thought to leave them open, but that is a great idea! XOXO
Cecilia from Georgia says
Good save! I love the simple look with the cute sign and no. tag. Hope you’ve recovered from Spook night!
Christy says
Thank you, Cecilia! Halloween was so fun, especially for a Monday! It is all down and packed up waiting for Jack to get home this weekend, so he can help us get it back into the attic! XOXO
Karen Moore says
Cute and the sign and tag are perfect accents.
Christy says
Thank you, Karen! XOXO
Cyndi says
I really needed to see this. It’s good to hear that someone else (and someone that’s REALLY good at this) makes the wrong choice every once in a while too! In the end, it turned out soooo cute!
Christy says
Oh yes!! It happens to us all, I promise! Thank you, Cyndi! XOXO
Rebecca says
Another GORGEOUS makeover. I love it.
Christy says
Thank you so much, Rebecca! XOXO
Cat says
This seems silly but, I kinda liked the checkerboard pattern. With that same placard in the center of it…..it’s not your usual style, I know, but….
Anyway, it turned out lovely! And I’m sure it will sell immediately!
cat
Christy says
Thank you, Cat! Someone else mentioned it had a MacKenzie Childs feel to it. Maybe if I had kept going it might have been ok lol. XOXO
Anita says
Christy, I love this basket makeover! All the detail is fabulous and so beautifully coordinated. I agree that your first black stripes looked good, but the checkerboard was a bit busy. I feel like I can still see the checkerboard black very faintly through the white in your staging photos. This could totally be my imagination, though! Good save in the end!
Christy says
Thank you so much, Anita! I did quite like the first stripes and should have stopped there. And ha ha that is probably because you know they’re under there lol! XOXO
Debra Hubbs says
It came out so pretty. Love the sign and the fabric.
Christy says
Thank you, Debra! XOXO
Cheryl Atkinson says
Well you get an A for effort. I’m always so proud when I can overcome a fail and I have plenty of those. Your tags always look so cute.
Christy says
Thank you so much, Cheryl! Yep, I tried ha ha! XOXO
Joanne H says
Very cute. Great save!
The liner, which I love, and the little sign and key, go perfect with the all white basket. Thanks for sharing the fail along with the recovery.
Just out of curiosity did you knot the white ribbon hinges in the back on the outside? Or are the ends on the inside and glued under the liner? Or how did you make that work?
Christy says
Thank you, Joanne! I’m glad you enjoyed it! I just tied the ribbon in neat bows at the back. 🙂 XOXO
Marcie Lovett says
Well, that became quite a project! I know you love your stripes, Christy, and I would have liked to see you create a buffalo check, but I think it looks even better the way it (finally😉) turned out. The little plaque in the center is charming and I can imagine you asking all the neighbors if you could have the key from their junk mail for other projects! They’re just going to get thrown out anyway, right?😂
Christy says
Ha ha thank you so much, Marcie! I never even thought to ask the neighbors for their keys…dang! That would have been awesome! XOXO
Cheryl says
In the end, it turned out fabulous!!
Christy says
Thank you, Cheryl! XOXO
Petra says
These baskets are so cute painted white and love the toile interior 🙂 I ended up painting a vintage dressing table 3 different colours to try to find the “look” I thought it needed. It sold straight away but it was a mammoth effort haha! 😀
Christy says
Thank you, Petra! Oh wow… at least it sold quickly, but sometimes it just takes a minute to get it right lol! XOXO