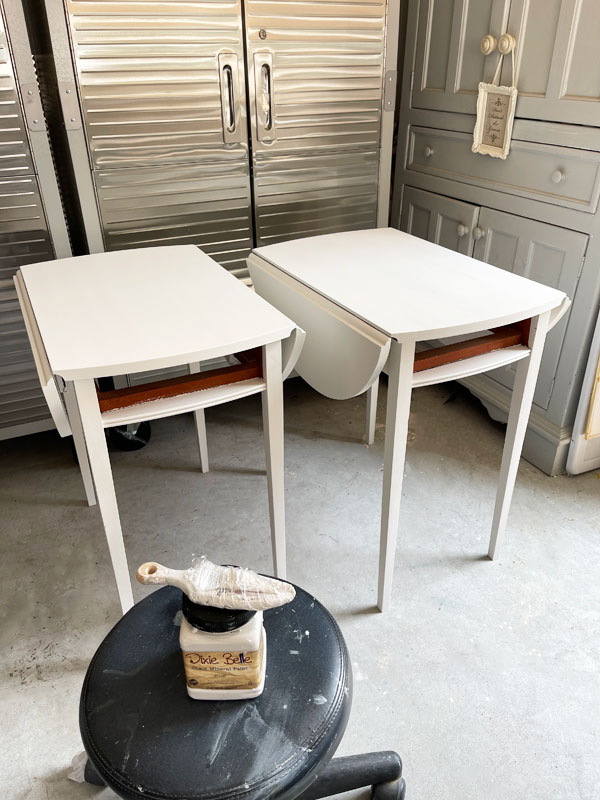
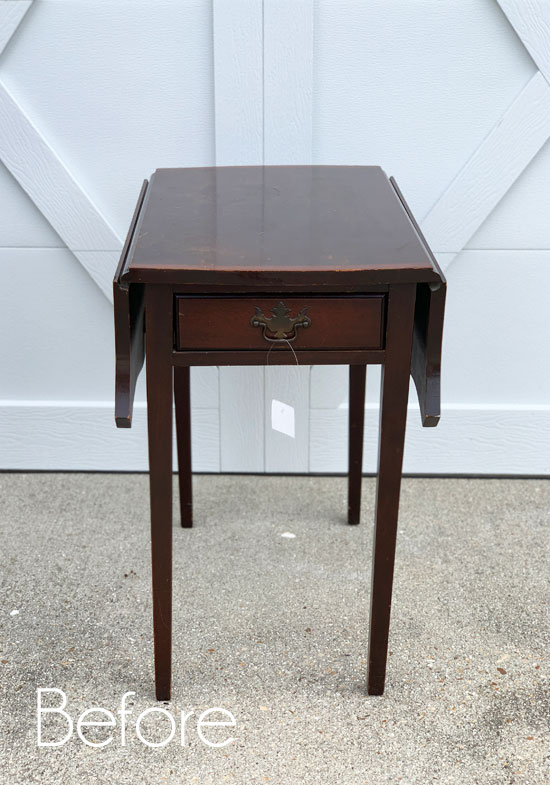
Happy Trash-to-Treasure Tuesday, amazing friends!! Although my makeover today isn’t very trashy, one of my friends’ makeovers totally makes up for it lol. Look for more makeovers from my friends at the bottom! Today, I’m sharing updated drop leaf side tables with decor moulds.
These two tables from my current haul were a huge yard sale score for only $20 a piece:
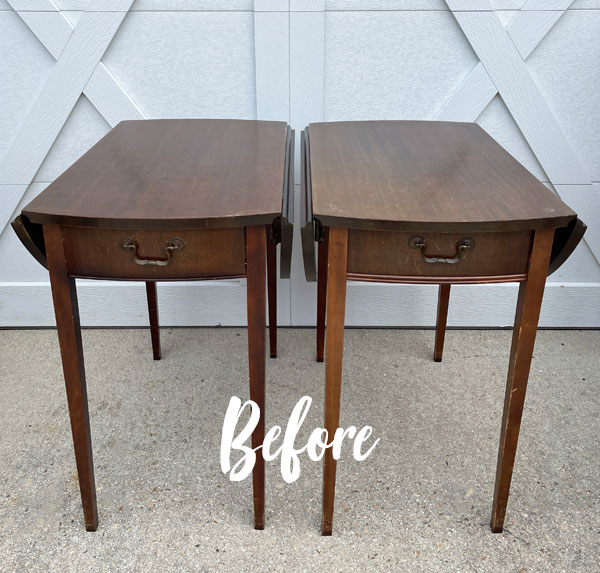
Of course, I played it cool and paid the man, but I was literally screaming with excitement inside my head ha ha. I love this style of table and the fact that I found a pair of them was a double bonus!
Some may see dated grandma tables (that is what the guy selling them referred to them as), but I see charming pieces that would be so sweet in my perfect beach cottage that I own in my dreams!
I’ve included a few affiliate links so you can find the products I love.
Clean
I got straight to cleaning!
I mixed up a tub of White Lightning (One TBSP mixed with a half gallon of warm water) which is a degreaser and a deglosser and will give my pieces the best prep possible!
Gloves are recommended, and these terrycloth pads work great for this…
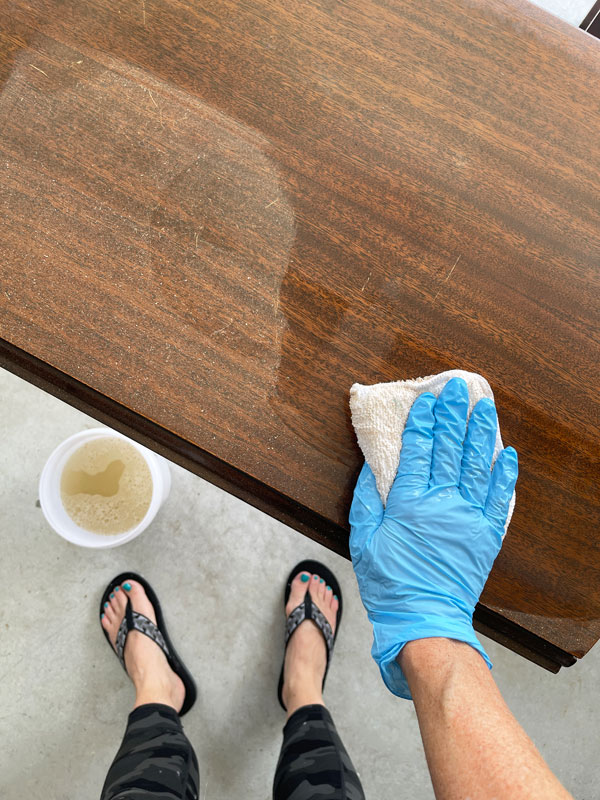
Then, I swapped out the water for clean water and gave it another wipe down to remove any remaining dirt and residue.
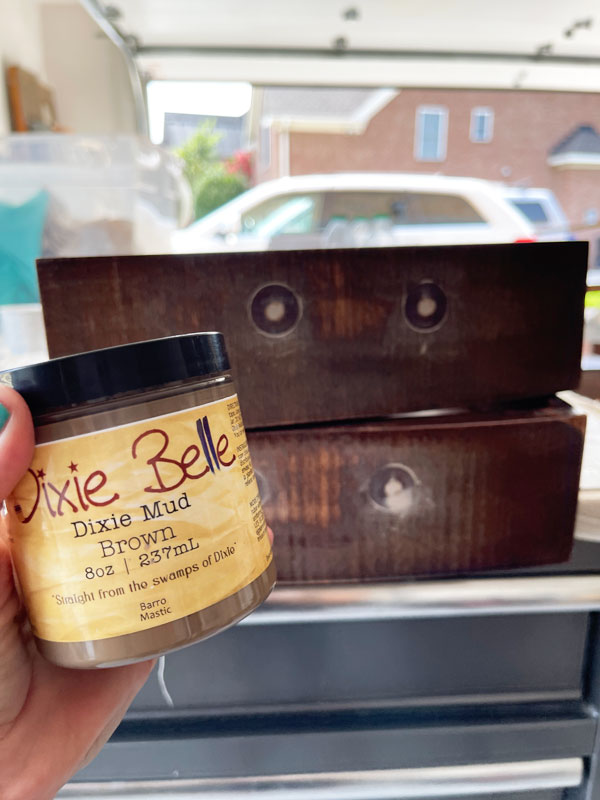
Fill holes
Next, I filled the old hardware holes with Dixie Mud since I had other plans for the hardware,
This is after I sanded them smooth with 220 grit sandpaper:
To Prime or not to Prime with BOSS?
If you are dealing with older Cherry or Mahogany pieces (red toned woods), or one where the finish has been sanded or is not quite in tact, it never hurts to go ahead and apply a coat of Dixie Belle’s BOSS and save yourself the potential headache of bleed through!
One coat is usually all it takes:
Wait at least overnight before painting!! This is KEY!
If you see bleeding through the BOSS, that is okay! As long as you allow that needed drying time, you should be able to paint right over that and not have those tannins come through.
BOSS can be applied over the paint if you started painting first and get bleed through. It also comes in Clear and Gray.
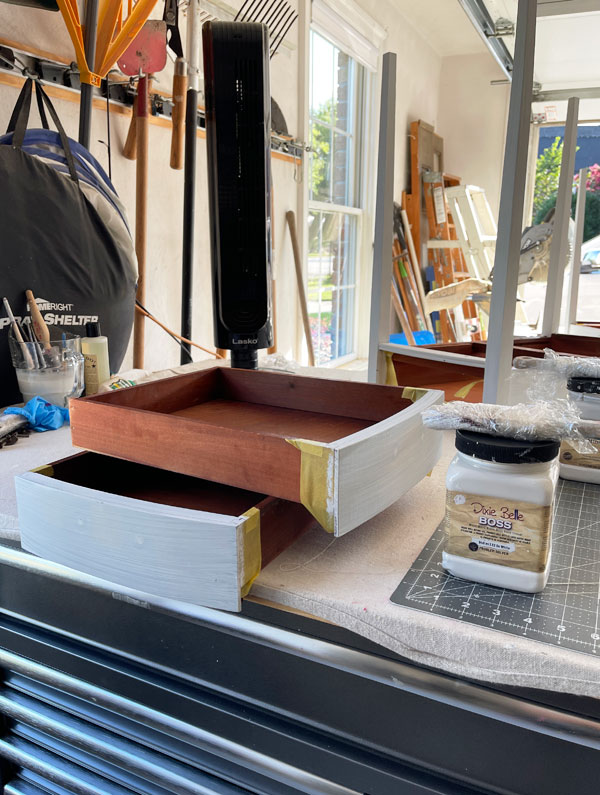
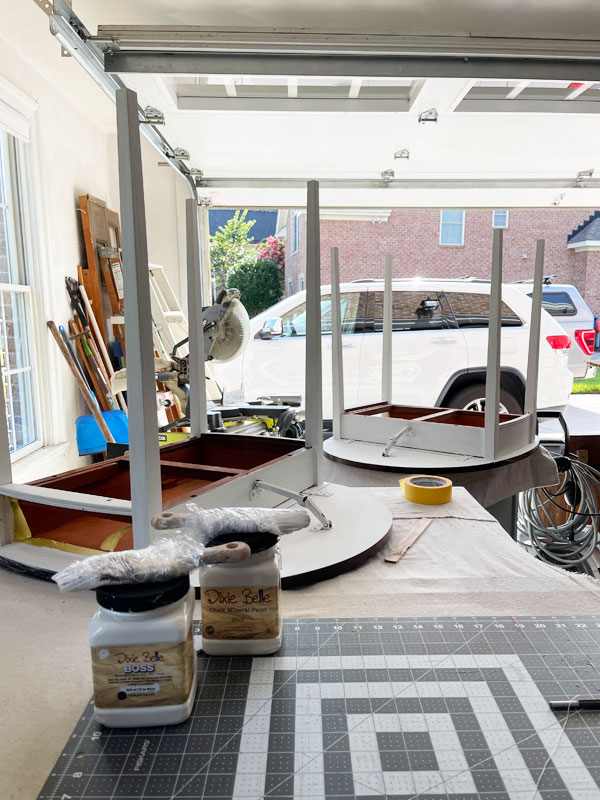
How do you paint a drop leaf table?
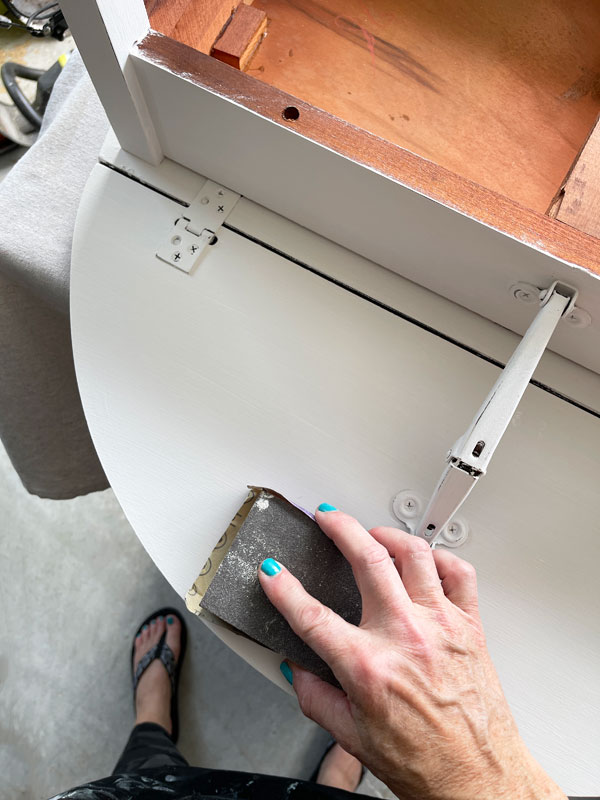
I always paint drop leaf tables upside down first. I do all the Bossing (if needed) and painting before flipping them upright:
I also sand the underside…
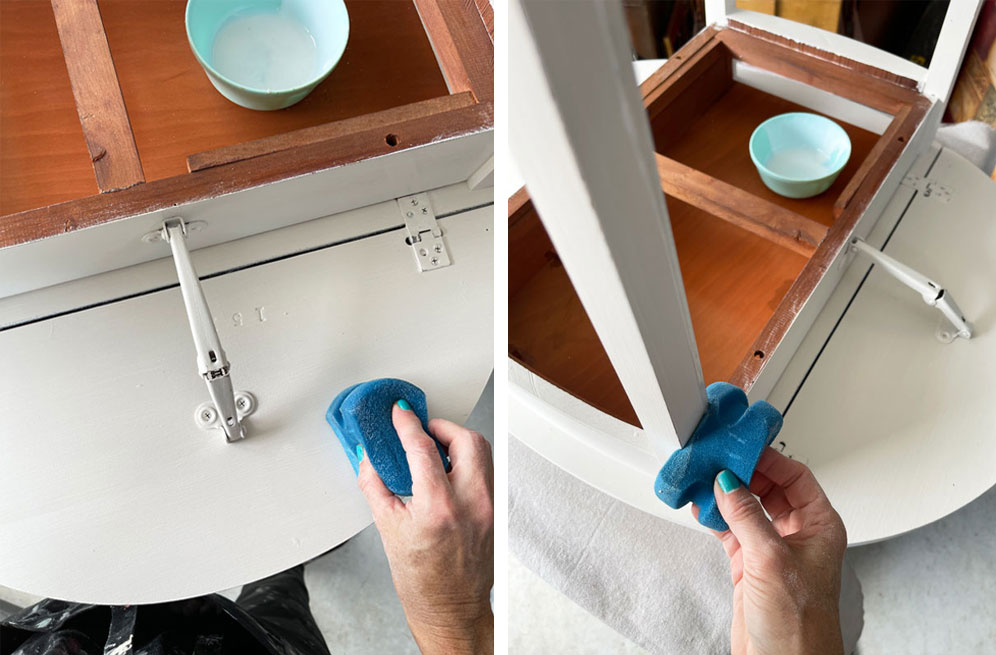
And seal as well…this time, I even sanded and sealed the body and the legs using my blue sponge to apply the Satin Clear Coat:
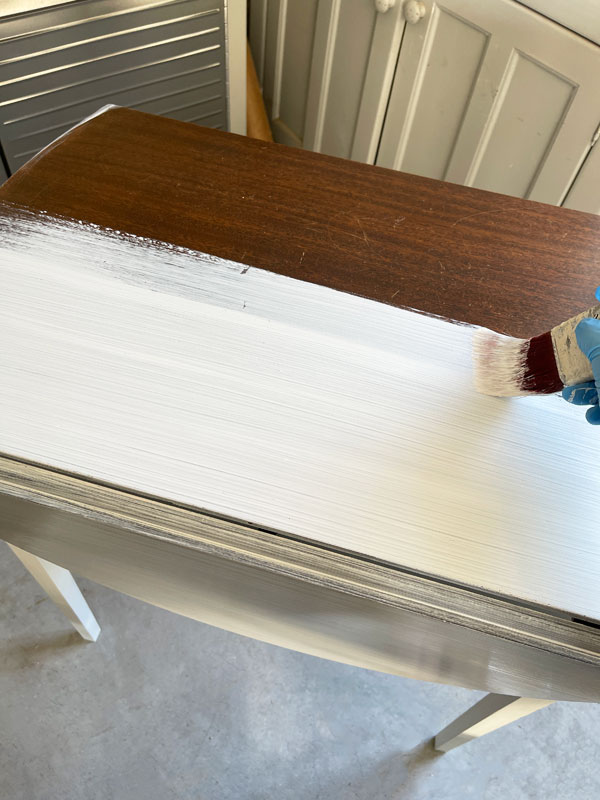
Then, I flip them over and do the tops. This is the BOSS going on:
And after two coats of Dixie Belle’s Fluff:
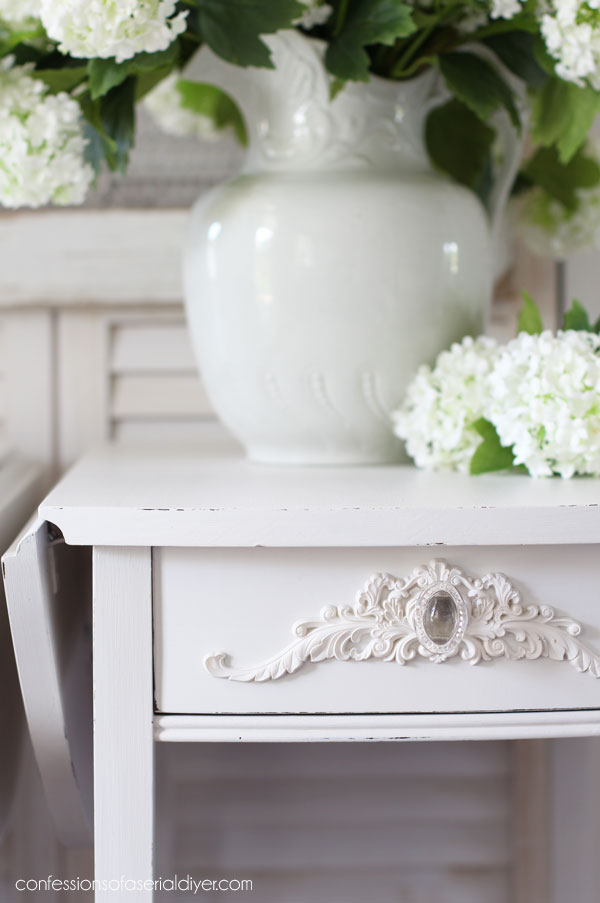
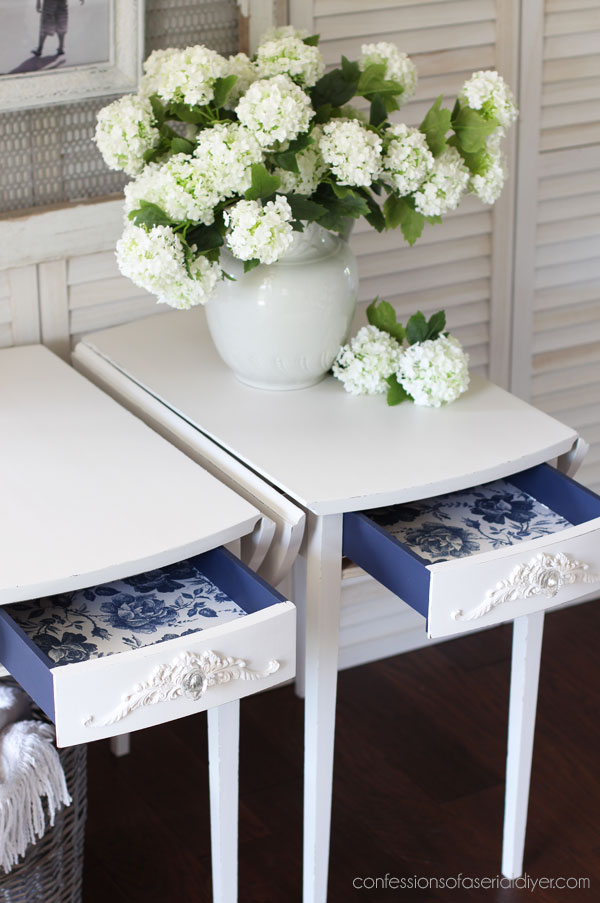
Adding Decor Moulds to the drawers
These tables were quite plain and although I wanted to keep them simple, I still wanted to add a little something.
So, I pulled out the Enlightened Etchings Decor Mould and some Amazing Casting Resin:
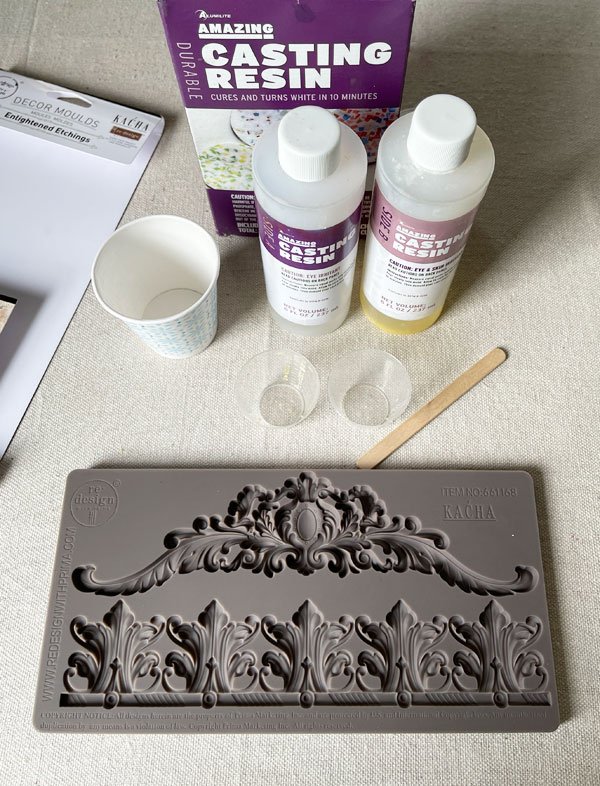
If you haven’t tried making decorative pieces with resin and these moulds yet, it could not be easier!
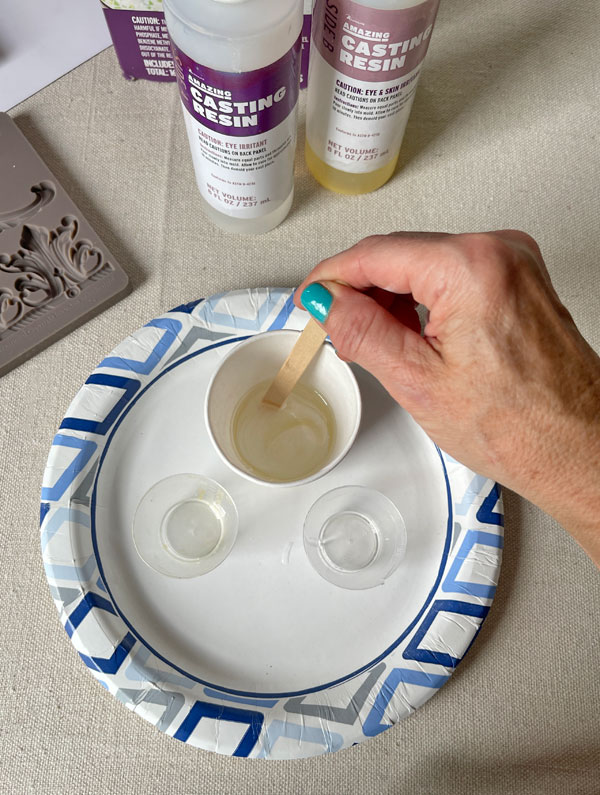
The resin kit comes with two liquids. You just mix equal parts into a small disposable cup:
And pour into your mould (be sure not to overfill):
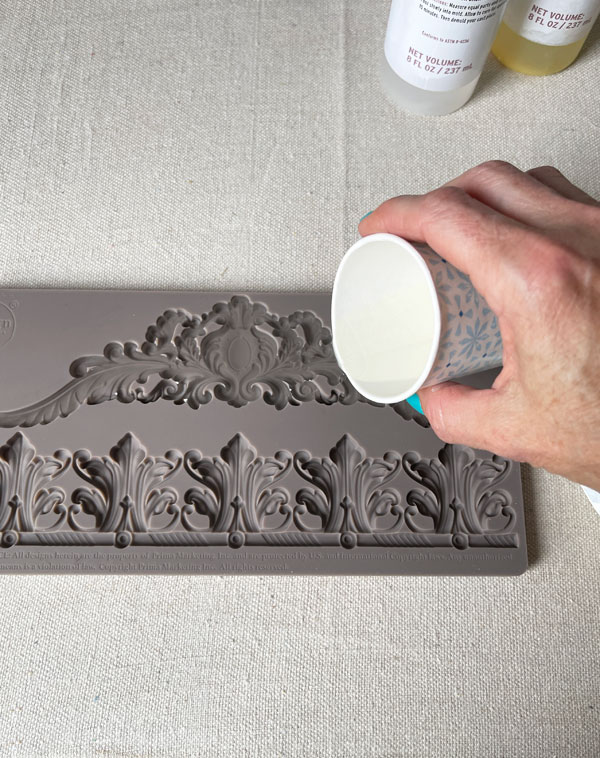
Let it set for about 12 minutes and voila!
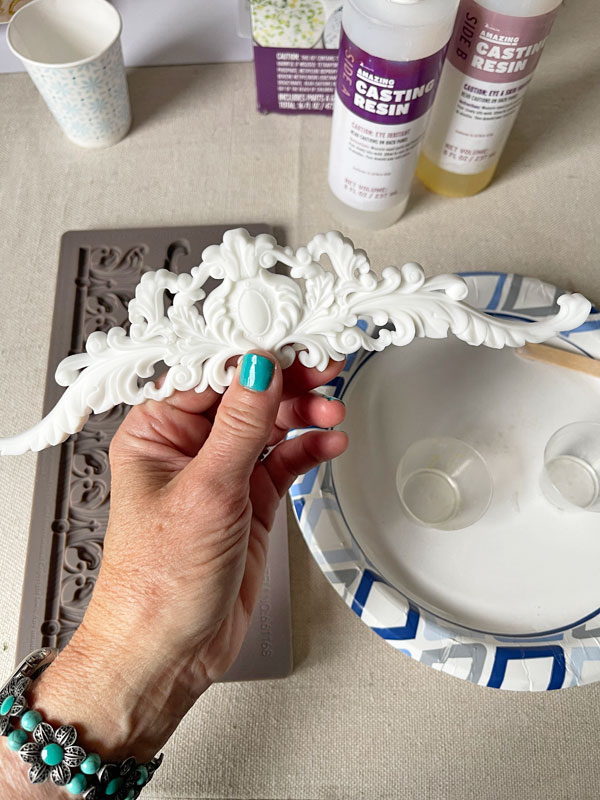
SO EASY!
One box of resin will make a bunch of pieces. They will be warm as they are just curing, and will harden once cooled. However, you can reactivate them to make them pliable again by putting them in the microwave for about 20 seconds.
See 18 more decor moulds in my shop HERE.
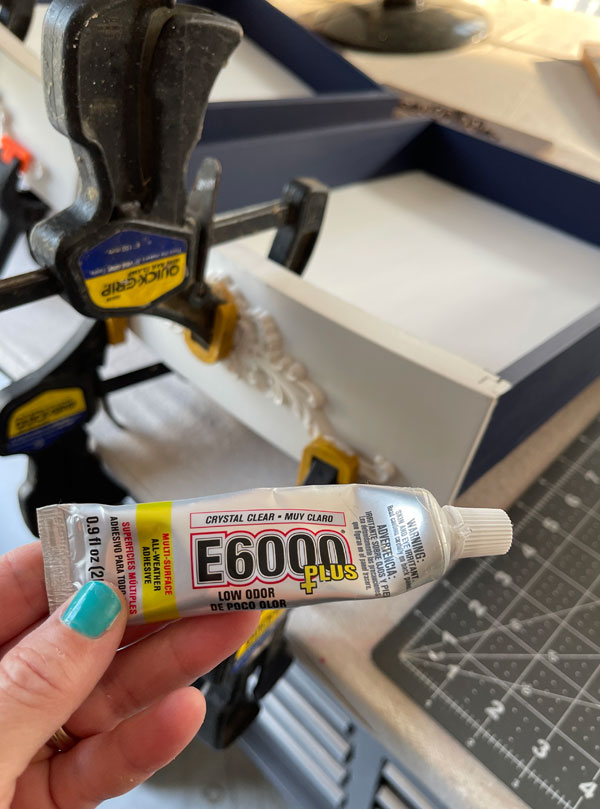
I painted these in Fluff and then used a spray matte sealer from Rustoleum on them before adding them to my drawer fronts using E6000 glue:
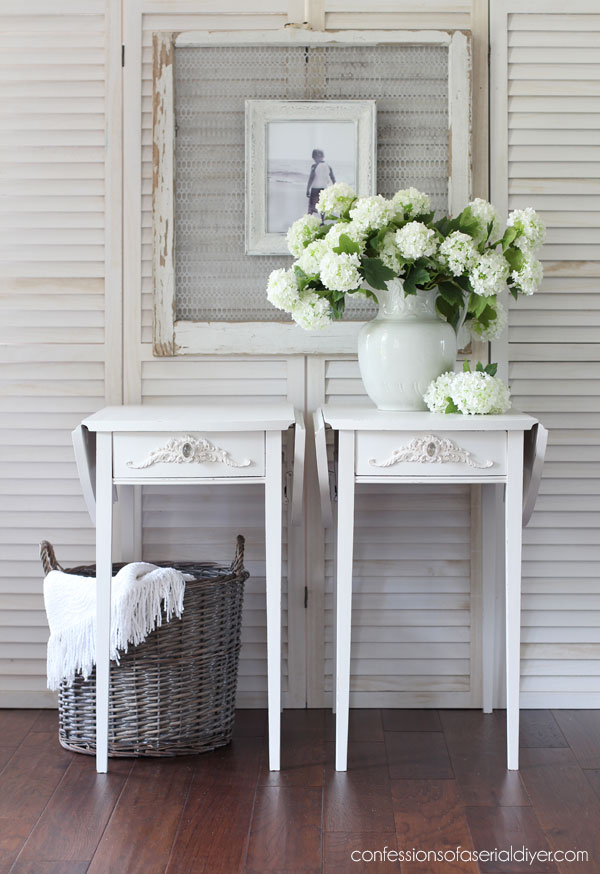
The after
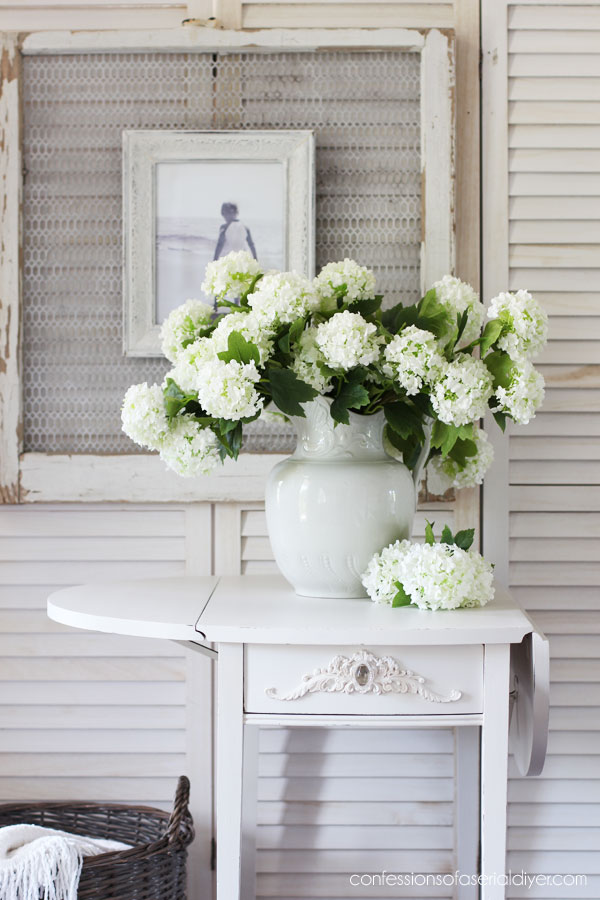
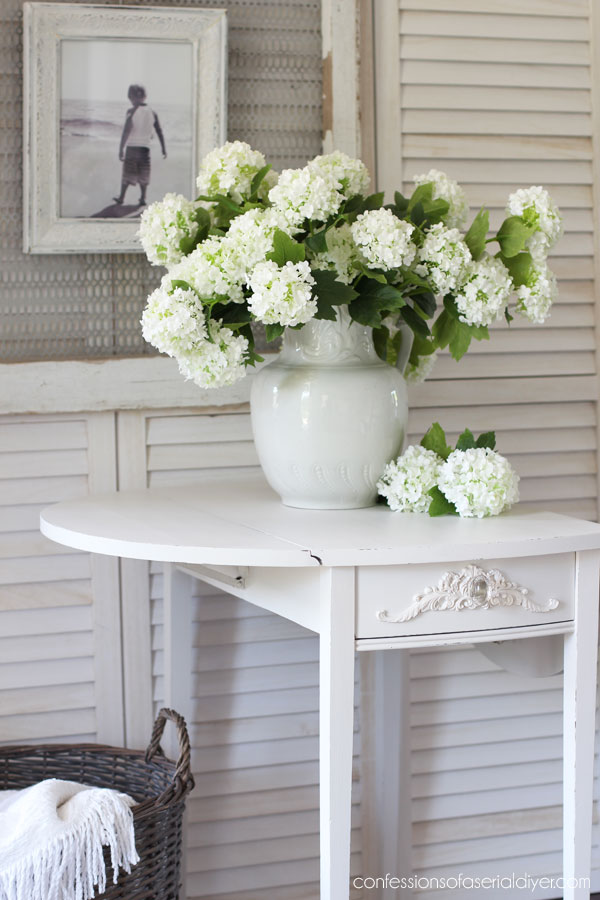
Let’s jump to the after of these pretty pieces!
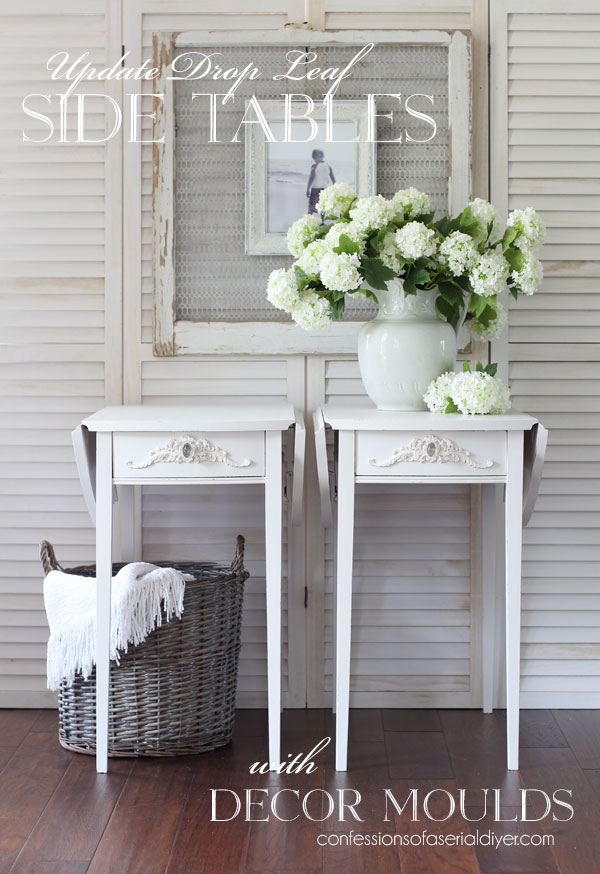
So soft and pretty now!
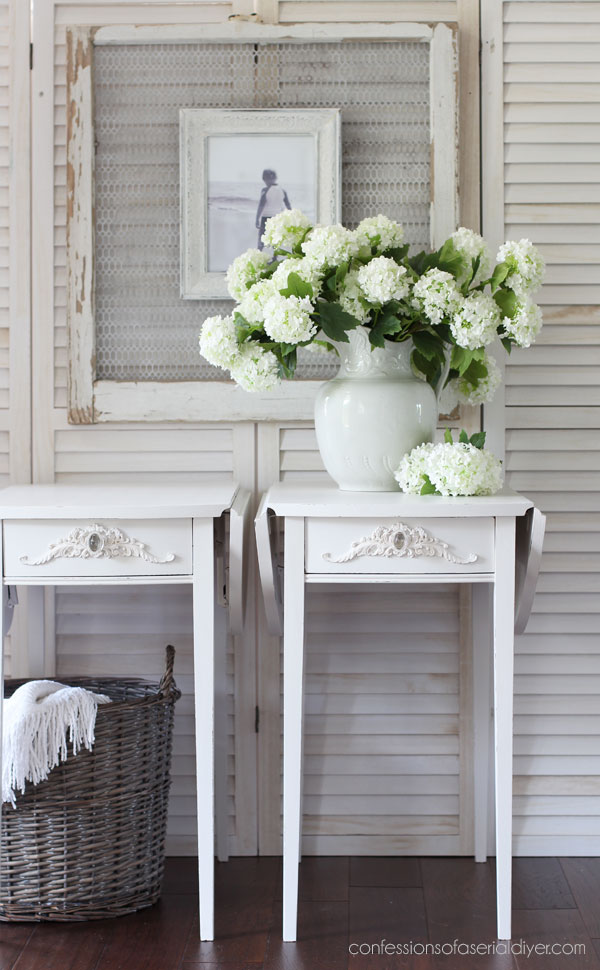
And what a sweet detail the resin pieces from the moulds add!
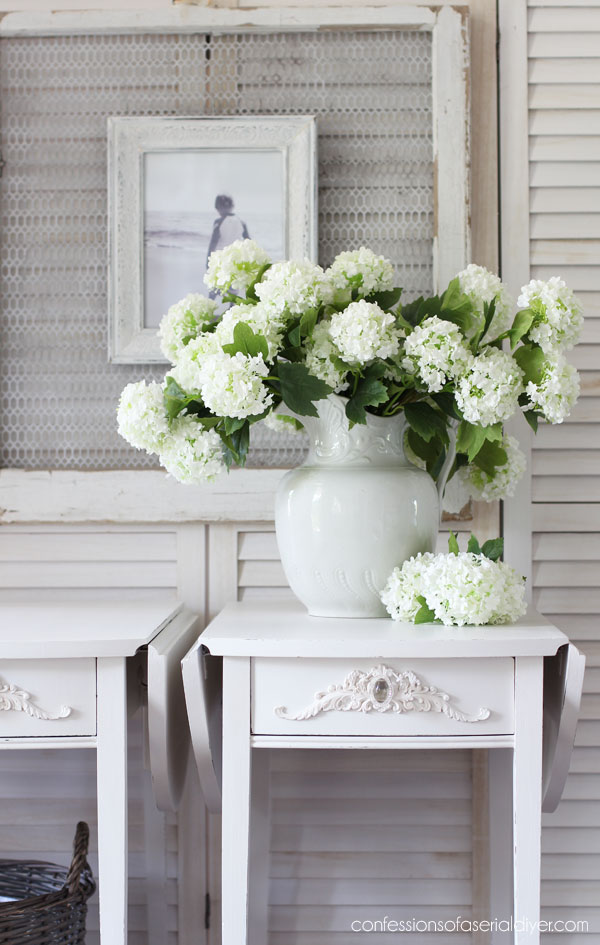
These oval glass knobs from Hobby Lobby worked perfectly with them, and I was able to drill right through the resin pieces to accommodate them:
I chose to photograph this pair together, but here is one opened up:
That provides a lot more surface area if needed…
The drawers
And what did I do with the drawers?
Of course I had to have fun with them!
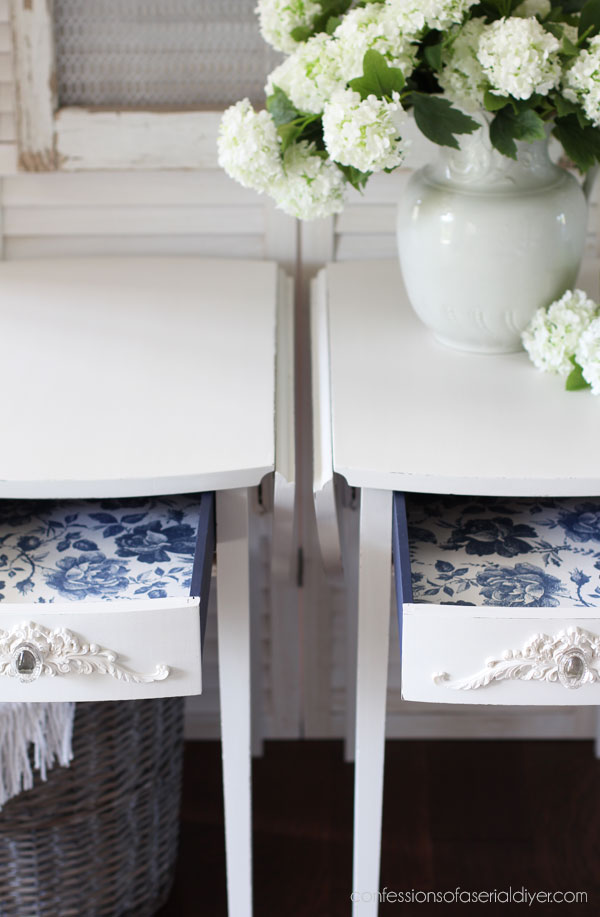
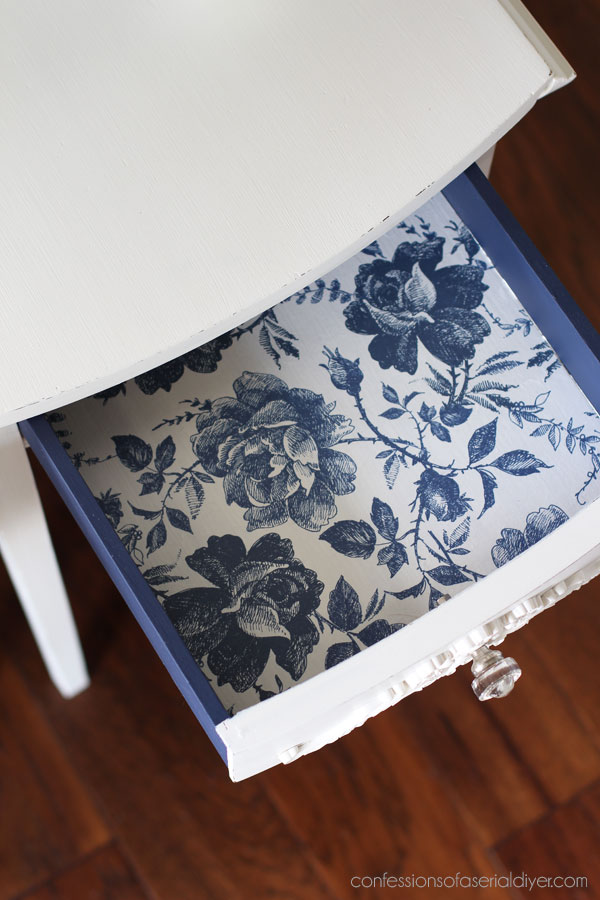
You got a peek earlier of the blue and white combo…this is Silk in Nautical and then I just used white BOSS on the bottoms:
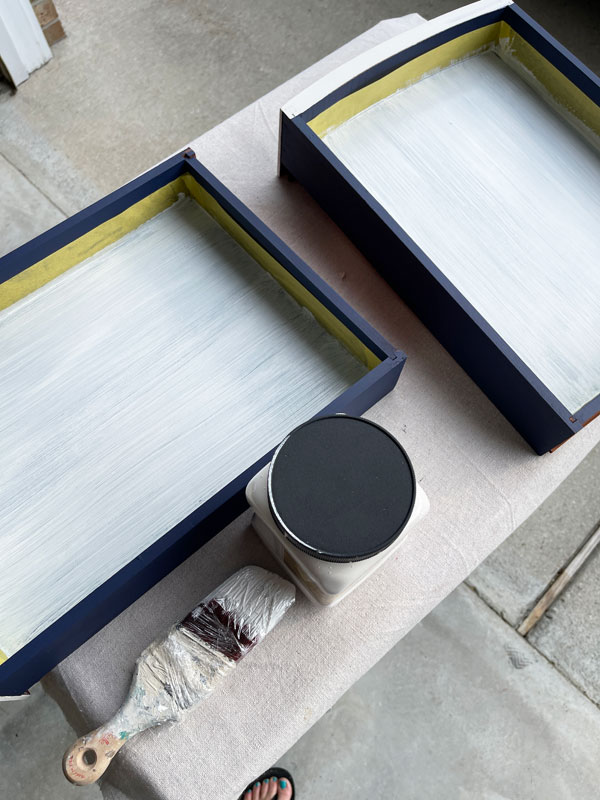
This was so that I had a nice white background for the paper I planned to use, and there wouldn’t be any bleed through my pretty decoupage paper!
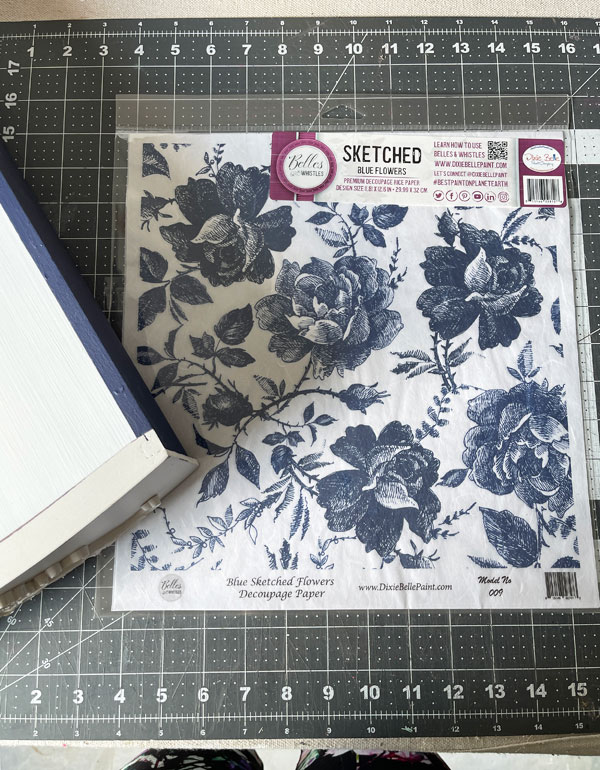
I”ve used this decoupage paper on several projects HERE, HERE, and HERE, and it was perfect for these drawers as well.
I usually use Clear Coat in satin to apply it. Add one coat and then add the paper, then top it with another coat. You can use matte Mod Podge as well.
The transfer tool is great for working out all the air bubbles, but a credit card works too.
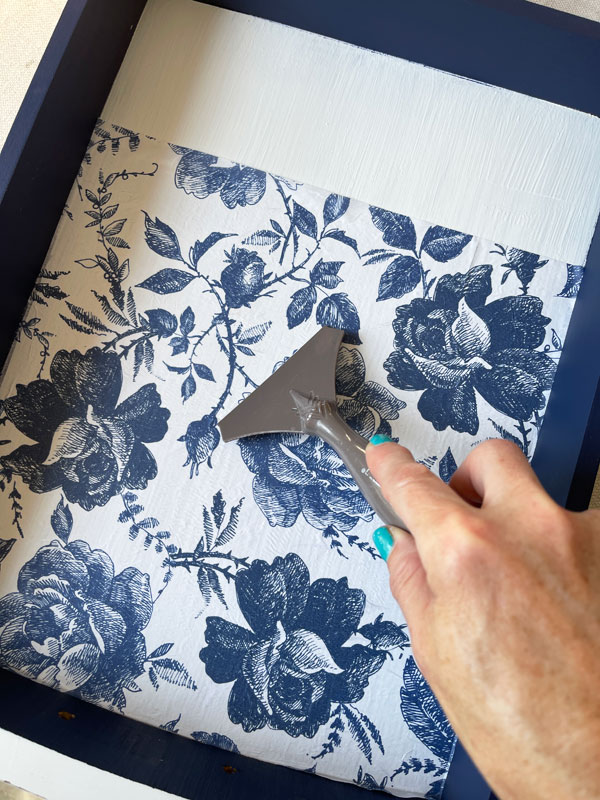
This beautiful paper adds a nice surprise when you open the drawers…
These are ready for their new life in that seaside cottage!

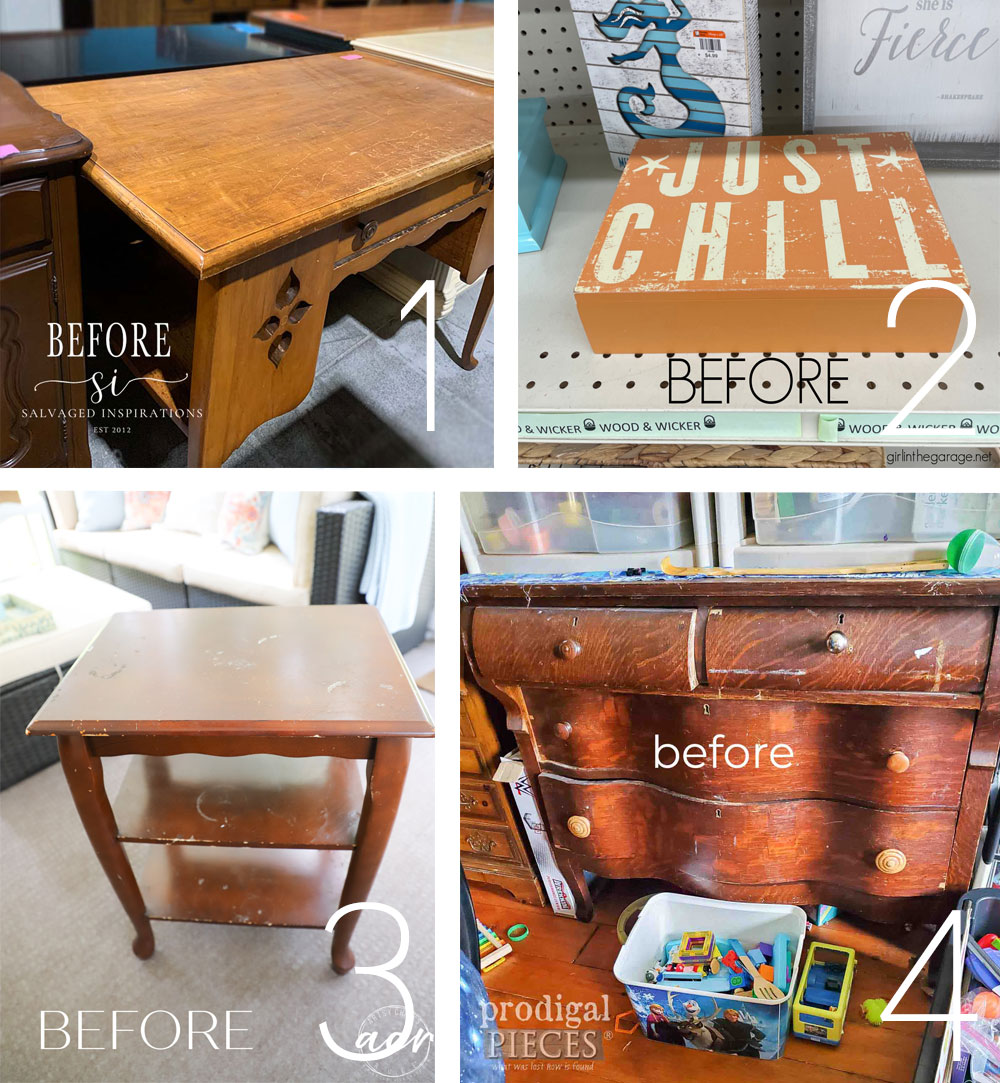
Don’t forget to check out what my friends are sharing today as well!
If you enjoyed this post, here’s a more colorful take on a similar table:
See what I did with this one HERE!
I’m flying through this haul!
Here’s everything I’ve completed so far:
Upcycled Tea Box (This is a can’t miss!)
$25 FARMHOUSE TABLE MAKEOVER
Painting the Smalls #22 (Six mini makeovers!)
Easily Paint a Silver Tray
Upcycled Sewing Machine Drawers
$5 Yard Sale Stool Makeover
$6 Mini Wall Cabinet Makeover
$4 Jewelry Box Makeover
Vintage Sewing Storage Table
Wooden Horse Redo TAKE TWO!
White Painted Drop Leaf Table
Unfinished Wooden Horse Makeover
Updated Candlesticks
Voodoo Stain and Stencil Bench Makeover
Drawer Organizer Makeover
We’ll be moving Jack into his college apartment on Tuesday, so I’ll be taking the rest of the week off to enjoy him a bit. You know I’ll be back with something thrifty though!
UPDATE: Here’s what I’m sharing on Thursday:
See what I did with those parts HERE now!
Have a fabulous weekend!
XOXO,

Don’t Miss a Thing!
If you like what you see, there are several ways to follow along!
EMAIL * INSTAGRAM * FACEBOOK * PINTEREST


Get FREE SHIPPING on all orders over $50. No code needed at checkout! Orders under $50 always enjoy $8 flat rate shipping! Most orders ship same or next business day!


Mary Kaiser says
Oh they looks so beautiful in your seaside cottage! I see them in your cottage and they fit right in! On the top of one of the table I see one of the lamps you have made over, and a little trivet box that you have painted and added flowers to! Over in the dining room I see a hutch that you have painted and a beautiful dresser as a side board to store the fun games what you have time to play in your seaside cottage! I see your vision and know exactly what it would look like! It is so beautiful! It is fun to dream, even if it is about your seaside cottage! Have fun with Jack, I can’t beleive its time to move him back to college!!
Christy says
Ha ha thank you, my friend! The space is so inviting!! I see it too!! We’ll be packing and making sure he has everything, but even that time spent together is precious! Have a wonderful weekend! XOXO
Robin Colling says
I just love all of your before and after projects. Your directions are so easy to follow, too. Thanks for sharing
Christy says
Aww I appreciate that so much, Robin, thank you!! XOXO
Janette Deans says
Two beautiful tables, love the moulds, they gave it yet another ‘look’ and those pretty knobs are perfect. Thanks for sharing again, I love to see how you transform things that others just get rid of. xx
Christy says
Thanks so much, Janette! It’s funny how we treasure things that others just don’t, just as they probably enjoy things I don’t ha ha…something for everyone! XOXO
Larissa ~ Prodigal Pieces says
They look so refreshed now, Christy. And I love the paper lining!
Christy says
Thanks so much, my friend! XOXO
Joni L Gonzales says
Love these! I enjoy your simple white makeovers like these the most. Good luck to Jack!
Christy says
Thank you so much, Joni! I really enjoy the simple ones too! XOXO
Janice Holt says
These turned out just beautiful. The molds and knobs are perfect and the insides look so pretty. I’m not surprised because you always do such a great job.
Christy says
Thank you, Janice! I appreciate that so much, my friend! XOXO
Nana Diana says
Very, very sweet redo. I have used similar moldings several times over the years. They are the perfect ‘finish’ to a simple piece. Have a great week.
Christy says
Thank you, Diana! They really do add so much for little effort. Enjoy your week too! XOXO
Ann Williams says
I love these side tables! Do you sell the decoupage papers? And then do you put it onto the satin top coat and cover with modge podge?
Christy says
Thank you, Ann! I do have these in my shop. I usually apply a coat of Satin Clear Coat, apply the paper and smooth out any wrinkles, and then top with Satin Clear Coat. This time I applied the matte Mod Podge (I usually just use that for fabric but wasn’t thinking lol), then I applied the paper followed by a coat of the Satin Clear Coat to give it some protection. It still worked great. XOXO
Cyndi says
OMG, yes! So much better like this! I didn’t realize you could warm these appliques to bend them. So you can do that to add them to something with a slightly rounded surface? Great job, Christy!
Christy says
Thank you, Cyndi! Absolutely! XOXO
Niki says
I think most of us have a sea side cottage or English garden cottage in our dreams. I know I used to….
These tables are great and I like the surprise of the blue drawer sides and paper.
Christy says
Thank you, Niki! We can dream lol! XOXO
p says
Ohhhhhh….. Such sweetness.
I love the simple lines of these drop-leaf tables !
The formal moulds add the “just right” detail, esp with the cute knobs.
But – I Love the drawer surprise. 🙂 You made it sing.
Someday I need to try these moulds. Thanks for providing your organized step by step process !! Sooo helpful.
Christy says
Thank you, P! It is always a pleasure to share, and yes, the moulds add such a sweet detail, but all the fun is in the drawers lol! XOXO
Marcie Lovett says
You definitely captured that beachy vibe, Christy. Although I must say I was a little disappointed there were no transfers involved. I should have known to hang on for the drawer reveal. Now it’s a Christy project 😁 Someone who prefers quieter furniture is going to love these!
Christy says
Aww thank you, Marcie! I do love the transfers lol…they are just SO fun to play with! But these seemed like they needed a more simple update…I still had to add something though in those drawers ha ha! XOXO
Mary King says
It’s been a while. I am still following, but have had a rough and painful year having two foot surguries in eight months. Now two weeks out from the second I am trying to catch up on any posts I may have missed. Today’s really caught my eye! The tables are beautiful !! I am looking forward to when I can walk again to go see your booth. I enjoyed your recent update post too!!
Christy says
Hi Mary! I am always so glad to hear from you! I hope your healing is quick this time and that they fixed whatever was wrong, so you can get back to living life. I’m glad you enjoyed this one, thank you! XOXO
Michele M. says
Oh my GOSH!!!!! No WAY they can be the same two tables. Holy cow, Christy – you did it again. They are gorgeous and perfect and I absolutely adore them. Wow. BRAVO!!!!
Christy says
Aww thank you so much, my friend!! They are so happy now! XOXO
Sandi says
This drop leaf duo is adorable! Would love them in the French country cottage of my dreams. I do have a question…how are the drawer pulls attached to the resin, glued or screwed through it. Wasn’t sure if screwing through the resin would crack it. Once again, love them !
Christy says
Thank you, Sandi! How pretty would they be in a French country cottage? I drilled right through the resin pieces with no issues at all. XOXO
Charleen says
Those aren’t old grandma tanles now !!!Such a transformation. The mounds added a young “hip”grandma vibe. Love the drawers. The added touch. Beautiful restoration. Enjoy your time off with Jack. Take care 🙂 💕
Christy says
Ha ha, right? Thank you, Charleen! I will! XOXO
Julie Briones says
So smart to add the decorative accents, Christy! Love these! I still have an IKEA Rast I need to makeover, but have been at a loss. I think I might add this technique! Pinned!
Christy says
Hi Julie!! Thank you! These would be the perfect way to add some decorative detail to a Rast! XOXO
Denise Zdziennicki says
You’re the “Queen of Inside Drawer Details” my friend! The tables turned out gorgeous and the blue and white florals in the drawers make it extra special! XOXO
Christy says
Ha ha thank you, my friend! I love a simple makeover, but this is a way to add still add some fun! XOXO
Marietta R Walker says
Yep, you did it again!
I love the blue inside the drawers.
A+
(Yes, I am out of words-you really have wrung every one of them out of my brain. There is just nothing left. Pu a fork in me. I am done.)
Christy says
Ha ha thank you, Marietta! I get it and I appreciate it!! XOXO
Lizzy says
I just love them! The moldings were the perfect touch.
Christy says
Thanks so much, Lizzy! XOXO
Corrine says
Gorgeous!! Those moulds are a perfect pick! Love these tables. 😍😍😍😍
Christy says
Thank you so much, Corrine! XOXO
Robin says
Oh my goodness. Love these.
Christy says
Thank you so much, Robin! XOXO
Nancy @ Artsy Chicks Rule says
Those turned out so pretty!! I love the moulds and have a few but haven’t tried them yet. I need to! xoxo
Christy says
Thank you so much, Nancy! The moulds are so fun to play with! XOXO