Hello beautiful friends, and welcome to Trash-to-Treasure Tuesday!! Most of what I share are trash-to-treasure projects, but today I get to do it with four of my favorite treasure-maker friends! You’ll find links to their projects at the bottom!
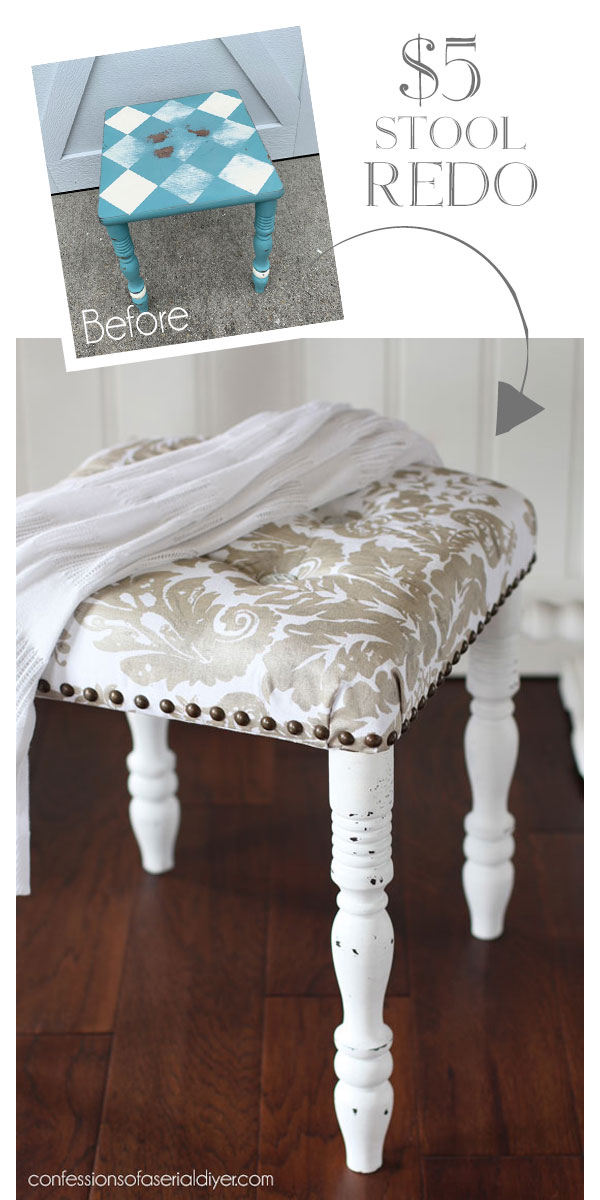
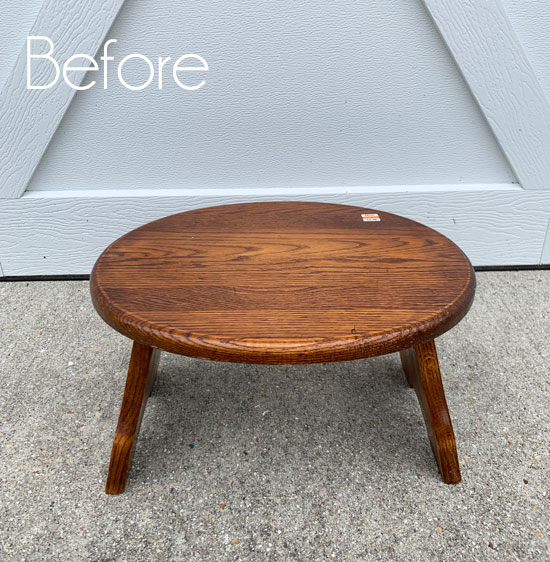
Today’s makeover is this little bench that I painted way back in 2013:
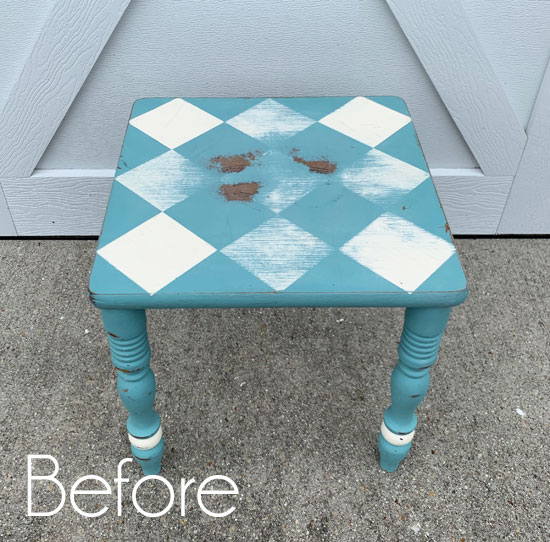
It made an appearance in my tutorial for adding graphics old-school style and used to have the word Love across the top. It lived in my closet until we moved two Summers ago.
It’s a little bold for my taste these days so I started to redo it last year since I missed having it in my closet. However, I only got as far as sanding the words off. I knew adding it to this haul would get it done. I’ve included a few affiliate links so you can find the products I love.
It looks much different now!
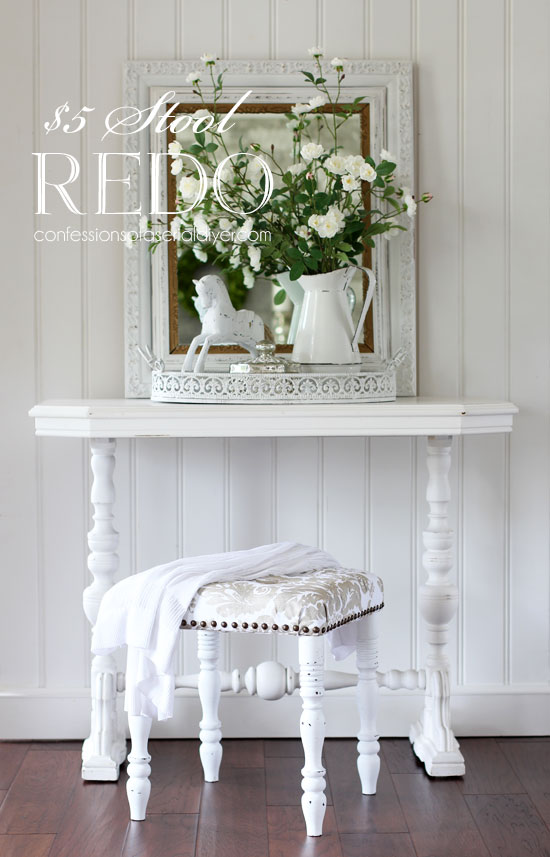
Right??
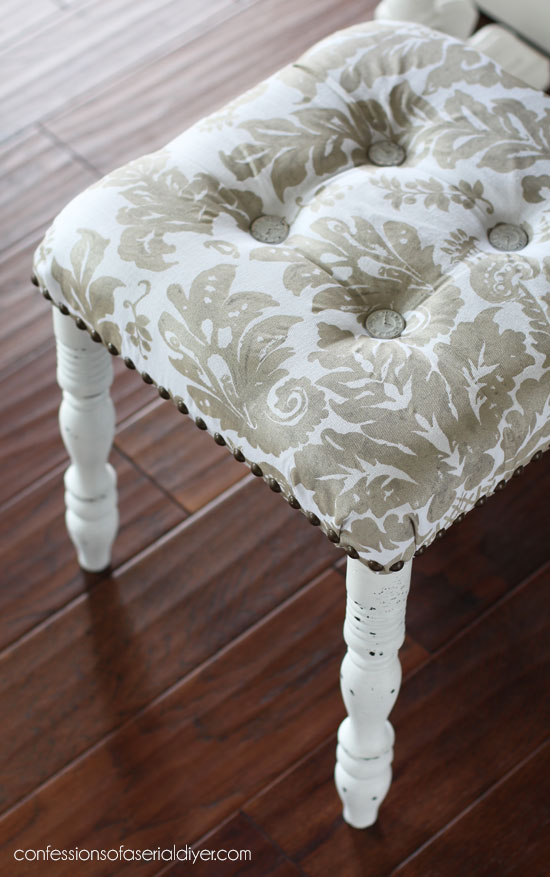
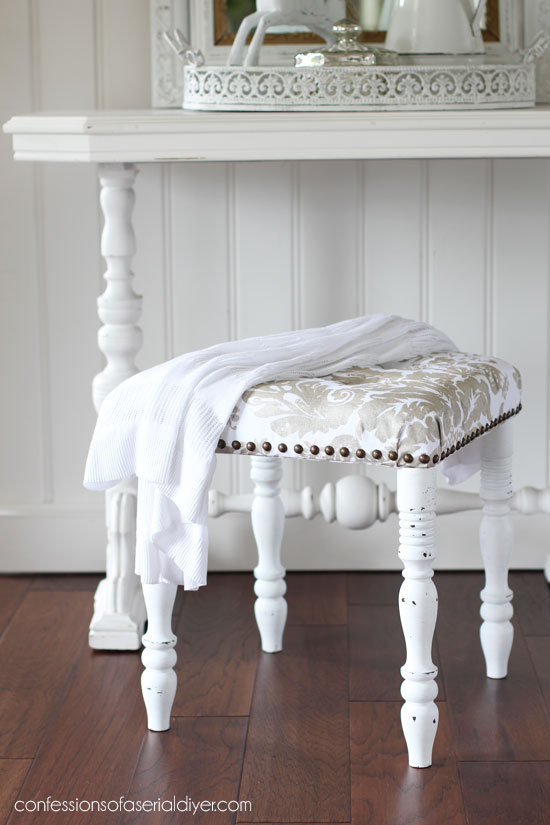
I used to sit on it to put my shoes on when it lived in my old closet, so I decided to add some cushioning to the top this time. Then I added a few tufts as well.
I started by covering up the blue paint with Rustoleum satin Espresso spray paint:
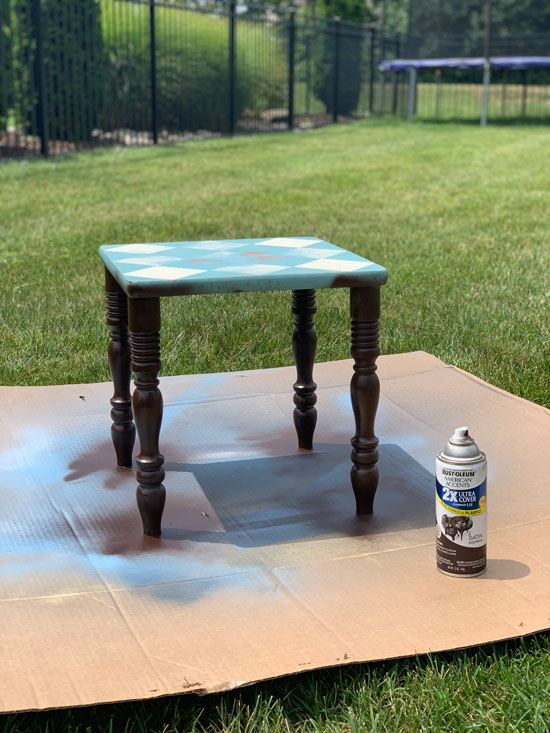
I didn’t want the blue to show through when I sanded.
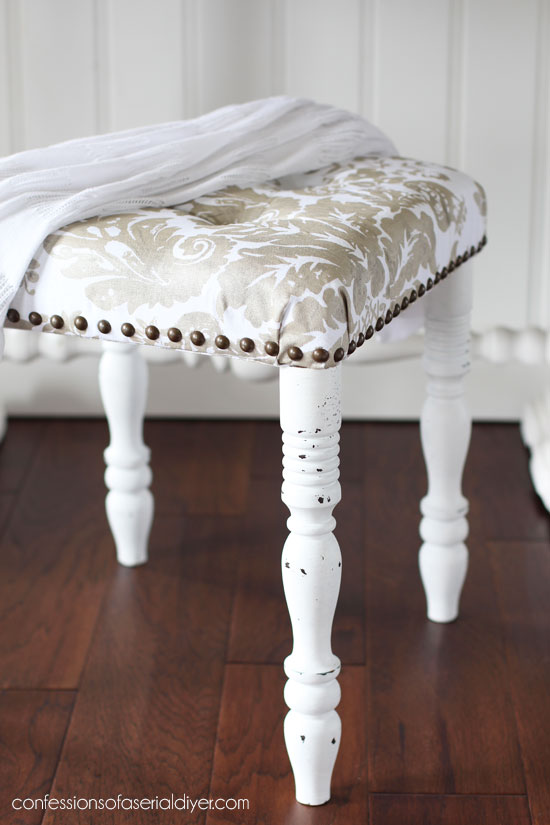
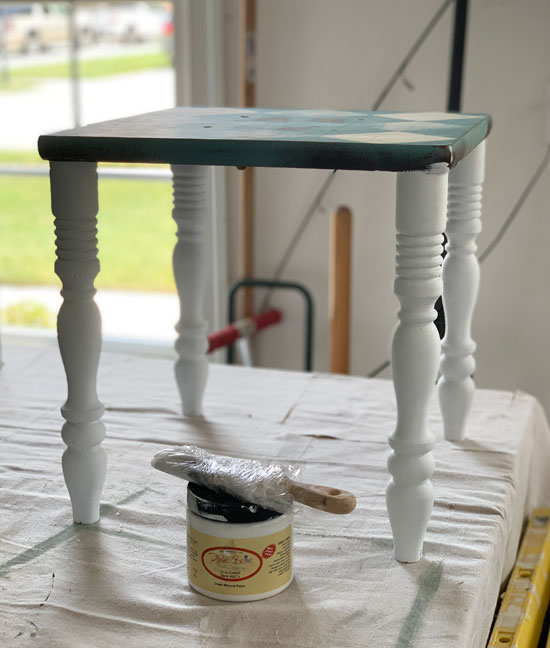
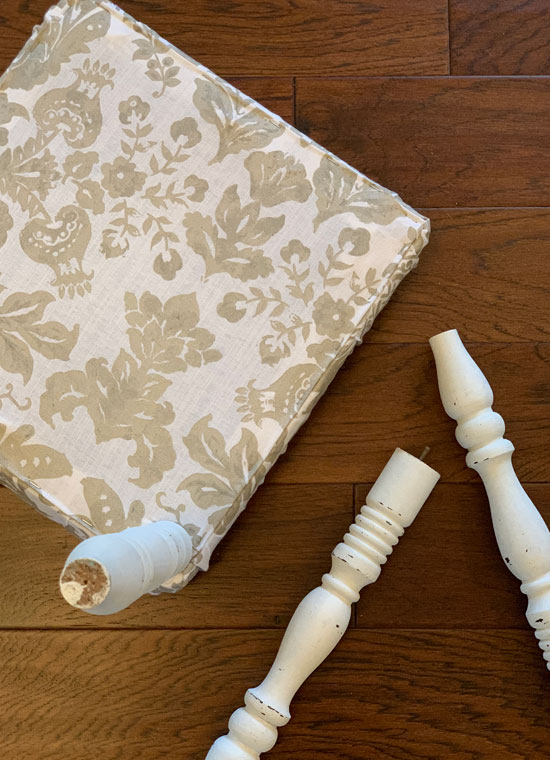
Then I painted the legs in two coats of Dixie Belle’s Cotton…
When the legs were dry, I lightly sanded them with 220 grit sandpaper and sealed with Dixie Belle’s Best Dang Wax. I would have used the satin clear coat, but I couldn’t find my blue sponge. I ended up finding it in Brennan’s room of all places!
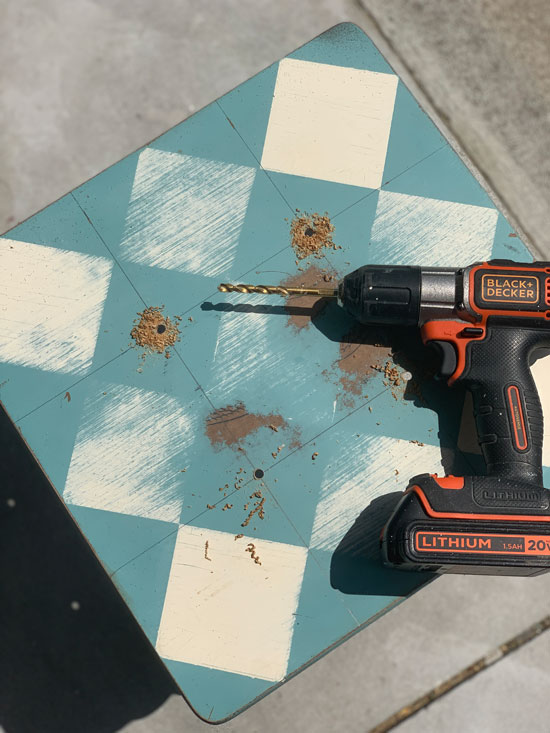
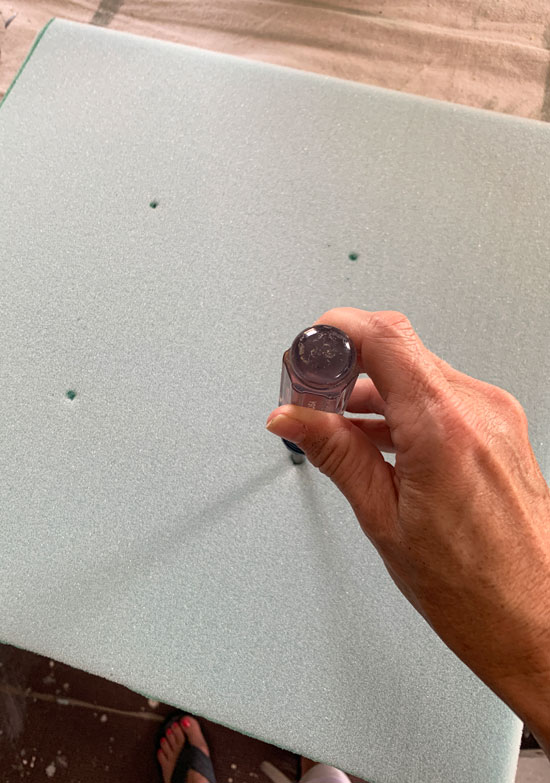
Then I measured out where I wanted the tufts to be and drilled holes with my drill:
I found my foam at Walmart. You can also find it online HERE. It’s an 18 X 18 X 2″ sized seat cushion that I cut to fit using my electric knife:
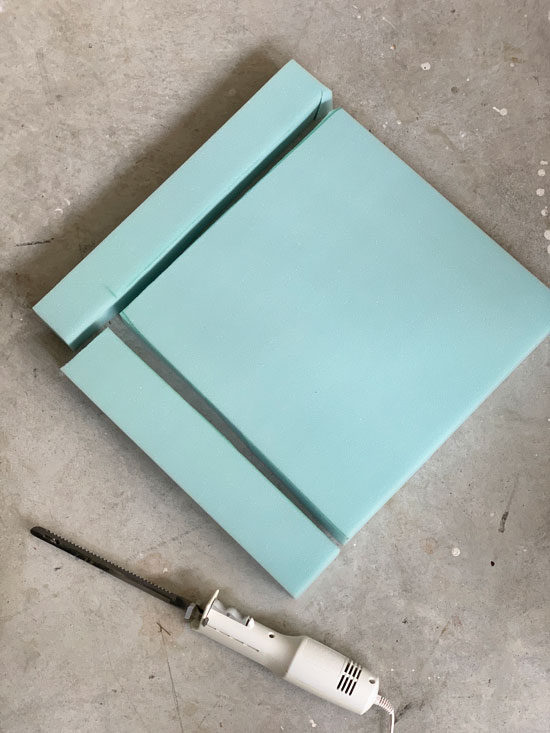
When I shared this moss-filled chair that I replaced the cushion on not too long ago, I used a regular knife because I couldn’t find my electric one. In fact, I hadn’t remembered seeing it since we’ve lived here. Turns out, my Mom had it! It was a lucky $4 thrift store find and makes it SO easy to cut foam…just like butter!
Then I marked my holes on the foam as well and used a screwdriver to puncture the holes:
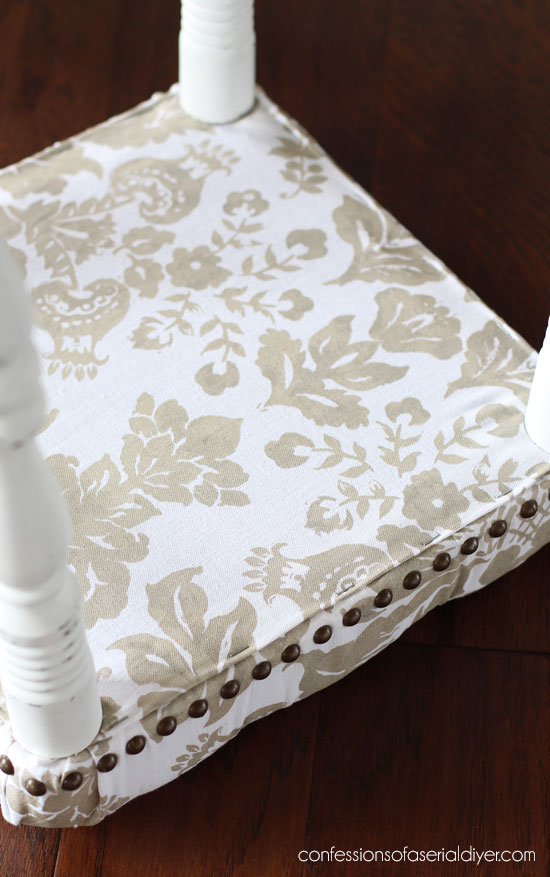
Next, I cut my fabric, including a thin white layer to cover the green foam since my fabric has a white background:

This fabric was originally a pair of curtains I found at HomeGoods for another project. The thin white layer was the liner that came with them. I love hitting up the curtain aisle for decor fabrics! You can see also that my legs unscrewed from the bottom which was super helpful!
For the tufts, I found these clock buttons at Walmart that I painted with a coat of Cotton first…
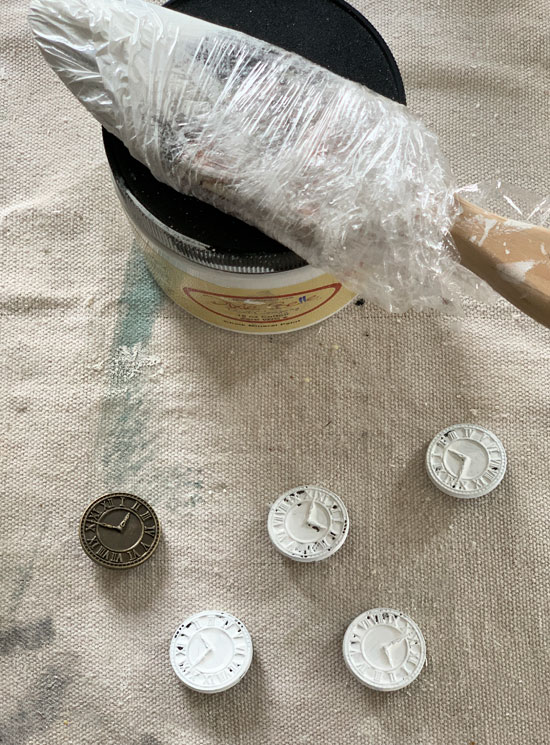
I usually cover my buttons with fabric and you can see what I use to do that in this post, but I decided to go a different route this time. I lightly sanded these and gave them a coat of spray sealer when they were dry. (You can also hit up the thrift store and look for garments with unique buttons you can use.)
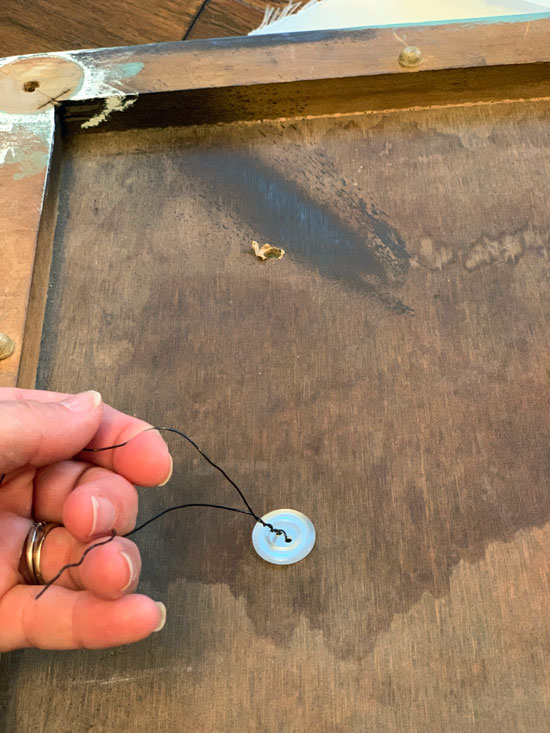
Then I grabbed some wire and my wire cutters.
I threaded the wire through the loop at the back of the button and then pulled the ends straight and slightly twisted the ends together like so:
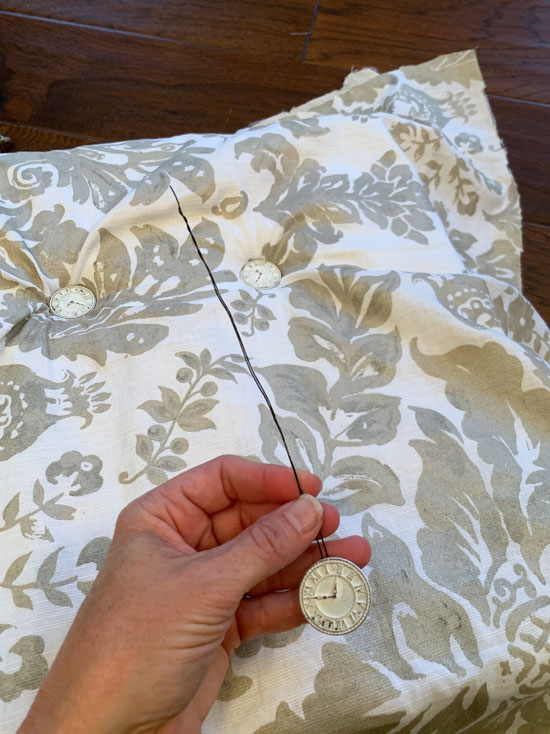
I poked the wire down through the top fabric, the foam, and then the bench top:
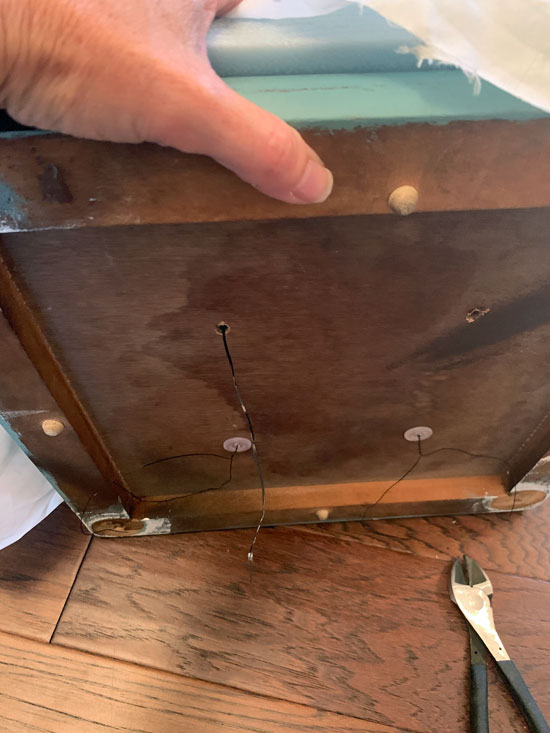
Then I used some buttons I already had to help secure them on the underside of the seat…
I just put my knee on the back and pushed the cushion into the floor while I tightened the wire.
That made it a bit easier to “sink” the button a bit to create the tuft.

When I had all my tufts complete, I used my el cheapo staple gun to secure the fabric to the back:

The bottom was really gross, so I covered that with fabric. You can see how I cut out some of the bulk on the corners before securing:

Then I cut a small slit in the fabric where the legs screwed in…
When it was put back together, it felt like it needed something more. I found a stash of old nailheads I had removed from these chairs when I redid them, and they were exactly what this little bench needed!
I used needle-nosed pliers to hold them in place while I tapped them in with a hammer.
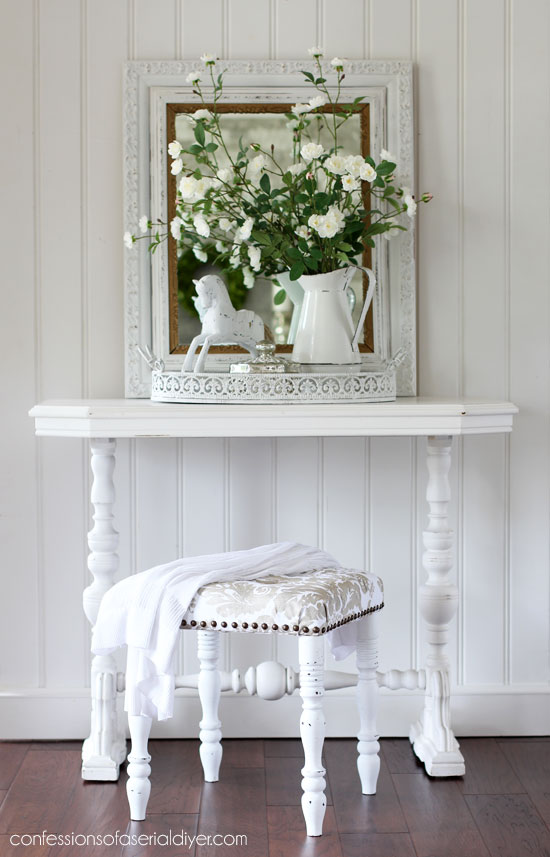
Remember this mirror? I used three pieces to create one chunkier frame:
You can see that makeover HERE.
And the underside as well…
I just love how this little stool turned out, and it only cost me the foam since I had everything else!
Don’t forget my friends have their own Trash-to-Treasure makeovers to share with you today!
If you liked how this little bench turned out, you might like this makeover too:

See how this chair turned out HERE!
For even more fun trashy makeovers, visit all of my Trash-to-Treasure Tuesday posts in one place HERE!
One more piece crossed off the list!
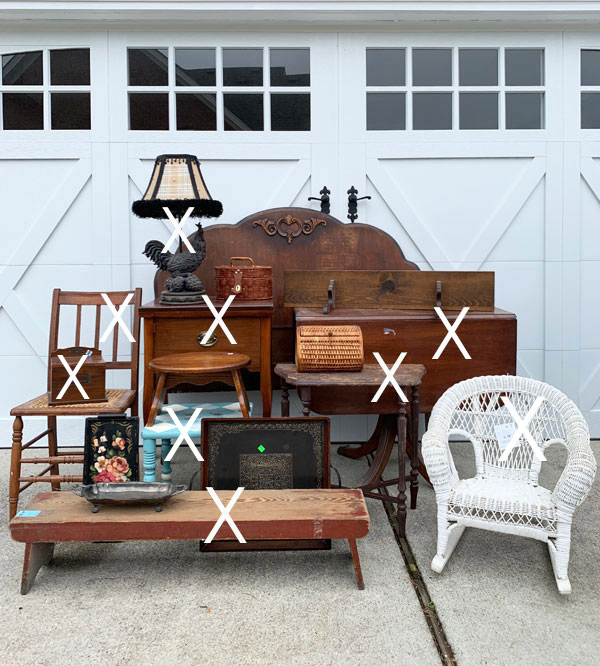
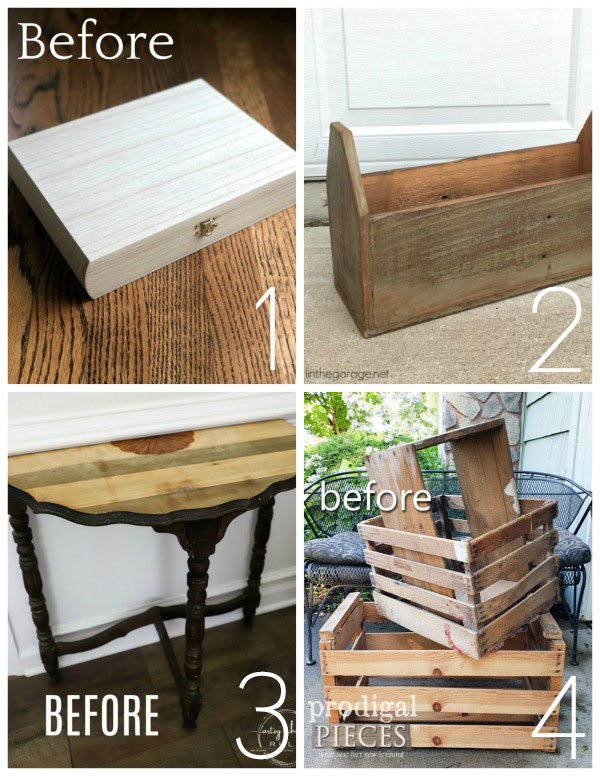
If you missed any from this haul so far, see them all below!
$6 Thrift Store Bench Makeover
Drop Leaf Table Makeover & How to Apply Sealer with a Sponge
I’ll see y’all on Thursday with this little step stool and that white-washing video tutorial I promised!
UPDATE: See how this stool looks now and see my tutorial on whitewashing furniture HERE now! 🙂
XOXO,
![]()
Don’t Miss a Thing!
If you like what you see, there are several ways to follow along!
Email * Facebook * Pinterest * Twitter *Instagram


")


Denise V Cox says
ADORABLE… AND… CAN YOU PLEASE SEND IT TO EASTON, MD???!!!.. LOL… This is a ‘simple’ redo compared to some of the others, but my, what a transformation!! I’ve been wanting a small stool for the longest time. The small town of Easton, however, offers such limited resources in thrift stores. I love your choice in fabric, as well! Great job.. but I have now learned to expect no less from you!!… ????????
Christy says
Aww thank you SO much, Denise!! Ha ha! I hear ya on the limited inventory…garage sales maybe? Good luck in your search! XOXO
Larissa ~ Prodigal Pieces says
eep! What a fantabulous new look and function, Christy! The buttons are the perfect touch. Love it!
Christy says
Thank you, Larissa!! I wish I would have tackled this one a lot sooner! XOXO
Dorothy Loose says
Love what you did with that stool Christy, it looks amazing as well as functional.
Christy says
Thank you so much, Dorothy!! XOXO
Mary Kaiser says
Oh my gosh is that beautiful now. I can not believe how talented you are. I would never ever believe that it was the same stool if you had not showed me the tutorial showing how you did it. You are so amazing.
Christy says
Thank you so much, Mary! You are the sweetest! I think this one surprised me too…who knew it could be such a cutie! XOXO
Janice Holt says
I cannot believe this little stool was that table. Super job and it looks so pretty now. Nobody but you would have thought of this. You are so talented.
Christy says
Right?? Thank you SO much, Janice!! I’m just tickled at how it turned out! XOXO
Candy says
Beautiful!
Christy says
Thank you, Candy!!
Christina in SW FL says
W O W ! ! This stool is a stunner! I mean … BOOM! mind blown! I love all the details you shared because I would have no clue how to do tufts. Thank you!!!
Christy says
Aww thank you, Christina! I’m so glad you found it helpful! XOXO
Holly says
I always wondered how tufting was done ! Thanks for such a great explanation.
The stool looks so pretty now, I definitely need to do the same for my closet.
Christy says
My pleasure, Holly! Thank you!! XOXO
Barbara Warner says
Christy,
What a beautiful job you did on this stool. It is absolutely gorgeous now! I love the fabric and tufting and the nailheads make it “snap to attention!” It is definitely a 300% improvement. You are the ultimate professional on makeovers!
Christy says
Aww you are so kind, Barbara, thank you!! It is definitely an improvement ha ha! XOXO
Marcie Lovett says
No. Way. That was an amazing transformation, Christy. It looks like a fancy bench out of Ballard’s catalog now! Really, just beautiful with all the little details. Now you can enjoy using it every day (and congratulate yourself for winnowing down the project pile!).
Christy says
Thank you, Marcie!! Yes, I am so excited to have my bench back and have one less thing to tackle!! XOXO
Tracy says
So sweet, love the buttons.
Christy says
Thank you, Tracy!! XOXO
Gail says
So much prettier!
Christy says
Thank you, Gail! XOXO
Denise - Salvaged Inspirations says
Christy! I’m always in AWWW of your fabric makeovers. I want to try this!!
Christy says
Aww thank you so much, sweet friend!! XOXO
Kimberly says
This is so pretty and looks so professional. I am not surprised, after all you certainly qualify as a pro. Thanks for sharing!
Christy says
Thank you, Kimberly! I appreciate that so much!! XOXO
Nancy @ Artsy Chicks Rule says
What a difference! Soooo much better. 🙂 I’m getting ready to do something sort of similar to those old bar stools I picked up when we went thrifting! Just got all my supplies in last week for it! Yippee! xoxo
Christy says
Thank you, Nancy! Your barstools will look amazing with upholstered tops!! XOXO
Sharon Girvin-Davison says
Genius tufting by drilling through the wood! beautiful job.
Christy says
Thank you, Sharon! XOXO
Carla says
It is adorable!! After looking at this re-do, I’m eyeing a stool that would be a perfect candidate for the “Christy” inspired make-over. You always make the most wonderful treasures out of someone else’s ‘trash!’
Christy says
Aww thank you, Carla! Go for it…this really wasn’t too hard to do at all! XOXO
Cecilia says
LOVE it! That’s gorgeous and perfect!
Christy says
Thank you, Cecilia! XOXO
Marie says
Well, you showed that little table who’s boss! GORGEOUS and swooning over the adorable buttons used on the tufting.
Christy says
Ha ha yes ma’am I sure did lol! Thanks, Marie! XOXO
Jen @ Girl in the Garage says
This turned out so beautiful, Christy! And you know I LOVE nail heads!! It’s so fun seeing how our styles change through the years and how older projects can be updated again. It’s the circle of life LOL. 😉
Christy says
Thank you, Jen!! Yes, it is funny to see what we thought was gorgeous several years ago lol! Thank goodness we evolve! 😀 XOXO
Mariele says
Amazing redo! And using wire for the tufts… ahh, how genius. I’ve done tufting before, but even my heavy duty upholstery thread came out after awhile. If only I’d known… (or had the brains to think of it myself 😉 )! You’re always so thrifty and inventive, I love it.
I also love that you said “el cheapo”… I never heard anyone outside my family use it to refer to things, haha!
Christy says
Thank you, Mariele! I had the same thing happen with my desk chair…the thread broke right through. The wire worked great! El cheapo…pretty much describes me too lol! XOXO