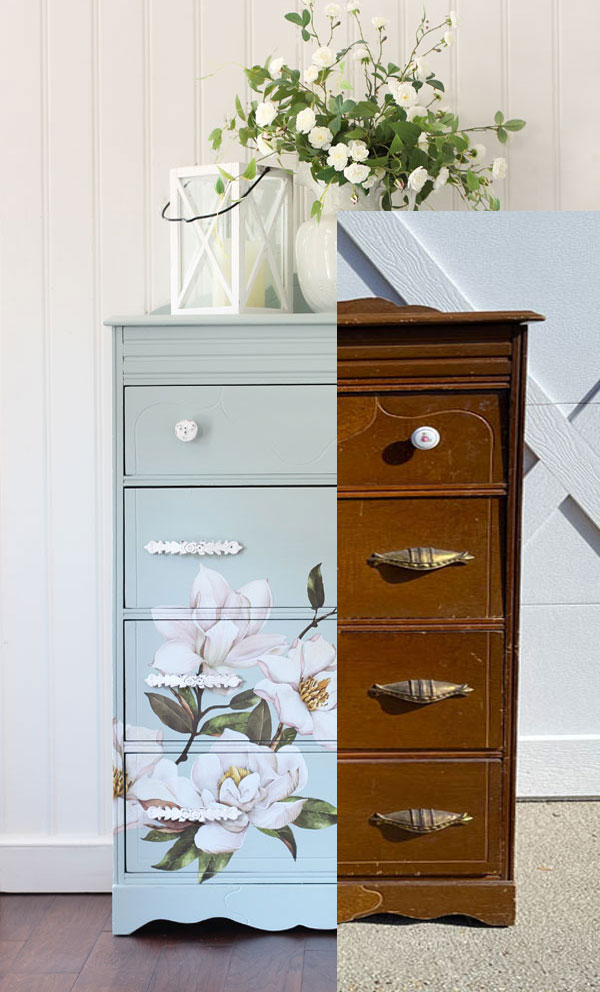
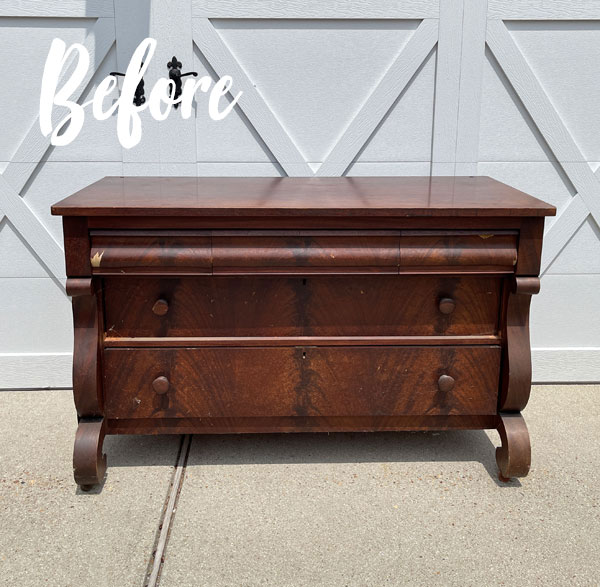
Hello lovelies and welcome to Furniture Fixer Upper Day!! My friends and I all have brand new furniture flips to share with you, so be on the lookout for their makeovers at the bottom! I’ve got the sweetest magnolia dresser makeover to share, but it didn’t start out that way!
This was definitely a fixer upper!!
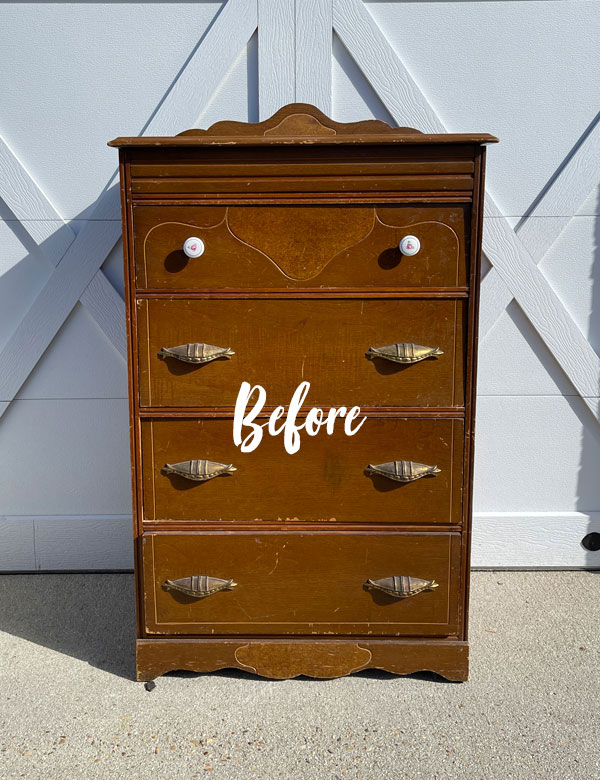
So. not. cute. But, I just couldn’t pass this one up for only $15.99.
These super needy pieces usually end up being my favorites to work on because you can really only go up from here!
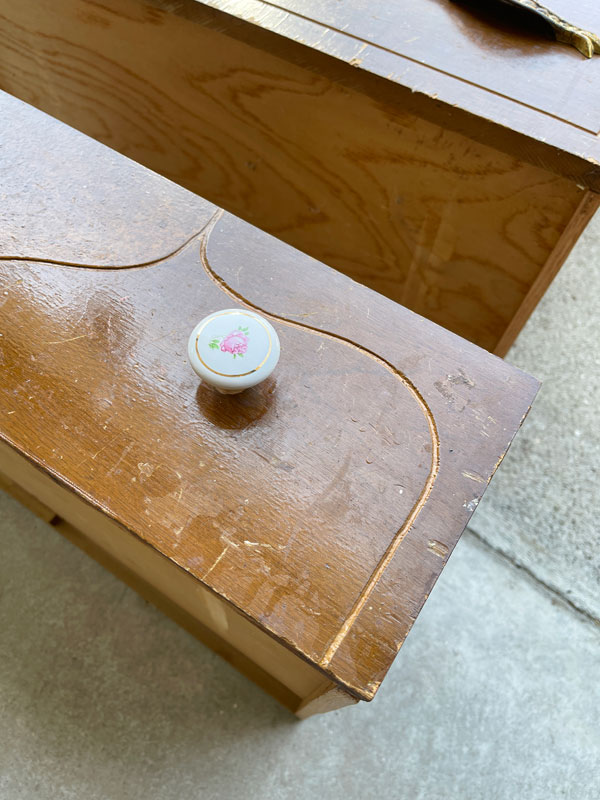
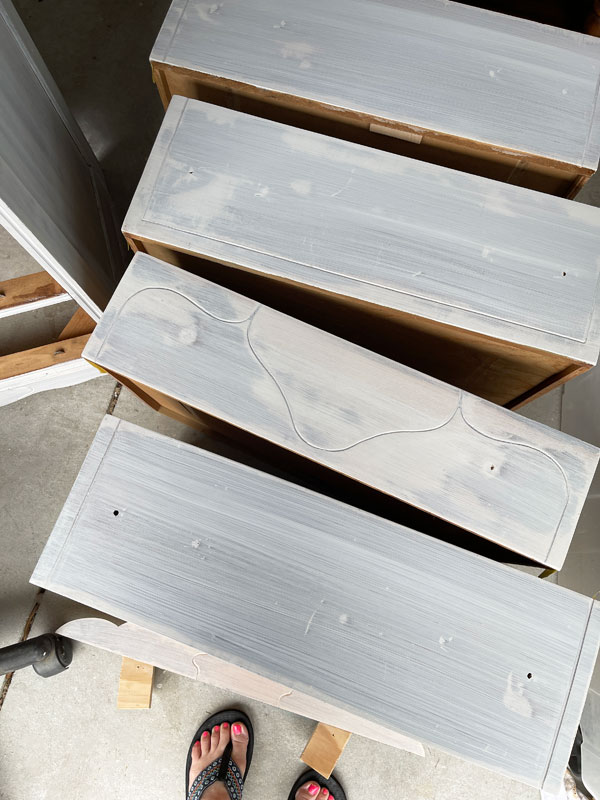
Here’s a view from the top…
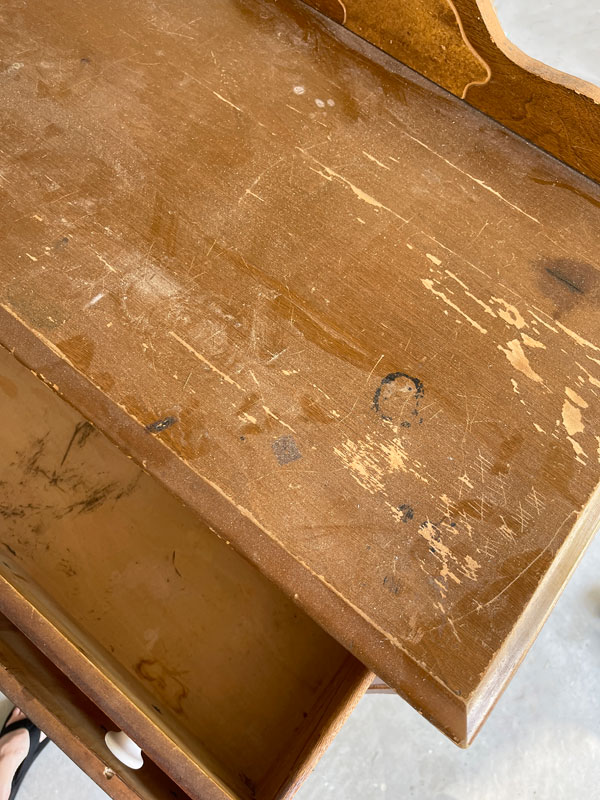
And what exactly is this finish??
Faux corkboard? Nice.
Sand all the boo boos
I started there with my sander:
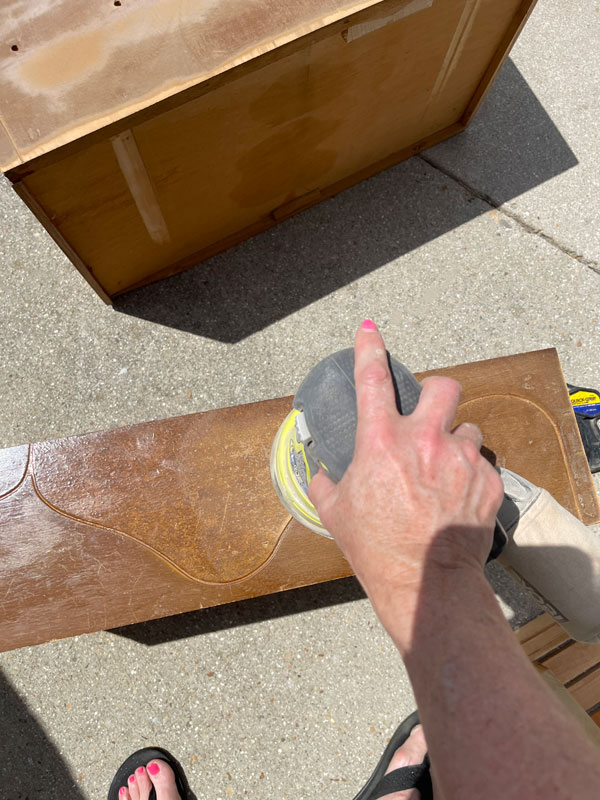
Luckily, that weird corkboard looking surface sanded away to reveal nice wood beneath it.
I’ve included a few affiliate links so you can find the products I love.
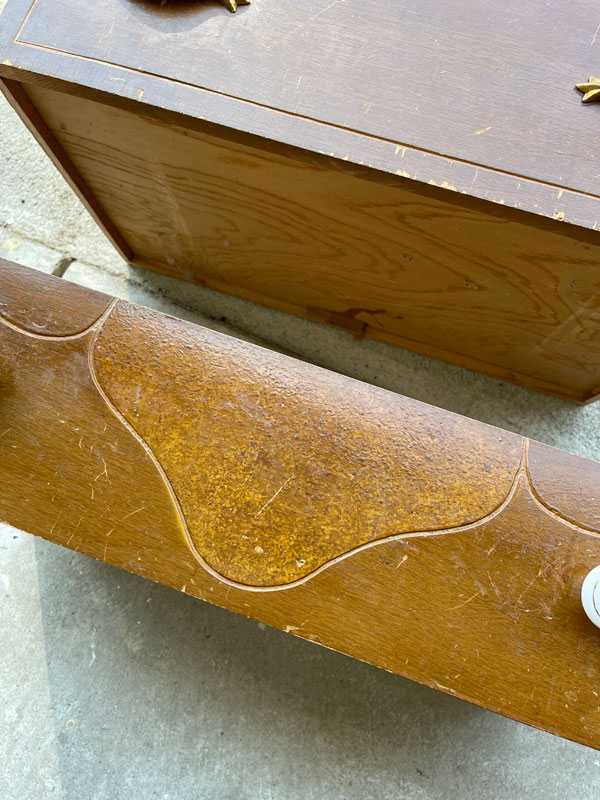
Here’s another shot of how bad the finish on this was:
I just kept sanding though until as many of the imperfections were smoothed out as possible.
This sander is great and comes in a corded and cordless version. I started with 120 grit sandpaper and finished with 220 grit.
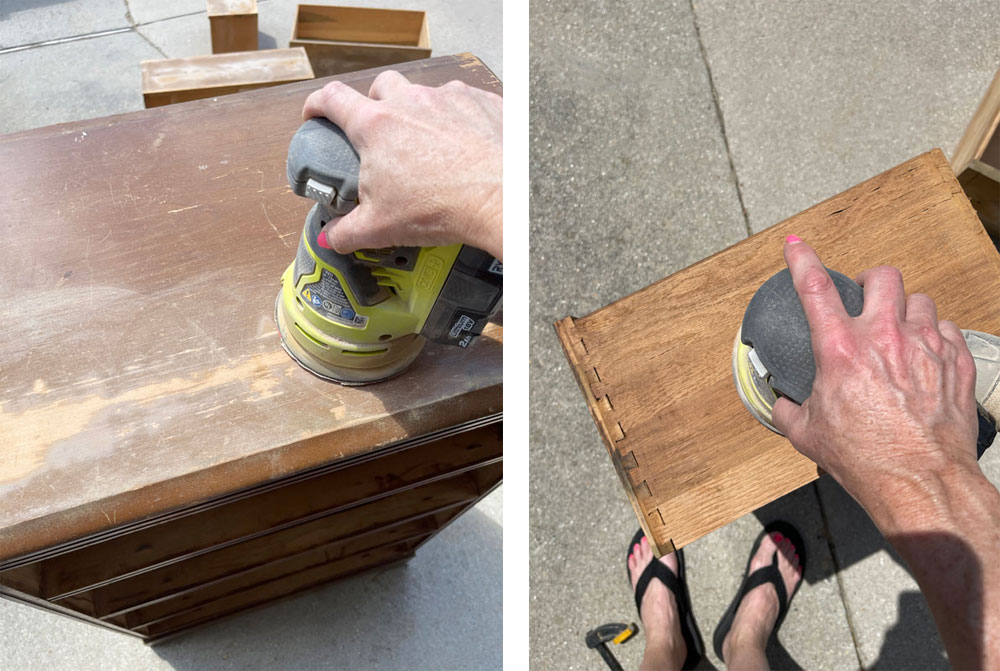
I sanded just about every surface, including the sides of the drawers that were splattered with stain that had been applied without much care.
Clean
Then, I vacuumed up all the sanding dust with my shop vac and gave everything a good wipe down with White Lightning to clean.
Fill holes and gouges
There were so many scratches and imperfections that I was not able to sand away, so I filled those with Dixie Mud and then left everything to dry in the warm sunshine…
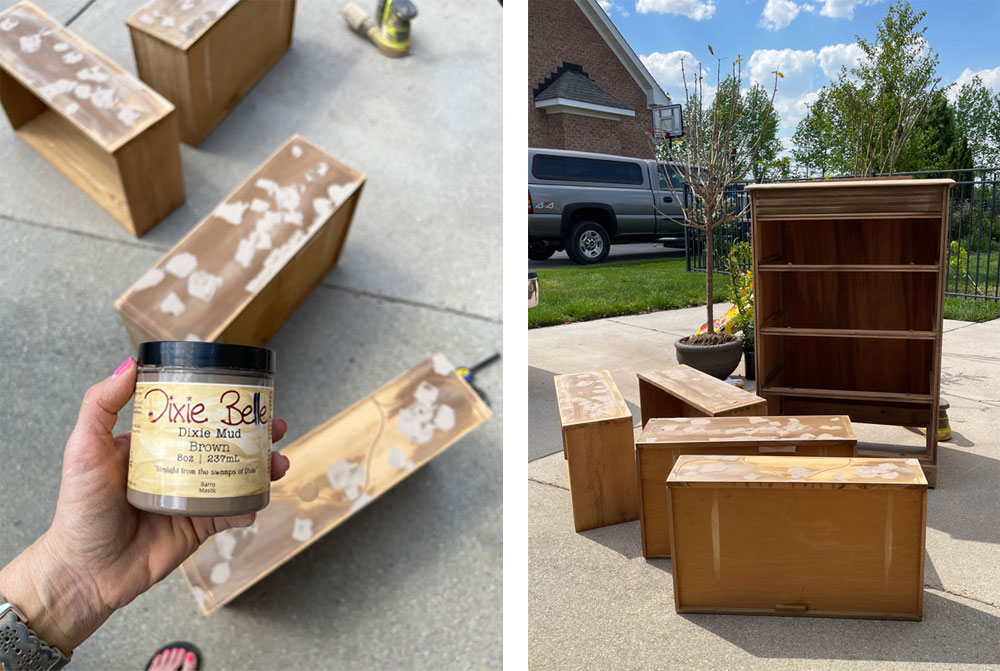
Once that was dry, I sanded the Mud smooth, vacuumed the dust, and gave everything another wipe down with a clean, soft cloth.
I get my “clean, soft cloths” that I mention in every other post at Lowe’s in these bags:
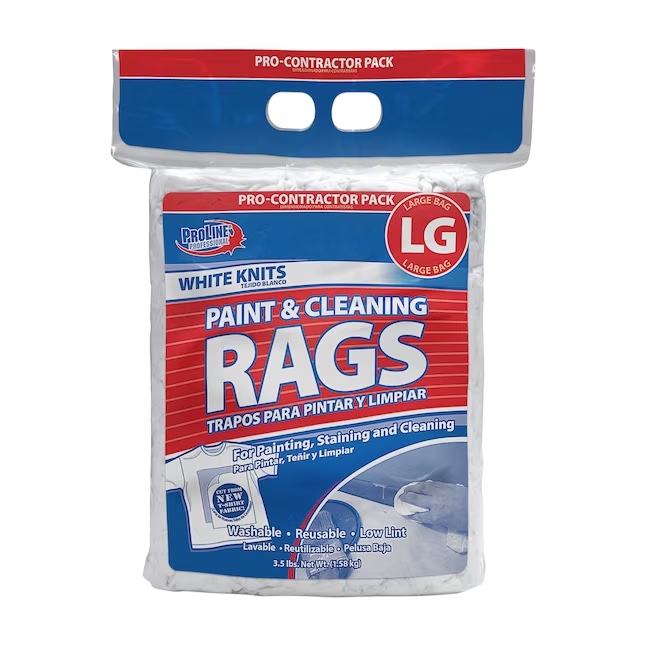
They are like cut up t-shirts and one bag is packed with a ton that lasts me for a long time.
Prime for Possible Bleed through
Once I had everything clean once again, I used BOSS stain blocker just in case of potential bleed through since this is an older piece and I sanded all over breaking the original seal.
No tannins seemed to come through the BOSS on this piece though, so there is a good chance I wouldn’t have needed it, but it doesn’t hurt to be too careful!
You can always paint a drawer to test first also, and then BOSS if needed.
The Fun part: Paint!
I left the BOSS overnight to do its thing and the next day I mixed up a fresh new color using two favorites: Fluff and Vintage Duck Egg Blue:
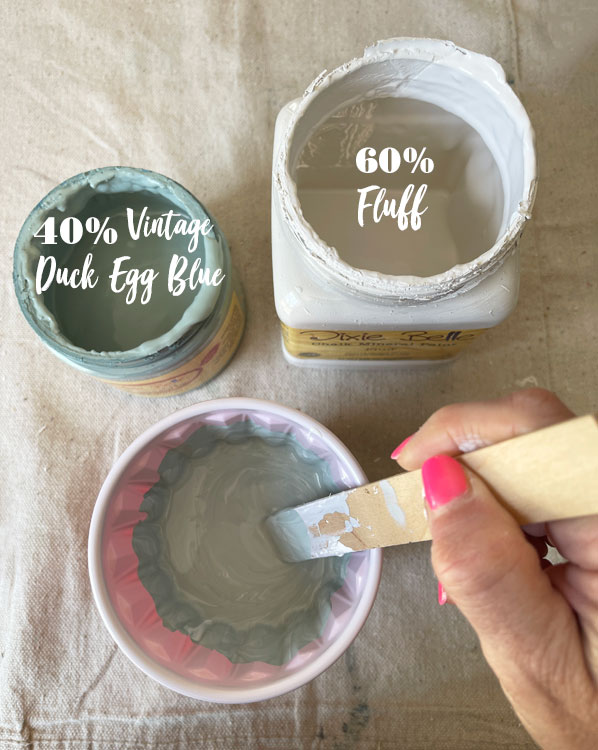
I love Vintage Duck Egg, but I love it even more lightened up! I usually will mix it 50/50, but I was a little heavier with the Fluff on this one.
It looks super light going on but dries darker…
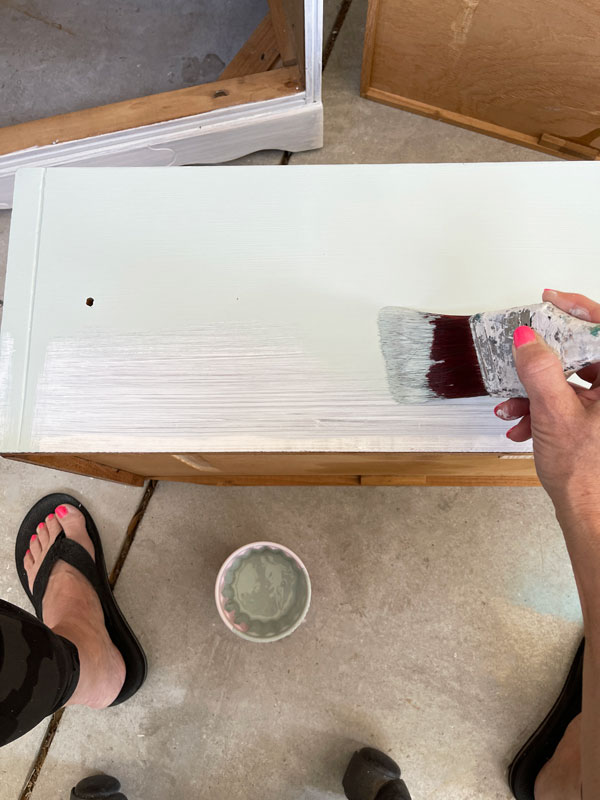
Even if I didn’t need the BOSS, it always makes for such a nice base for the paint layer and you can see how well the custom paint mix is covering!
I did give it two coats and then lightly sanded all over with 220 grit sandpaper to smooth out the surface and distress just a little.
Even if you don’t want to distress, you’ll want to sand to get a buttery smooth finish and these sanding sponges are perfect for that!
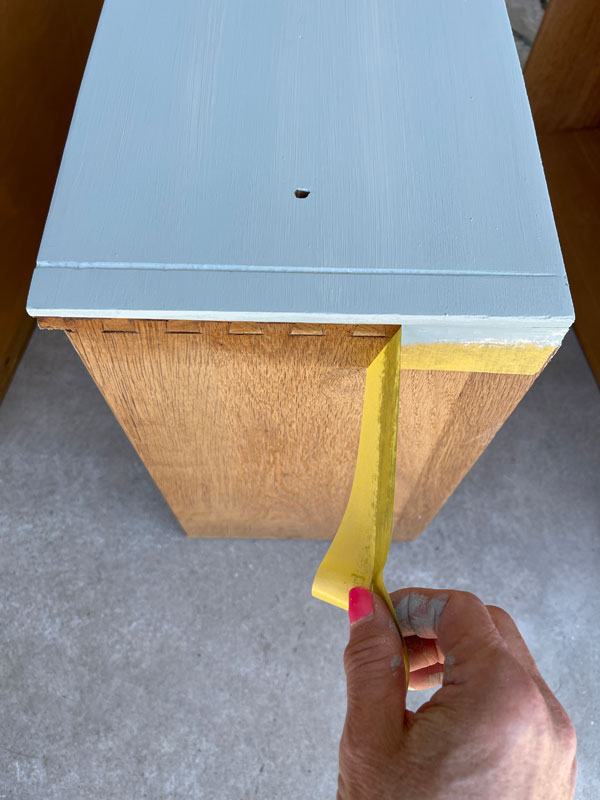
Don’t forget to tape off the sides too (FrogTape is my favorite painting tape), so you get a clean, professional looking result:
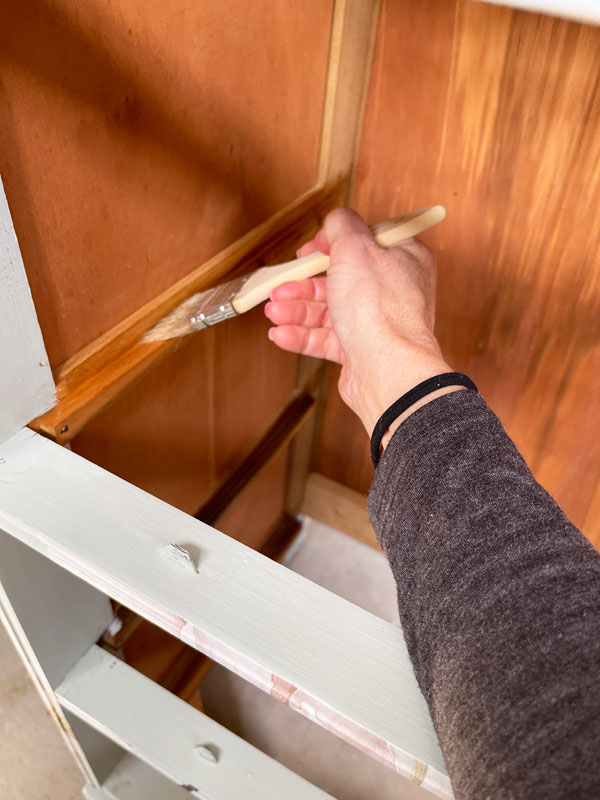
The most fun part: adding a transfer!
I decided this dresser needed a transfer, and I’ve been wanting to use this large magnolia transfer on something since I got it in:
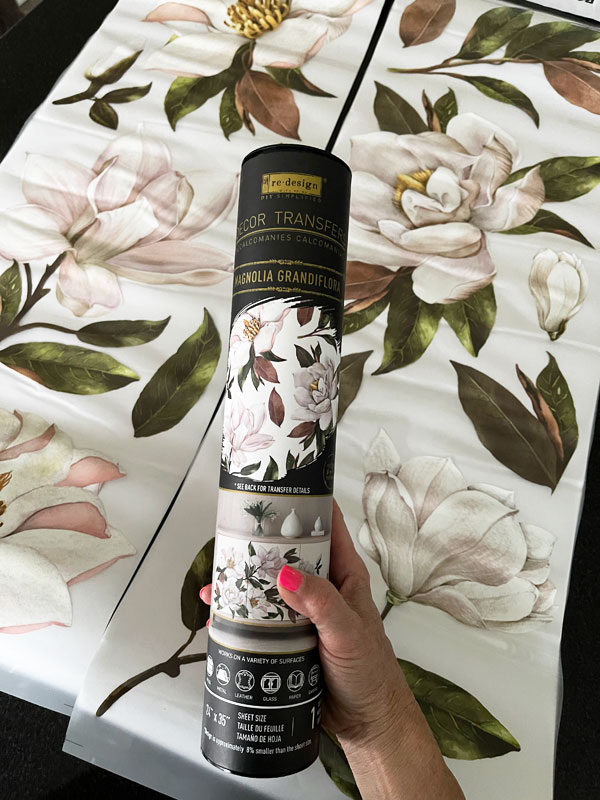
I just love how HUGE the blooms are!
I cut apart the pieces and laid them out first to get an idea of how I wanted it to look:
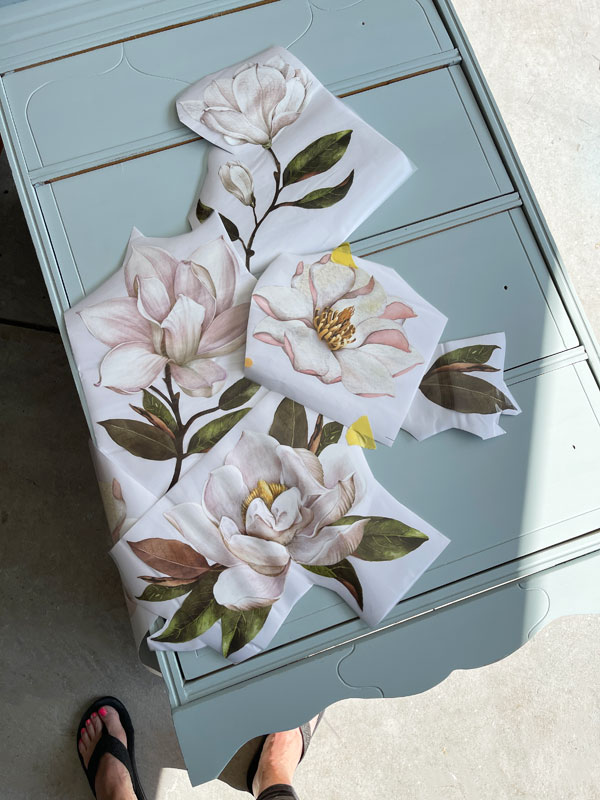
If you’re adding a transfer to a dresser, laying it on its back makes it much easier to apply.
Then, I went at it!
If you haven’t used transfers yet, they are super easy to add to your projects!
- Get an idea of how you want to arrange it first like I did here. Transfers can be cut apart and combined anyway you like.
- Peel off the white backing.
- Lay the transfer onto your surface.
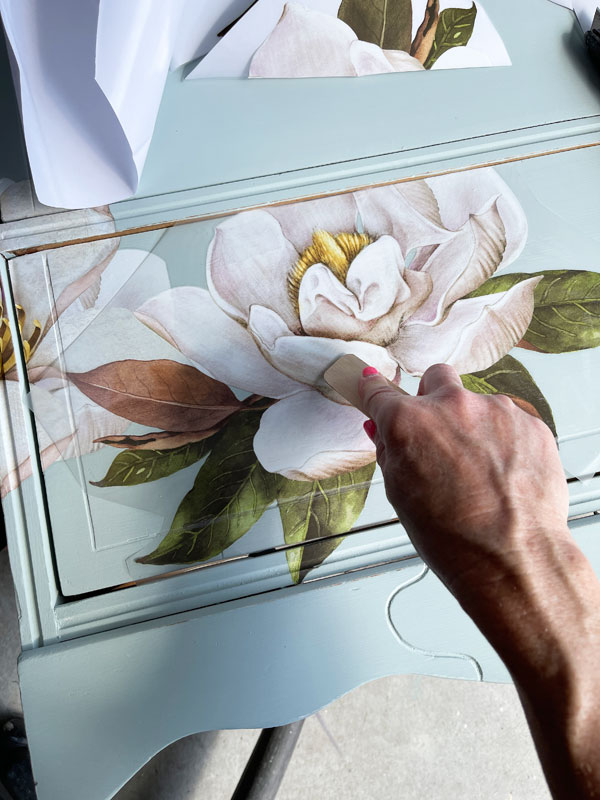
- Use the enclosed stick (or this fancier tool) to burnish (rub with pressure) to release the image from the clear top sheet onto your surface.
- Once the image has been transferred, peel back the clear top layer and remove.
- Then, take your fingers, a clean cloth, or a finishing pad and rub it across the entire surface of the transfer to be sure it is adhered well all over.
That’s it!
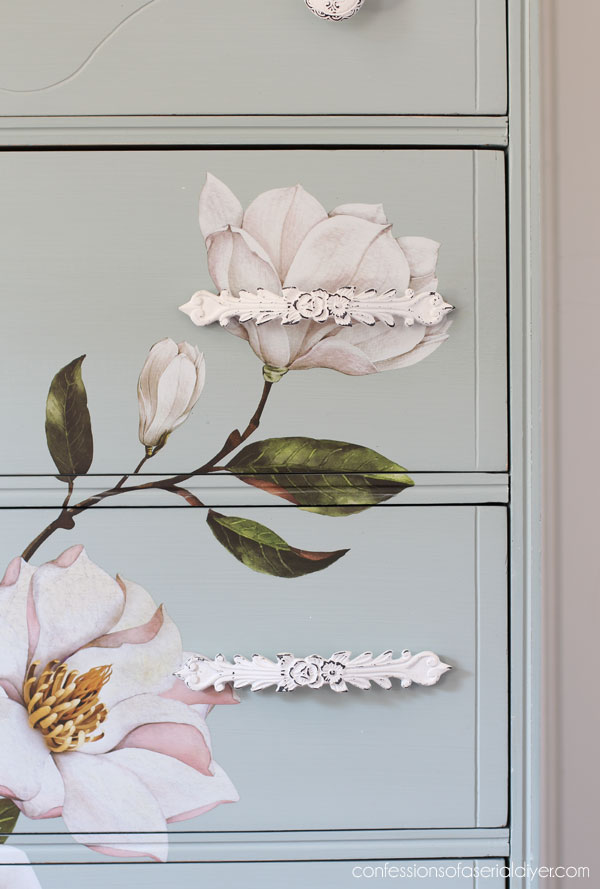
I do cut them apart in hard to apply places though like here:
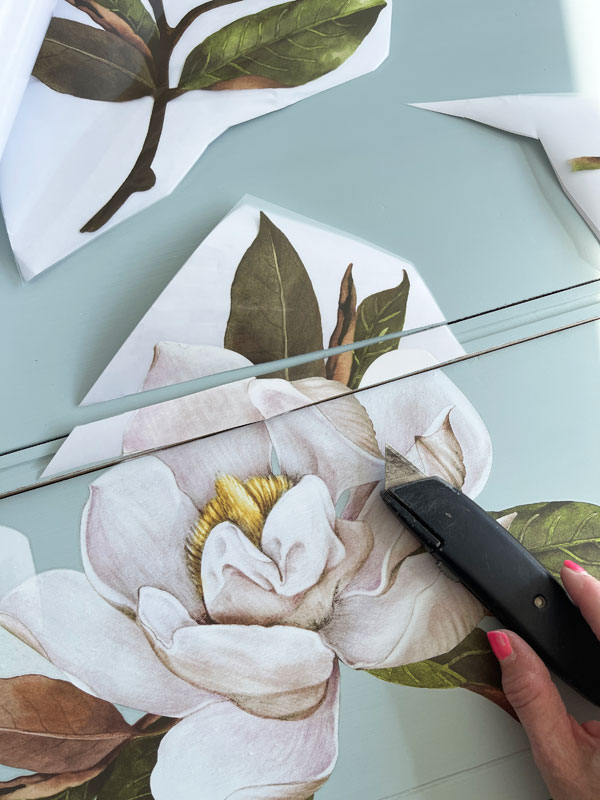
Cut them before removing the backing.
You can see all the transfers I have in stock in my Etsy shop HERE.
Redesign is in the process of replacing all the transfers they had us pull due to a patent issue, and the first ten are in! PLUS, there are more on the way AND a bunch of BRAND NEW smaller transfers coming soon!!
Seal
Finally, I sealed with my favorite sealer for most furniture, Clear Coat in satin, using the blue sponge applicator to apply it:
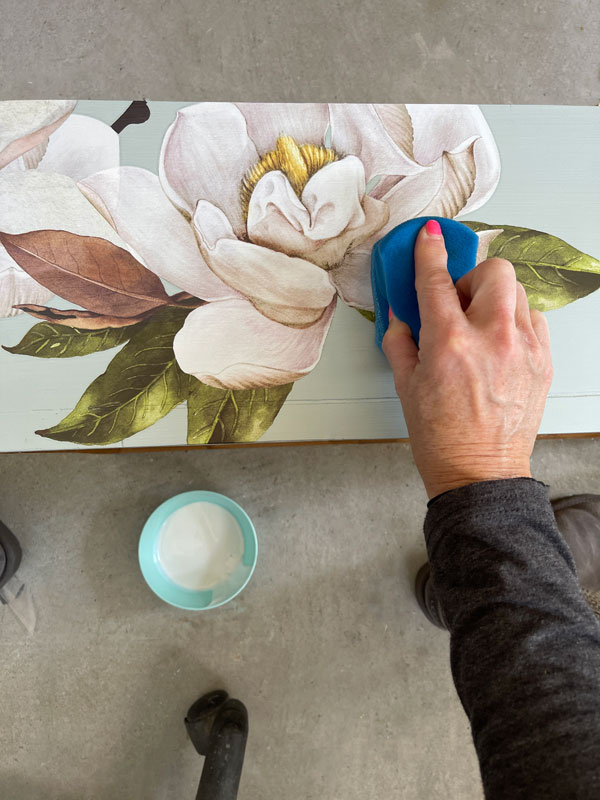
As you can see, I trim the top and bottom to give me a straight edge on either side:
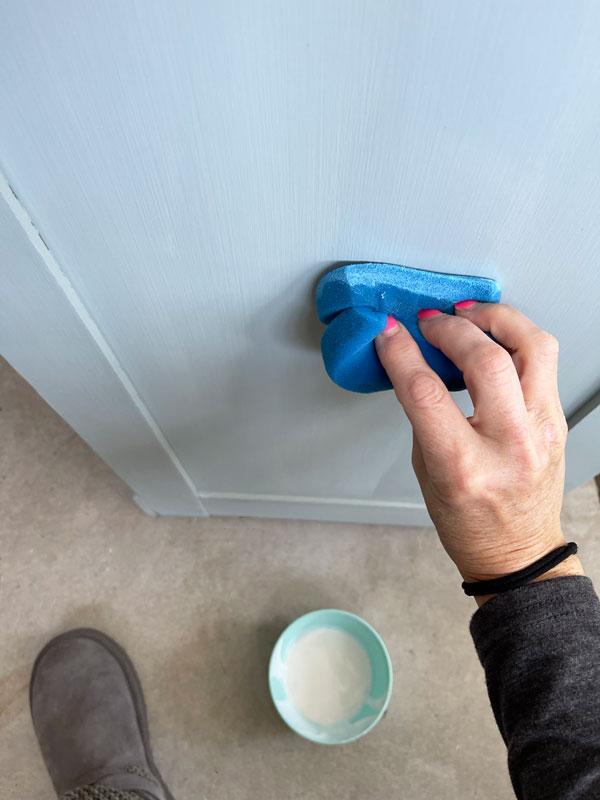
Using the sponge on these mostly flat surfaces makes applying sealer so much easier!
I did two coats on everything.
Sticky drawers??
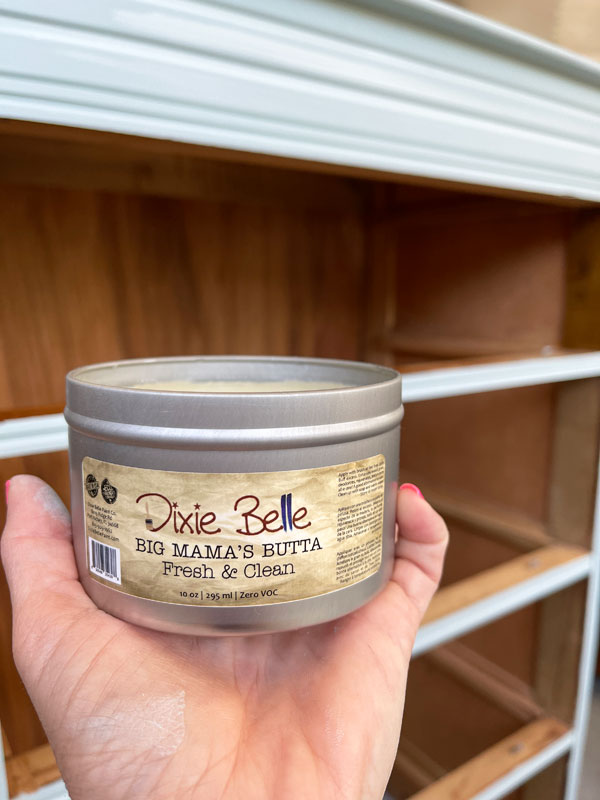
Every drawer on this dresser was sticking. I did have to reassemble a couple which helped, but I also went over all the outsides of the drawers with Big Mama’s Butta:
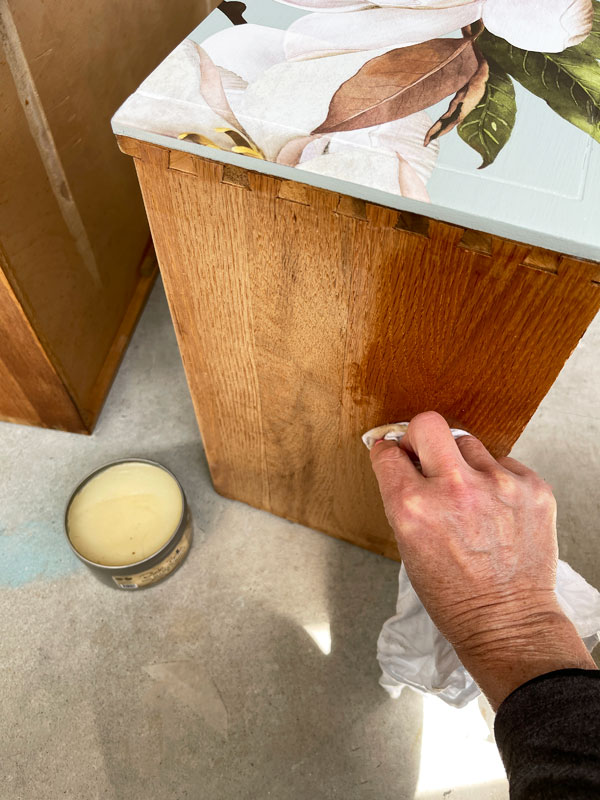
This is the BRAND NEW Fresh and Clean scent, and I think it’s my new favorite!
I also added it to the rails where the drawers slide on the interior:
Not only does the Butta hydrate the wood and make it smell amazing, but these drawers all slide like a dream now!
The Big Reveal
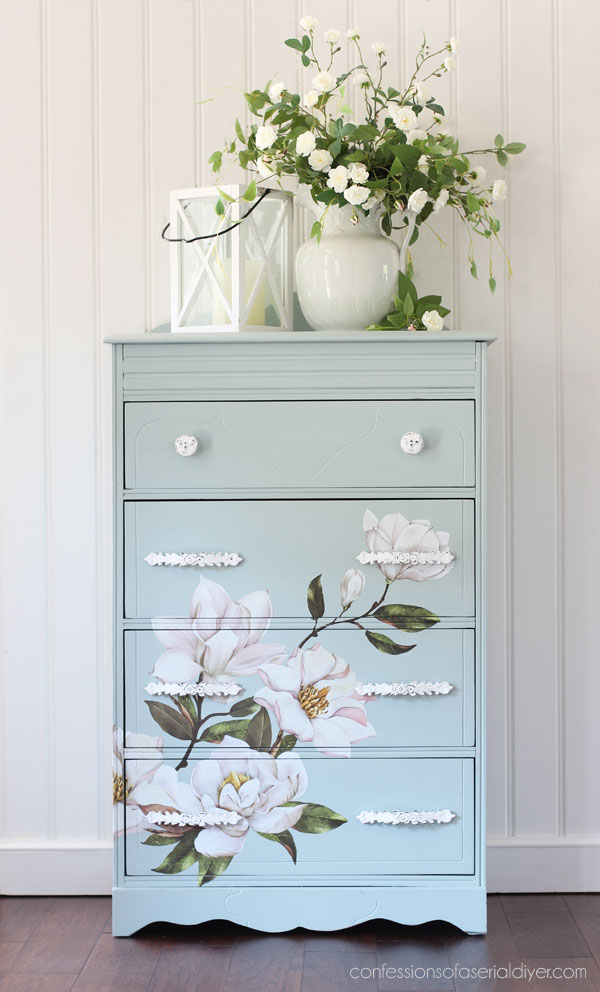
Here is how this once NOT cute dresser looks now!
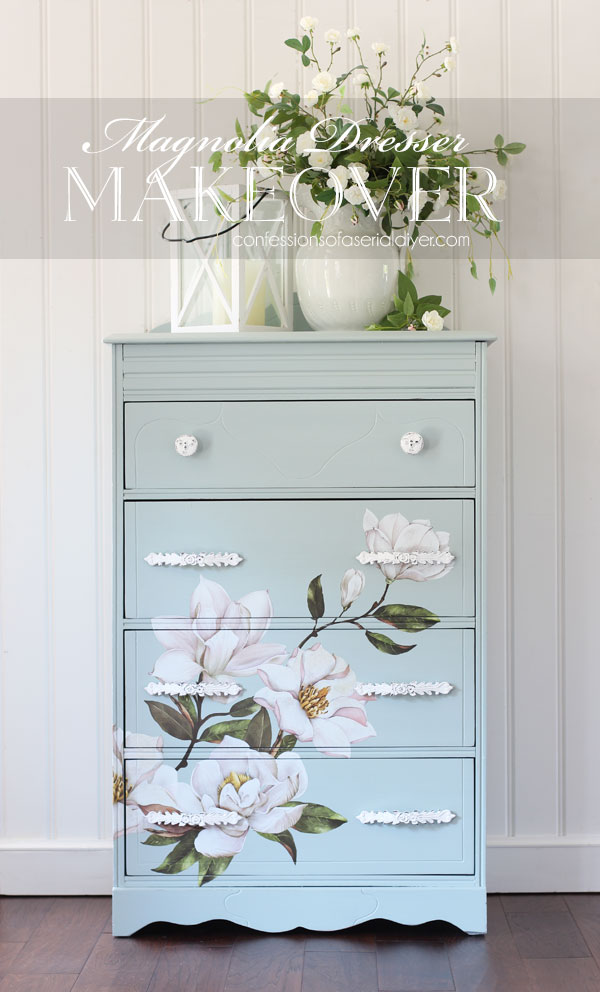
Cute, right?
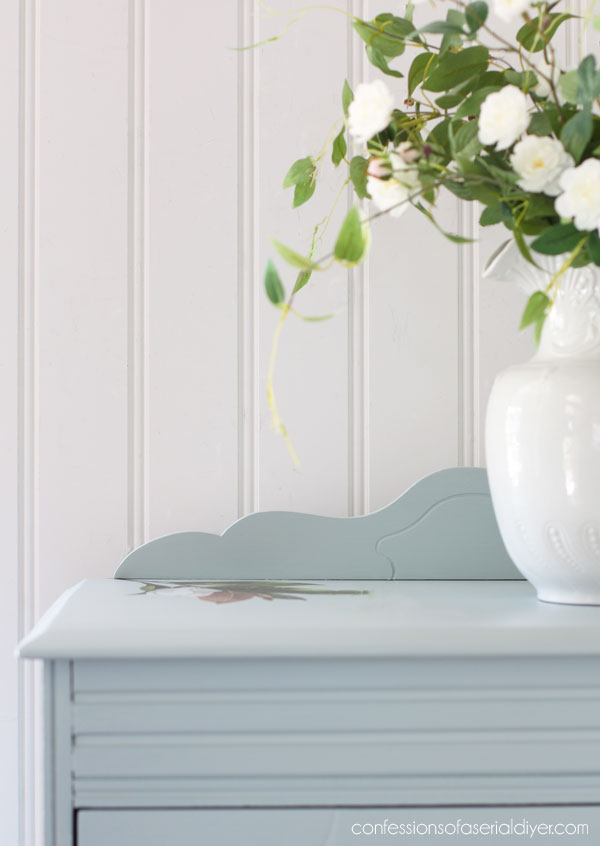
This soft blue is so pretty…the top color is more accurate. The bottom is reflecting light from outside.
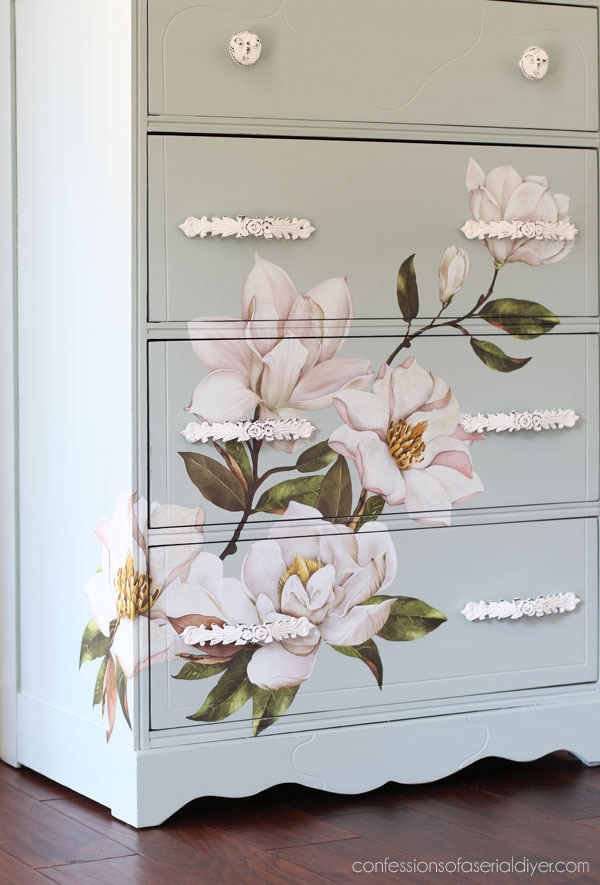
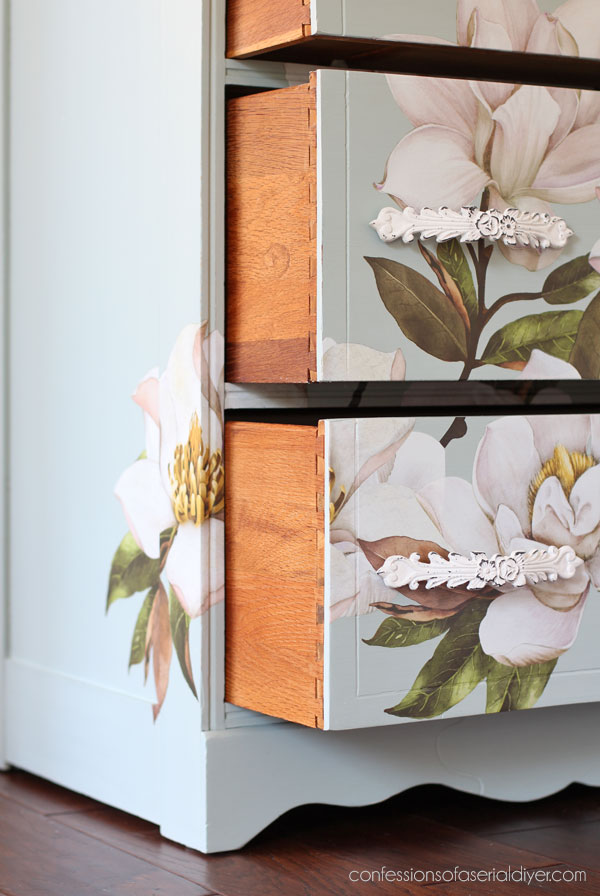
And this transfer! I love the big, bold magnolia blooms!
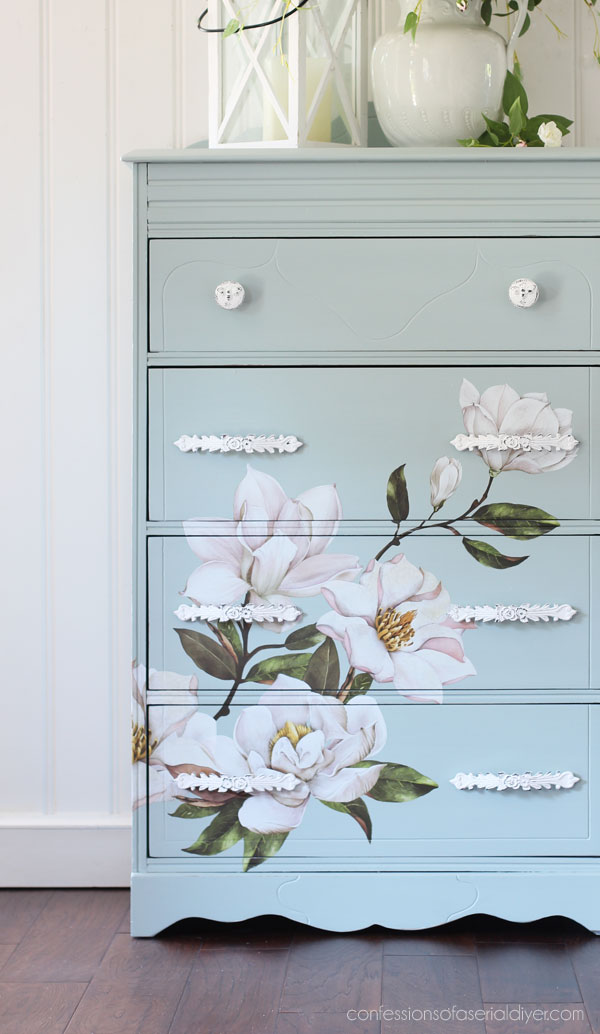
They start at the side on the bottom…
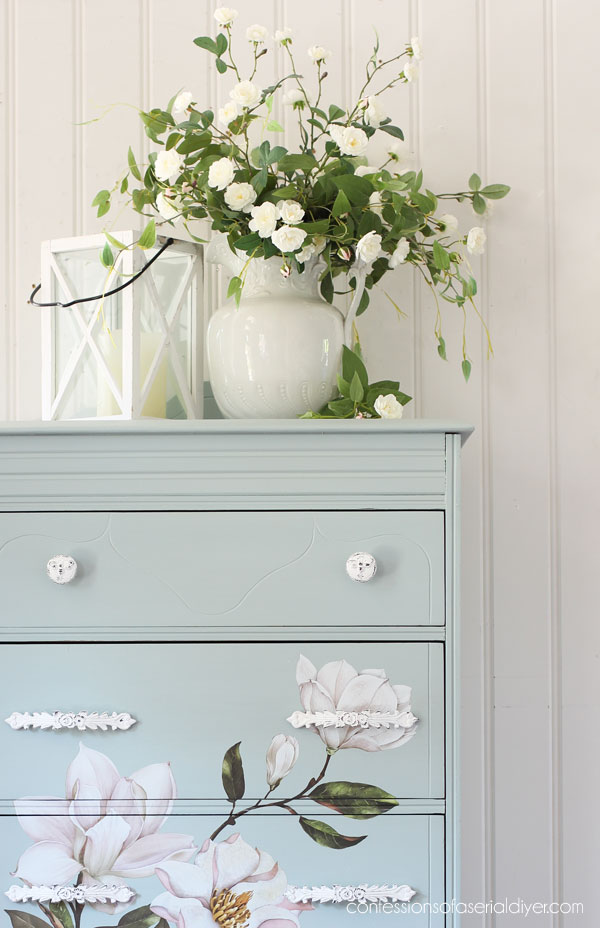
I swapped out the original hardware also.
Although I liked the original cup pulls, I felt like they didn’t work with the softness of the magnolias. I’ve definitely saved them for a future piece though.
The small knobs on top have bees on them:
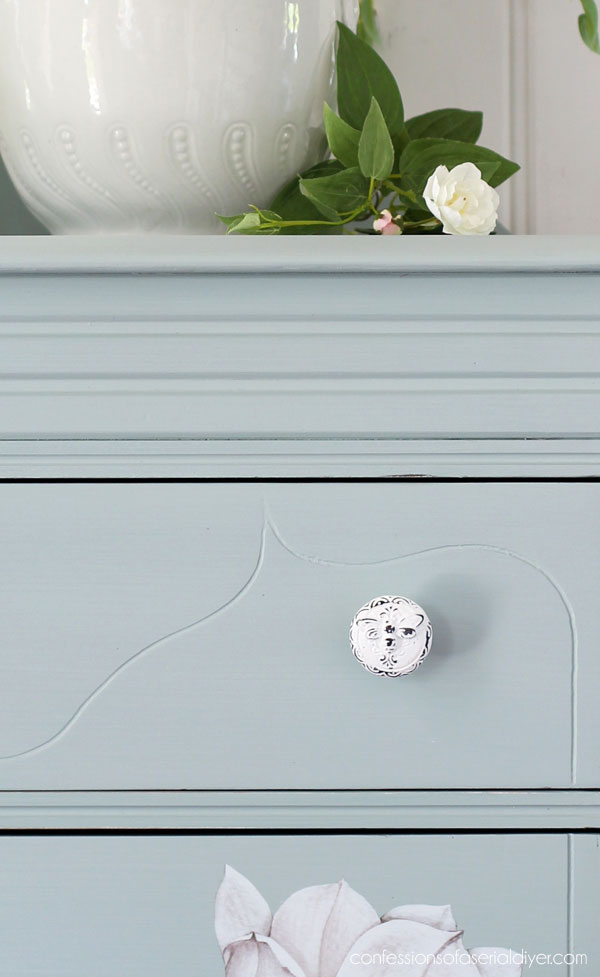
All of the hardware came from Hobby Lobby.
I always love this detail on the backs of older dressers:
Perhaps that is what drew me to this piece in the first place.
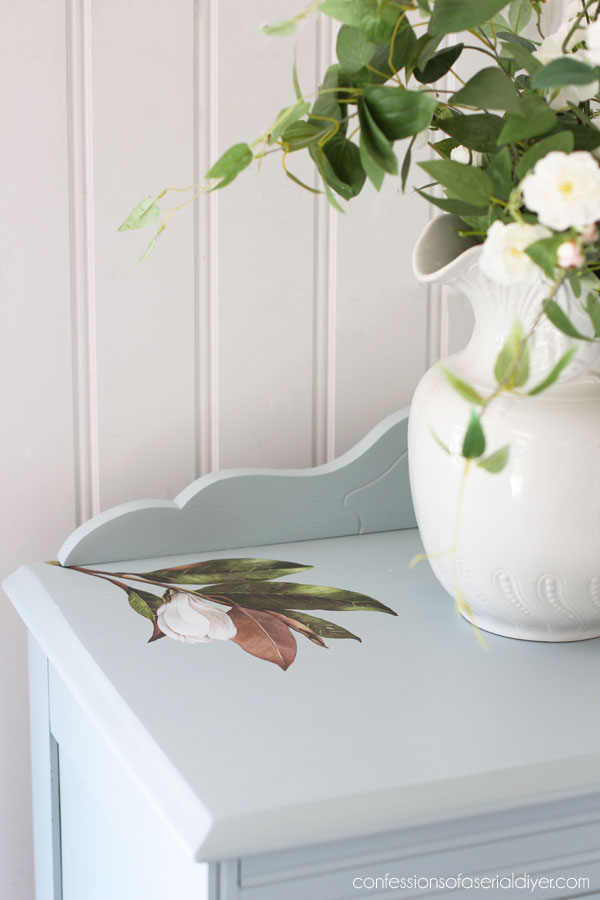
I found a spot for some of the transfer on the top there too:
The Drawers
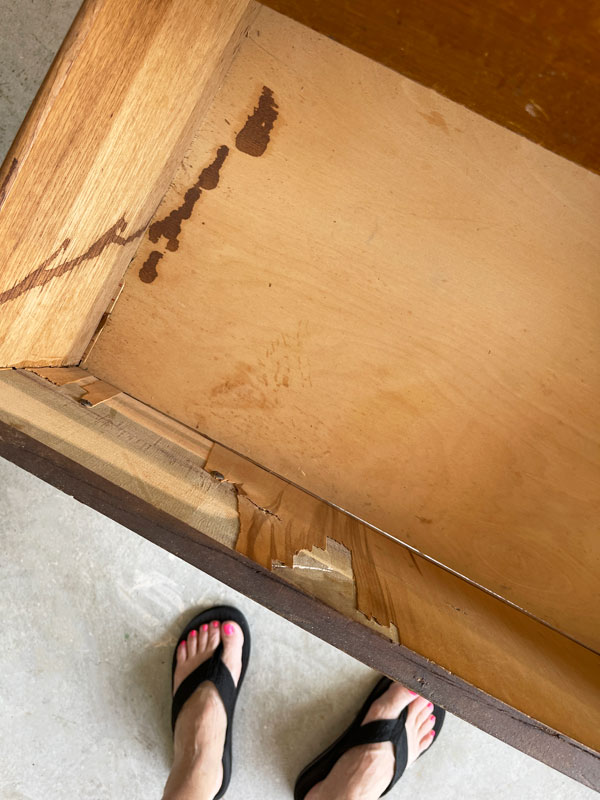
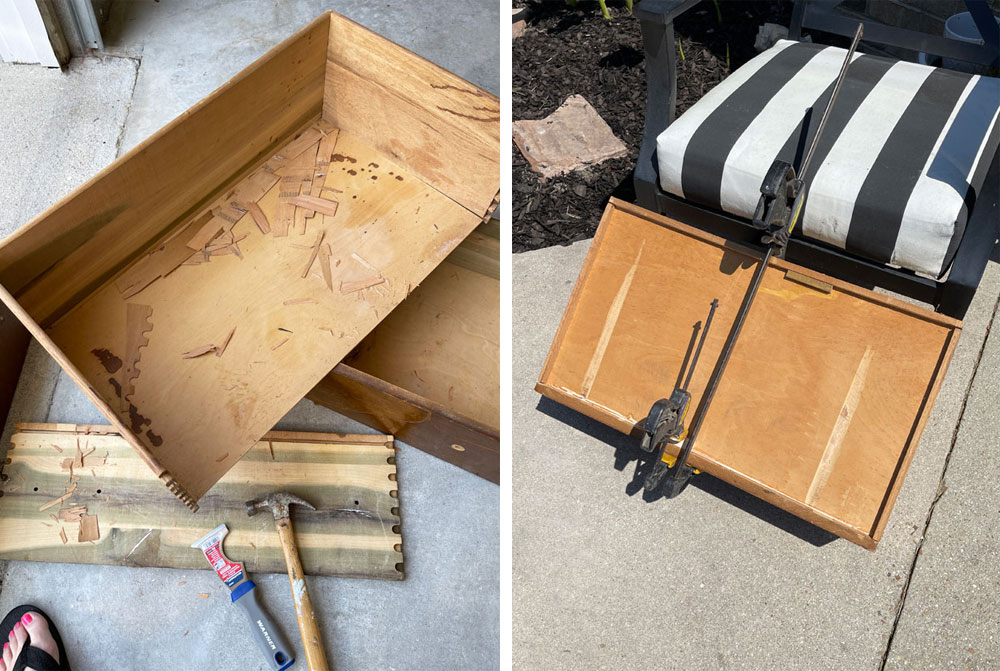
The drawers were in bad shape on this one. All were sticking, stained, and had peeling veneer on the insides:
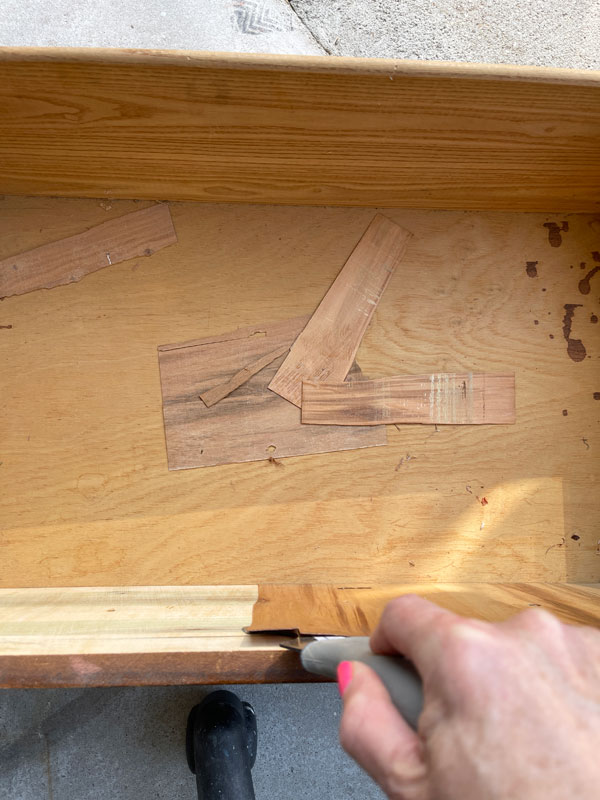
Luckily, this tool helped to remove the veneer pretty easily:
I had to rebuild a couple of them that were coming apart. Wood glue and clamps to the rescue!
Here they are now all fresh and new!
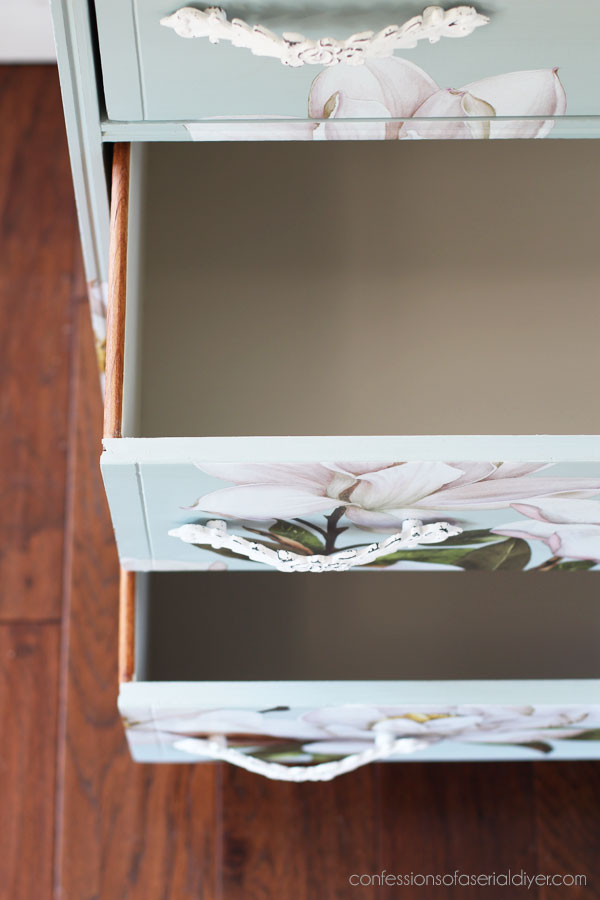
The insides got two coats of Silk paint in Oyster.
Silk paint doesn’t require a top coat and although it typically requires that you sand first, there is no need with raw wood, so it’s perfect for drawers!
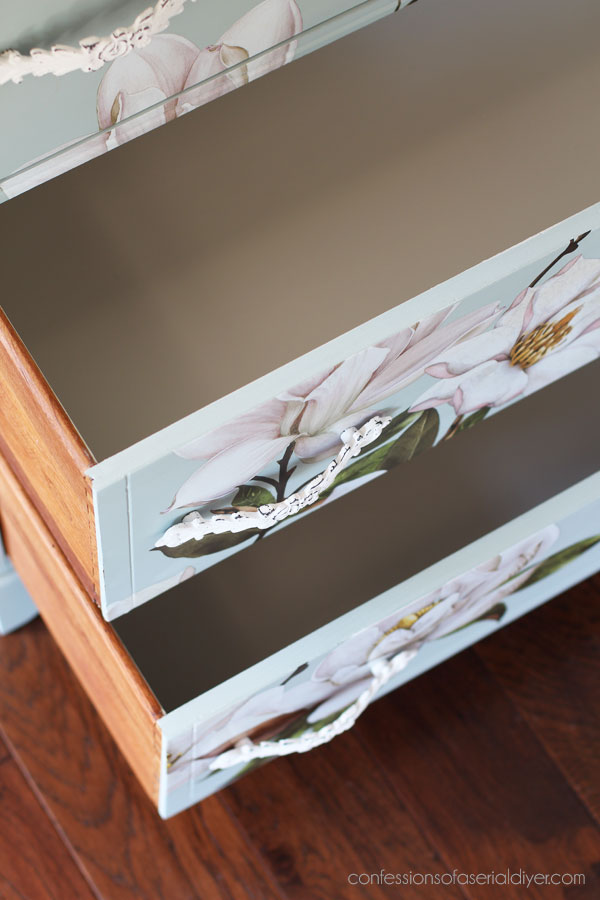
And look how pretty the sides are!
I loved bringing this fixer upper back to life!

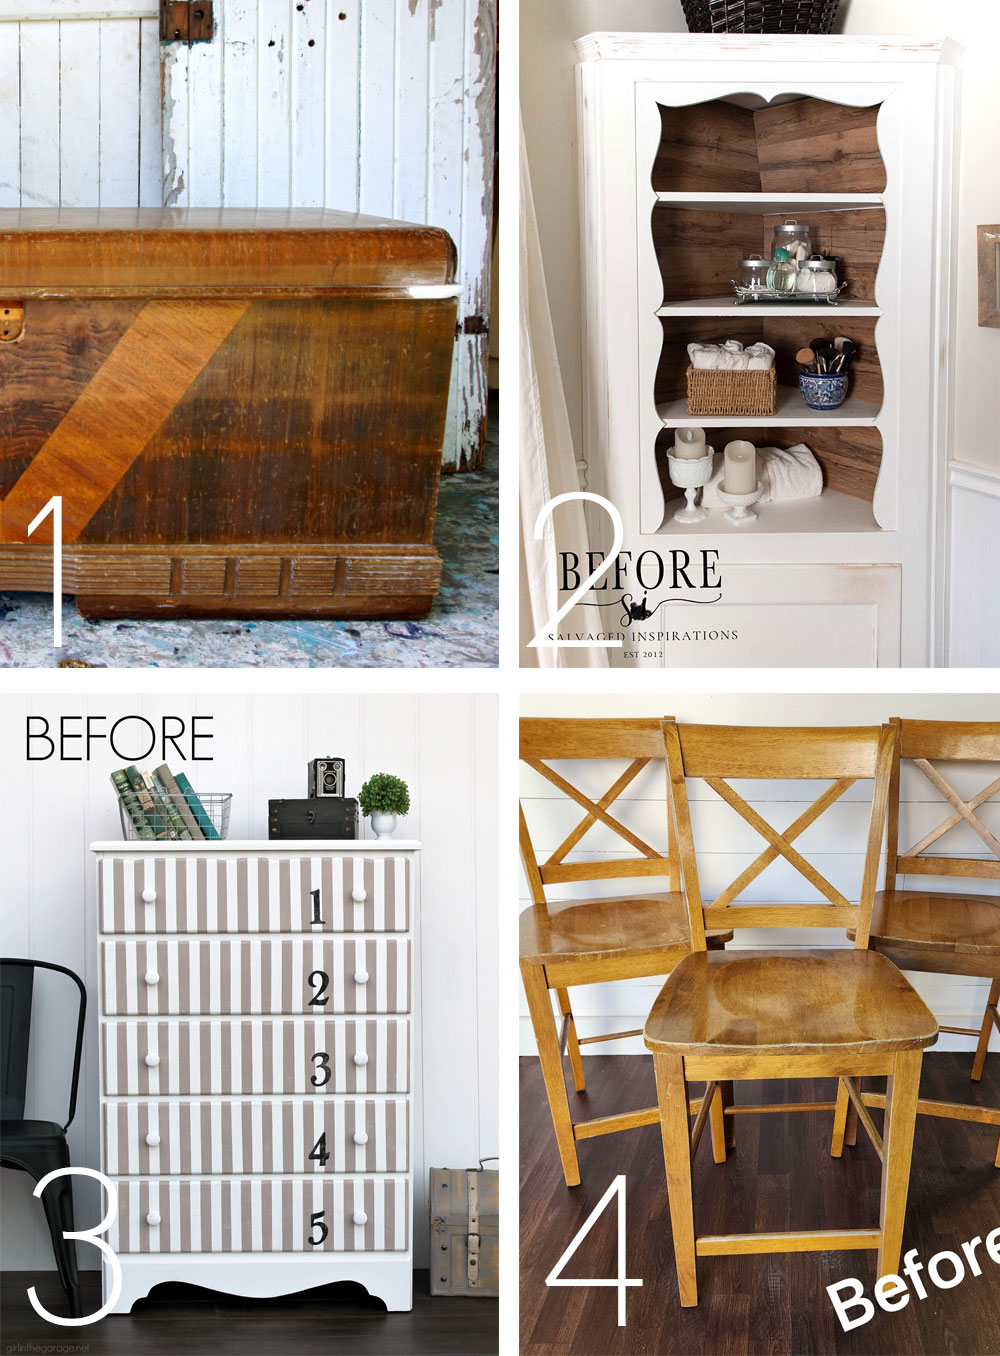
Don’t forget to check out what my friends are sharing today!
A couple of them are redos of redos…I love seeing what they do the second time around!
One more done!!
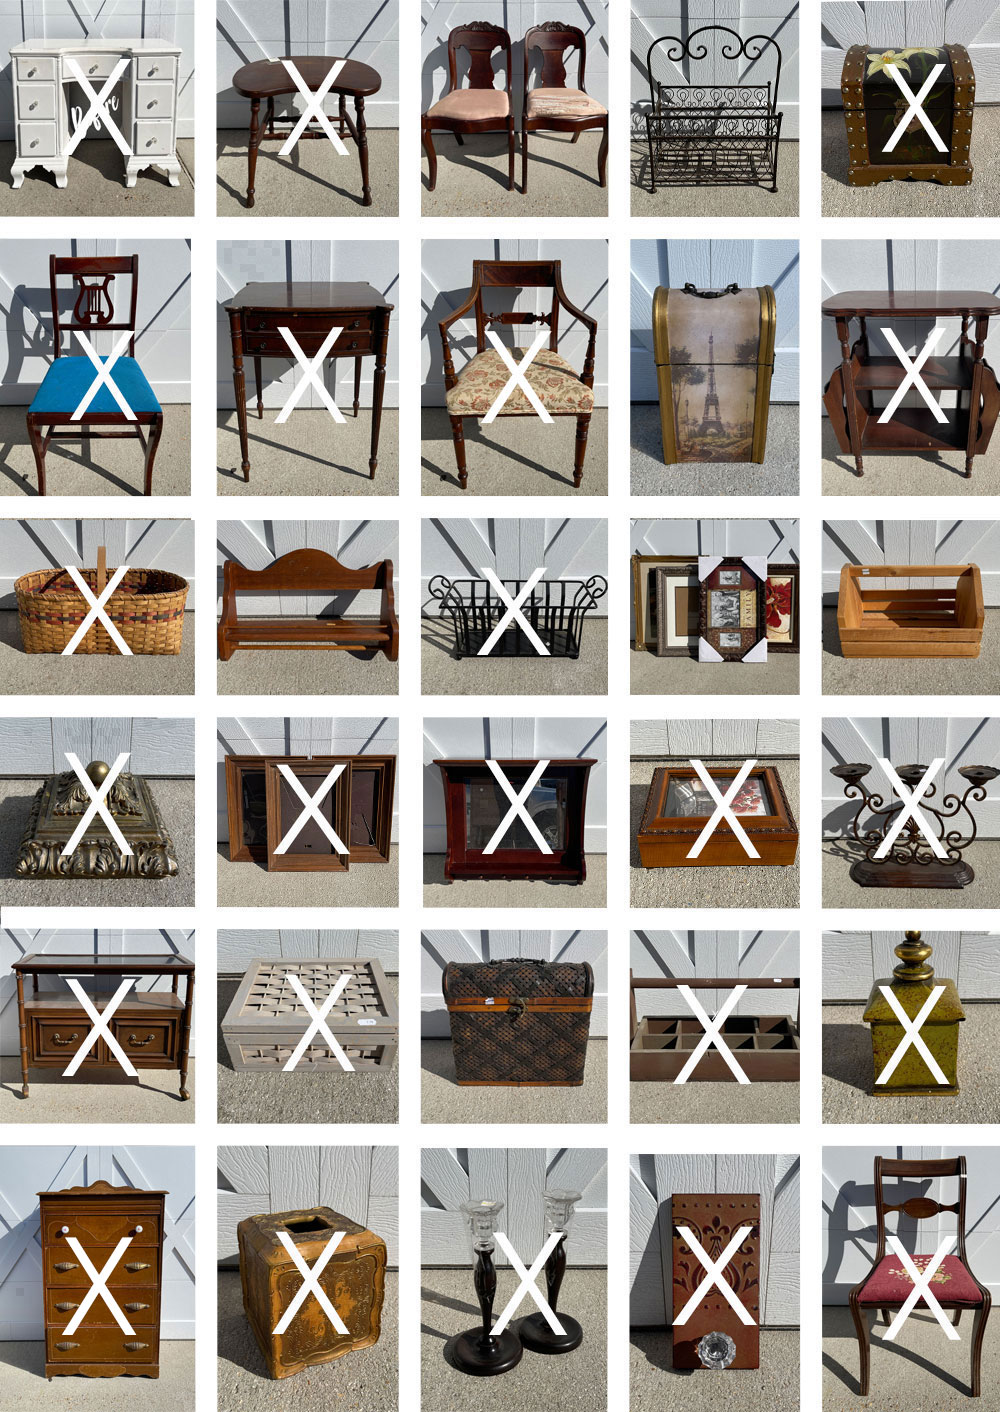
See everything I’ve completed so far below!
Petite Antique Dining Chair Makeover
Vintage Magazine Table Makeover
Painting the Smalls #21 (Six seven more mini Makeovers!)
Update an Old DIY Toolbox
How to Make a Tray from a Picture Frame (Super Easy!)
Freebie Chair Makeover
Vintage Stool Makeover with Terra Clay Paint
Mini Basket Box Makeover
Mirrored Wall Shelf Makeover
Rolling Buffet Makeover
Painted Antique Side Table
Pretty in Blue Box Makeover
A Great way to Repurpose a Chair
Painting the Smalls #20 (Six mini makeovers!)
White Painted Desk with Transfer
If you enjoyed this post today, you might enjoy this one too!
See what I did with it HERE!
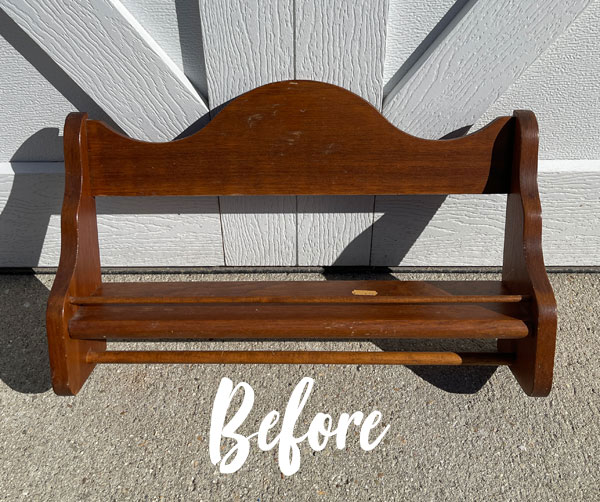
I’ll be back on Tuesday with this 80’s towel rack shelf thingy:
UPdate: See how I updated HERE now!
Have an amazing weekend!!
XOXO,

Don’t Miss a Thing!
If you like what you see, there are several ways to follow along!
EMAIL * INSTAGRAM * FACEBOOK * PINTEREST


Get FREE SHIPPING on all orders over $50. No code needed at checkout! Orders under $50 always enjoy $8 flat rate shipping! Most orders ship same or next business day!


Mary Kaiser says
Oh my it turned out beautiful! I love the big magnolia blooms on this one! That is now the sweetest little dresser. If I lived in Virginia I would so buy that dresser! Great job saving it!
Christy says
Thank you, my friend! I really enjoyed breathing new life into this one! Wish you were closer! XOXO
Janette says
Oh I love this, a beautiful transformation and not a distress in sight, sorry but I don’t really like distress, I know lots do. Anyways, another fabulous inspiring make-over. I love how the transfer climbs round and up top , gorgeous.xx
Christy says
Thanks so much, Janette! I’m so glad you enjoyed this one! XOXO
Denise Cox says
It’s lovely!! Everything about it!! I’m coming over to buy it…( a gal can dream can’t she, 😉
I always enjoy the finishing touches , the drawer pulls. They always a touch of class and drama!!! Great job, Christie. You should offer a one week workshop, where we pay, etc., and you would choose simple projects that could be done to within a week’ s time. Added income for you…and a chance for us to work with the “Master”. If it proves to be worth your while, you could offer it every year. Advance the skill level as necessary, then offer a class every six months/ twice a year. You select the timing. Hmmm…something to think about ,”oh great one,”…lolol! You ARE the BEST….
Christy says
Ha ha thank you, Denise!! Wouldn’t that be so fun??? XOXO
Robin Stephens says
Were those crab handles on the original? 😂 Yikes! You put blood, sweat and tears in to this one, I’d assume. It is gorgeous. Very Vuh-gin-yuh! 🥰
Christy says
Thank you, Robin!! The original pulls were a mix of cheap metal cup pulls and white porcelain knobs with roses. What a great combination, eh? I did save them all because of course I save everything lol! XOXO
Joyce says
I loved the old handles on this chest of drawers. Can’t wait to see if you reuse them on something else. Dresser turned out lovely!
Christy says
Thank you, Joyce! They were a thin metal that were rusting, but I did keep them, so you will likely see them again! XOXO
Nana Diana says
WOW! That is an amazing job on that piece. I don’t always leave a comment but I see every post you do. Love the insight you have into each piece to make it shine at its best.
Have a wonderful upcoming weekend. xo Diana
Christy says
Aww thanks so much, Diana! I always appreciate you stopping by! Enjoy your weekend too!! XOXO
Jackie C says
This turned out SO pretty! Love that transfer. This one was a lot of work. Amazing job Christy!
Christy says
Thank you, Jackie! This one took me a bit longer to get through, but these needy pieces are always my favorites!! XOXO
Niki says
Those magnolias though 🤩. So much better. I like the soft blue, and with the light shining in on it, it gives it a slight ombré effect. What does the fresh and clean butta smell like? I’m very sensitive to smell so I steer clear of heavy perfume scents. I’m thinking I’d probably be better off with the orange smelling one. And does the butta mask or actually get rid of it? I’m dealing with moth ball smell….
Thank-you Christy
Christy says
Thank you, Niki! The Fresh & Clean smells just like that…Fresh & Clean. It’s really nice. Of course, the orange is my best seller as everyone enjoys that one. I don’t really use it to cover odors but more for bringing back the beauty in dried out wood. Plus as an added bonus, it works wonders for sticking drawers, etc. And, the scent will fade over time. If you are looking to eliminate moth ball smell, say from a chest or dresser, you want Clear BOSS. Paint it on every exposed raw wood surface INSIDE. Just one coat will seal in that smell. XOXO
Cecilia says
Well, the bones were there on that dresser but poor thing…the awful finish on it and just beat up condition made it ugly. Love the transformation! The bee knobs are a favorite of mine – we used them on our storage closet doors plus we have bee hives so yay, for bees! Have a great weekend!
🐝Cecilia
Christy says
Thank you, Cecilia! I love the bees too! And how cool that you have hives (Ha ha, I mean BEE hives 😀 )!! XOXO
Laura F says
Amazing transformation! Great job 🙂
Christy says
Thank you so much, Laura! XOXO
Mary Smart says
Christy you amaze me! You are the best at taking a hunk of junk and transforming it into a piece of art. You inspire me to tackle my own hunks of junk!
Christy says
Aww I love that so much, Mary, thank you! Now go get to work ha ha! XOXO
Charleen says
Night and Day!!!!What a beauty!!Superlatives all the way. Someone will buy this and give it a new home. Wonderful . Have a blessed day and take care
Christy says
Thank you, Charleen! I’m hoping it won’t last long! XOXO
Susan says
Really beautiful! Love the drawer pulls/knobs too!
Christy says
Thanks so much, Susan! XOXO
Liz Shivel says
Looks beautiful! Love the magnolias on it! Went from looking heavy & drab, to light & airy! Great job!
Christy says
Thanks so much, Liz! Funny how paint can do that! Enjoy your weekend! XOXO
Celia says
I say this all the time but this is definitely one of my favorites! The color, the knobs, the transfer and your expertise all combined into this beautiful dresser. Thank you!
Christy says
Aww yay! I’m so glad you enjoyed this one, Celia! Thank you! XOXO
Ruth Anne says
What a beautiful transformation! Love the magnolia transfer–it just makes the chest of drawers sing!
Christy says
Thank you so much, Ruth Anne! I was so excited to use that transfer on something! XOXO
Lizzy says
It’s gorgeous! If I saw it in a store, I’d buy it.
Christy says
Aww yay! That means a lot! Thank you, Lizzy!! XOXO
Nette says
That’s stunning! One of your best!
Christy says
Wow thank you so much, Nette! XOXO
Debra Hubbs says
So pretty!
Christy says
Thank you, Debra! XOXO
Denise Zdziennicki says
Night and day my friend! I love how you placed the magnolia design and the custom color is beautiful! This one is going to sell FAST! XOXO
Christy says
Thank you so much, Denise!! Hoping for a quick sale, but I know I’ll be sad to see this one go too! XOXO
Josee says
Your visions are amazing!
Christy says
Aww I appreciate that so much, Josee, thank you! XOXO
Karen Moore says
Love the color and the transfer is gorgeous! Beautiful transformation.
Christy says
Thank you, Karen! I’m so glad the combination worked out so nicely! XOXO
Marcie Lovett says
So beautiful, Christy! I’m a sucker for old furniture with all the details, too, and it’s always a treat to see one come back to life. The magnolia just takes it up a notch, in my opinion!
Christy says
Thanks so much, my friend! These older, forgotten pieces are always my favorites to work on! XOXO
Joanne says
OMG, Christy! That chest is so gorgeous…now! You turned it into a beautiful piece of furniture. And those pulls – so much better on the color and stencil you chose. A knockout re do!
Christy says
Thanks so much, Joanne! I’m so glad you enjoyed it! XOXO
gail says
Amazing transformation Christy. I love that transfer, and it always amazes me how perfectly easy you make it look!
That color is so pretty.
pinned!
gail
Christy says
Aww thanks so much, Gail! That means a lot coming from you! XOXO
Janice Holt says
Late commenting on the dresser (went to Huntsville, AL thrifting today but didn’t find much). No doubt it was tons of work but in the end, it looks beautiful. Beautiful color of paint and the transfer goes so well with it.
Christy says
Thank you, Janice! You are excused since you were thrifting ha ha! I appreciate you stopping by any time! XOXO
Rose Lefebvre says
So lovely and those pulls are wonderful! Great job!
Christy says
Thanks so much, Rose! XOXO
shan says
This little dresser says thank you, I’m sure. It looked like mistaken identity until you brought out her feminine side. I too, love the poor and beaten down. It’s so much fun to see the change in them. Lovely job!
Christy says
Thank you, Shan! It really didn’t have a clue what it wanted to be before lol! I was happy to remedy that! XOXO
Cheryl r Atkinson says
Hey Christy!! You really saved the life of this one. It looks magnificent now!! I have cut up transfers and used them but I struggle with arranging them sometimes. It really is pretty now. Thank you for sharing.
Christy says
Thank you, Cheryl! I can’t tell you how long I stared at these pieces trying to arrange them just right lol! The blooms are so large that they kept ending up too high…then I got the idea to start them on the side and go up from there. So, it challenges me too sometimes! XOXO
Jeanne V Barrett says
It’s perfect. 🙂
Christy says
Thank you, Jeanne!! XOXO
Kay says
Gorgeous transformation! Thanks for sharing the process!
Christy says
Thank you, Kay! MY pleasure! XOXO
Mary Loveland says
Absolutely lovely, well done! One question, when you burnish and there are “lines”, indentations in the wood, do you just go over them with the transfer or how do you treat that area? Like on the sides of this dresser, there are lines, do you do anything special? Thanks
Christy says
Thank you, Mary! I will keep the backing attached and fold it back little by little on those areas, burnishing down in the grooves as I go. Sometimes I’ll even cut the transfer apart like I did for the areas in between the drawers ( I shared a pic of that.) and apply them separately. That helps too! XOXO
Margie Bramer says
I think this is my favorite that you have done…. so far!
Christy says
Oh yay! I’m so glad you like it, Margie, thank you!! XOXO
susan says
It turned out beautiful! 💕
Christy says
Thank you, Susan! XOXO
Jen @ Girl in the Garage says
Amazing save, my friend! This turned out gorgeous!! xo
Christy says
Thanks so much, Jen! XOXO
Michele M. says
Oh My GOSH!!! How did I miss this incredible transformation?????!!!!!
Oh, Christy – it is absolutely adorable! I cannot even for one second believe it is even the same piece. Holy Toledo, girl, you sure do work up
some magic! Just wow. It is stunning, love love love.
Christy says
Aww thank you, my friend! It was a hot mess for sure lol…only one way to go from there…UP! XOXO
Catherine Carrillo says
Hi I love what you have done with this sad dresser. Beautiful work as always. You brought her back to life. Perhaps i missed it but you were working on the drawers and you were using some type of tool What is the name of this tool , how do you use it and where do you buy it please ? Thank you
Christy says
Thank you so much, Catherine! That is a scraper tool that I used to remove the peeling veneer from the backs of the drawers and it worked great. Here is a similar one on Amazon: https://amzn.to/413dKg0 Not all veneer peels away as easily and if you have trouble, soak towels in water and lay them on the stubborn veneer at least overnight. That will moisten the glue and allow you to use your tool to remove the veneer more easily! XOXO
Petra says
One of my faves of all your pieces. I would whip this up in a heartbeat. Haha can you imagine the cost of getting it shipped to Australia? 😀 xo
Christy says
Aww Yay! I’m so glad you like it! Wow yes, that would be quite costly lol! XOXO
PC says
I’m new to this. I have no idea of how I came across your page but I like all that I’ve seen. I just brought a Broyhill dresser that appears to be in good condition, everything but the smell (ugh). Where/how do I start the transformation?
Thank you
PC
Christy says
Hello! I am so glad you found me! Start with this post here on how I paint a dresser from start to finish: https://www.confessionsofaserialdiyer.com/how-to-paint-a-dresser-from-start-to-finish/ This one was super stinky, so I share how I took care of that, and also how to tackle just about anything you may encounter. If your dresser is in decent shape, you can skip some of those steps. I sell all the products I used in my Etsy shop, so if you click on the products, it will take you right to them. I hope that helps and good luck! XOXO