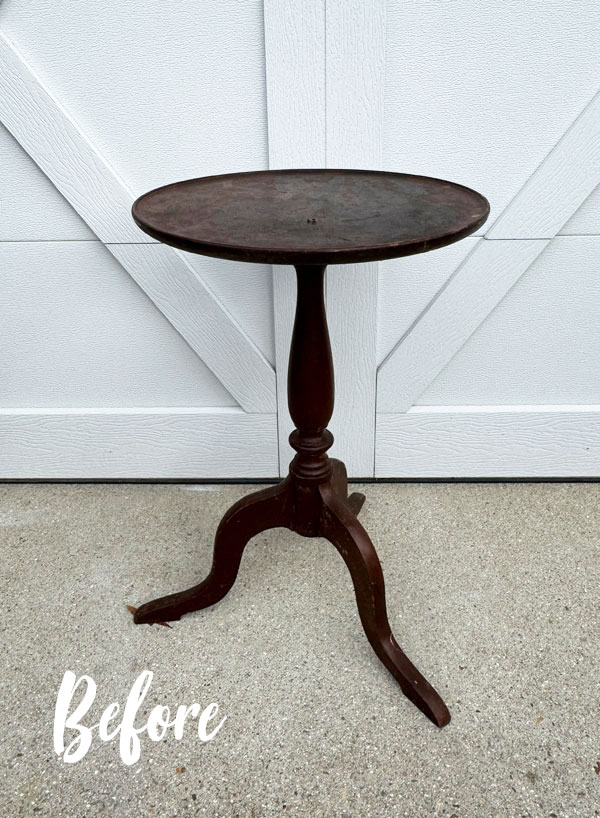
Hello lovelies, and welcome back! Today, I have what I originally considered to be a small pedestal table. It is definitely more like a plant stand though, so I’m calling this one a painted plant stand makeover.
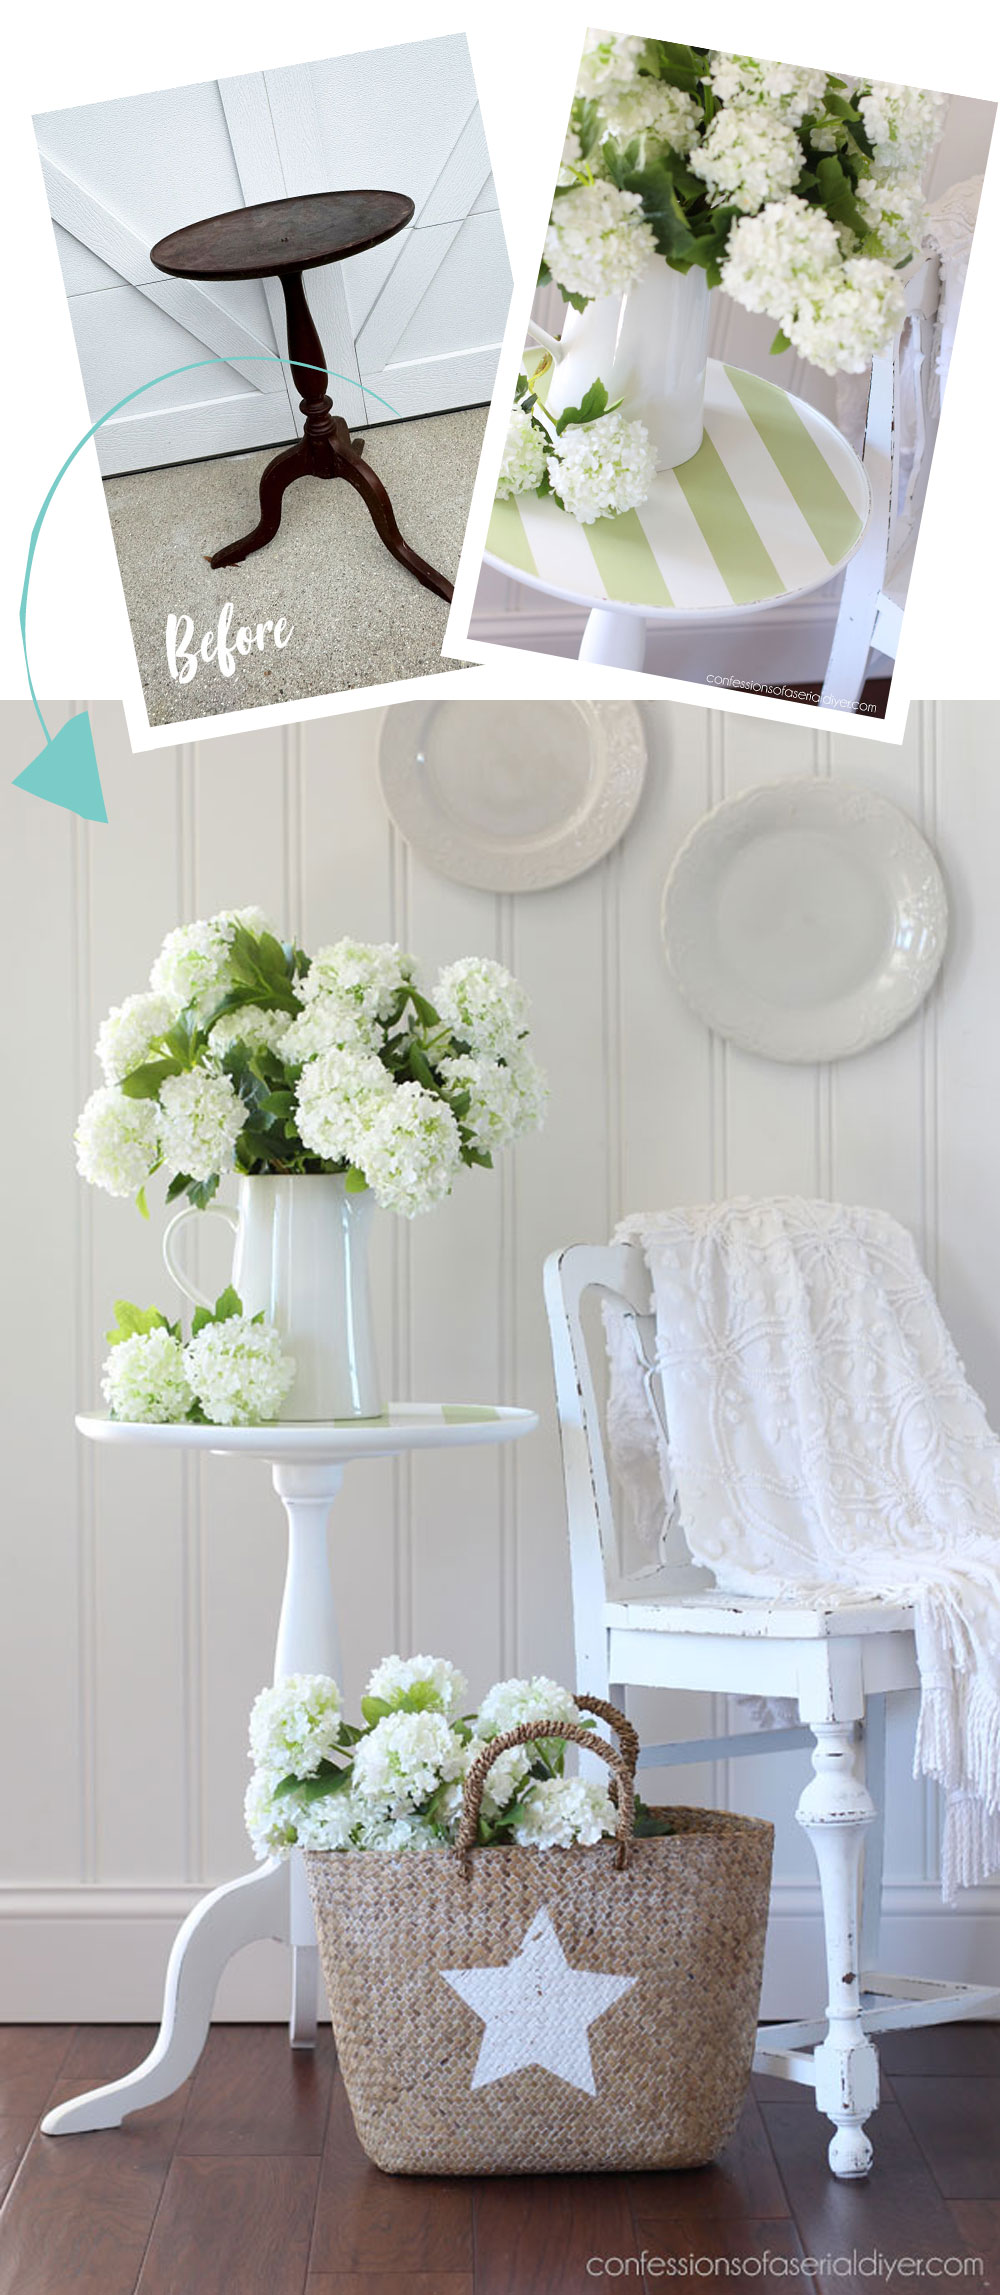
I paid $20 for it at the thrift store, and it started out like this:
This thing was SO dirty! I actually bought it with the new Bonding BOSS in mind because I new this piece would definitely need it and this would test out the new BOSS for sure!
I had planned to share this makeover on Tuesday, but I wasn’t happy with it, and I’ll share more on why in a bit.
I’m sharing both makeovers with you today though!
Clean
Of course the first step with this makeover was a much-needed cleaning with White Lightning:
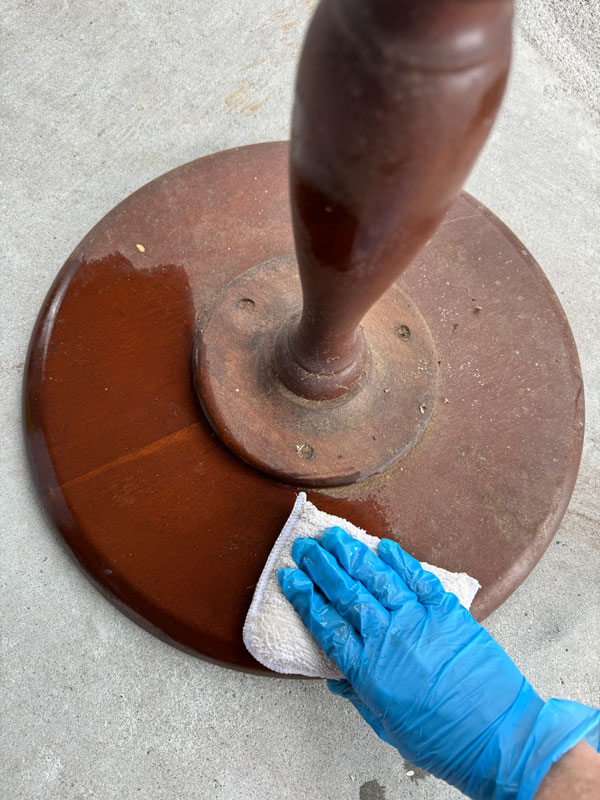
Dirty!! I’m sure this little table had been stored in a storage unit or garage for years.
The top of it had what appeared to be grease or another color of stain:
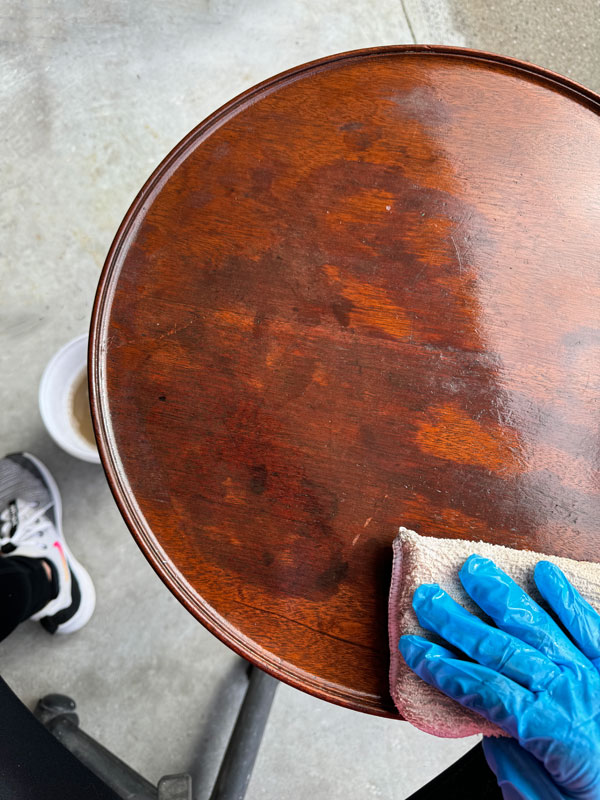
Cleaning did nothing to remedy that…
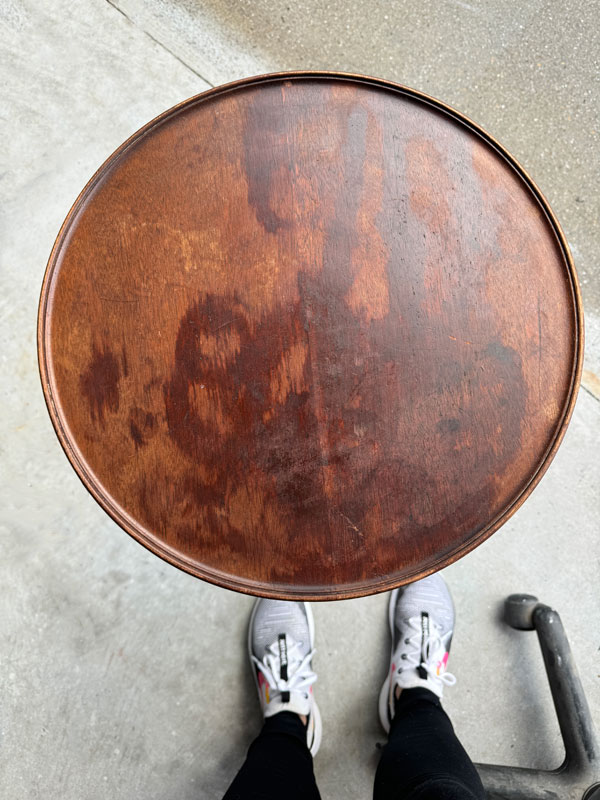
But at least it was good and clean and ready for the next step.
Bonding BOSS
I knew I wanted to test out the New Bonding BOSS to prevent whatever that was from coming through.
I wanted to test it with white paint, so I chose the white formula:
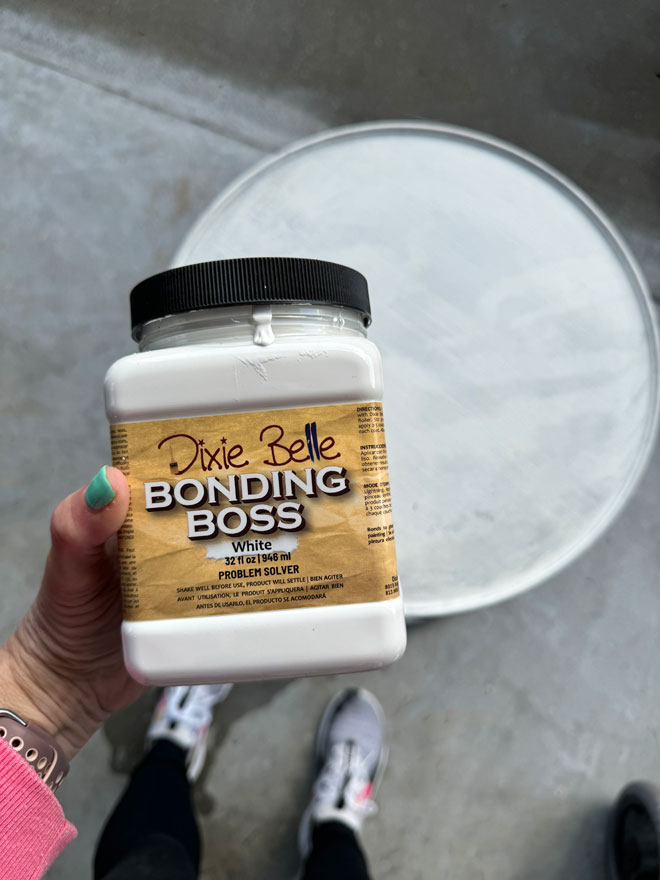
That was after one coat. I used to be able to get away with one coat of the original BOSS, but I wanted to test the actual suggested instructions for this one first. So, I gave it another coat after four hours, as suggested.
(If you haven’t heard yet, Dixie Belle has combined Slick Stick and BOSS to create one product that both primes for adhesion AND stains/odors.)
Then I allowed it to dry for 24 hours.
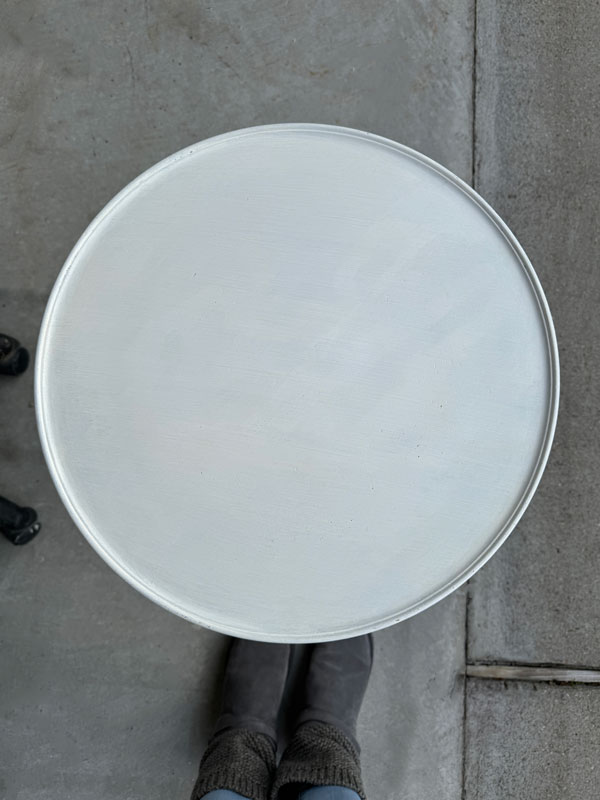
It looks pretty good after coat number two.
Paint
It then got two coats of Cotton for complete coverage, and it did wonderfully…no bleed through or whatever that was coming through at all. (I will definitely test out one coat in the future when I have time to play with it.)
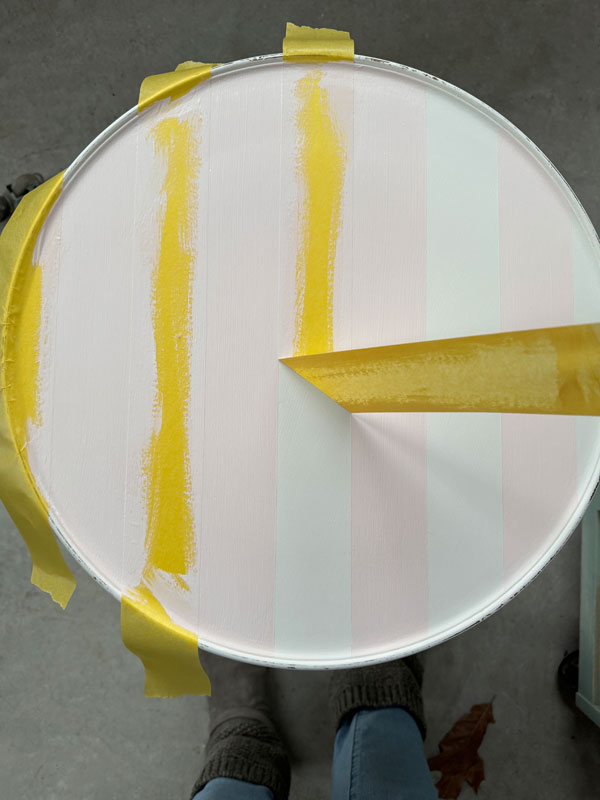
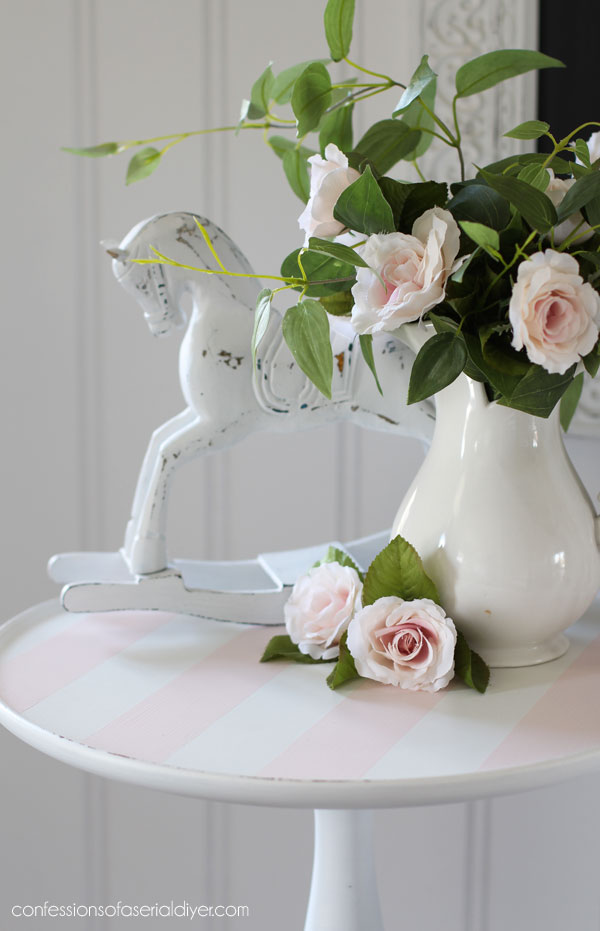
To add a little something extra, I then added a stripe in this pretty Champagne Pink:
Sand
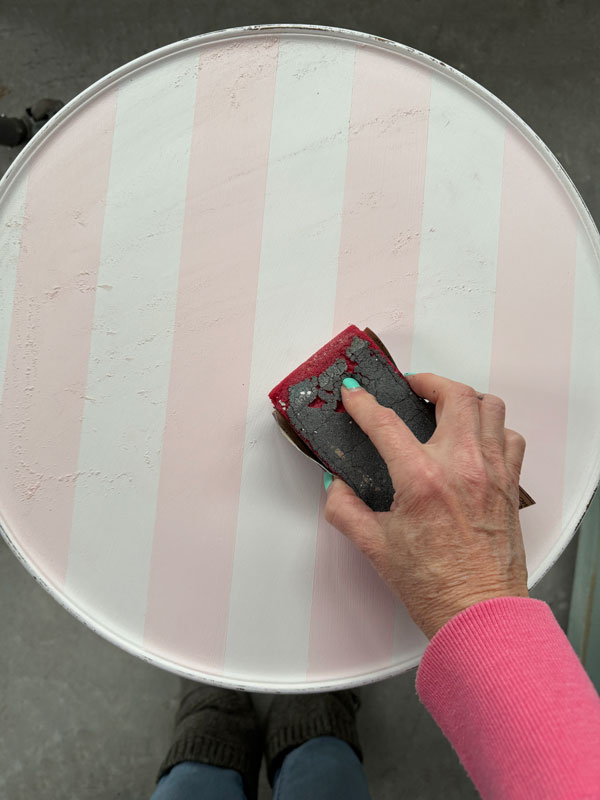
I sanded all over to smooth and distress some using 220 grit sandpaper wrapped around an old sanding sponge.
After vacuuming up the sanding dust, all that was left to do was seal!
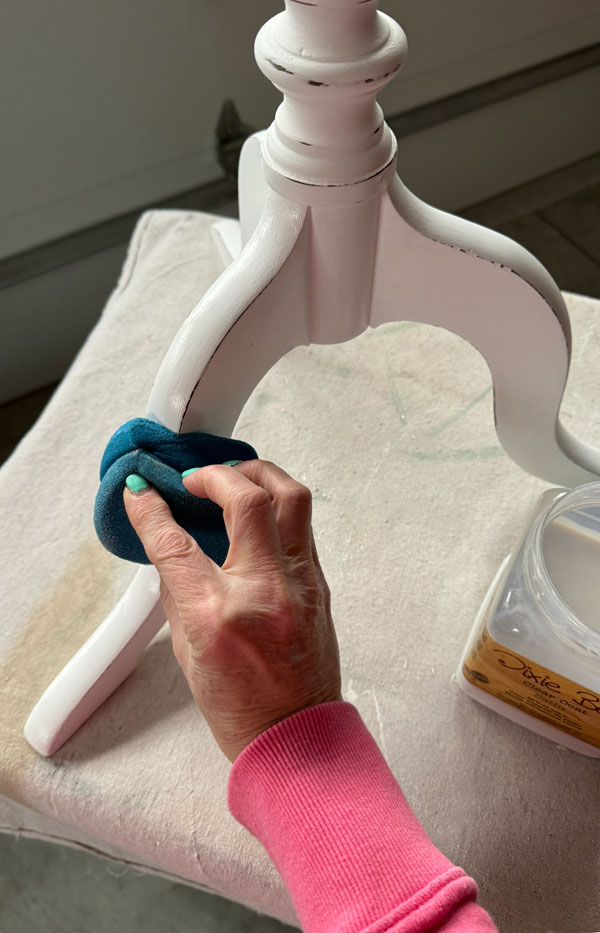
Seal
To seal, I applied Clear Coat in the satin finish with the blue sponge applicator:
Painted Plant Stand Reveal #1
So when I first imagined what I would do with this little plant stand (when I thought it was a very petite table), I imagined it in a nursery beside a rocking chair.
It would be perfect in a small space to put a drink or whatever you might need close by while nursing or feeding the baby a bottle.
Perfect for that, right?
And so feminine!
But…
When I showed it to my sister, who babysits her one year old granddaughter, she said. “And what happens when she starts pulling up on everything and pulls it down on top of her?”
Well dang! I just couldn’t get her words out of my mind.
So, I put it on the back burner and finished up the flatware box I had planned for today, so I could share that on Tuesday instead. That gave me time to think about this one some more.
If it couldn’t be used in a nursery, what good would a tiny pink table be?
I had to imagine it more as a plant stand, and in doing that, decided to make one small change!
More Paint
I retaped the stripes and decided to go with Farmhouse Green instead!
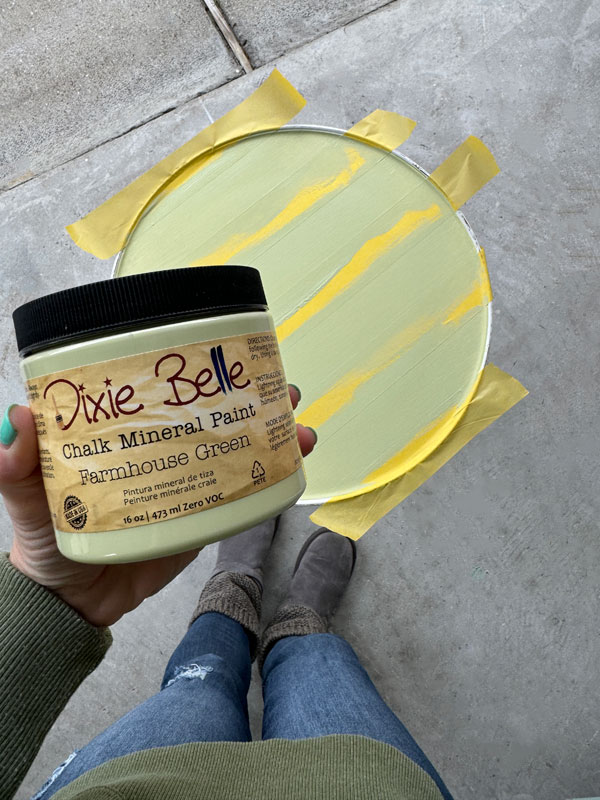
(I think it’s so funny that when I was painting the pink, I was wearing pink, and here I am wearing green! I didn’t plan that at all ha ha!)
I sanded and sealed once again and this makeover was finally complete.
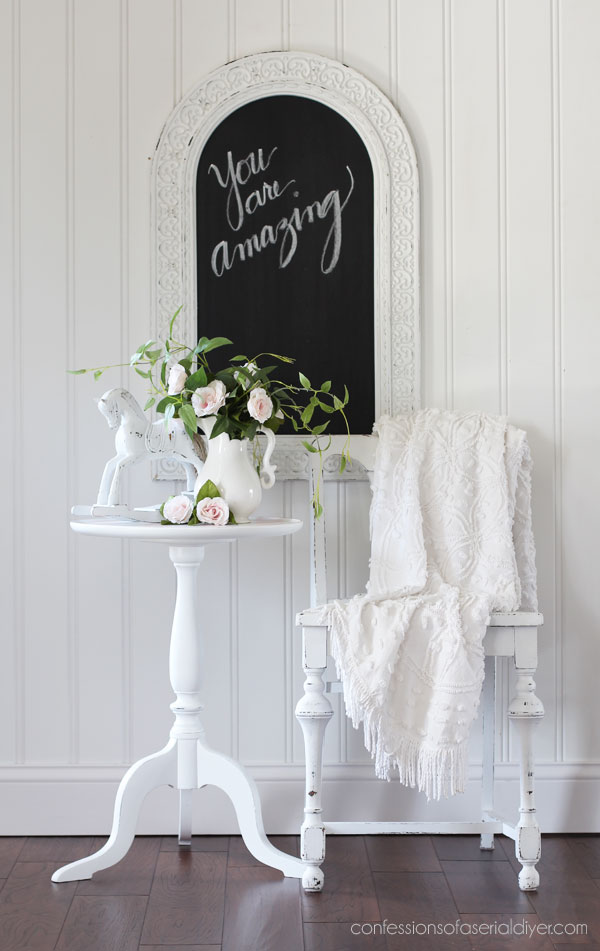
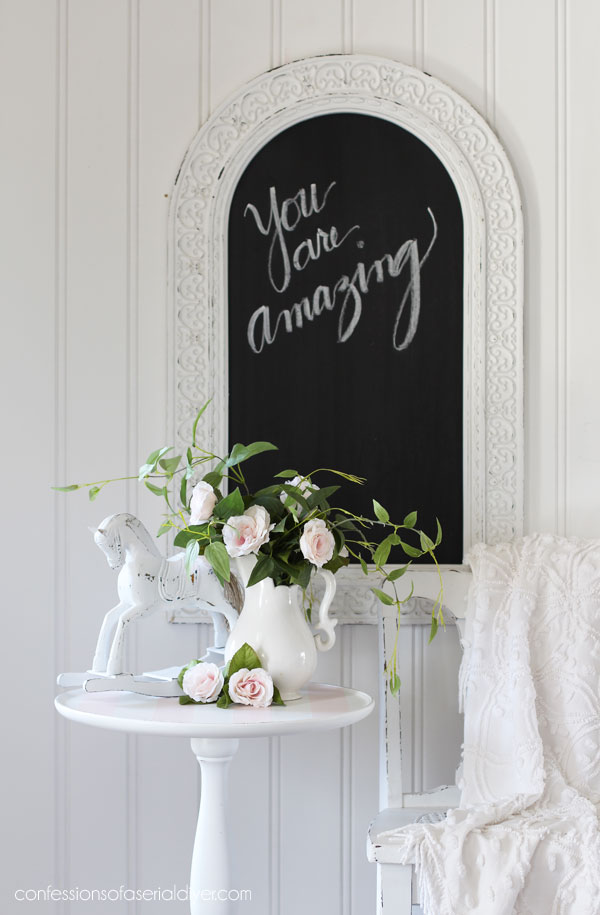
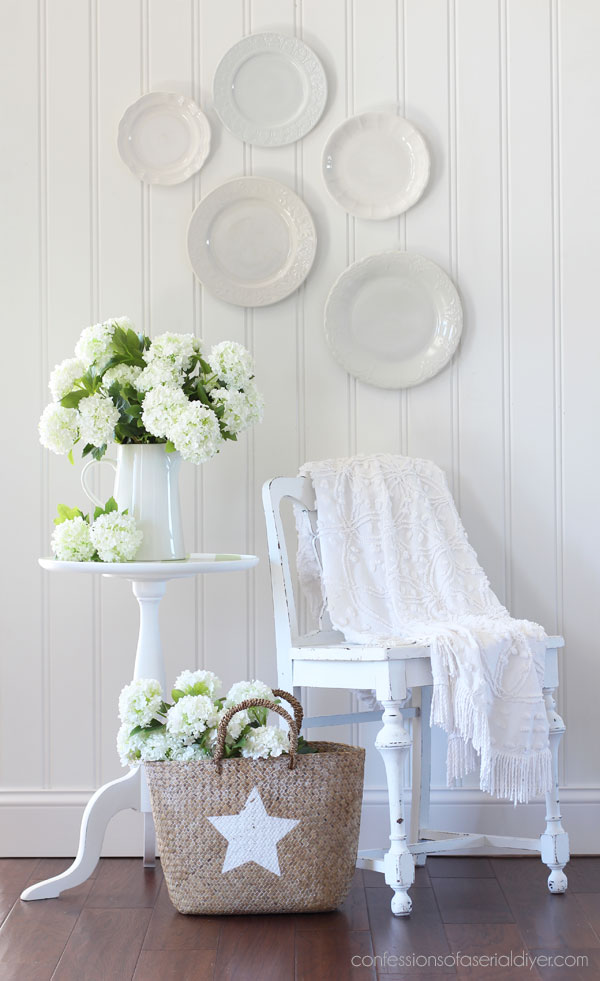
Painted Plant Stand Reveal #2
This was such a simple fix and I love the outcome!

(And yay for a sunshine day to take photos this time.)
Now let’s see the best part!
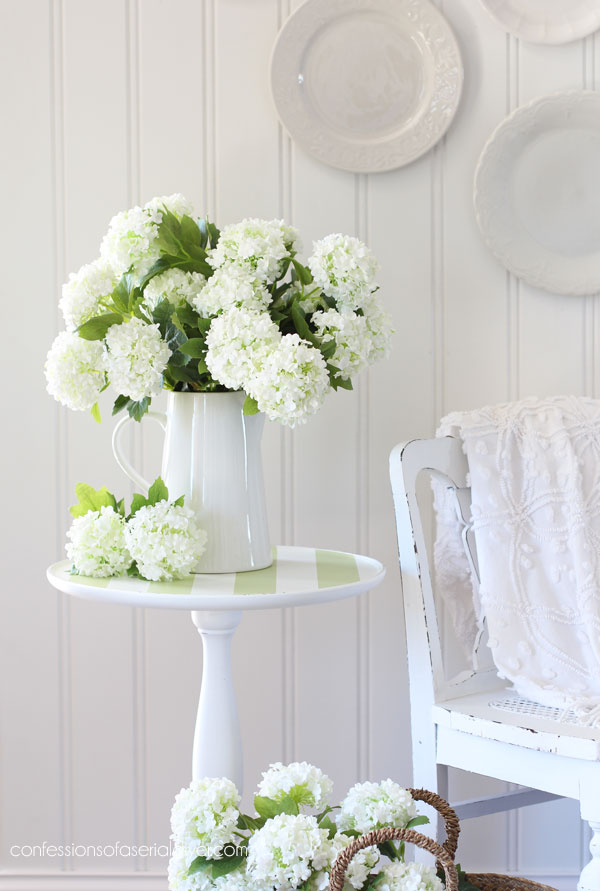
This lovely spring green is much better for a plant stand, don’t you think?
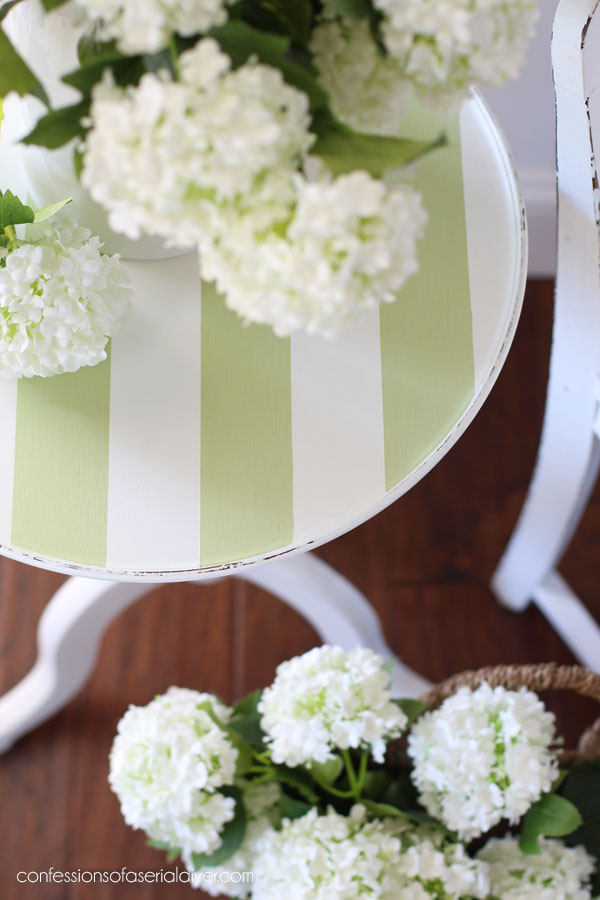
And hopefully, no babies will be pulling it over…got that off my conscience ha ha!

Do you prefer the pink or the green??
Either way, it’s done!
Catch up on any you may have missed at the links below:
Elegant Flatware Box Makeover
Mini Lane Cedar Chest Makeover
DIY Herringbone Tray
Whitewashed Side Table
Sewing Basket Makeover
Louvered Door Cabinet Makeover
Painting the Smalls #25 (SIX mini makeovers!)
Shoe Shine Box Makeover
Metallic Vintage End Table Makeover
I’ll be back with a special post on Tuesday!
I’ll be joining a few friends in promoting the new National Park Silk collection with one of these lovely colors:
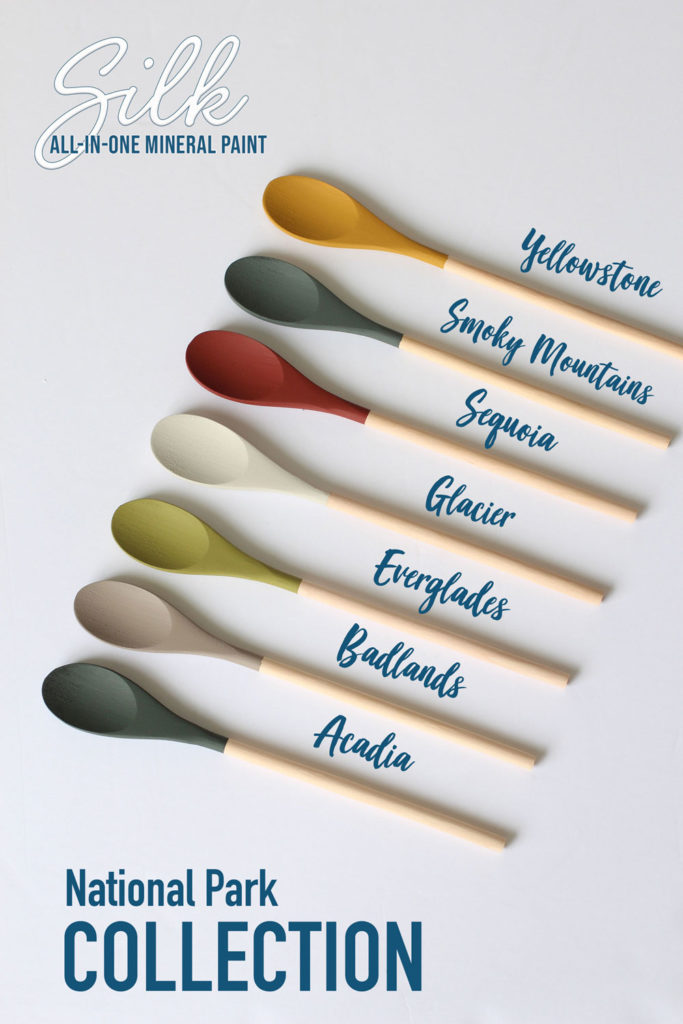
All of these are now available in my Etsy Shop.
(Select Silk Mineral Paint in the menu on the left on desktop or from the drop down menu at the top on mobile to see all the Silk colors.)
I’ll be sharing this beauty!
Any guesses as to what color I’m using??
UPDATE: No need to wait to find out! See what color I chose HERE now!
Have a fabulous weekend!!
XOXO,

Don’t Miss a Thing!
If you like what you see, there are several ways to follow along!
EMAIL * INSTAGRAM * FACEBOOK * PINTEREST


Mary Kaiser says
I Love it green! It was pretty as pink, but as a plant stand the green is better! It would go so well in my house as a plant stand! I love the dresser your going to be working on, it is going to be a beauty when it is done! I think maybe you will use black on the dresser! I can’t wait to see, you always surprise me, but I am sure that what ever color you use it will turn out beautiful as every thing does you touch!
Christy says
Yay thank you, Mary! Black was my first choice for that dresser!! I do have to use one of the new Silk colors though, so we shall see!! Have an amazing weekend! XOXO
Joyce Almquist says
Christy,
You make my coffee wakeup time Tuesday and Thursday something to look forward to!!!
I love your style and everything you do.
I am getting inspired for when the garage temp warms up. I’ll be starting small.
Thanks so much,, Joyce
Christy says
Aww I love that so much, Joyce, thank you!! It is starting to feel like spring here woohoo! XOXO
Janice Holt says
I love both colors on the plant stand but can see your sister’s point. I can just see a baby trying to hold on to it and pull themselves up. So for a plant stand, the green is a beautiful color.
Christy says
Thanks, Janice! We won’t tell her she’s right shhhhh ha ha! XOXO
Jaye says
Truthfully they’re both so very pretty. But the green is probably better unless it’s for young girls and those of that love pink.
Christy says
Thank you, Jaye! I agree…the green is a bit more versatile! XOXO
TRACY TOTTY says
I can’t get over how pretty that green is with those hydrangea! I love how you style your photos too. Going to head over to your outdoor standing post.
Christy says
Thank you so much, Tracy! I really enjoy the staging part! XOXO
Marcie Lovett says
I’m not a fan of pink, so I have to go with green, Christy. I think it’s bright and springy and would be useful in lots of places. It still could be used in a nursery, and switched out for something sturdier as baby starts to stand 😁
Christy says
Thanks, Marcie! I’m much happier with the green as well! XOXO
Debra E Hubbs says
When I saw you doing this in pink, I thought it would be a great little side table for a little girls room, maybe to hold a cute tea set, books, or whatever. I agree not good for a nursery. It looks great also as a plant stand with the green stripes.
Christy says
I agree, this would be great in a little girl’s room. I guess I was just worried about finding that buyer lol. Hopefully, it is more appealing to more buyers now! Thank you, Debra!
Bonnie says
I love the pink !! I love pink in general so I don’t believe it needs to be in a nursery.
Christy says
Thank you, Bonnie! You are probably right! XOXO
Liz Shivel says
Hi Christy, I like both the pink and green versions. Funny, the pink version with the pink roses reminded me of my senior prom dress from 1966 which was white with small pink roses! I didn’t think of a baby at all! Ha! 😁 I think the table was a “tea table”, maybe from Bombay furniture days? I think that table is perfect next to a comfy chair, holding your morning coffee!
Christy says
Hi Liz! My first dance was with my boyfriend to his ring dance when I was a sophomore and he was a junior…that dress was pale pink and I never related it to a baby either lol! Oh well, maybe this will appeal to more buyers. It may very well be a tea table…I imagine it would be just perfect for your morning coffee! Thank you, my friend! XOXO
Cyndi says
I’d have left it in the nursery in that pretty pink til the baby starts getting around, THEN painted it and moved it out. 🙂 Either way, it’s so cute!
Christy says
Great solution, Cyndi!! Thank you! XOXO
Catherine says
Love the green as well! The basket with the star….is it a purse you up cycled or a basket you found? I don’t remember seeing it as a makeover but maybe I missed it? I love it and I think I might be able to actually do that using a stencil? Thanks for all your inspirations!
Christy says
Thank you, Catherine! That bag was a lucky thrift store find just like that. It would be super easy to stencil a star on a bag for sure! XOXO
MrsSW says
I’ll bet everyone that read the wearing pink/painting pink – wearing green/painting green scrolled up to check. 😉
I can’t guess which color you will use for the dresser but I hope it’s Sequoia.
Sheila
Christy says
Ha ha! I thought that was so funny as I rarely wear green. I’ll be getting started on the dresser tomorrow and have my color picked out…we’ll see if I stick with that color! XOXO
Denise Zdziennicki says
The stripes are super sweet and I can’t wait to see what you do with that gorgeous piece on Tuesday!!
Christy says
Aww thank you, my friend! I’ll be getting started on it tomorrow…that’s early for me ha ha! XOXO
Cecilia says
Well, it seemed like a good idea as a nursery table. It was cute with the pink too but I love the green/plant stand. 😊Cecilia
Christy says
Thank you, Cecilia! I thought it would be super cute in a nursery and even a little girl’s room, but I guess you would have to remove it during the early walking years lol. The green is more versatile for sure. Have a great weekend! XOXO
Naomi Shelton says
I really like this tutorial as I have a little table that was my mom’s which was in our home when I was growing up. It is similar, but has an upper and a lower round shelf. I have wanted. to re-do it and even bought a stencil to go on the top shelf. Now I have this tutorial of yours to guide me, especially the product examples. Thanks for sharing this project. I know it will help me get that little table done!
Christy says
Oh wonderful! Thank you, Naomi…I’m so glad this post will be helpful in redoing yours! Have fun! XOXO
Annabella says
Awe my grandfather had the very same pedestal!! Have it in my room currently with a plant and lamp,the base broke many years before it came into my hands though so I have the base balanced on something else and the legs put away till I have the right tools. Not sure where he got it, was a Vietnam vet so was all over at the time. Some of the things are from Japan, the Phillipines, so I can only assume its from somewhere he was sent to and not back home from the states. Would love to find the true heritage of such piece.
Christy says
I bet your grandfather is/would be so happy to know that you still enjoy that piece today! It is so versatile and small enough to fit anywhere! XOXO
Michelle says
Hi Christy, I’m a huge fan and I love your projects! Since you had already used the Clear Coat on the pink, was there anything that needed to be done so the green would adhere over it?
Christy says
Thank you so much, Michelle! Chalk paint has excellent adhesion properties, so I was able to paint right over the clear coat. XOXO
Addie says
Green.
Christy says
Yes!