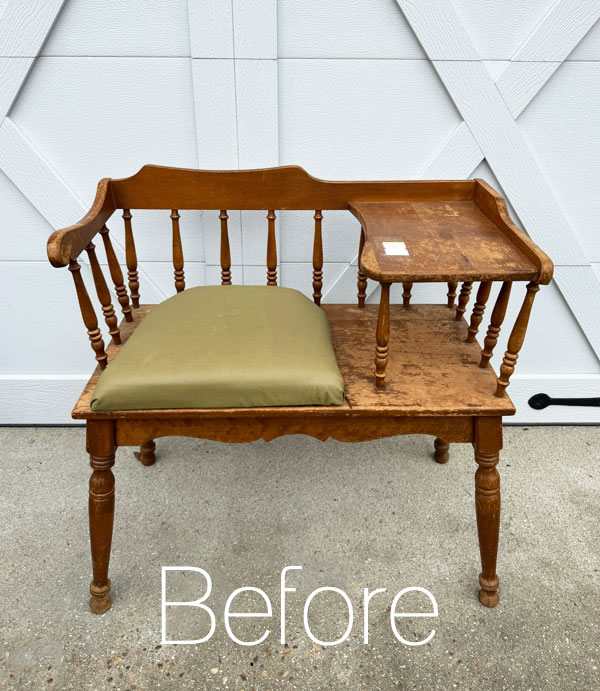
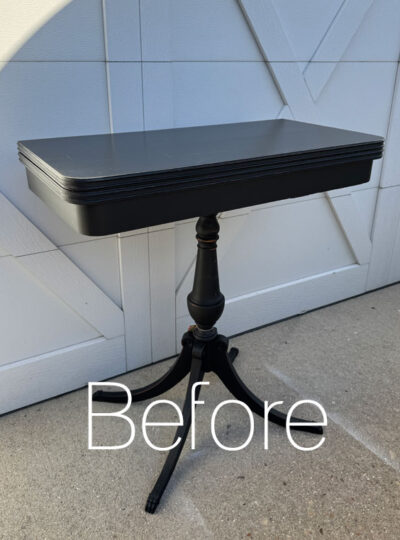
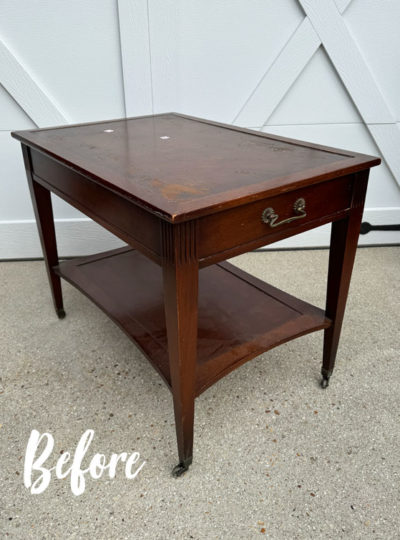
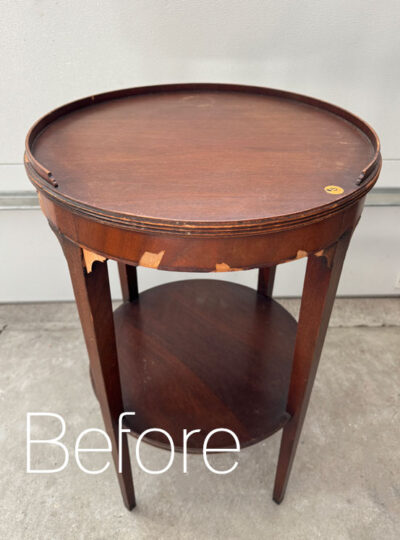
Hello, beautiful friends! I probably didn’t need to call this a vintage telephone table makeover ha ha…any telephone table would be considered vintage! This table was such a fun find for only $19.99 at the Goodwill closest to my house, and I thought it would be perfect for a Trashy Treasures Tuesday makeover:
My friends have makeovers of their own to share, so be on the lookout for those at the bottom!

I’ve included a few affiliate links so you can find the products I love.
Let’s get to it!
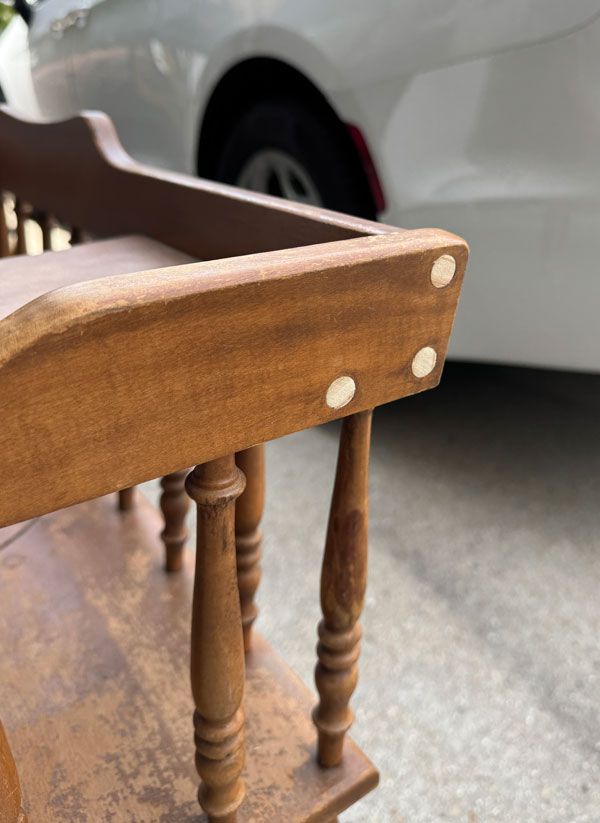
The first thing I did was address these holes. As you can see, only one of the buttons that fills the holes remained:
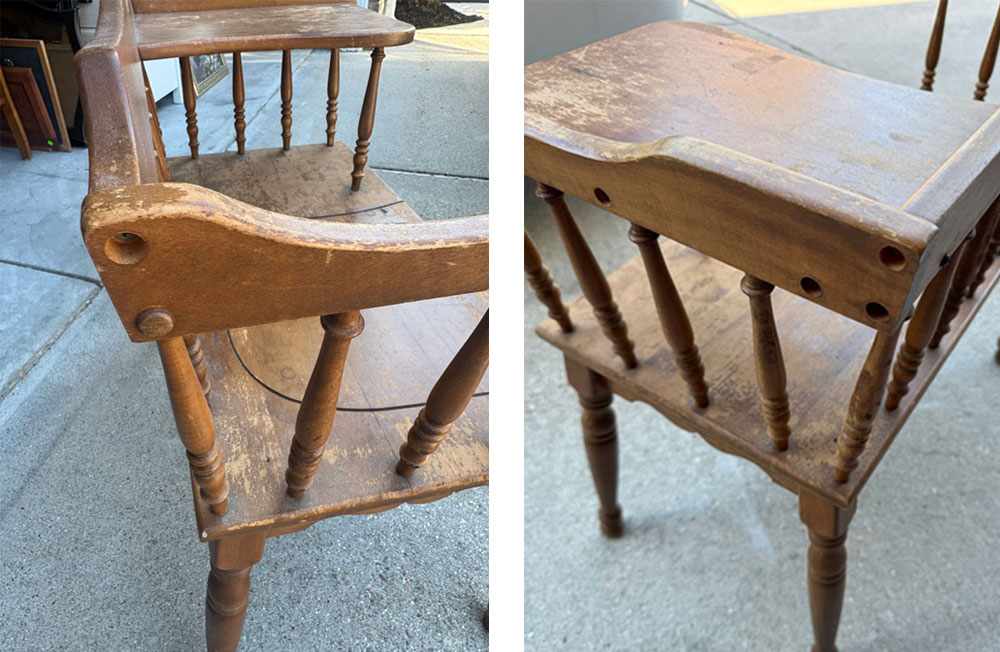
I removed the remaining one and headed to Michaels to pick up a 1/2″ dowel.
I then cut it into small pieces using my miter saw, to fill the holes:
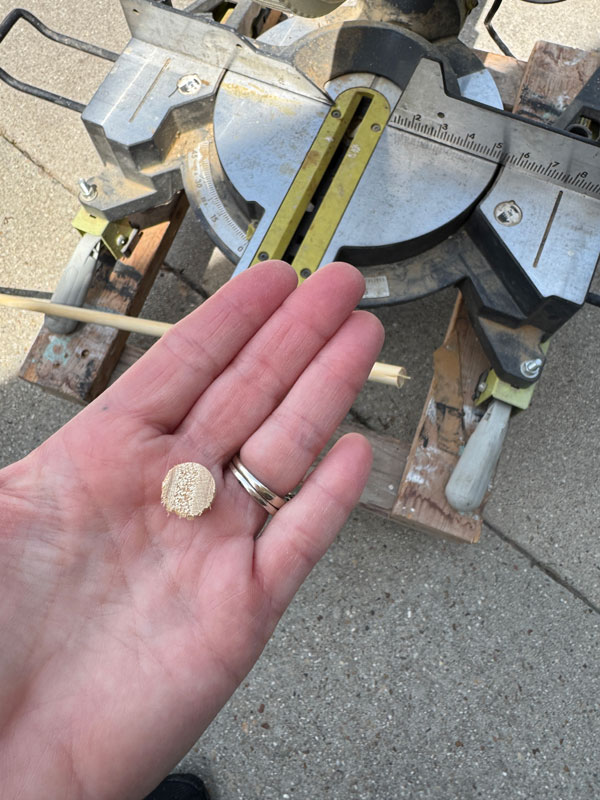
It looks a bit rough there, but I sanded it nice and smooth and gently tapped it in place:
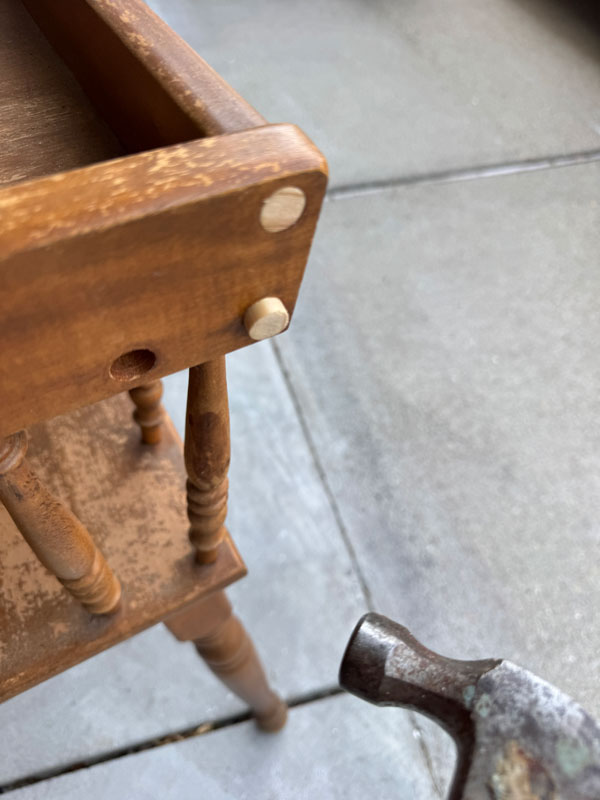
With a deep hole like this, I find it better to fill this way verses trying to fill with filler.
Here they are all filled and ready to go:
Sand
Next, I needed to address this worn finish:
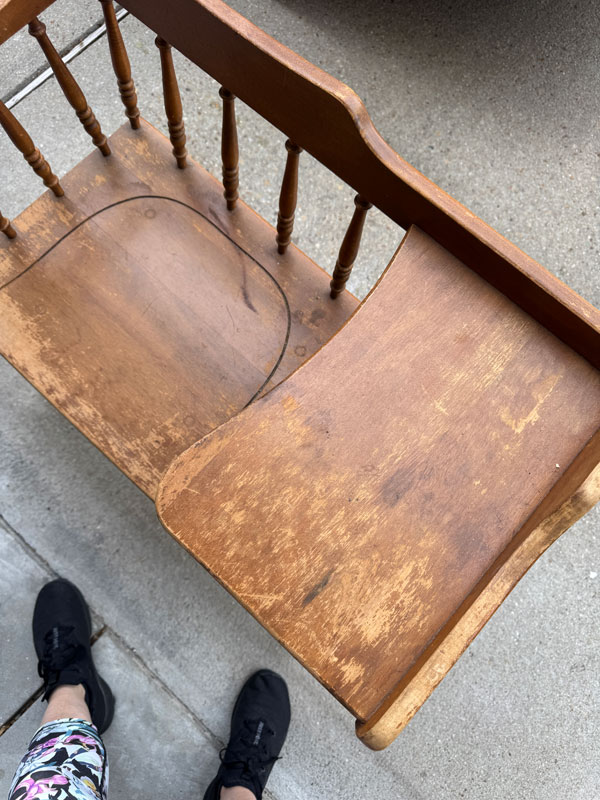
That finish would need to be sanded smooth before painting.
I started sanding by hand, but it was more stubborn on the seat area, so I switched to my Ryobi Cat Sander for that part:
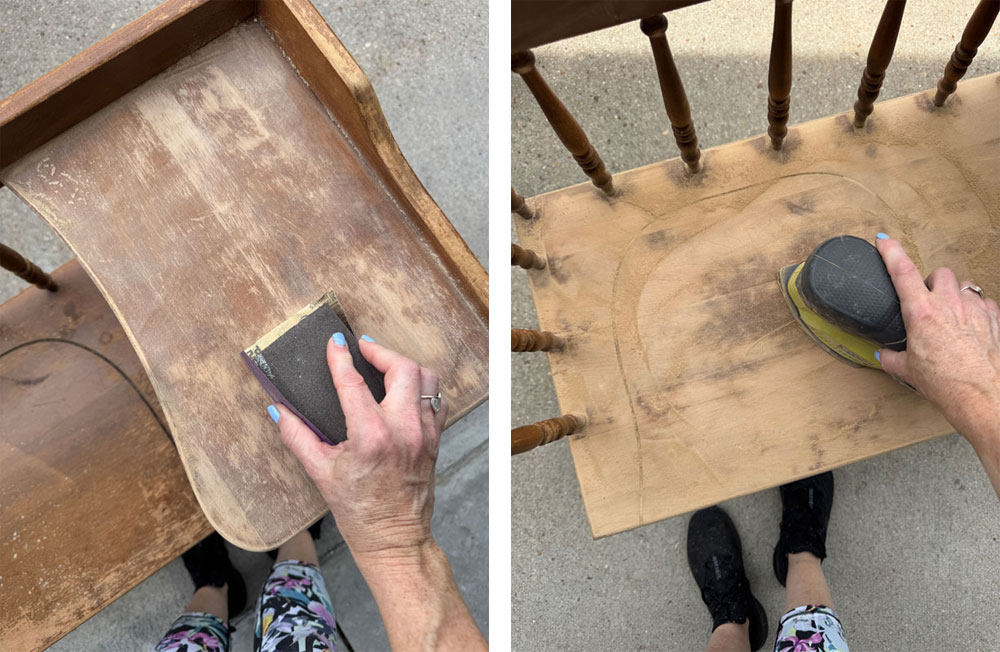
Once I had it good and smooth to the touch, I was ready to clean.
Clean
White Lightning got this piece cleaned and prepped for paint perfectly! I mixed one TBSP into a half gallon of warm water and got to it:
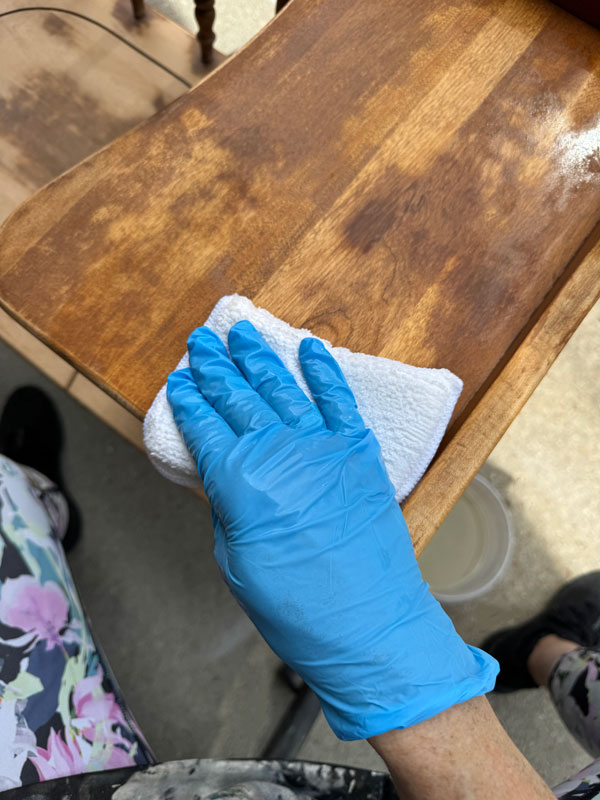
Gloves are recommended, and be sure to swap your water out for clean water and wipe down once more to remove any residue.
Paint
I knew from the start that I wanted to use Caviar by Dixie Belle on this piece. It had quite dated lines that actually paint up beautifully in black.
I painted the first coat by hand:
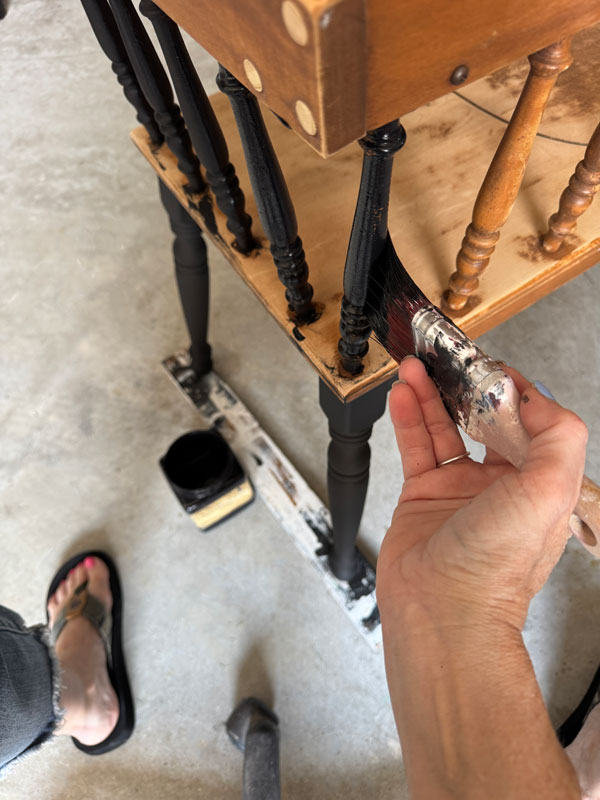
I always say that I enjoy the quiet business of painting my pieces by hand, and I truly do, but this took forever lol, so I switched to my HomeRight Sprayer for the second coat:
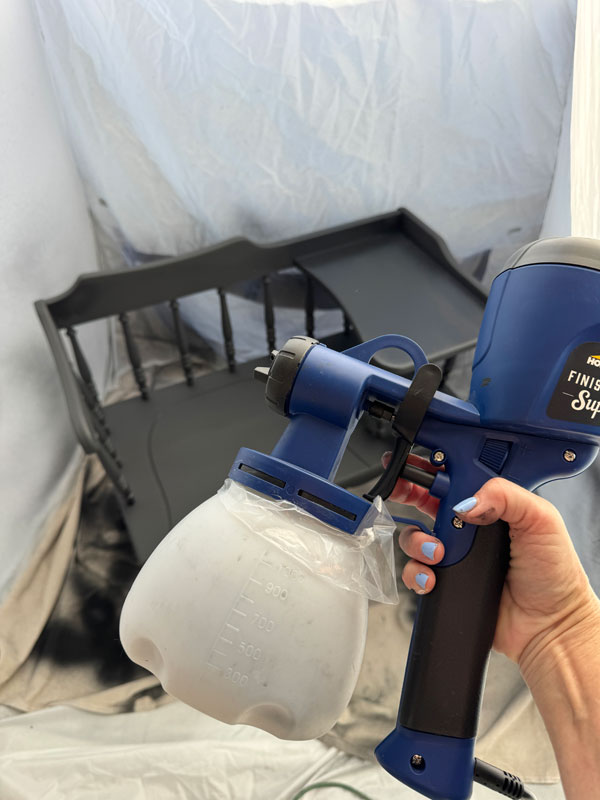
I know it’s much faster to use a sprayer, but I just don’t enjoy the set up and prep required. If I had a dedicated space for spraying, I might feel differently, but I don’t.
That was super fast though, and the secret to making clean up easier when using a sprayer is having an extra container filled with water for rinsing:
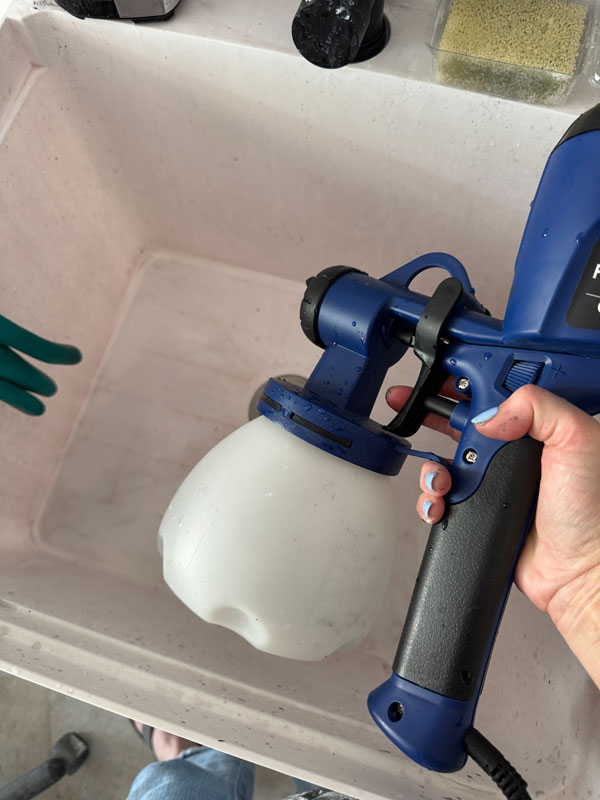
AND having my new (doesn’t look so new anymore!) utility sink in the garage is a game changer for that too!
Sand
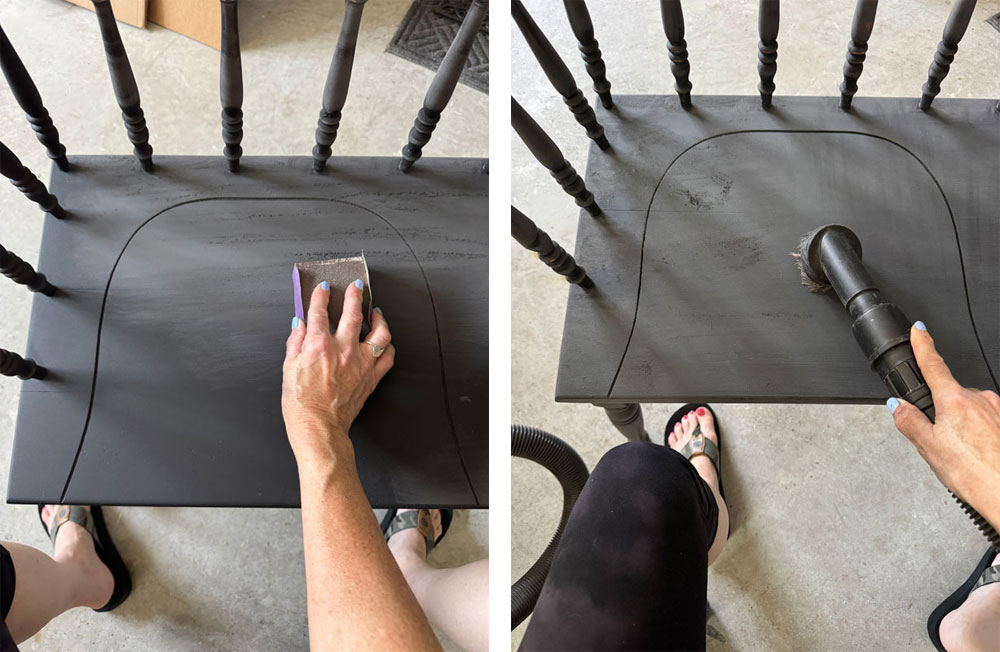
Once the paint was dry, I sanded all over to smooth and distress just a little, followed by a dust clean up with my shop vac:
Seal
And finally, it was time to seal and protect this telephone table. You can leave chalk paint unpainted, and after 21 days or so, it will be cured and solid, but I find the very flat finish unflattering, so I always apply a topcoat.
I chose my go-to topcoat, Clear Coat in the satin finish to seal this piece.
First, I added a little bit of paint to my sealer. This is about how much I add:
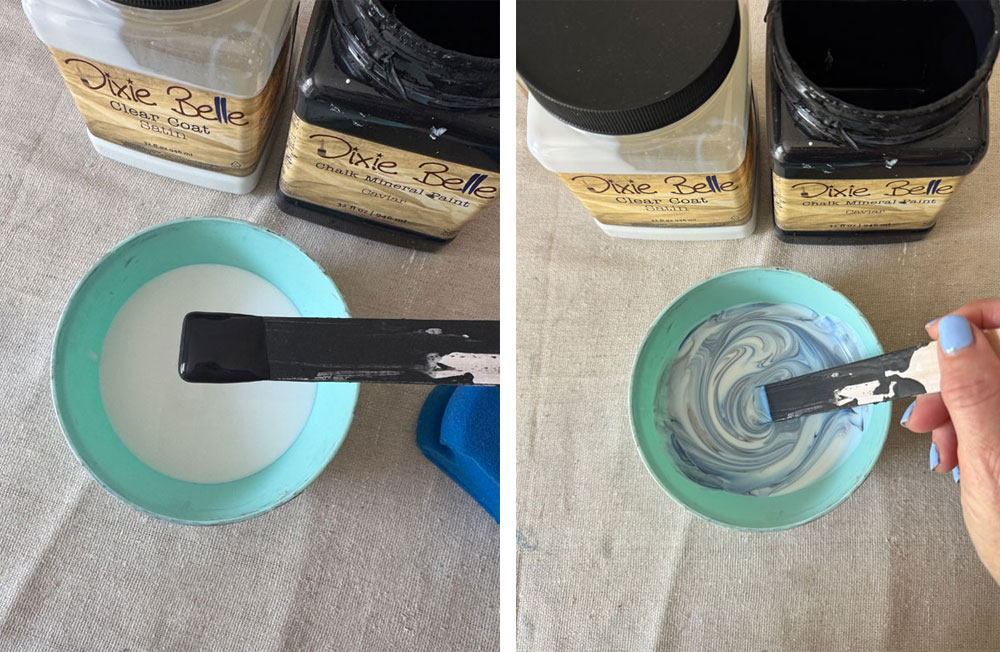
As I’ve mentioned before, this creates a nicer overall finish when sealing dark colors and helps to prevent the “ghosting” you get when you run your fingers across the surface.
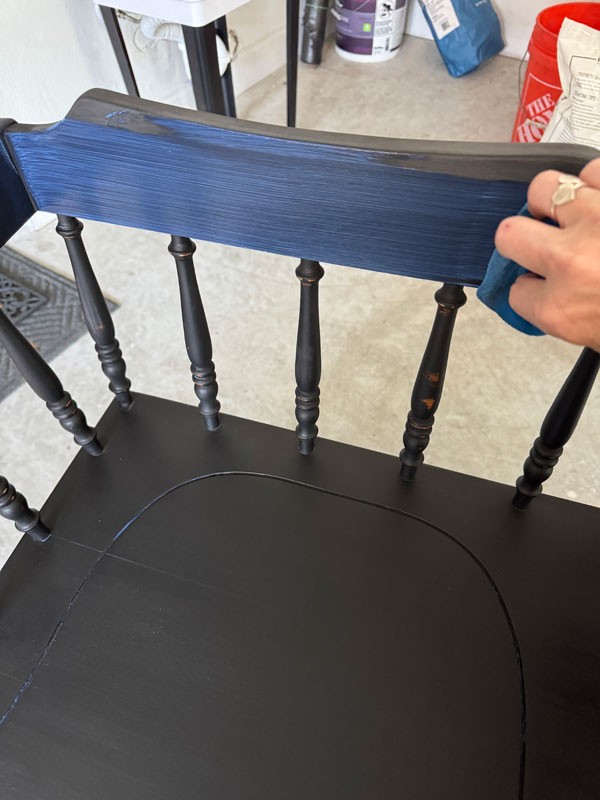
I applied it using the blue sponge applicator which made sealing all the spindles much easier than painting them!
The cushion
Remember the cushion? I don’t believe it was original to this piece. It was actually just sitting on the bench part, and as you can see above, there was an area routed out to outline the seat, and it appeared that the cushion had been added after.
I knew I wanted to keep the cushion, but it needed to be covered, so I removed the original 70’s vinyl with this handy staple remover:
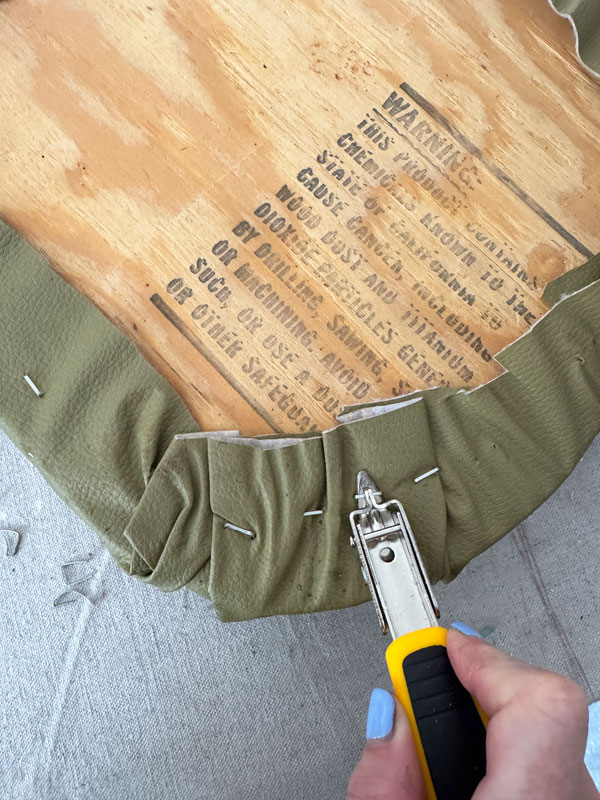
The 70’s loved some vinyl upholstery!
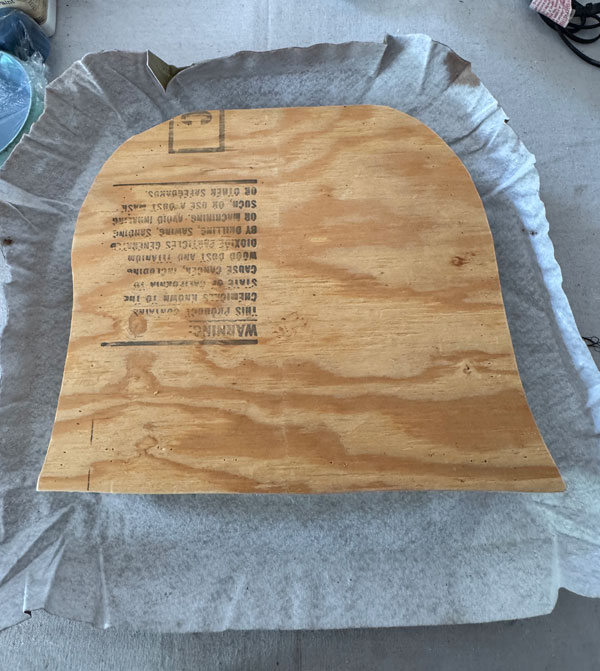
This is what was underneath… stiff foam that you might see used as packing material:
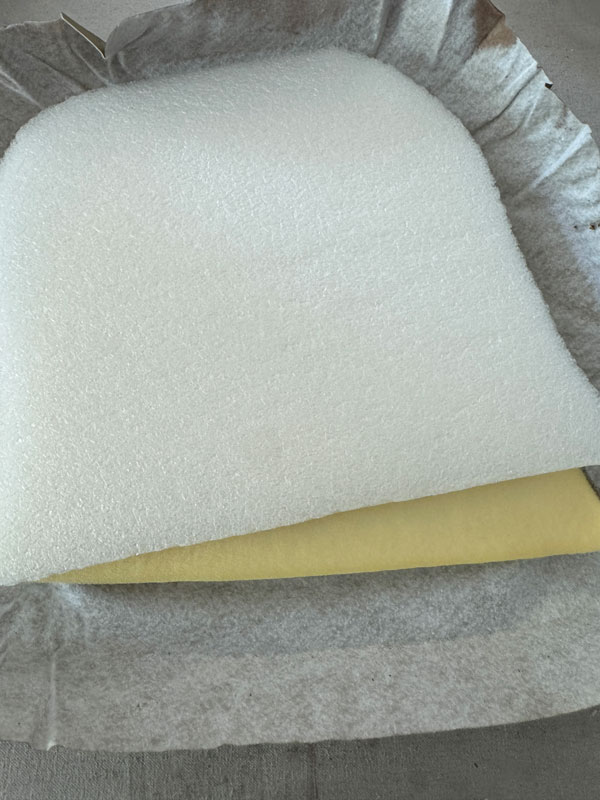
And the shape of the plywood base wasn’t even on both sides…
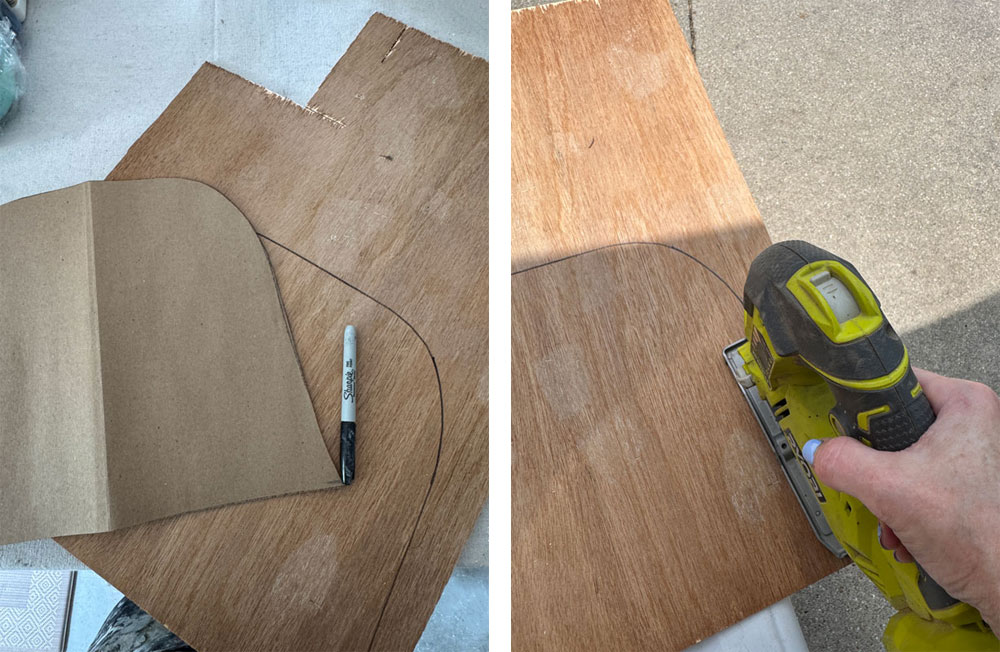
I ended up cutting a new base by making a template from the routed area on the bench, and then cut it out using my jig saw:
Then, I ran up to Walmart to grab a foam seat cushion and cut that using an electic carving knife:
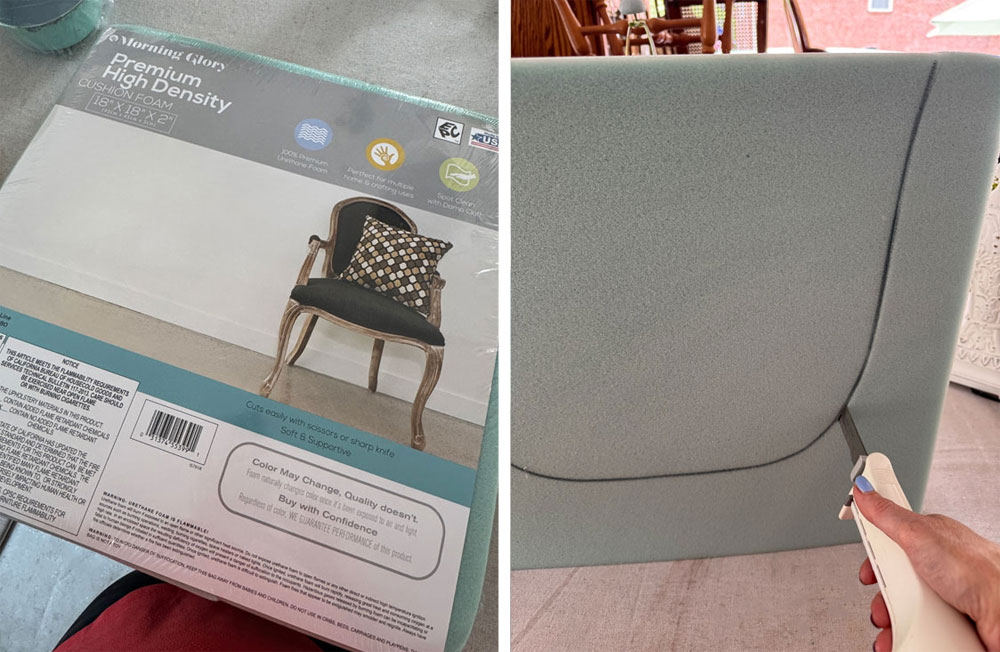
That is by far the best way to cut foam. You can see how it cut through the foam so effortlessly!
All that was left to do was add my fabric, securing it with my staple gun:
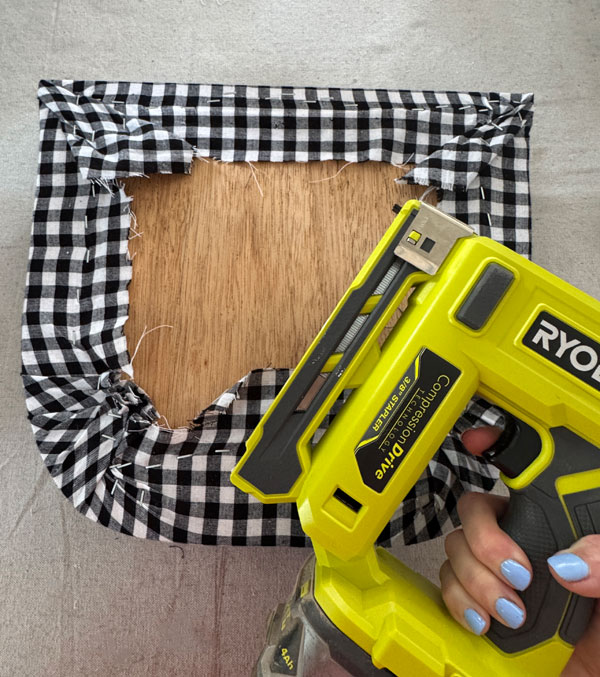
As you can see, I finally upgraded from my el cheapo staple gun lol!
Vintage Telephone table Makeover Reveal
Let’s see the after!
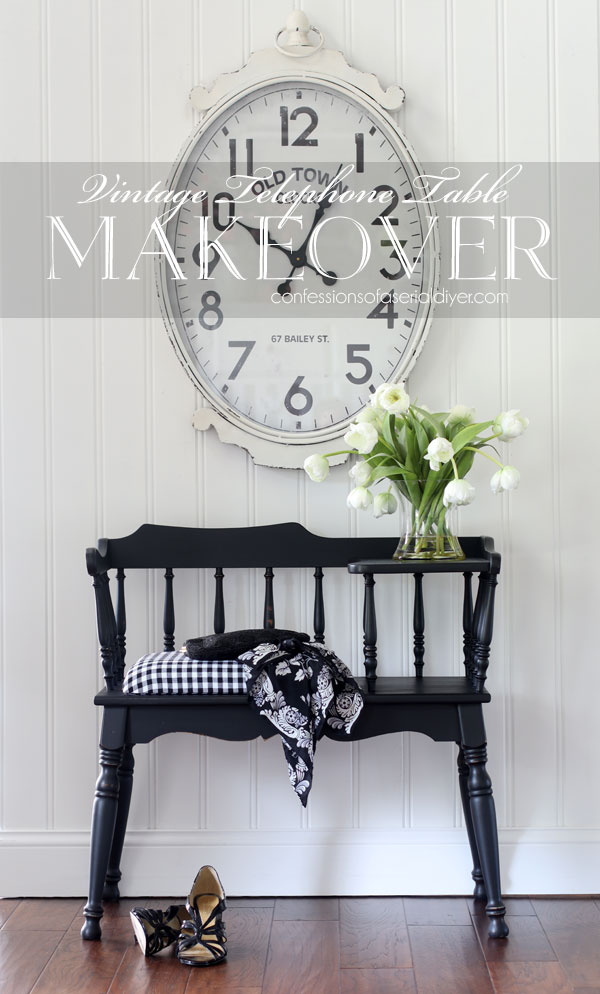
How much better does this table look in black??
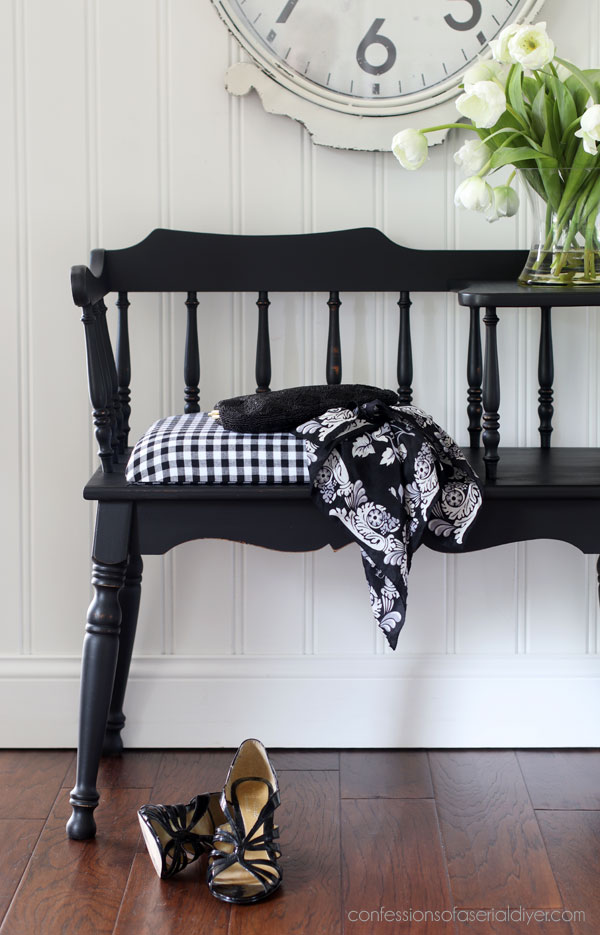
So much better!
And the seat is such a cute addition with that pop of gingham!
Lyla likes it too…she made herself right at home as I was setting up to take photos!
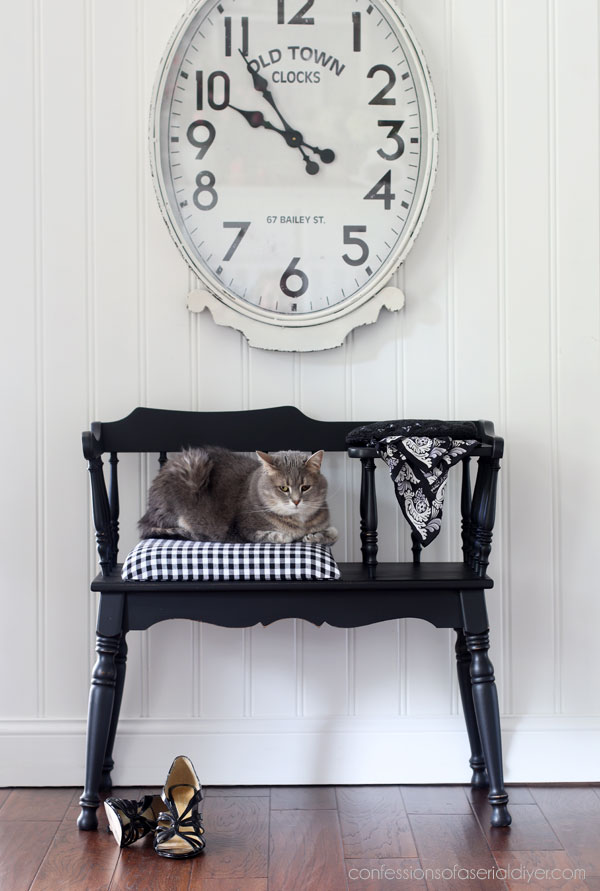
She is a very large girl…barely fits on the seat ha ha!
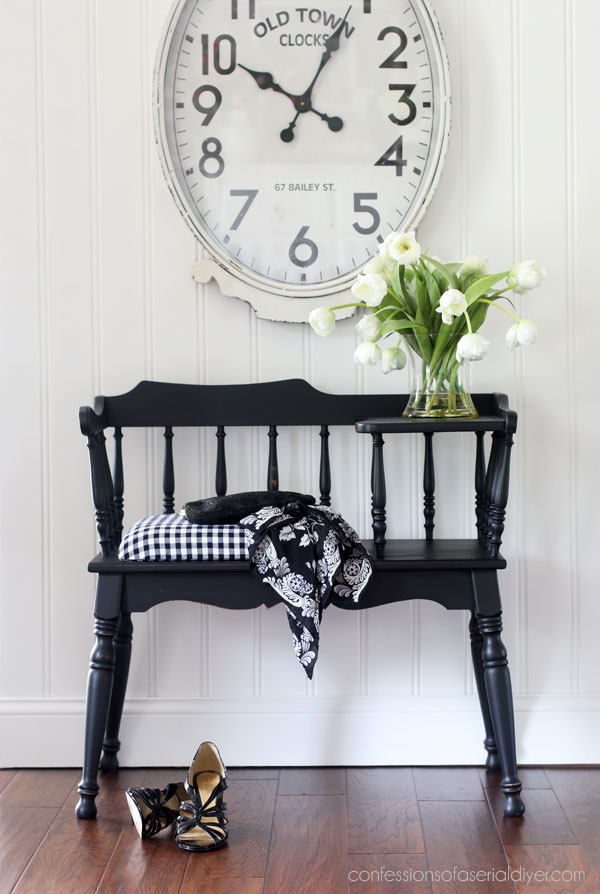
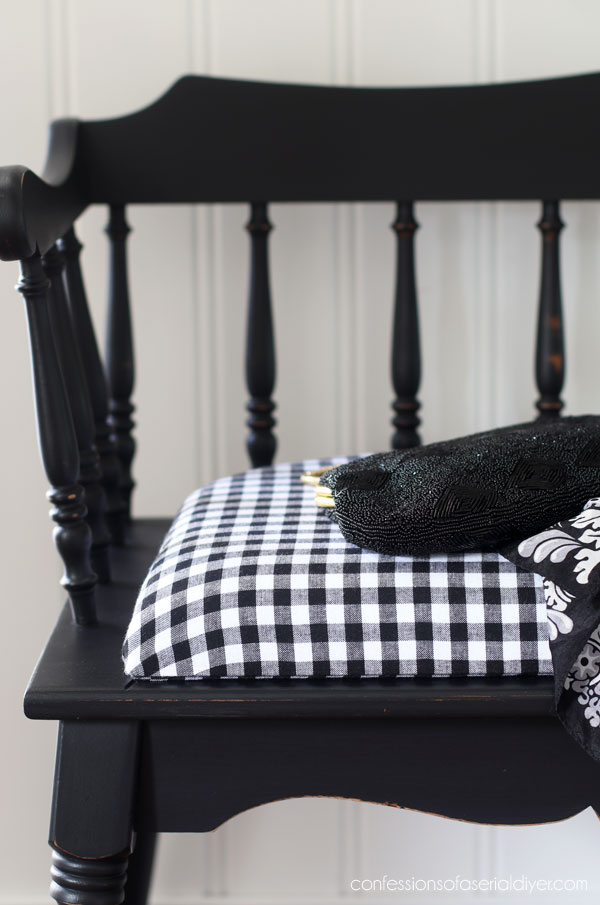
Here’s a peek at the minimal distressing…
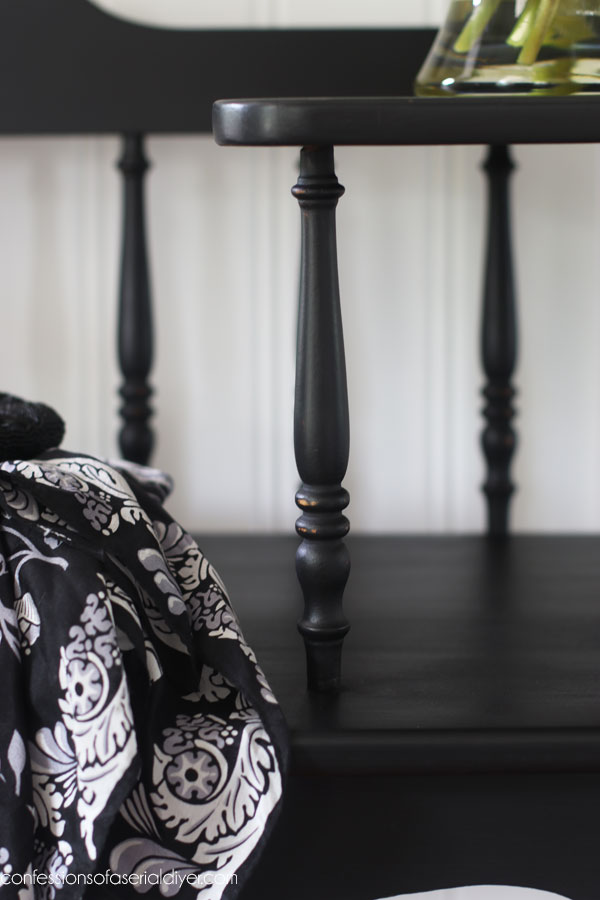
I don’t so that on every piece anymore, but I love the wood to show through on these black-painted pieces!
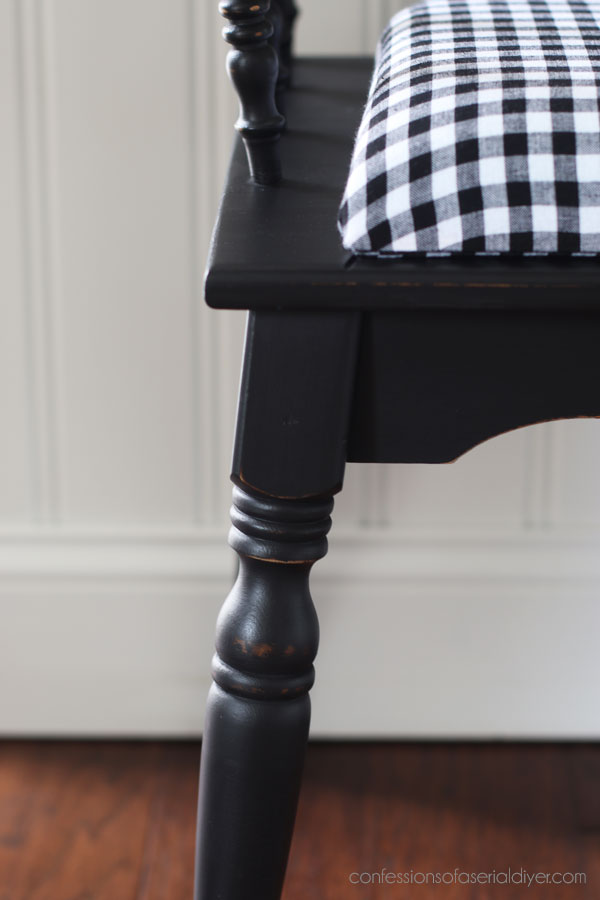
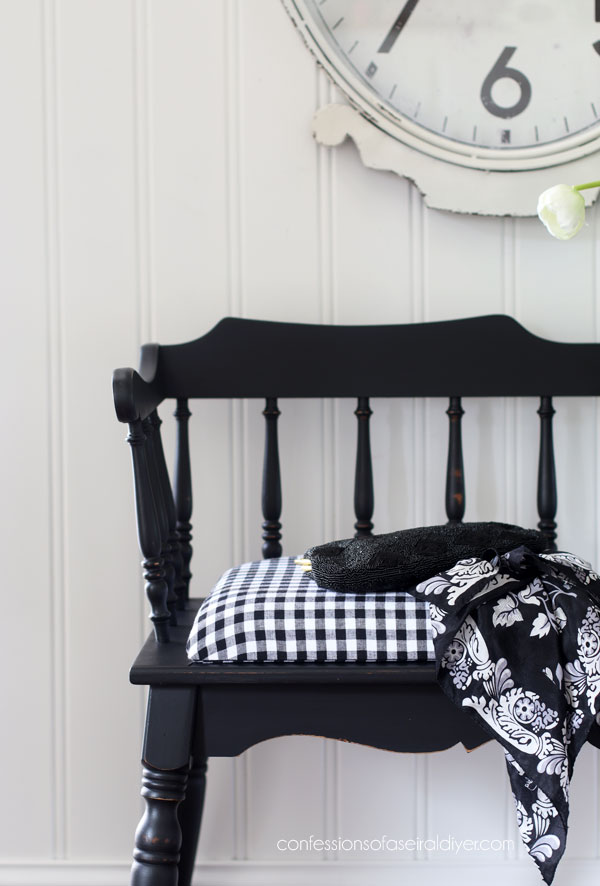
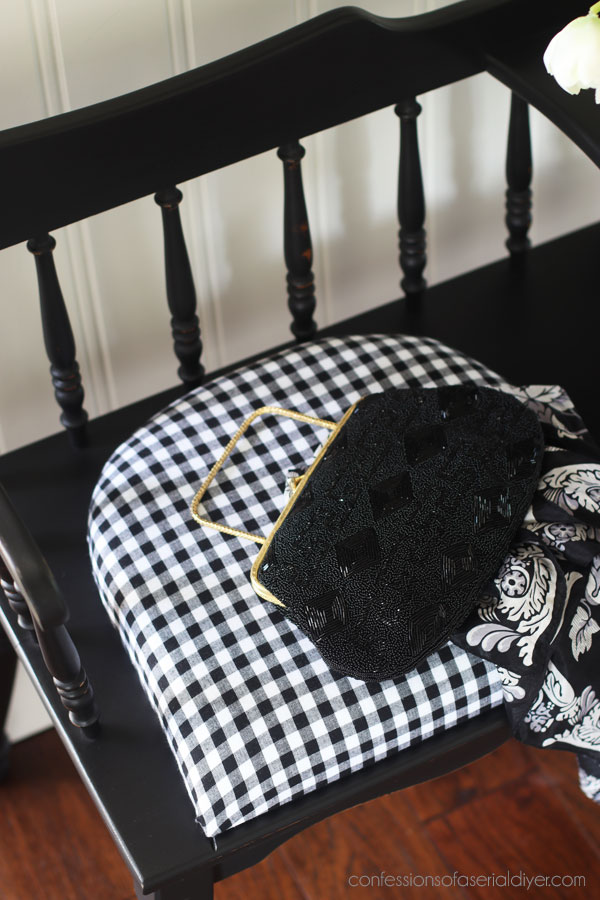
And a look at the seat without anything on it. It’s easy to stretch the pattern and distort it, but I tried to keep it even…
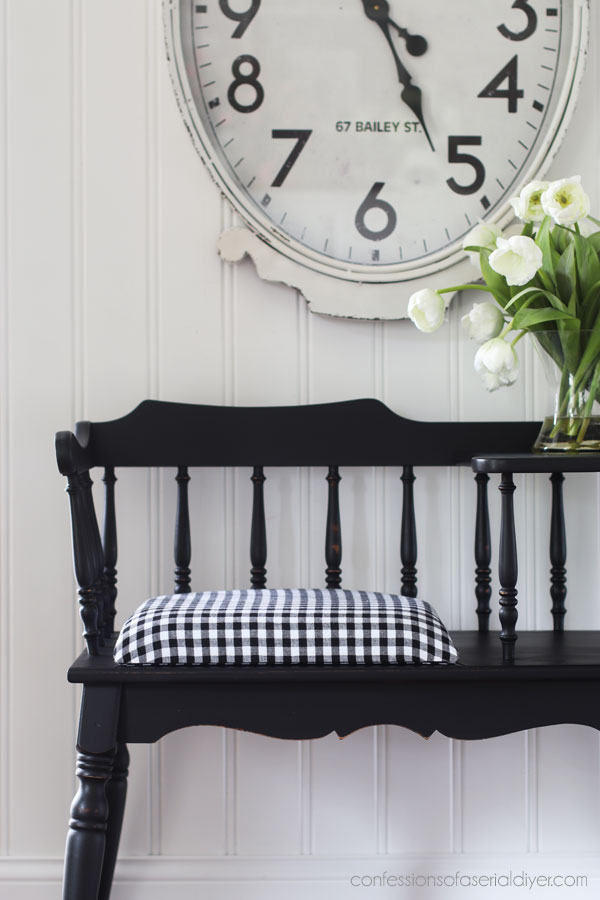 Still vintage but no longer dated!
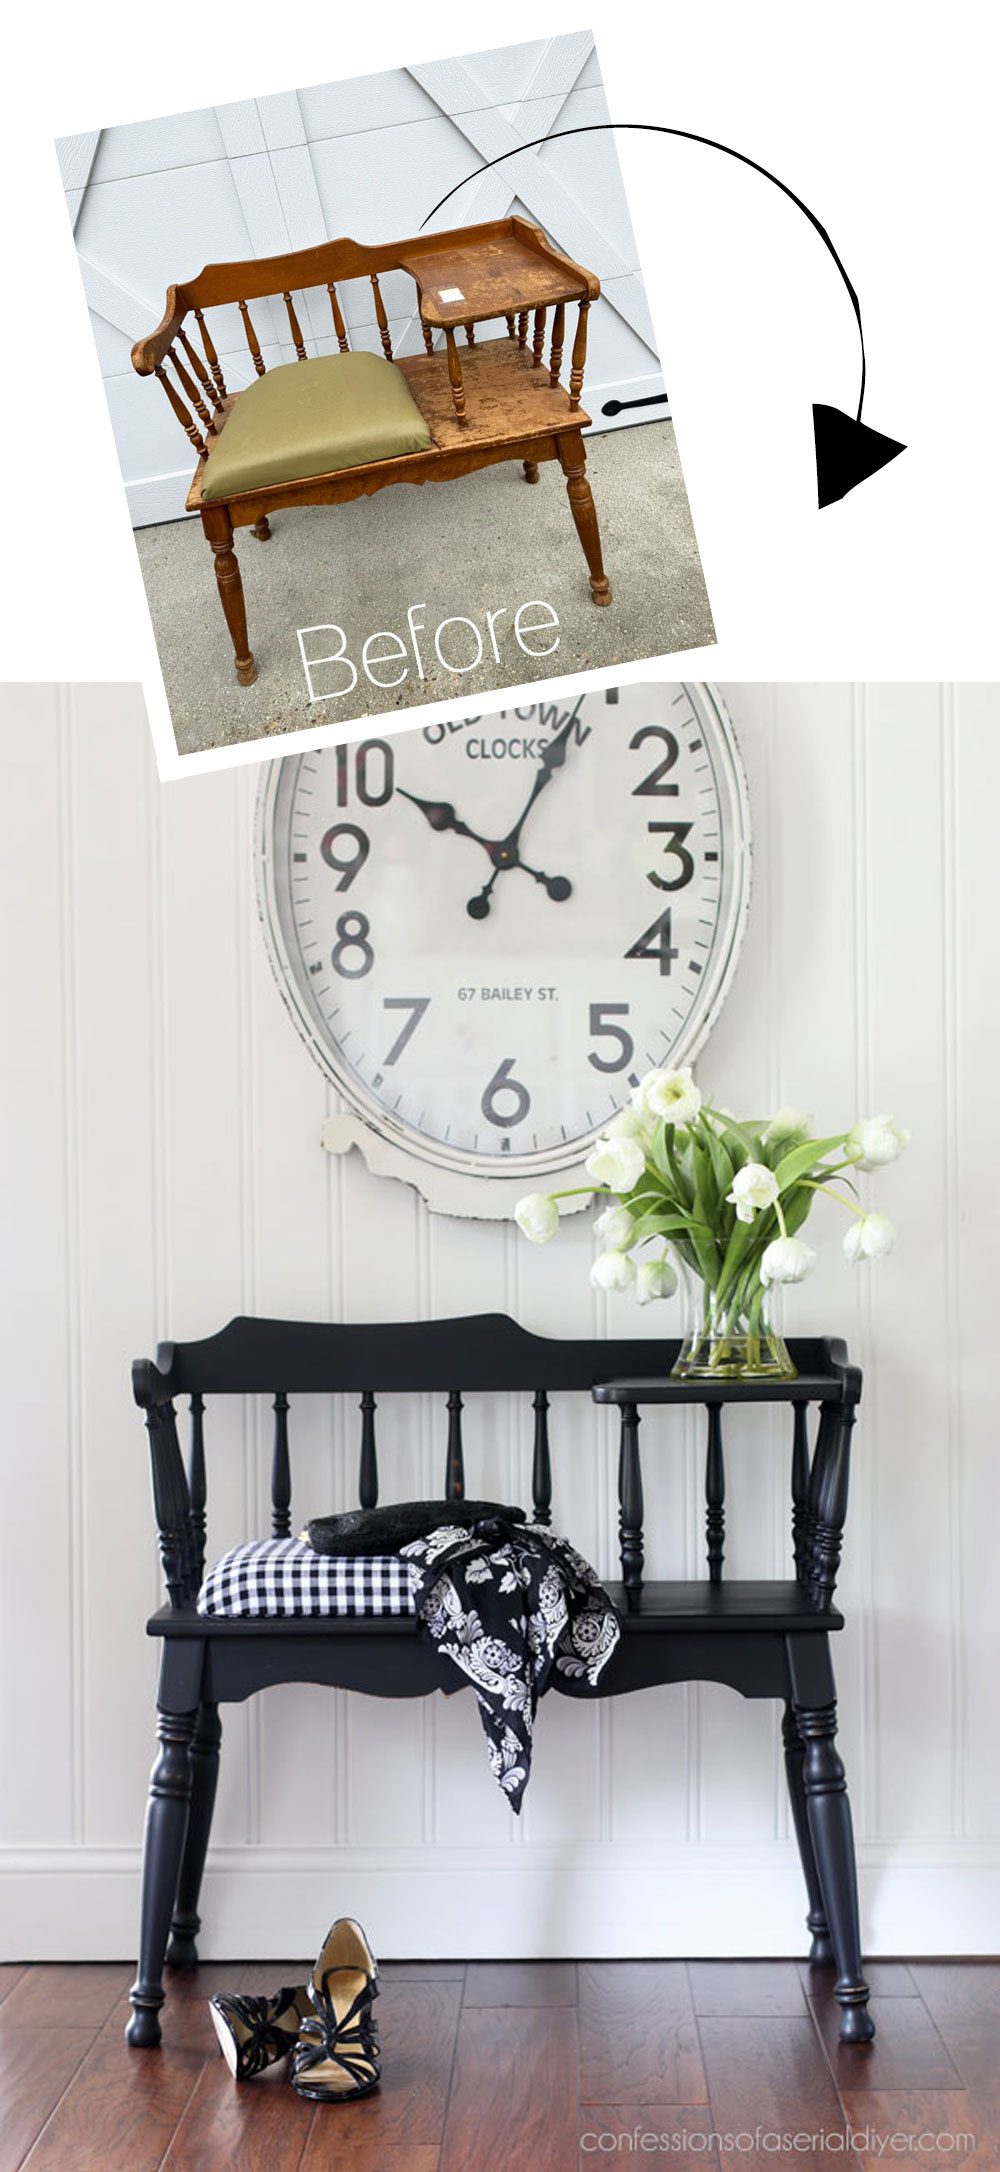
Another one done!
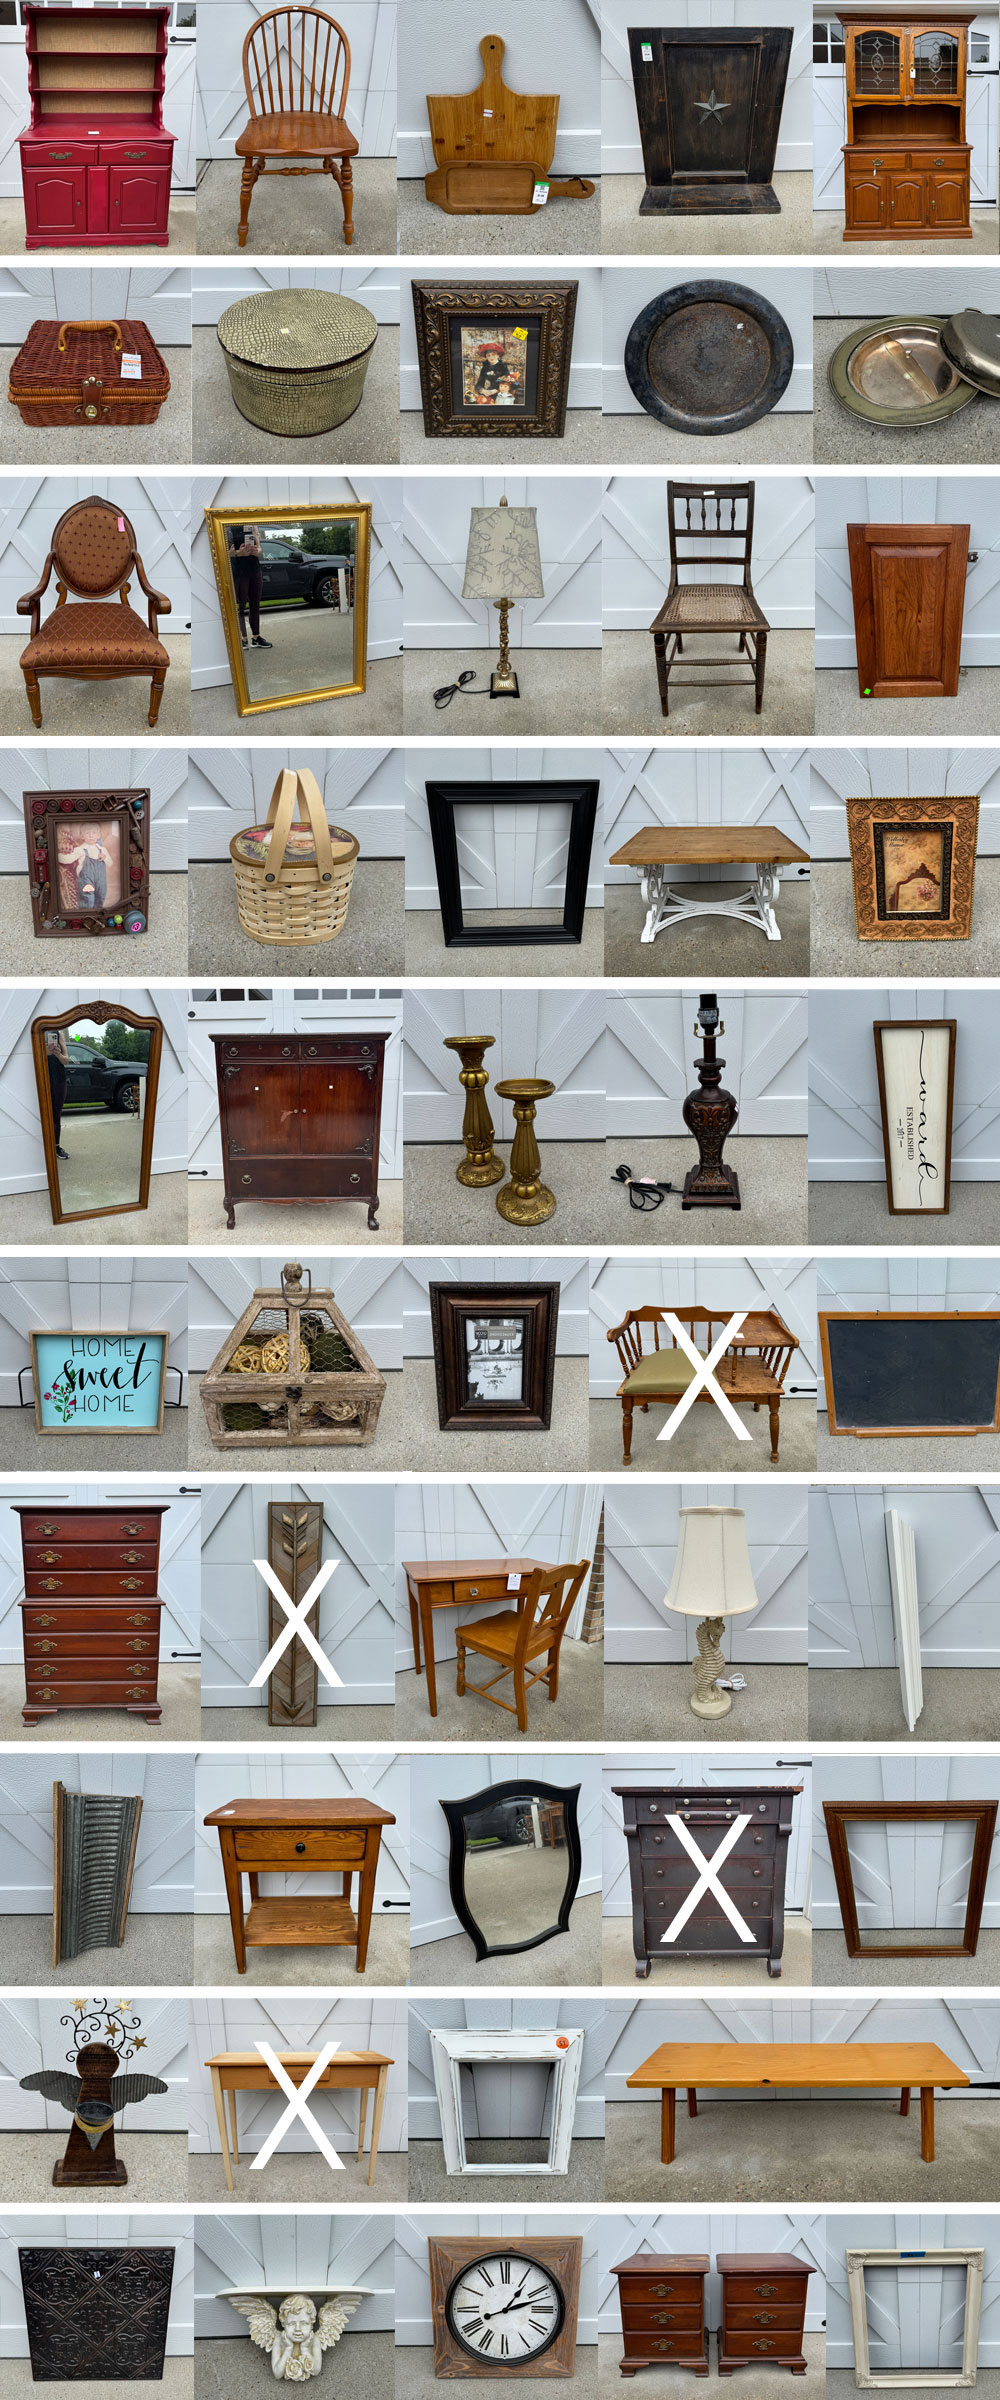
My friends still have three more Trashy Treasures Makeovers waiting for you!
1. Salvaged Inspirations
2. Artsy Chicks Rule
3. Petticoat Junktion
I’d love to know your thoughts on this one!
I’m desperate for lamps in my booth, so I’ll be back on Thursday with these two:
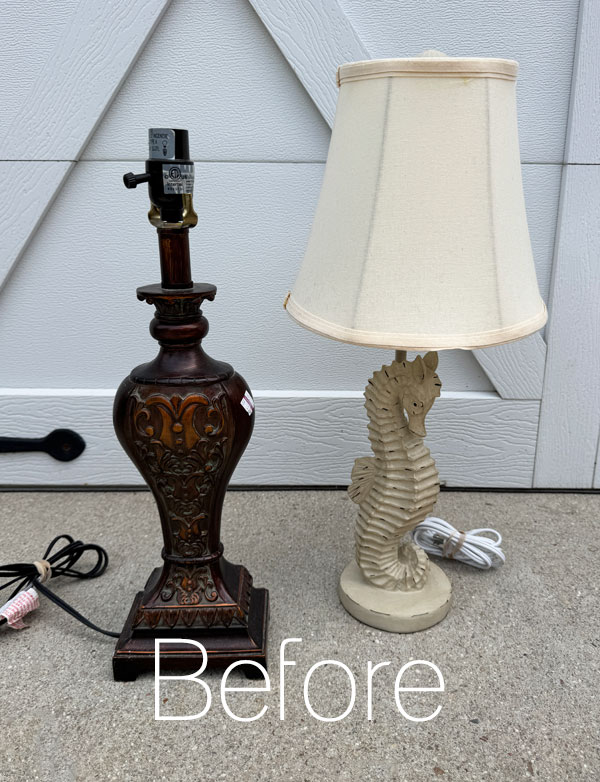
UPDATE: No need to wait yay! See them both HERE now!
See ya then!
XOXO,

Don’t Miss a Thing!
If you like what you see, there are several ways to follow along!
EMAIL * INSTAGRAM * FACEBOOK * PINTEREST

Get FREE SHIPPING on all orders over $50 in my Etsy shop. (No code needed at checkout!) Orders under $50 enjoy $8 flat rate shipping!
Most orders ship same or next business day! Visit my shop below!





Mary Kaiser says
Love it in Black! I also love the fabric with the black. It is so fresh and beautiful now! Wow, I love it.
Christy says
Thank you, my friend! I love a classic gingham check too! Have a wonderful weekend! XOXO
Teresa Mossi says
I wanted to ask – how did you attach the seat to the telephone chair? Is it nailed down?
I just found a chair similar to this and will attempt to redo it. I want mine pink 🙂
Thank you!
Christy says
Hi Teresa! The cushion was not held in place when I found it, so I left it the same way. It can easily be removed if the buyer doesn’t want it. However, if you wanted to attach it, I would screw it in place from the underside using screws long enough to pierce the wood of the cushion, but not long enough to poke you in the bum lol. Have fun with yours! XOXO
Teresa says
Thanks so much!
Christy says
You’re welcome! 🙂
Marcie Lovett says
Or you could apply hook and loop tape to the bench seat and the underside of the cushion.
Christy says
Yes! Even the command strip one that won’t damage the surface would work great! XOXO
Josee says
Someone will really appreciate this piece. Great job.
Christy says
Thanks so much, Josee! XOXO
Cecilia says
The black paint really dressed up this adorable telephone table. Kind of sad they aren’t needed anymore. Remember being tethered to the cord? Lol, we’ve come a loooong way. I have a cute telephone table too only the table part is enclosed. I made a small hole to thread the charge cords through so we can use it as a charging spot. Have a great week. I’ll be painting my nightstand as soon as my order gets here! 😊
Christy says
Thank you, my friend! As a teen, we had a cord that stretched all the way from the kitchen at the back of the house, through the living room and around the stairs to the front door ha ha! I do love these little tables though and I bet yours is perfect as a charging station! Happy creating!! XOXO
Gina says
I love these old telephone tables! This looks so classic.
Christy says
Me too…I just love them! Thank you, Gina! XOXO
Geri Harvey says
Christy, That is adorable!! …and…I love it! Have a great day1
Christy says
Thank you so much, Geri! Enjoy your day too! XOXO
Jill says
That’s adorable and such a classic look in black! And the cat adds some interesting character, too! Never would have thought of cutting foam that way. I have heard there’s a foam manufacturing facility near me now that sells foam pieces directly to the public but I haven’t checked it out yet.
Nice work!
Christy says
Thank you, Jill! My cat couldn’t wait to jump up there lol. And yes, cutting foam couldn’t be easier than doing it that way, and I see those electric knives at thrift stores often. Cool that you have a hook up on the foam nearby! XOXO
Karen says
Amazing what a difference paint can make! The update breathes new life into the piece, and the seat cushion fabric can “dress it up” or “dress it down,” depending on where it will be used! I love the gingham! Another winner!
Christy says
Right?? Black paint works miracles for sure. Thanks so much, Karen! XOXO
Teresa Brown says
Hi Christy , the vintage phone table turned out beautiful painted black . I have a vintage phone that would look perfect sitting on there, have no clue where I would sit it but it did turn out nice.
Christy says
Thank you, Teresa! That would be so cool! XOXO
Amanda says
Love this!
Christy says
Thank you, Amanda! XOXO
Linda says
Great rescue! Love all your choices here. Good job not distorting the gingham check like you said, takes effort. Looking forward to the seahorse lamp next week! 😁
Christy says
Thank you, Linda! It does take effort to keep the gingham straight…that probably took the longest ha ha! See ya next week! XOXO
Jackie C says
❤️❤️❤️love it! Great find.
Christy says
Thank you, Jackie! XOXO
Denise - Salvaged Inspirations says
Super sweet with the checks fabric – and you know it’s a hit when Lyla approves! Have a great week, my friend! XOXO
Christy says
Thank you, my friend! Absolutely ha ha! XOXO
Cyndi says
I love it! IMO, it doesn’t get much better than classic black, and the gingham check is the perfect addition.
Christy says
Thanks so much, my friend! XOXO
Kathy Owen says
Aren’t you the smart one, making your own buttons. Awesome! Caviar is one of my favorite paint colors and I think I used that same fabric on some black chairs. Another winner!!
Christy says
Thank you, my friend! Caviar fixes just about anything and you can’t go wrong with gingham for sure! XOXO
Rebecca Payne says
I love this makeover. I especially like the gingham you chose. I love using gingham in my projects.
Christy says
Thank you, Rebecca! I agree…you just can’t go wrong with the charm of gingham! XOXO
Rhonda says
What a change! The black looks great. I’m Seeing these telephone seats everywhere. How did you attach the cushion?
As always you did an amazing job.
Christy says
Thank you, Rhonda! The cushion wasn’t original to the piece, and so it was not attached. I decided to leave it unattached also and just finish off the underside nicely. You could make it more permanent by screwing it into place from underneath. XOXO
Nancy @ Artsy Chicks Rule says
So perfect, Christy!! Love it!! And yes, to the utility sink… I am FINALLY getting one in the garage this Friday. Gosh, I will be so happy!! haha!! And also yes to the spray painting…I should’ve done that on mine. It took forever to paint the little end table of mine. But set up and all that is a pain, I agree! xoxo
Christy says
Thank you, my friend! You will absolutely LOVE your new sink…I don’t know how I lived without one for so long! And yes…it seems backwards, but I think it actually takes more patience spray ha ha! XOXO
Sharon Austin says
Whoa, I was not expecting the black, but I love it! I’ve always wanted one of these, but no room in the house for one, darnit!
Christy says
I’m so glad you like it, Sharon! I love them too…thanks, my friend! XOXO
Marlene Stephenson says
I think Lyla was giving you her approval, it is beautiful.
Christy says
I think so ha ha! Thanks, Marlene! XOXO
p says
I also did not expect the black. I am amazed how much it un-dated this piece ! The gingham check is perfect. A great timeless accent piece now.
I sewed a lot growing up – to be able to have a school wardrobe.
I recall using an iron-on fabric – stiffener ? – for stretchy fabrics – and shirt/blazer collars. I would not have trusted myself not to crooked/stretch the fabric 🙂 You did a great job.
I Love when you update lamps. I am always impressed with how updated/current you make them. and with the best lamp shade shape too! I’m looking forward to your Thursday project.
Christy says
Thank you, P! Yes, the black really took years off of it for sure. I never thought to use a stiffener… that would be so smart! I used to make a few things when I was in high school as well and then when I started working full time after, I needed nicer things to wear and made a bunch of things! See ya tomorrow! XOXO
Susan says
Love it! Your update is so well-done! I never cared for this piece in its original stain. I love seeing it in black and the cushion fabric looks great, too. Who would not want it now??!
Christy says
Thank you, Susan! I’m so glad you like it now! I am still amazed at what paint alone can do for a dated piece lol! XOXO
Michele M. says
Oh my goodness, Christy – it looks FABULOUS! I love that piece and the choices (and job) you did on this. Really super cute now.
Christy says
Thank you, Michele! It is so much more fun now! XOXO
Marcie Lovett says
How charming that bench is now, Christy, from its very uncharming beginning! The finish was so rough – I’m always amazed that just sanding and painting can make something sad look amazing. I’m thinking the original cushion probably tied to the spindles. Yours looks much more comfy than one of those floppy pancake-flat chair pads!
Christy says
Thank you, Marcie! It was in rough shape for sure. And you might be right…it very well could have had a cushion that tied on. It’s super cushy for your tushy now! XOXO
Michelle B. says
That came out so pretty! When I was a little girl around 6 or so, my Grandma had one just like it in her home. I always thought it was so neat with her phone right on top. I was sure that when I was a grown up I would get one just like it for my home and put my phone on it too. It was my very first decor decision. I’m 59 now, and I never did get one. lol
Christy says
Thank you, Michelle! What a great memory and funny that it was on your list of must-haves lol! These really were neat. I’ve never come across one before, so I was so excited to find this one! XOXO
Michelle B. says
Thank you for your response to my comment. That meant a lot to me!
Christy says
My pleasure! I love that we can interact in the comments! 🙂
Caye says
Nice job, getting that checked fabric straight! It looks like a million bucks now. I would never have thought about doing the whole thing in black. Gotta LOVE that little Lyla! She’s adorable!
Christy says
Thanks so much, Caye! The black definitely took it up a few notches, and it’s Lyla approved lol! XOXO
Laura J. says
How exquisite Christy! I would love it in my entryway. The black paint made it just so gorgeous!!! And Lyla is proof on how comfortable it is! My cat would curl up on it too! And once again your staging is the best! Thank you for another fantastic makeover!❤️
Christy says
I’m so glad you love it, Laura, thank you! Paint, a new cushion, and Lyla approved ha ha! XOXO
Koleta Scott says
I sure wish I lived closer to you. I would buy this in a minute. We live in the Oklahoma Panhandle, so that is out. My mother had one that was supposed to go to me, but the farm and land burned from a wildfire several years ago. My parents had passed away a few years before. Both of my brothers lived there, but got out before the fire took the house.
I have not found one like this yet in our area.
Christy says
Aww I wish you were closer too, Koleta! I’d love for you to have it. I’m sorry to hear about your mother’s home, how devastating that must have been to lose those memories. Glad your brothers were saved. I hope you come across one some day! XOXO
Darlene Spence says
Wow, beautiful in black and cat approved! Can’t go wrong with gingham, but I’m a country girl so I could be bias. I love your work. And your play by play is so helpful. I’m learning a lot.
Christy says
Ha ha yes! Thank you, Darlene! I love that you enjoyed this one and that my format is helpful! XOXO
Petra says
I absolutely love this piece – the black 🖤 is perfect and that gingham is the cherry on top. But it’s Lyla’s 😻 seat now so you can’t put it in your booth haha 😛
Christy says
Thank you, my friend! Ha ha! I went to pull her off of it and all the claws dug in. I was like NOOOOOOO. Luckily, it didn’t pull the fabric lol! XOXO
Susan M says
This turned out so cute!
However, that cushion was not dated from the 1970s. With the prop 65 warning on the back of the plywood; prop 65 didn’t even take affect until 1988; and the listing of the specific chemicals that were dangerous wasn’t mandated until 2018! So that cushion wasn’t that old. FYI, just a little piece of trivia. 🙃
Christy says
Thank you, Susan! Good eye! It was a DIY job, so my guess is they used some old vinyl they had hanging around since the 70’s ha ha! XOXO
ZOYA K RAUSCH says
Hi Christy, I love this project you completed!
so cute and SUCH AN IMPROVEMENT!!
I do have a question though. the new staple gun you sent the link for… Did this gun staple through PLYWOOD OK?? My hubby has been looking for a new staple gun for me that is NOT AN air gun. But he runs into issues using it on plywood which is what we use a lot. the staples do not go in all the way. Does your gun work okay on plywood?
Christy says
Hi Zoya! Thank you! The new piece of would I cut was super thin, and I haven’t tried it on traditional plywood yet. There are several electric staple guns that do not require air compressors. I don’t know if that would have more power behind it than this battery powered one? XOXO