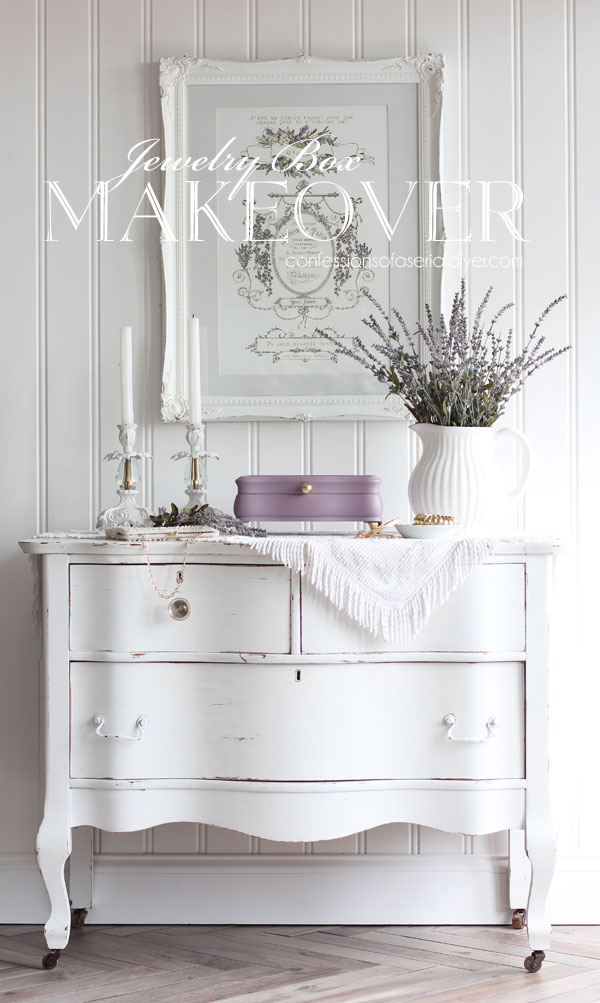
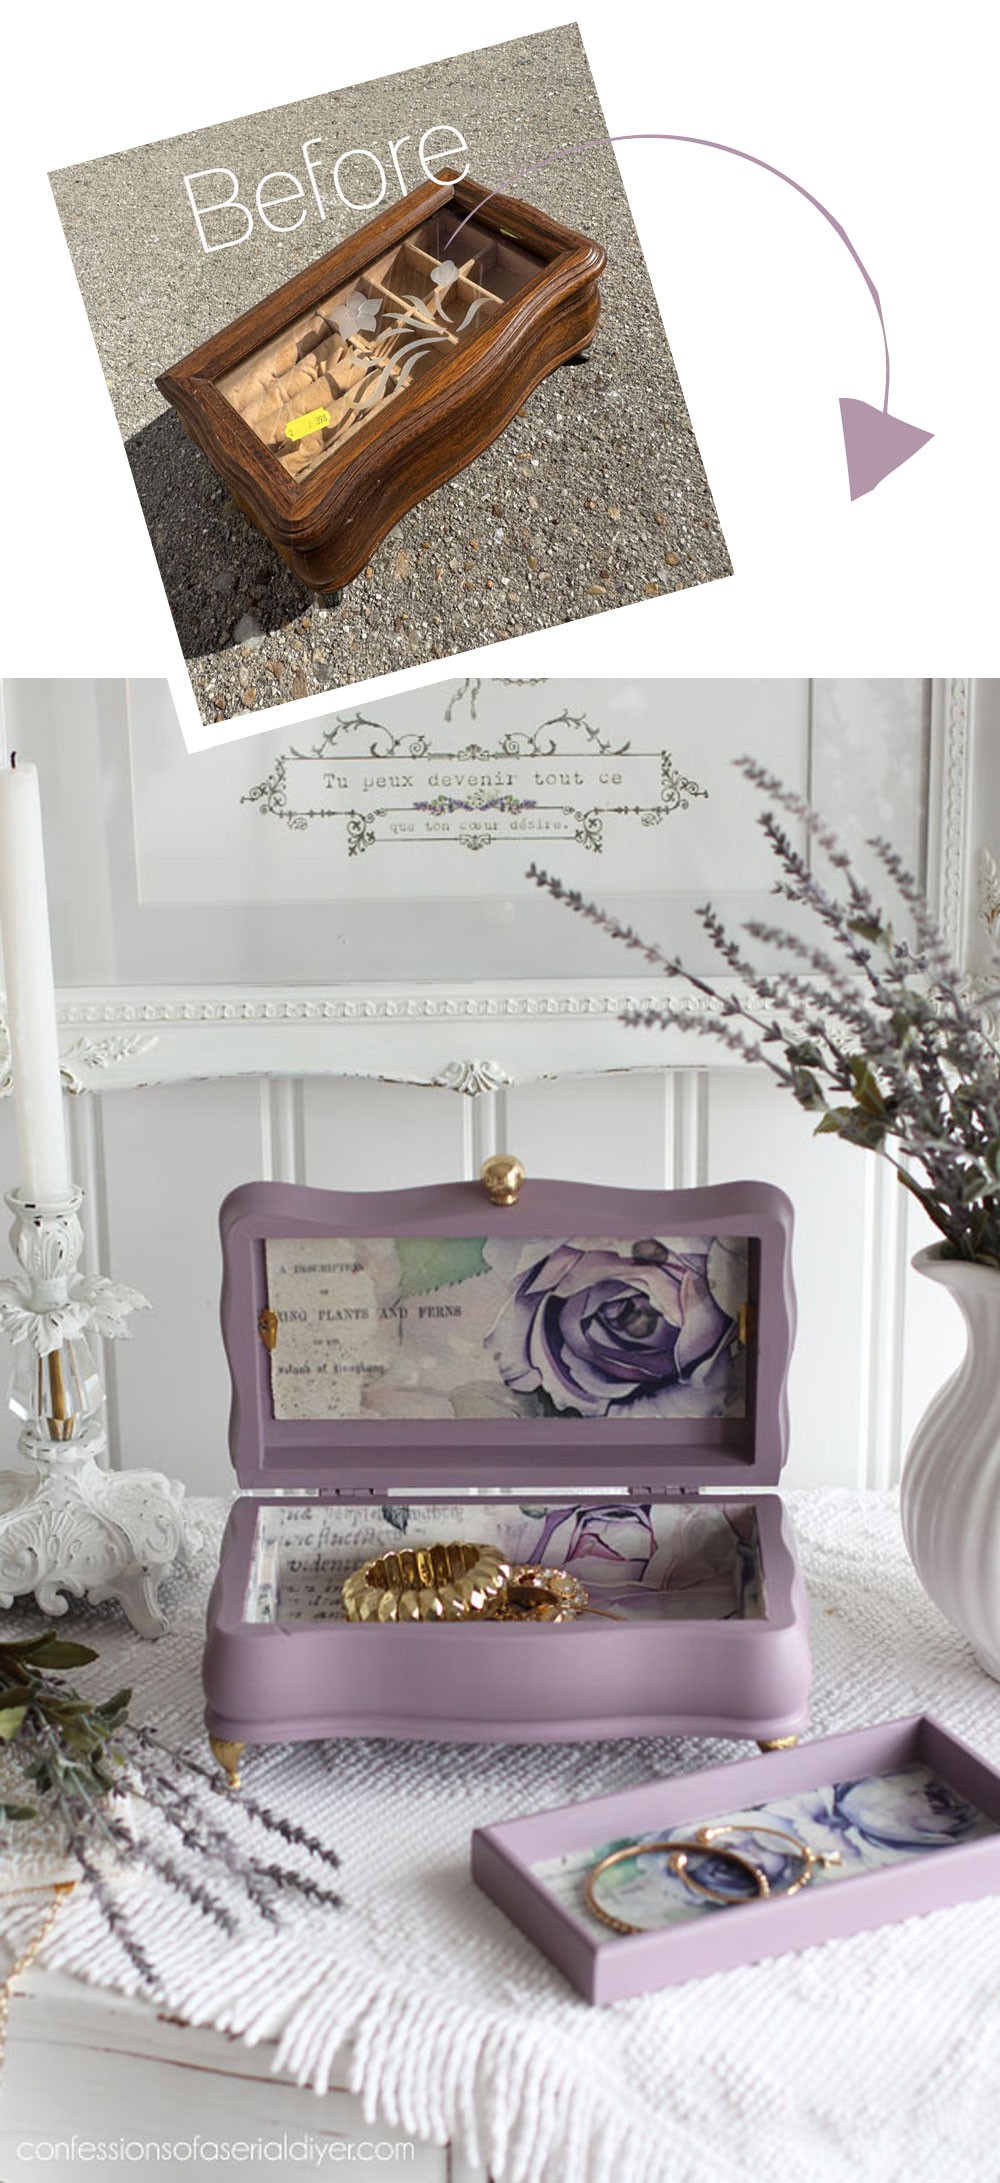
Hello, lovelies! I’m SO happy you’re here! I know how busy this time of year is, so I truly appreciate you taking a minute to stop by! Today, I’m sharing how you can easily update a jewelry box with paint and decoupage paper. I can’t wait for you to see how this pretty little thing turned out!
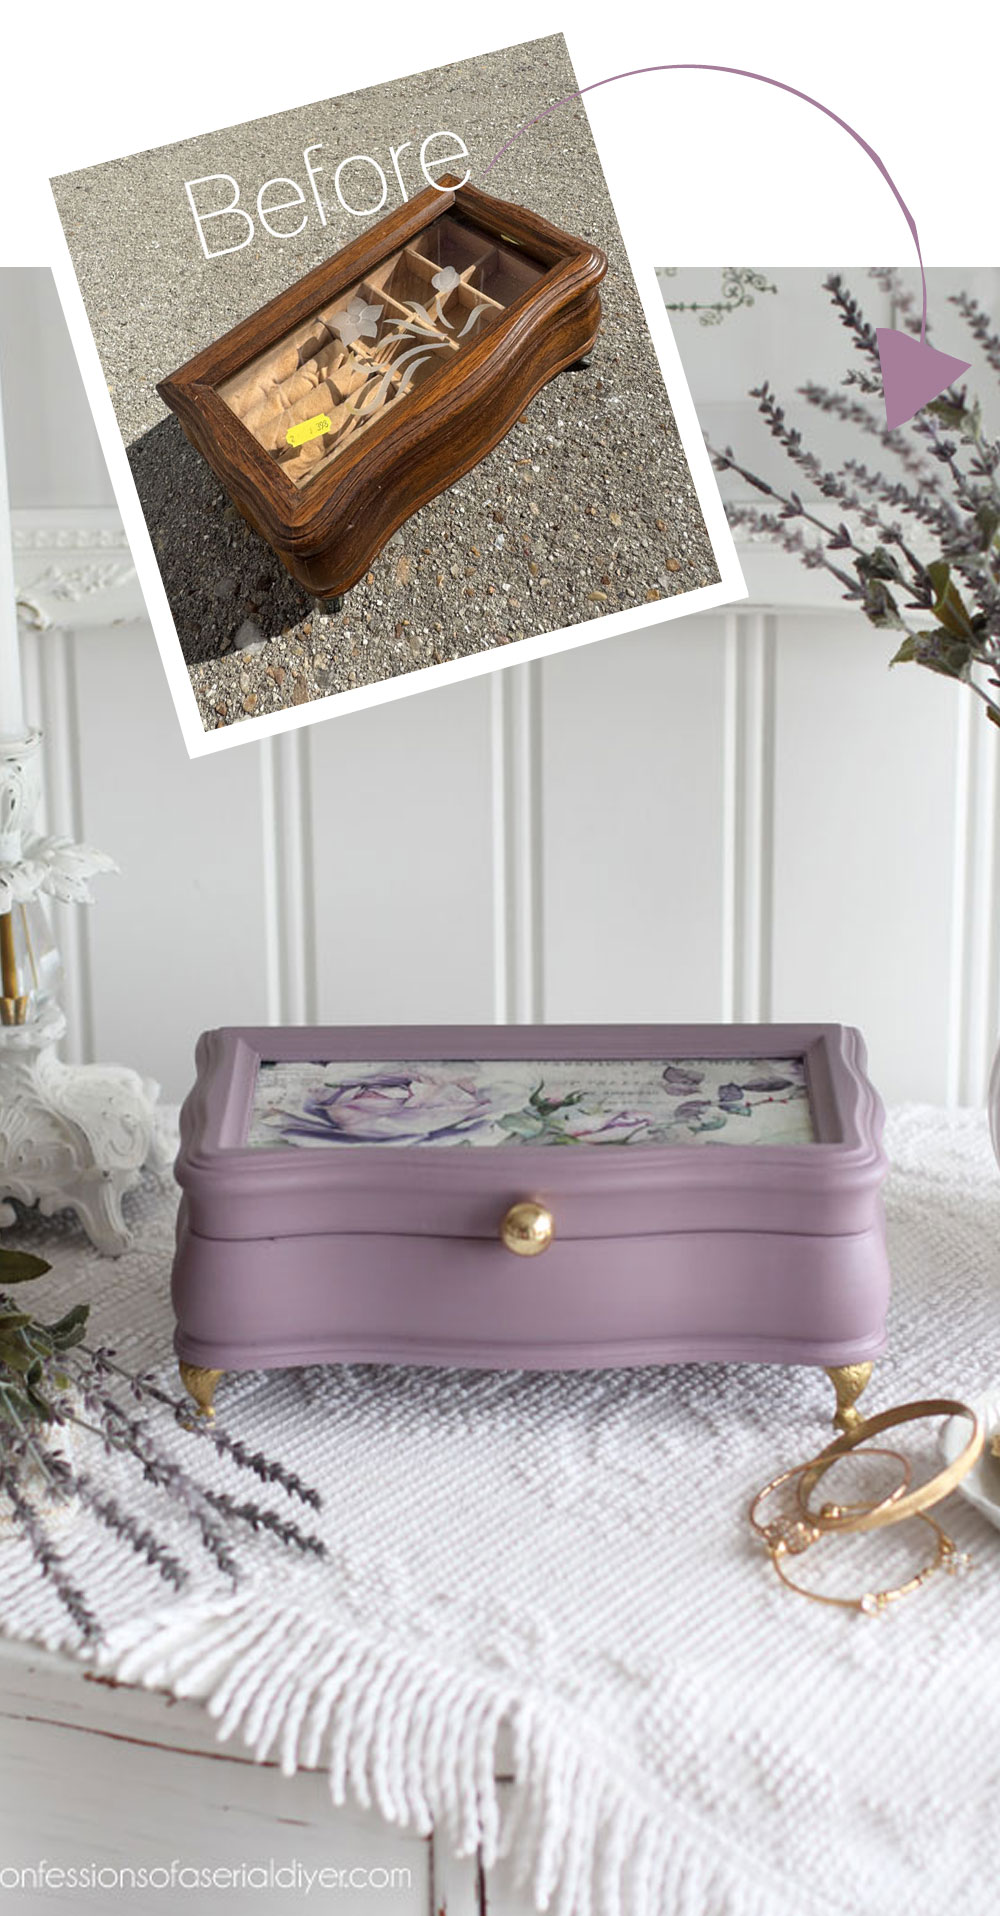
I often pass on jewelry boxes when I see them because they can be a lot of work with all those small drawers and compartments, but this one was so pretty for just $3.98 that I had to grab it!
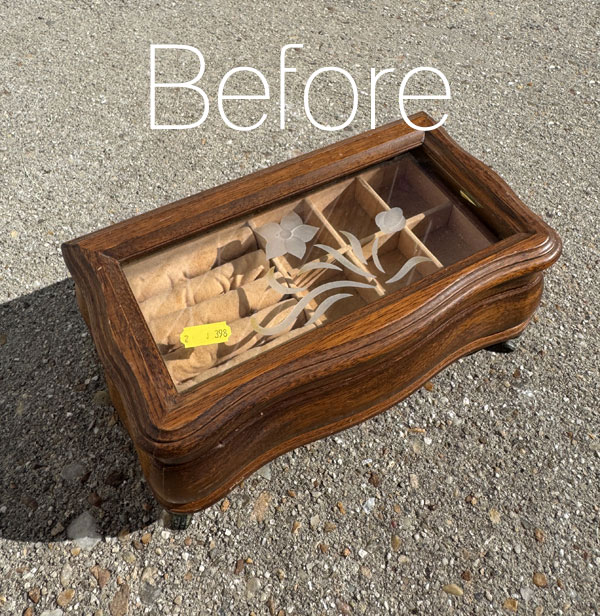
This one just had two compartments:
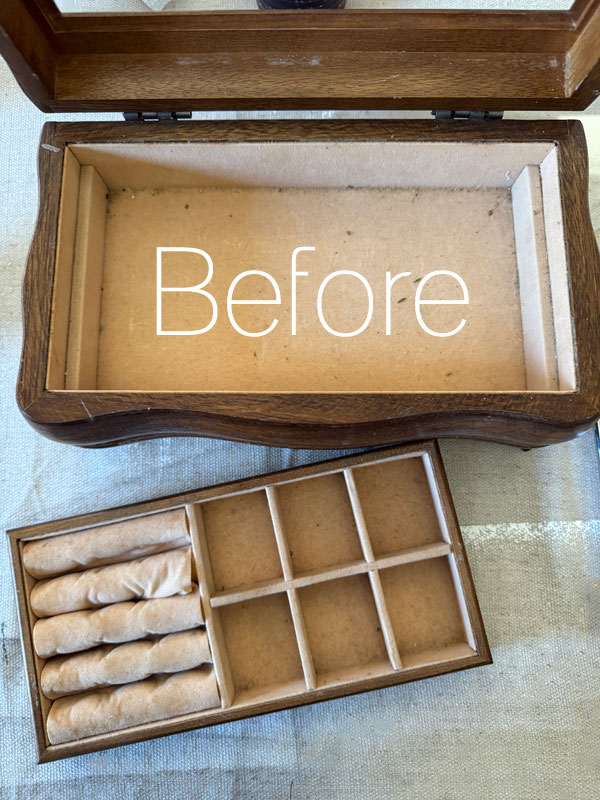
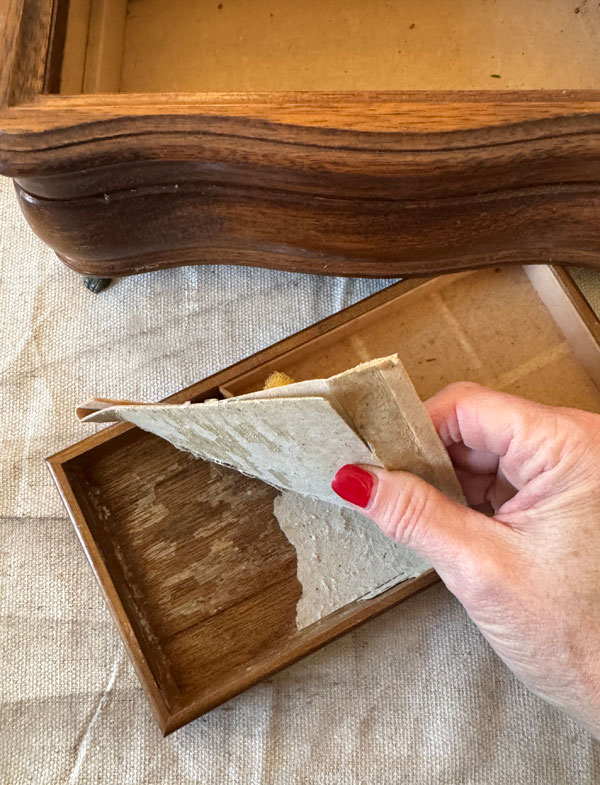
Remove the Lining
There was really no reviving that lining, so I chose to remove it:
I’ve included a few affiliate links so you can find the products I love.
Clean
Then, I gave both pieces to this box a good wipe down with White Lightning, mixing just a half TBSP into a quart of warm water for this small project.
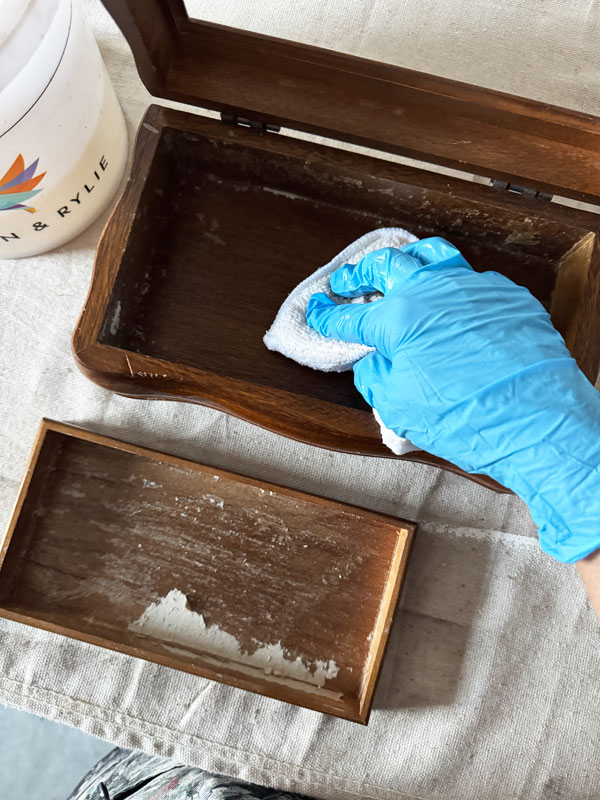
Once I got the paper leftover in the tray there wet, I was able to easily scrape it away. I did a quick rinse with clean water to remove any residue.
Paint
I knew I wanted to use color on this pretty box and chose Secret Path from Dixie Belle’s Chalk Mineral Paint line:

This is a gorgeous dusty purple!
I did two coats. Then I taped off the interior once it was dry and painted that in Fluff:
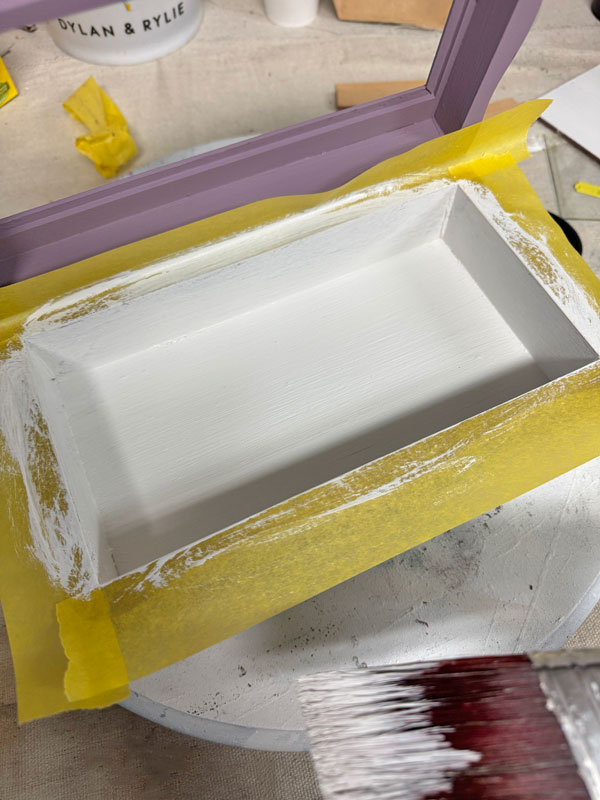
I decided that a lighter background would work better for the lining I decided on.
Sand
I sanded all over lightly to smooth using a fine grit sanding sponge since I didn’t plan to distress this jewelry box.
Replacing the Glass
Not only is the glass a bit dated, it had also yellowed at most of the end points of the design:

It kind of blends in with that peach color beneath, so it’s difficult to see here but very obvious in person.
I traced the glass onto a piece of hardboard (It’s like pegboard but without the holes and perfect for this purpose.) I had in my stash:
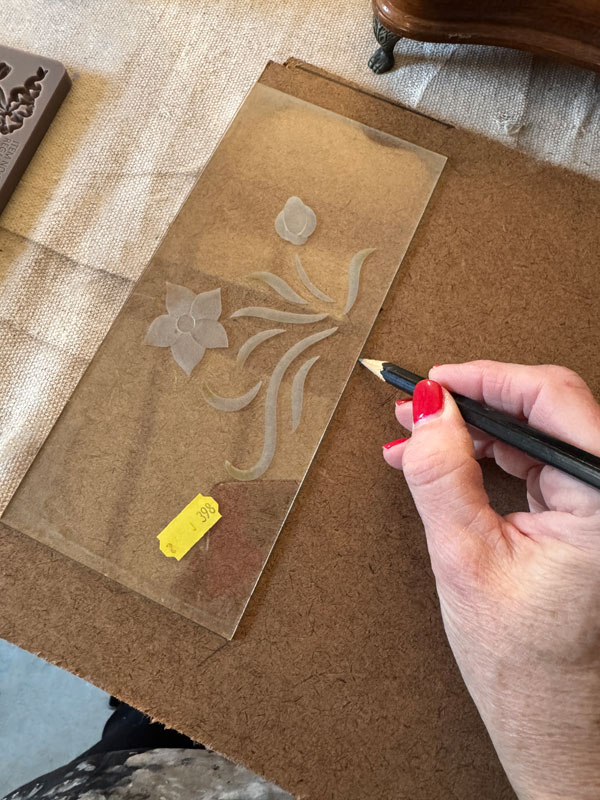
I then used my miter saw to cut it out.
I painted that in Fluff also and set it aside to dry.
Adding Decoupage Paper
Redesign’s Decoupage Fiber Papers have an almost fabric like texture making them really easy to work with.
I had some of this gorgeous Soft Veil Decoupage Paper left over from this round wooden box I shared last month:
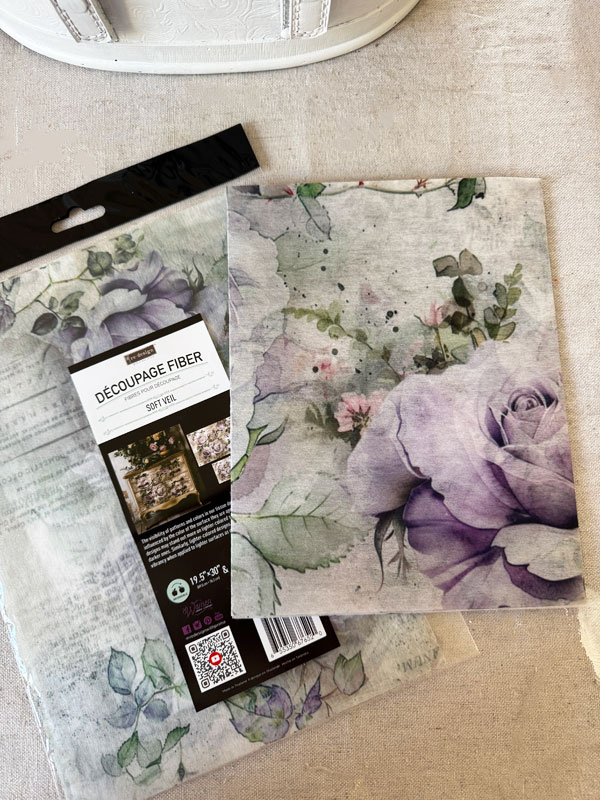
This is one of the Double Delight papers that include one larger 19.5” X 30” sheet and one smaller scale bonus 11.7” X 16.5” sheet. (See all the Double Delight sets in my shop HERE.)
Redesign with Prima decoupage papers are often limited run only, so these papers may not be available if you are viewing this makeover long after the posting date. See all the decoupage papers I have in stock HERE.
I cut the paper to fit using my rotary cutting mat set to get a nice, straight cut.
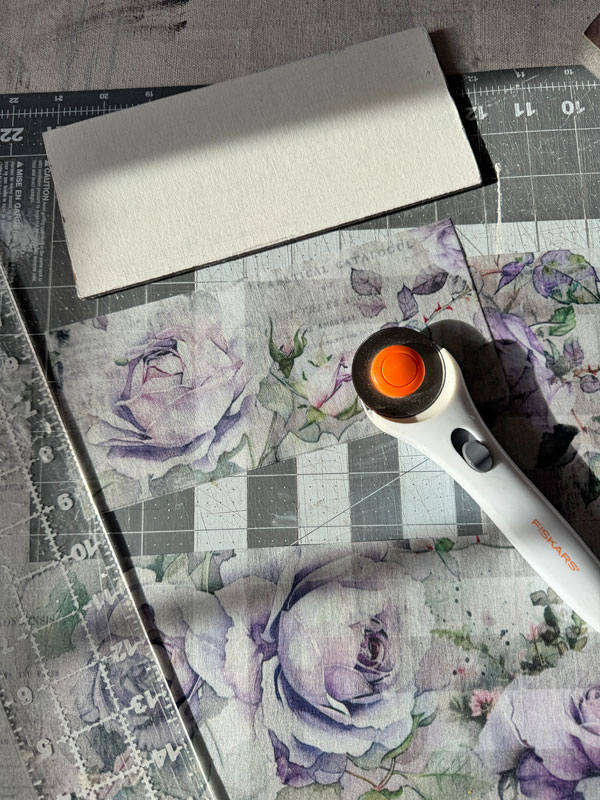
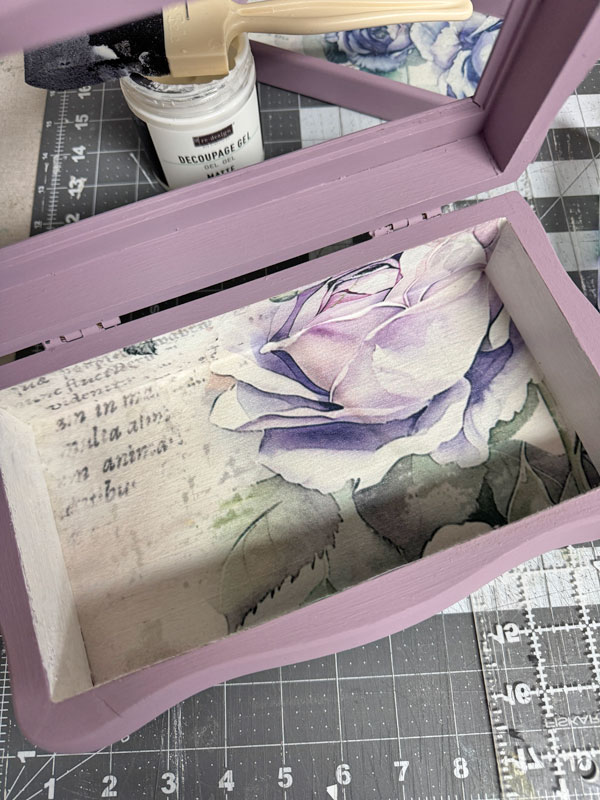
Next, I applied a layer of Redesign’s Decoupage Gel in the matte finish using a 2″ Foam n Dandy brush:
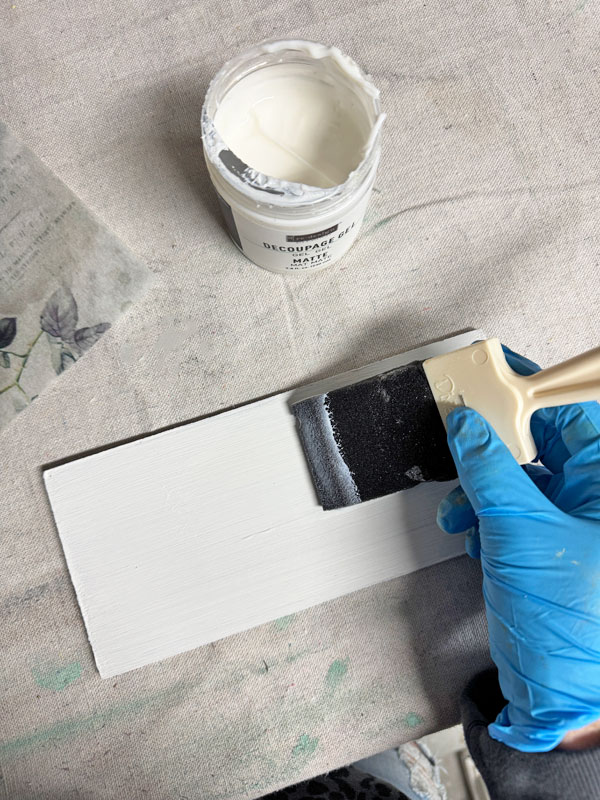
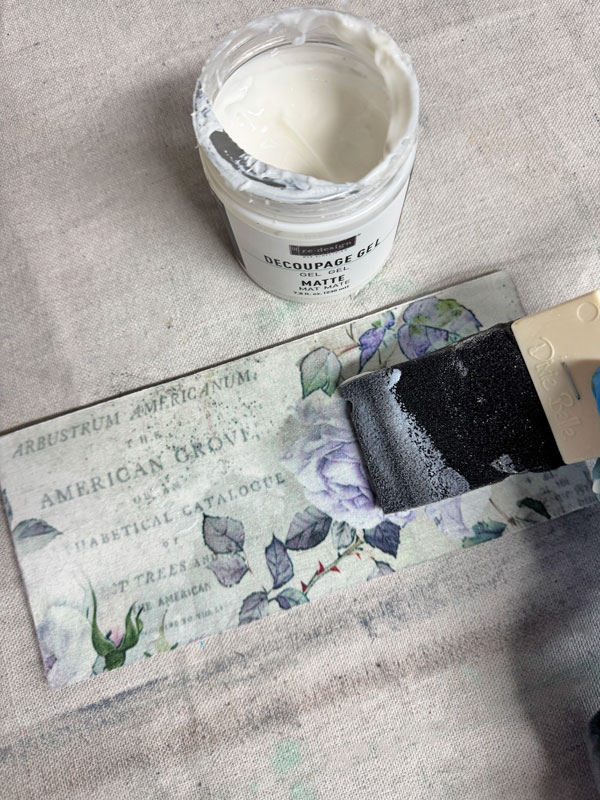
Then, I laid the paper in place and used a piece of saran wrap to rub across the surface to smooth out the paper. The saran wrap glides nicely over the paper. The decoupage gel is quite tacky, so I like to wear gloves when applying it.
Once I had the paper laid out, I added another coat of Decoupage Gel over the top to seal:
Seal
Everything was sealed with Clear Coat in Satin both inside and out. I also added a layer over the new papered top for extra protection.
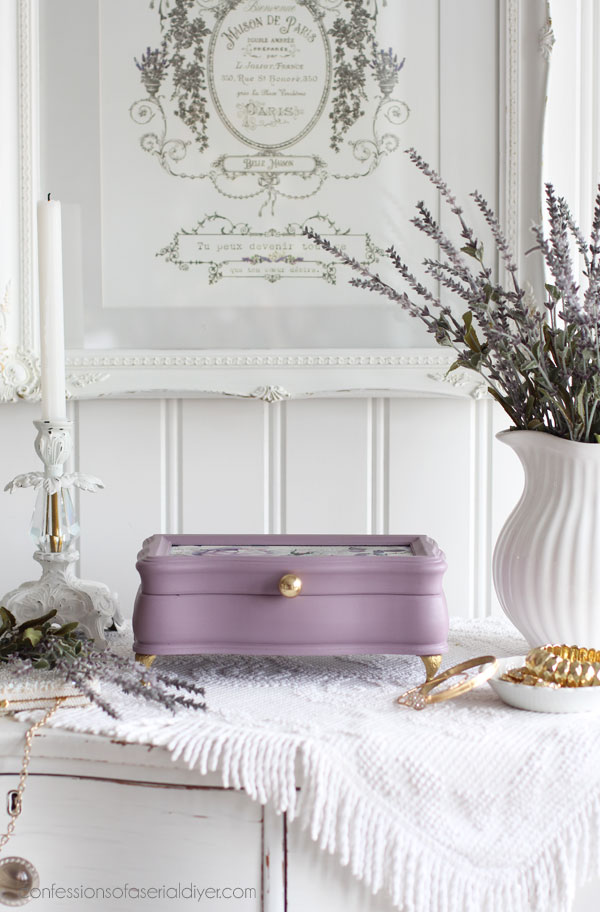
Let’s see how this box turned out, shall we?
Update a Jewelry Box with Paint and Decoupage Paper Reveal
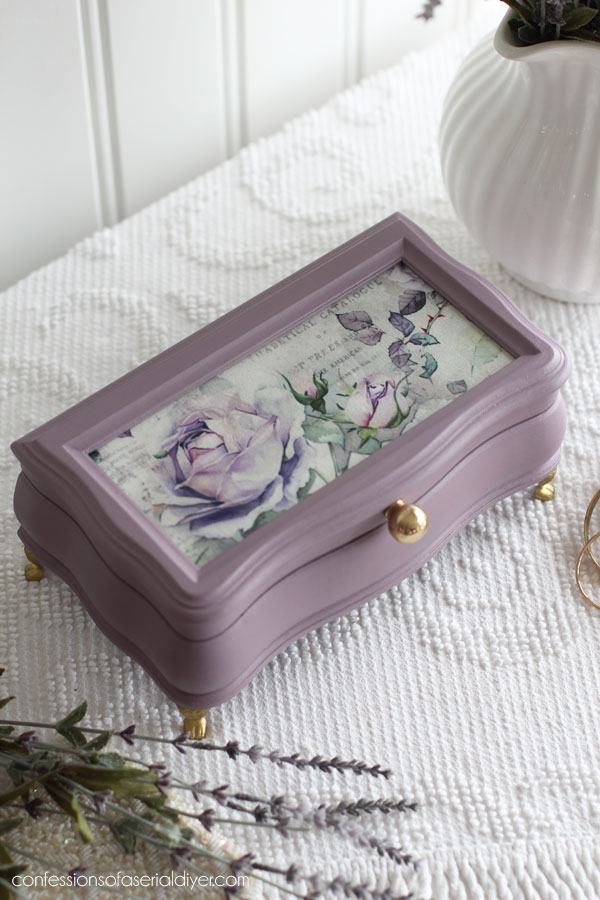
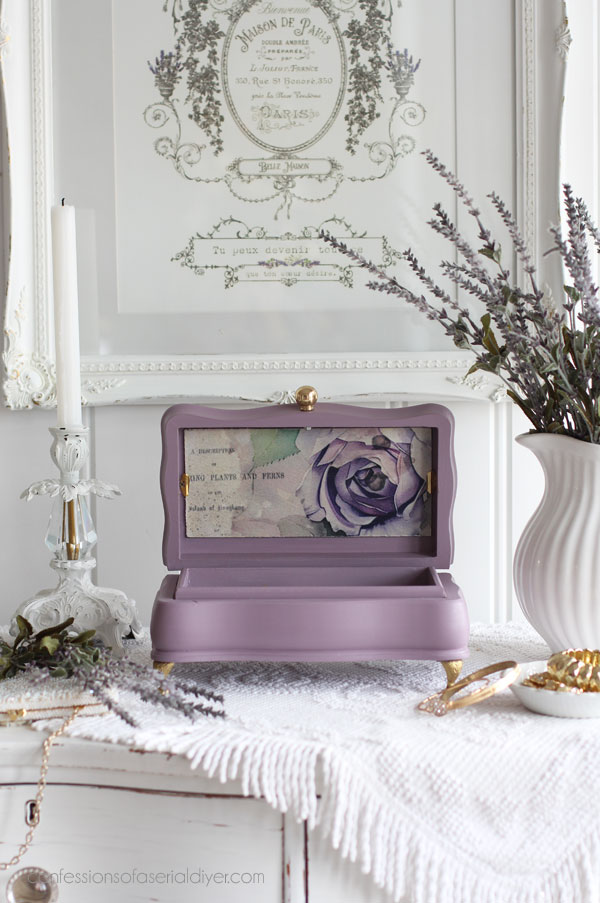
Here is how this box looks now!
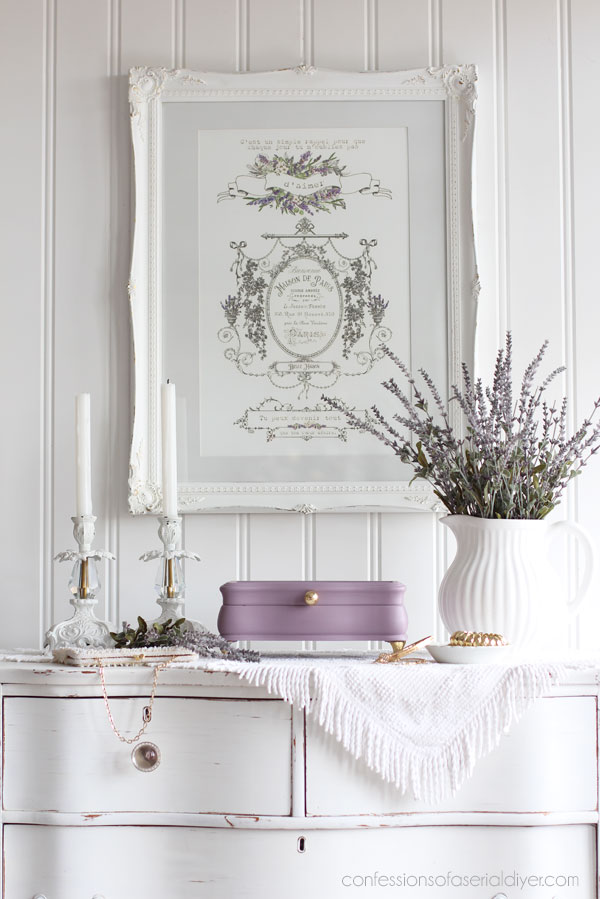
As you can see, I added a cute gold knob to the front:
And here’s a look at the new top…
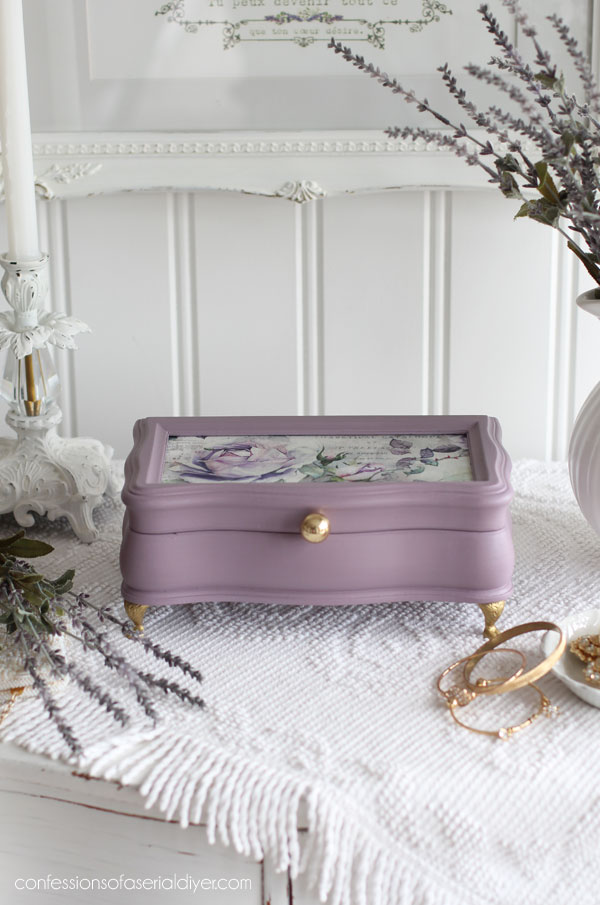
I ended up using a different section of the paper for the top than I originally chose…
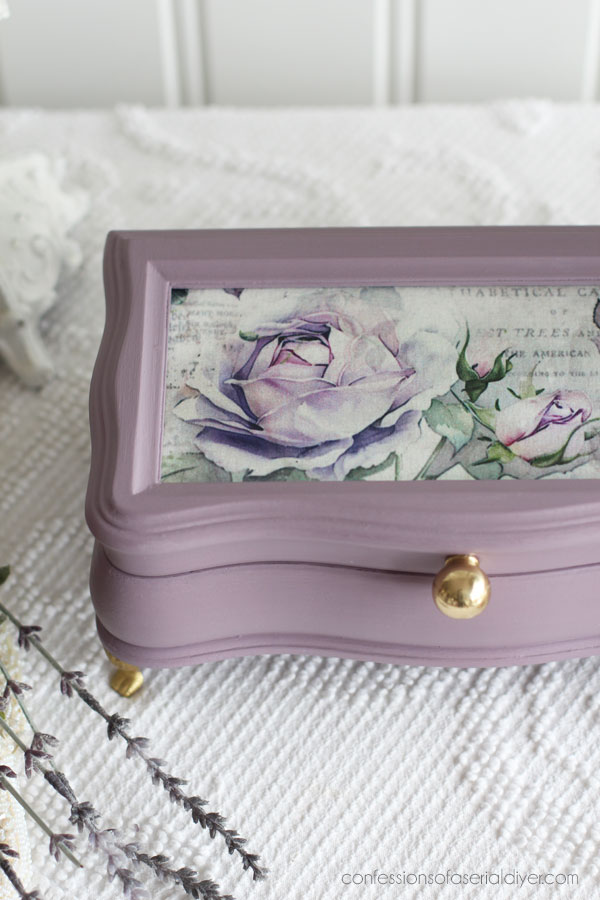
Better than the glass??
I just love this paper!
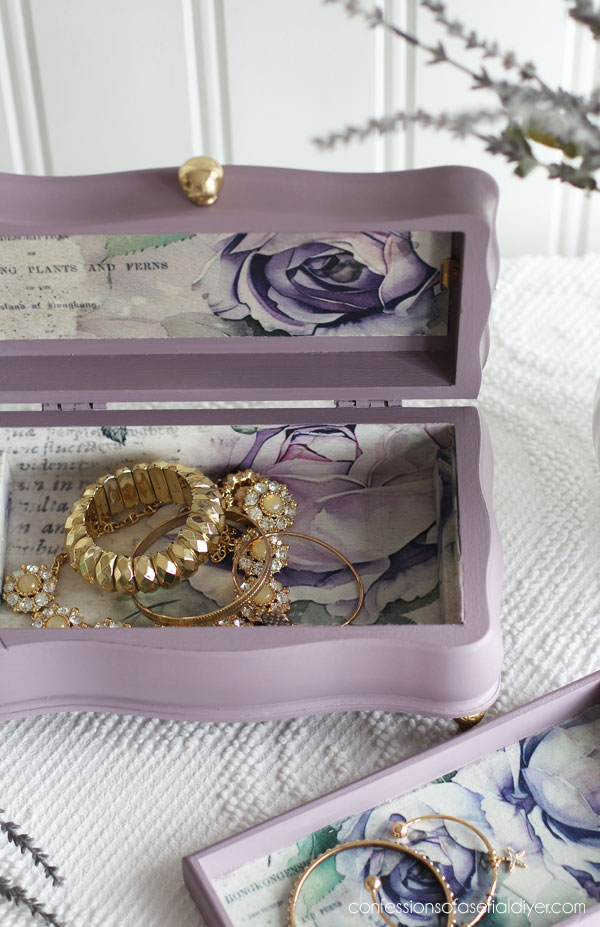
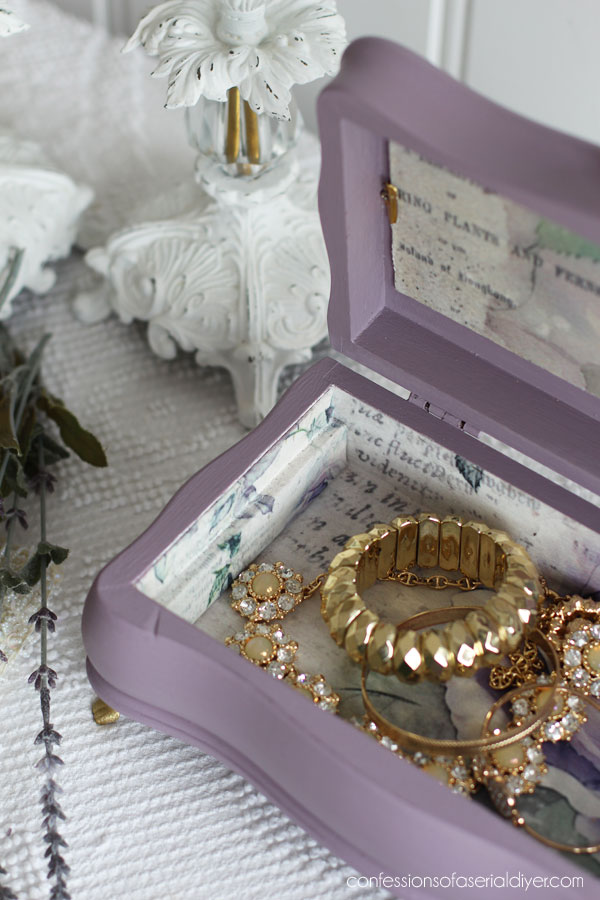
The Inside
I cut and added the paper to the inside the same way I added it to the top.
I just needed a single piece for the tray portion, and for the bottom area, I cut one continuous piece that I placed from back to front:
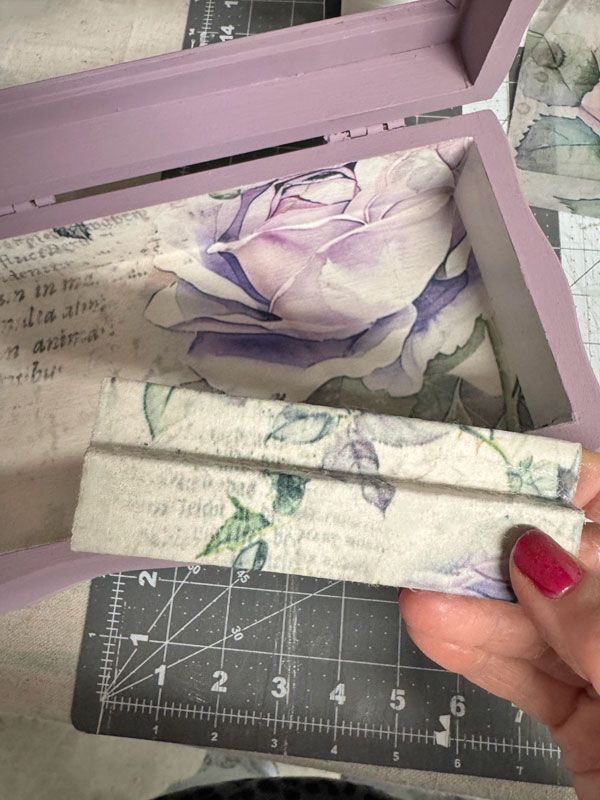
For the sides, I saved these side support thingies from the original lining that held the pull out tray:
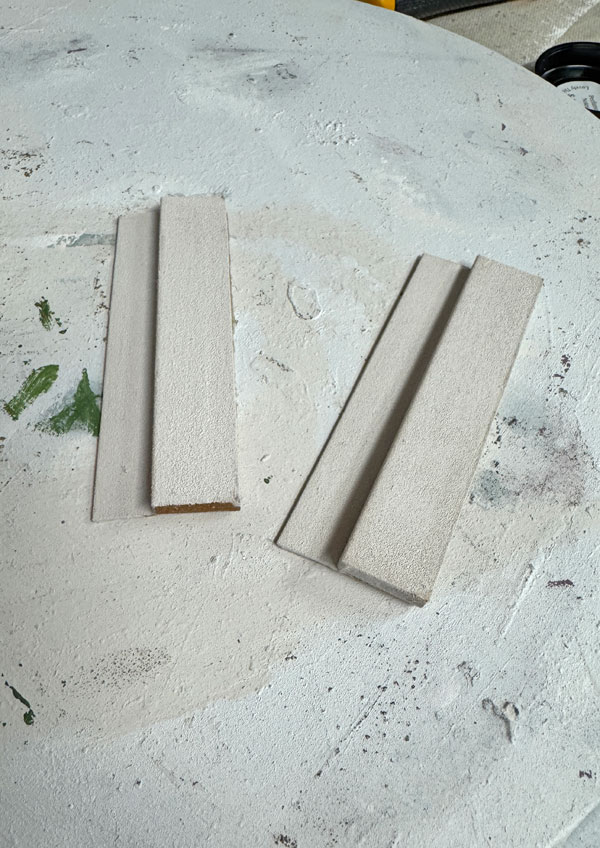
I papered those as well:
Here is how the inside looks now:
I attached the new top with the same tiny gold brackets that held the glass in place.
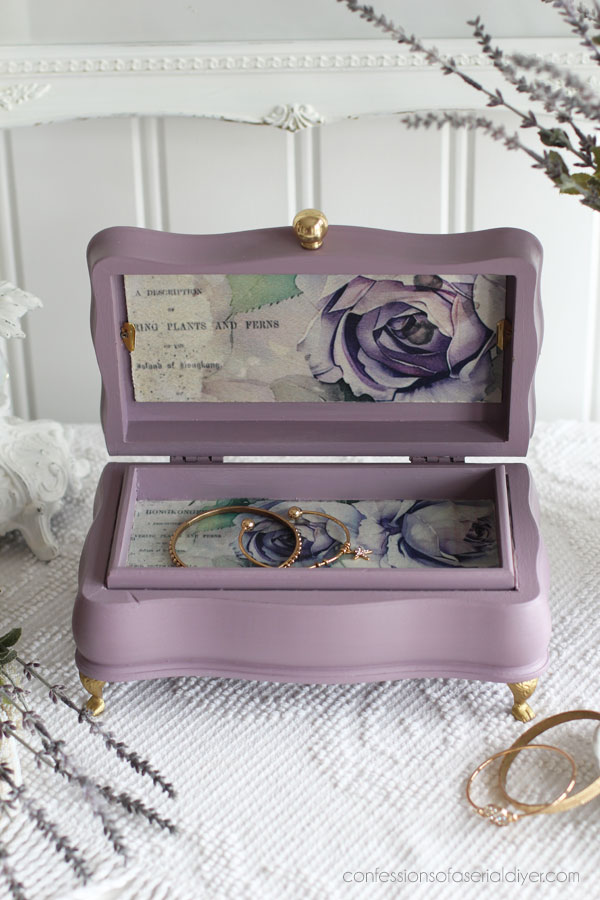
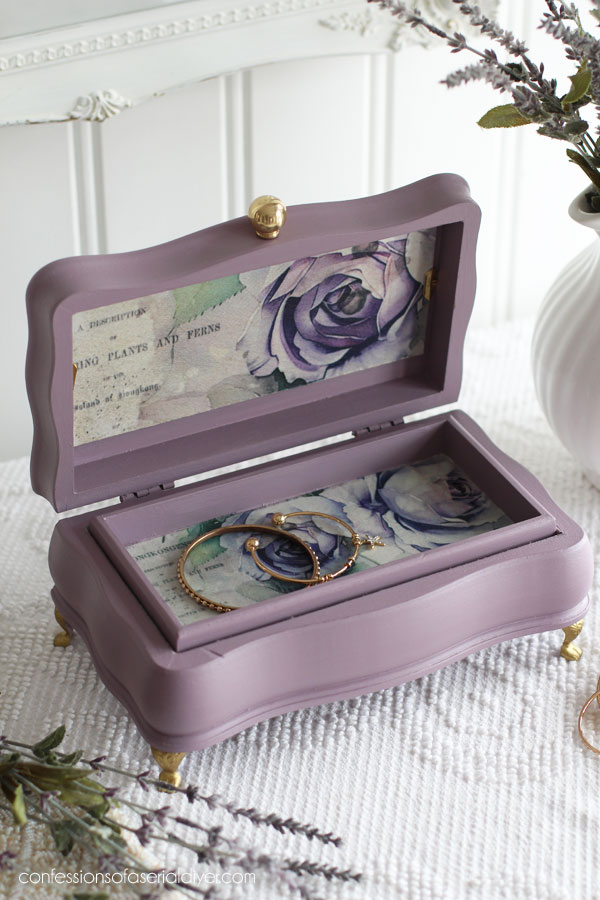
And the tray lifts out for more storage beneath it…
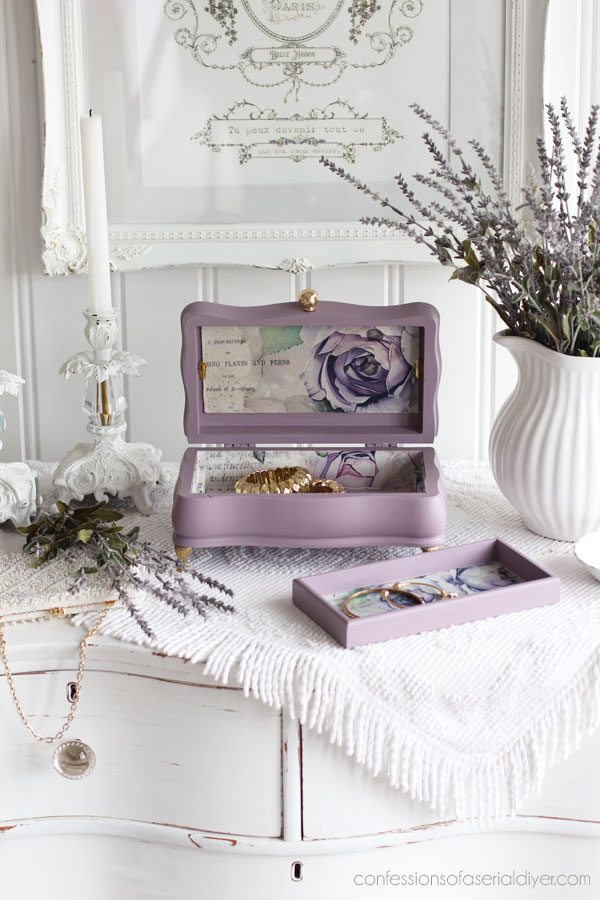
I think this is more functional than all those tiny compartments the original lining had, don’t you?
It doesn’t seem like it would be easy to pick up tiny earrings out of them lol!
Here you can see the side support…
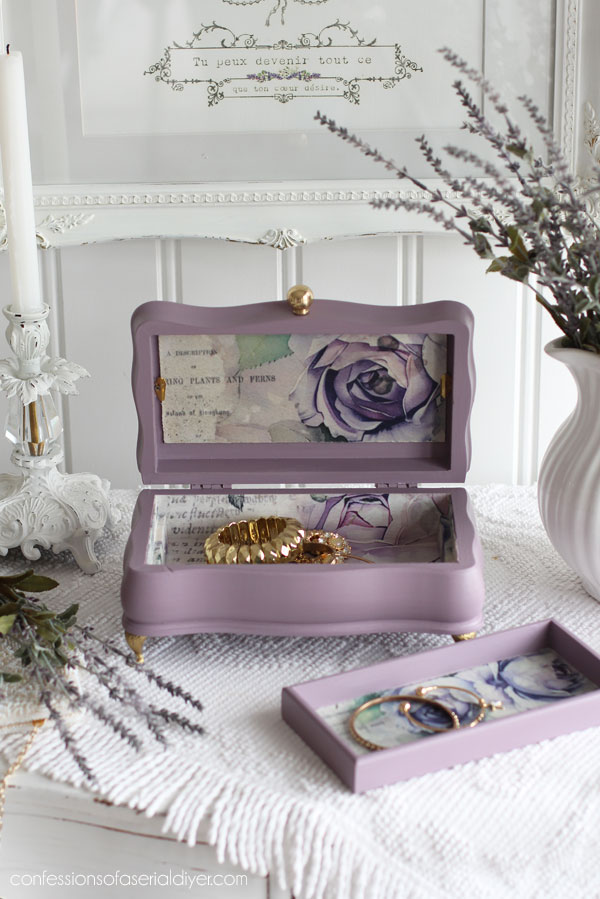
The feet were already on this piece, but I highlighted them with Gold Gilding Wax to match the new knob…
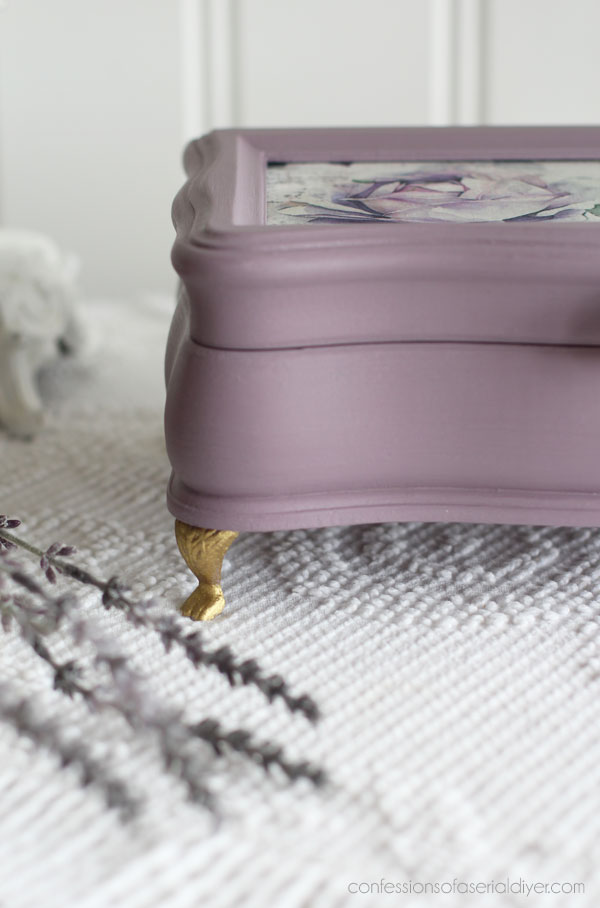
I fell in love with the curves on this piece, and now the style matches those pretty curves!
And that is another piece complete!
See anything you missed so far at the links below:
$10 Night Table Makeover
Update a Mirror with Moulds
Update a Flatware Box for the Holidays!
Yellow Painted Chair
Trashed $10 Thrift Store Table Makeover
Round Wooden Storage Case
Washstand Cabinet Makeover
If you liked this makeover, you might like what I did with this one too:

See how it turned out HERE!
I have family coming in town this weekend and lots of shopping still to do, but I’ll be back with this oldie but goodie:
UPDATE: See what I did with this set HERE now!
XOXO,

Don’t Miss a Thing!
If you like what you see, there are several ways to follow along!
EMAIL * INSTAGRAM * FACEBOOK * PINTEREST


Get FREE SHIPPING on all orders over $50. No code needed at checkout! Orders under $50 always enjoy $8 flat rate shipping! Most orders ship same or next business day!


Mary Kaiser says
Oh it is so beautiful! I love that color and I love the paper with it! It will sell super fast from your booth! I see those old jewerly boxes all the time at the thift store, who knew it could be so lovely again!
Christy says
Thank you, my friend! This one shouldn’t hang around for long. Maybe it will end up under someone’s tree! XOXO
Janice Redden says
Christy, you never disappoint! This is now such a sweet gem! I bet a lucky little girl will find this under her Christmas tree. And, I agree totally – jewel boxes are as much work as one large dresser and it is hard to get earrings out of those tiny compartments!
You have a great weekend with your family!
Christy says
Aww thank you so much, Janice! I do hope someone nabs this for a Christmas gift! And yes…they are a lot of work. Thankfully, this one didn’t have all those tiny drawers, etc lol. Enjoy your weekend as well, my friend! XOXO
Cecilia says
What a cute little box and now it’s gorgeous! I love that paper too. So glad you replaced the glass. Makes me want to find a little jewelry box to redo!
😊Cecilia
Christy says
Thank you so much, Cecilia! This paper is so pretty and yes, much better than the glass! I hope you find one! XOXO
Rebecca Payne says
Awesome job. I love the colors.
Christy says
Thanks so much, Rebecca! It is so fun to paint with color! XOXO
Christine says
Wow, what a transformation!!!
Christy says
I’m so glad you like it, Christine, thank you! XOXO
Denise says
Absolutely gorgeous! I know that beauty is going to sell in a minute. I know you have a shop where you sell all the treasures you have brought back to life; however, I often wonder how you part with some of the items that you make so beautiful and have put so much love into. I just love the colors and the paper you chose. It is truly something someone will cherish for years to come. Thanks for sharing!
Christy says
Aww thanks so much, Denise! I am hoping someone picks it up as a Christmas gift! And yes…it really is hard to part with pieces sometimes. I just want to keep them all lol! XOXO
Kim Wollmer says
Oh my, that little dark box turned out amazing! I think the color was perfect for it. I love it! Great job!
Christy says
Thank you, Kim! I’m sure this box is so much happier now lol! XOXO
Charleen says
There aren’t enough words to describe how gorgeous this turned out. That I would buy if I lived in your area. It will be wonderful in a teen girls room. That is a very lovely color ,like every thing you have painted in the shade. Great results as always. Take care and have a blessed weekend
Christy says
Aww I’m so glad you love it! Thank you, Charlotte! I would love to paint another large piece in this color! Enjoy your weekend as well, my friend! XOXO
Jackie C says
LOOOOOOVE it!!
I wish you’d put some of these smalls in your Etsy shop and let us buy them. I want it (just like everything else you re-do) 😂 🤗
Christy says
Thank you, Jackie!! Aww…I do ship smaller things from time to time, if the shipping isn’t too crazy. This one has been claimed already, but you can reach out in the future and get a price and shipping quote if it is something small! XOXO
Cyndi says
My, oh my! Absolutely gorgeous!!!
Christy says
Thank you so much, Cyndi!! XOXO
Caye says
You did an exquisite job, Christy! I love the color and the decoupage paper. That little knob adds just the right touch. Good job!!
Christy says
Thank you so much, Caye! Those curves were just too pretty for how it looked before lol! XOXO
Jen says
Adorable! The paper and paint color are perfect together. Do you prefer using the decoupage gel or the satin clear coat with decoupage paper? I’ve seen you use both. I’m about to decoupage a nightstand and wasn’t sure which one to use. Thanks!
Christy says
Thank you, Jen! If I use the thinner decoupage Rice papers from Dixie Belle, you can use either and I usually use Clear Coat. However, if you use the Decoupage Fiber Papers from Redesign, they are a bit thicker and you need the decoupage gel for those. Have fun with your project! XOXO
Annabelle says
So beautiful!
Christy says
Thank you so much, Annabelle! XOXO
p says
This box is waaaay happier now. Love it. A very special gift for someone.
My daughter (sadly not a kid anymore) still loves a special bit of purple.
I loved both the last basket and this box w/ this color/paper.
I bought both at your shop. Been looking for a cute basket/box since.
Your artistry has inspired me. 🙂
Questions: The basket had a band of pattern – looked amazing under the paper. Any way to add teture to a plain surface ?
Also – what color would you use to soften the purple a bit. (grayish ?)
You – and Denise – do such creative pieces.
Thanks for sharing !
Christy says
Thanks so much, P! Now the look matches those pretty curves it had all along. I love this paper and color together as well. To get some texture beneath, you could stencil on texture using Dixie Mud and a stencil? Maybe try it on a scrap piece first and see how it goes? It would have to be nearly flat as not to mess with the way the paper lays, but you could sand the textured down to get it almost flat. To soften the purple, I would probably add a lighter color like Fluff or Cotton. And Denise and I appreciate you! XOXO
Cheryl B Acampora says
That box is just a little bit of elegance, so sweet! Good job!
Christy says
Thanks so much, Cheryl! It was fun to redo! XOXO
Debbie in TX says
Simply beautiful!!! Love the replacement for the glass and the inside details. You knocked it out of the park with this one!
Christy says
Thank you, Debbie! I appreciate that so much! Hope you are enjoying your weekend! XOXO
Debra Hubbs says
How pretty it is now! I love everything you did to it…as I always do lol.
Christy says
Aww thank you, Debra! You are so kind, my friend! XOXO
Michele M. says
Oh my goodness, she is BEAUTIFUL!!!! WOW – what a gorgeous transformation. You took such a dated ugly duckling and just made it perfect. I absolutely love this piece. Oh the choice of color and paper for it is stunning together.
Christy says
Thank so much, Michele! Now the style matches those pretty curves it had all along! Hope you are enjoying your weekend! XOXO
Kimmylouwho says
Another beautiful job on a jewelry box! And it must have been fun to make it too! I am going to keep an eye out for something similar to up-cyle!
Christy says
Thank you, Kimmylouwho! This was so fun to redo for sure! Good luck in your search!! XOXO
Jeanne says
Love it! I wouldn’t be drawn to the box originally, but now I’m going to look for them. Haha
Any chance you would do another “how to price” or what you’ve sold your pieces for? You put so much into some of these smalls–are they cost efficient or just fun?
Keep inspiring us. 🙂
Christy says
Thank you, Jeanne! Ha ha right? It was straight out of the late 80’s for sure! That is a great idea for a post…I should do that. This is definitely still a money maker for me, albeit on a smaller scale, since I have most everything on hand already and I used leftovers of the paper from another redo. XOXO
Geri Davis says
This turned out so cute! I’ve passed on these dated looking jewelry boxes as I didn’t have the insight like you have, maybe I’ll try one like that now! Didn’t even see the feet before, I thought you added them!
Looks awesome
Christy says
Thank you, Geri! I do usually pass on the ones with all the little drawers because they can be a lot, but boxes like this with just a couple of compartments aren’t bad at all! And yes, it had the prettiest little feet! XOXO
Sharon L Austin says
Love everything about this!!
Christy says
Thank you so much, Sharon! It was so enjoyable to redo! XOXO