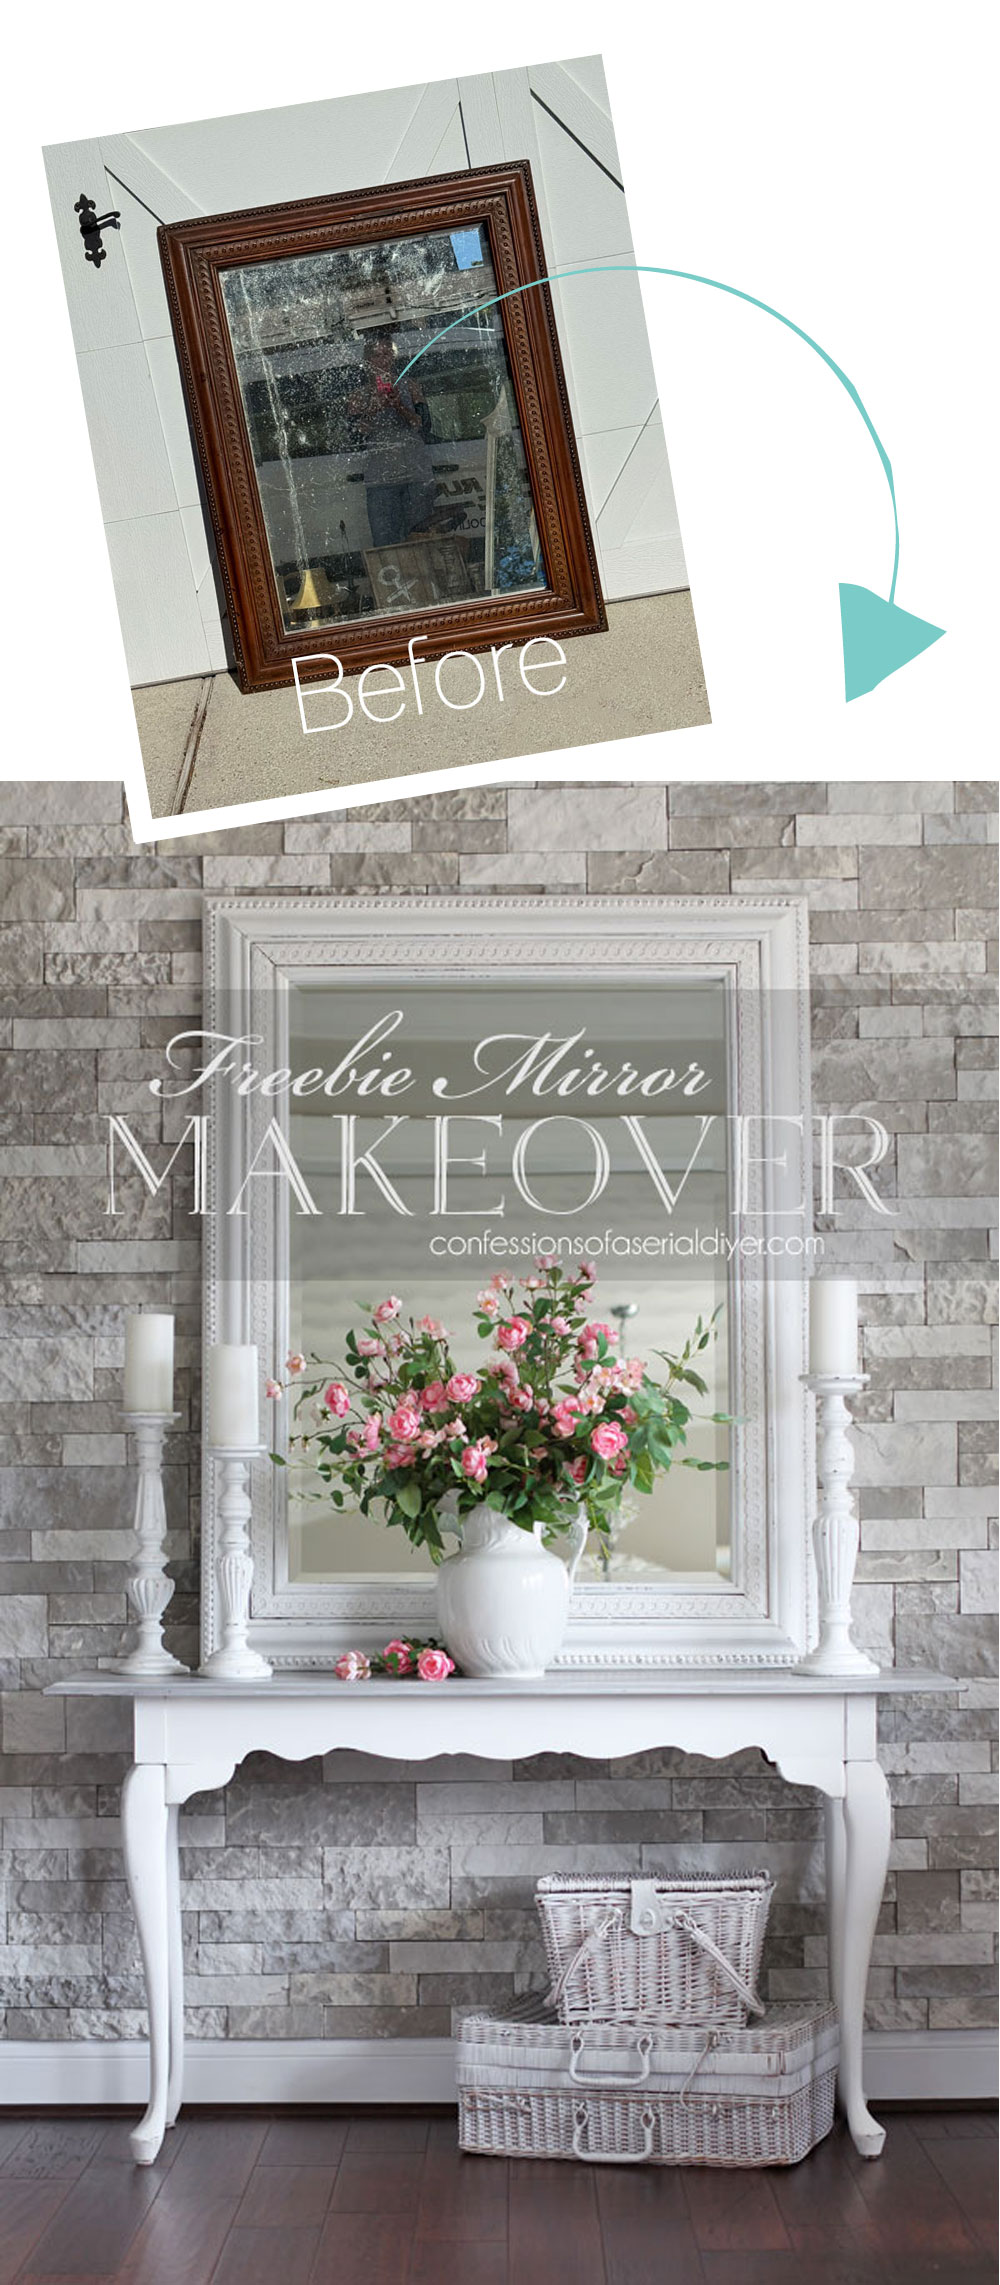
Hello, dear friends! Thank you for the enormous amount of love on the antique dresser I shared on Thursday! It is definitely one of my favorite makeovers to date! Today, I’m sharing how to fix chewed up trim with Bondo using a HUMONGOUS mirror my friend and I found sitting outside a dumpster last year.
We had been out to dinner and drove behind the shopping center after. This mirror was leaning up against a dumpster:
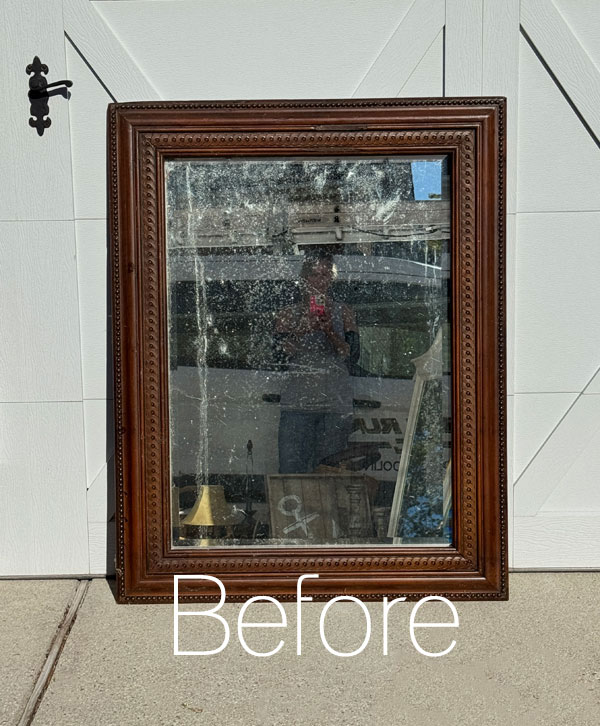
What a lucky find and we wasted no time loading it into my car!
I took a photo of my reflection so you can see how HUGE this mirror actually is!
We were thinking that maybe this had been hanging behind the bar at one of the restaurants?
I’ve included a few affiliate links so you can find the products I love.
Uh Oh
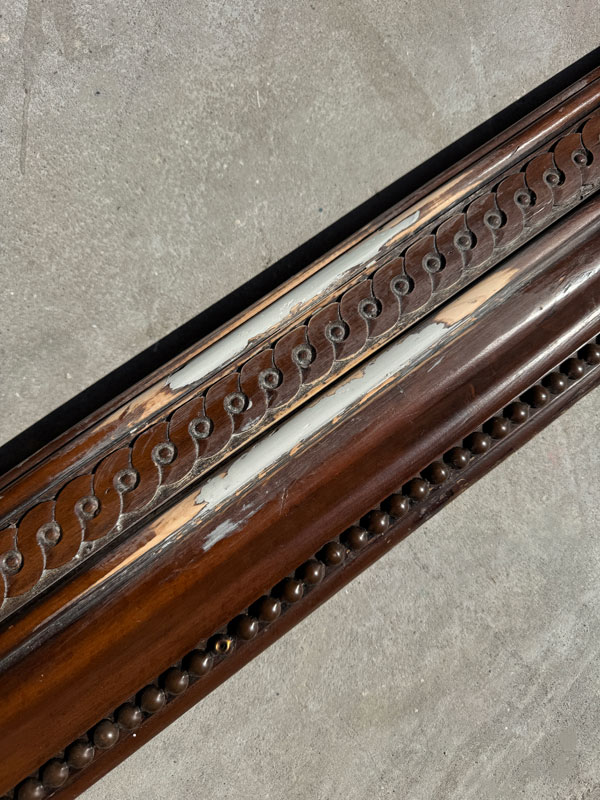
It wasn’t until I dragged it out to photograph it that I realized it had this damage on one side:

Doesn’t it look like it was chewed off?
That likely wasn’t the case. Something must have repeatedly hit it in those spots, I guess.
Either way, I thought it was fitting to show how to fix “chewed up” trim with Bondo!
Remove the mirror
Before getting into this project, I removed the mirror and set it aside for safe keeping. That made it much easier to handle.
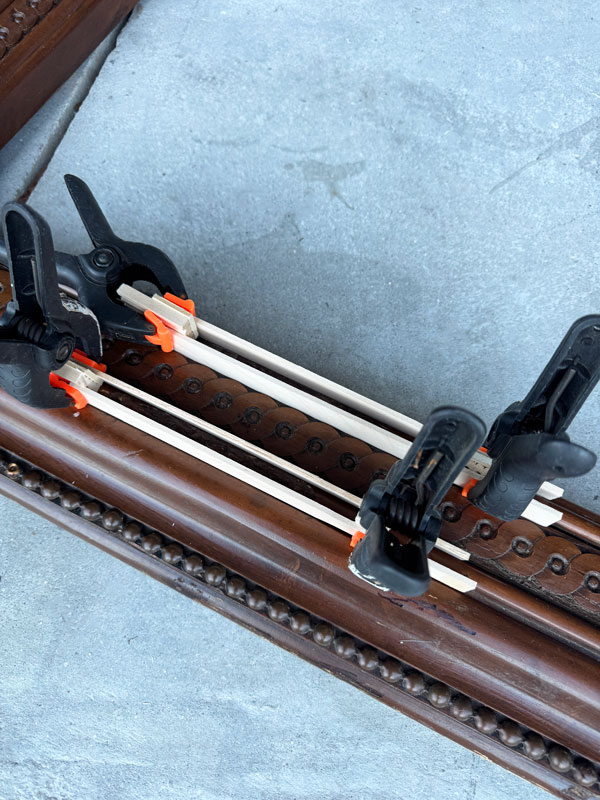
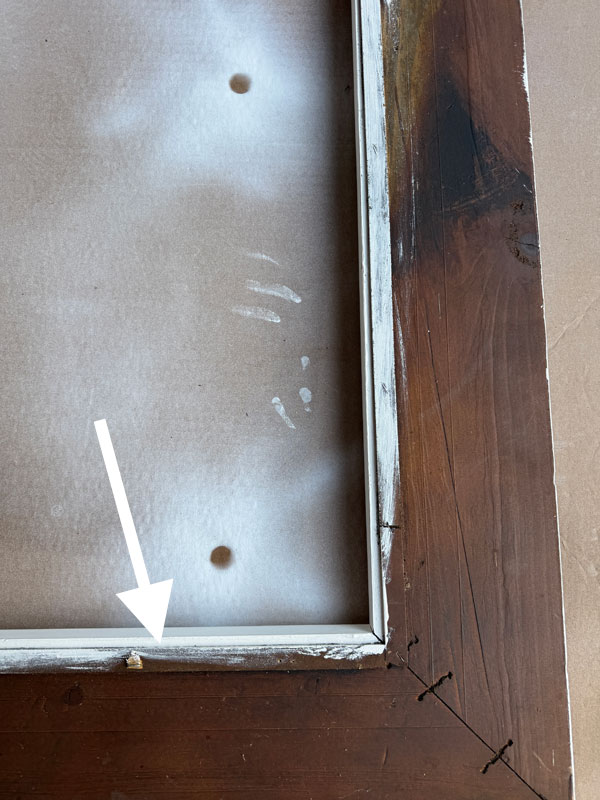
I also found that this trim was coming off in a couple of places:
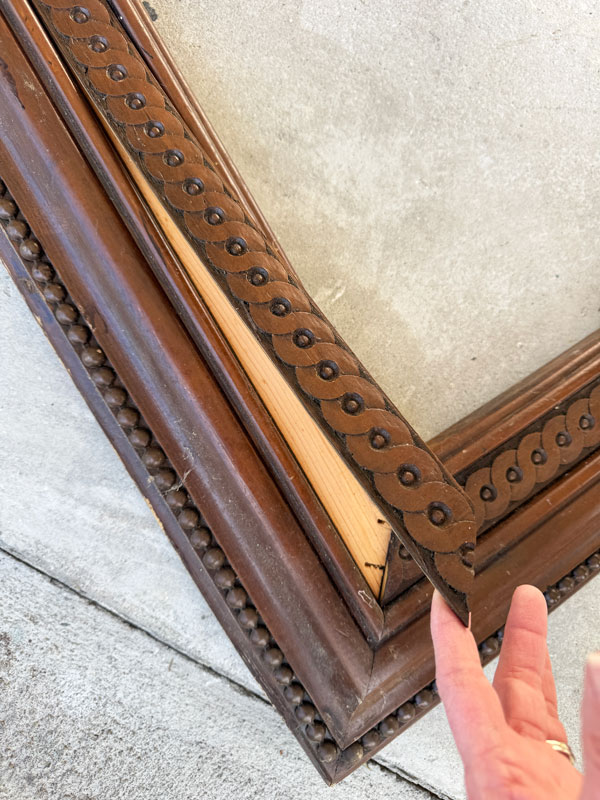
I glued that with wood glue and secured it with spring clamps.
Clean
While the glue was drying, I gave the frame a good cleaning with White lightning. It comes in both a pre-mixed spray and a concentrated form which is what I like to use since I prefer to mix a fresh batch for each project:

I added one TBSP to a half gallon of warm water, gave it a good stir, and got to work …
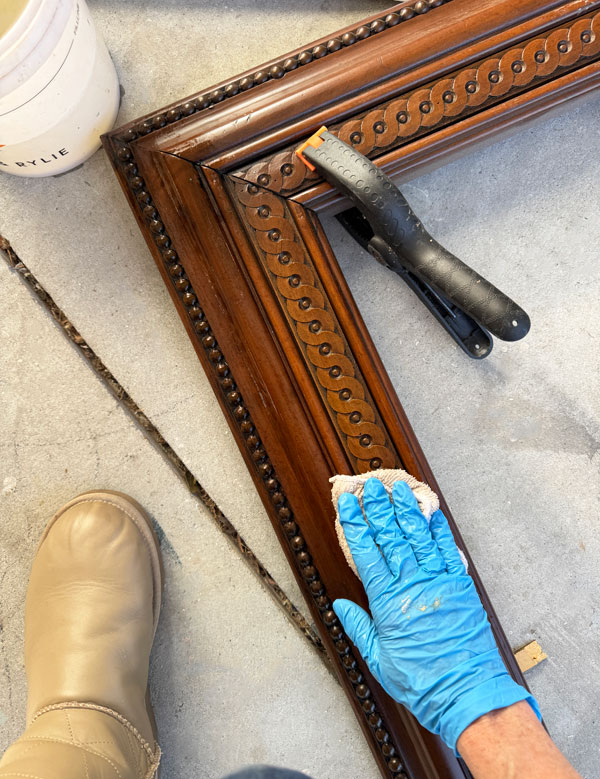
Gloves are recommended.
I then wiped it down once more with clean water to rinse away any remaining residue.
Fix Chewed up trim with Bondo
Now for the fun part! What are the chances I would have TWO pieces in this haul that needed trim to be replaced or fixed? (You can see how I made my own detailed trim that was missing from the dresser makeover I just shared HERE.)
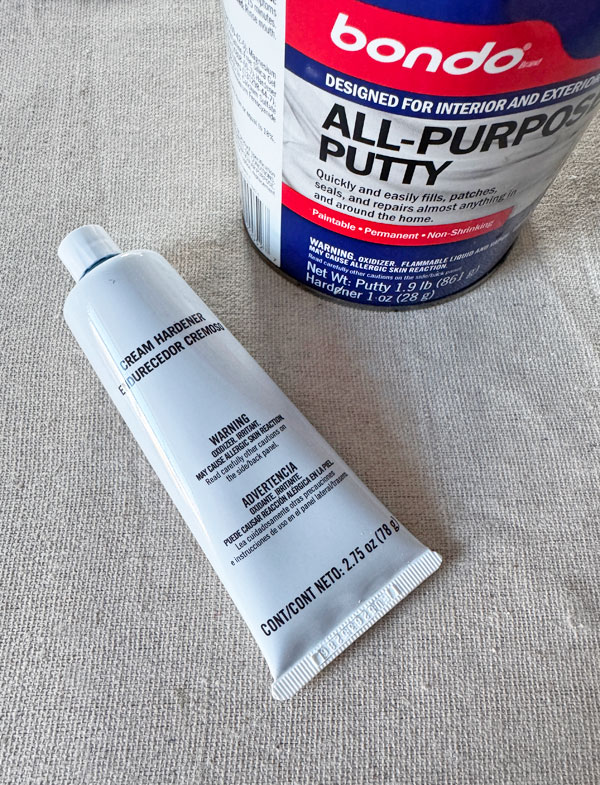
I pulled out my old can of Bondo All-purpose Putty and realized that the hardener that came with it was done for…
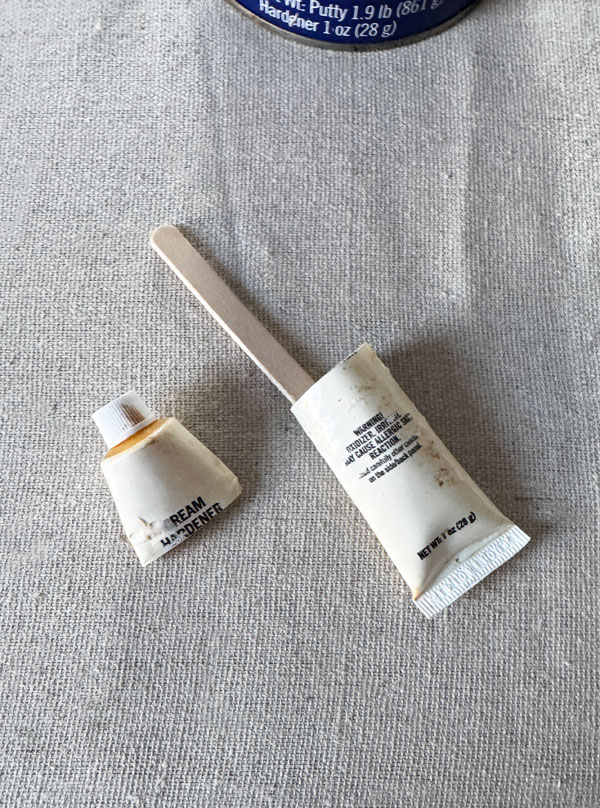
Luckily, I was able to purchase just the hardener at Home Depot:
Create a form if necessary
This is very helpful if you have straight edges.
I spent a good twenty minutes coming up with a way to make a form for the two areas that needed fixing:
That way, I can then put the Bondo in the form and the sides will be nice and straight, so all I will have to do it sand and shape the top area.
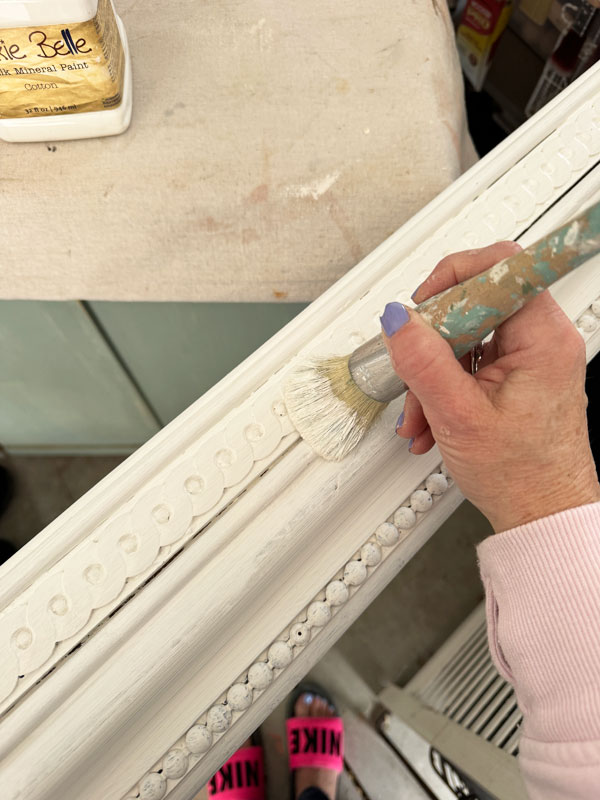
Mix up the Bondo
It’s important to have everything ready to go because Bondo sets up super fast, so you have to work quickly!
I added about a half inch or so of the cream hardener to a three inch circle of Bondo Putty per the instructions:
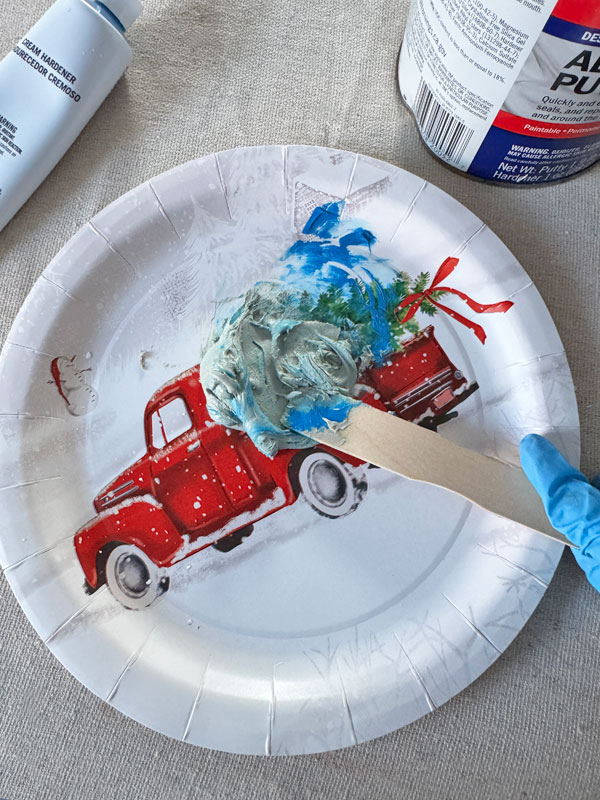
The original was white, but this was blue. That did make it easier to tell if it was thoroughly mixed.
Forget the form and slap it on there
Ha ha! I tried like heck to get that putty into those tiny slots, but they kept falling over and popping off, so I ditched them and tried as best as I could to add the Bondo to the top without it hanging too much over the sides…
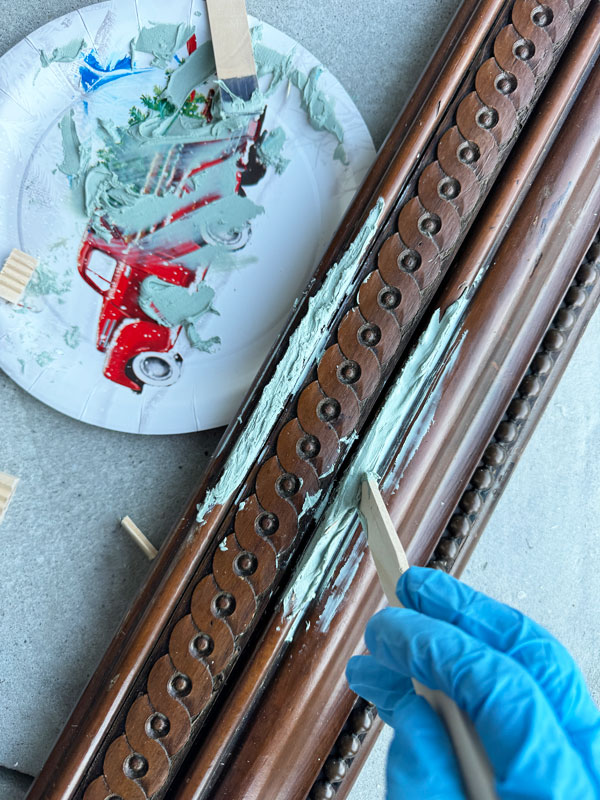
I used a paint stirrer to flatten it out on either side. This would have to do! This stuff is stinky, so be sure to use it in a well-ventilated area.
You never know how easy or difficult something will be, even if you took twenty minutes to set it up just right lol!
Sand
I left it to dry for an hour or so and then sanded it to shape it using a couple of pieces of 220 grit sandpaper:

I figured if I needed to add more I could, but it actually turned out pretty darn good:
Just like my last project that needed trim repair, I would have to see how it painted up.
Paint
And that was next! I gave it a total of three coats of Dixie Belle’s Cotton for solid coverage, applying it with the Belle Brush to help get into all those details more easily:
I flipped it over and painted this groove all the way around also since that would be reflected in the mirror:
Once it was painted, it was hard to tell where I had fixed it!
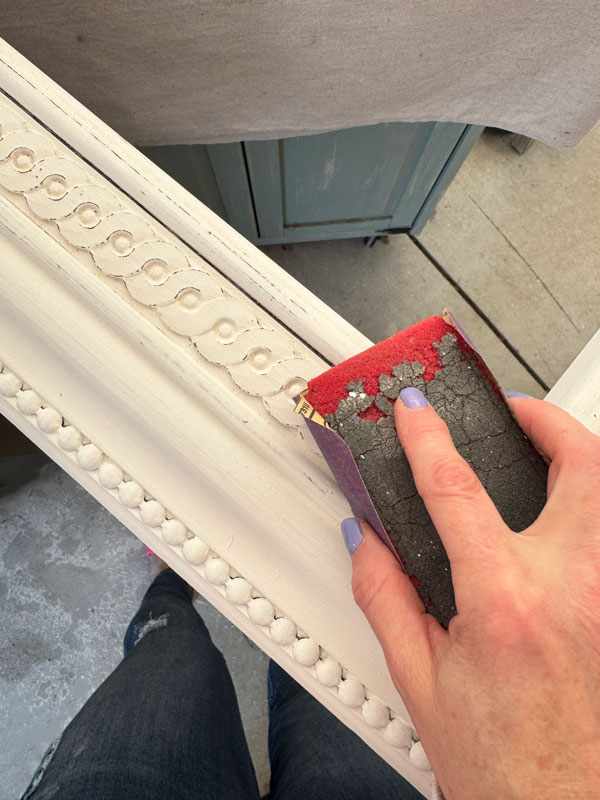
Sand
Once the paint was dry, I sanded all over to smooth and distress to enhance the details…
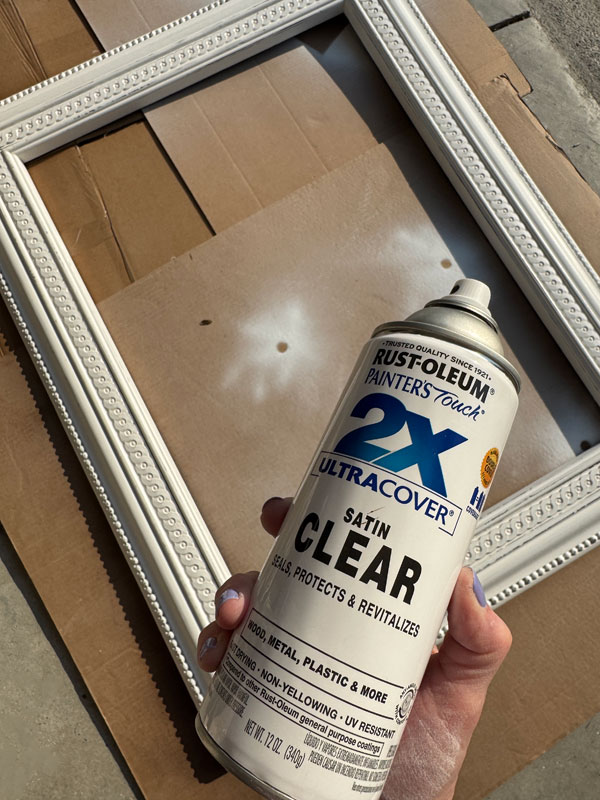
Seal
The easiest way to seal all that detail was with Rustoleum’s Clear Satin spray:
All that was left to do was clean the very dirty mirror and reassemble everything!
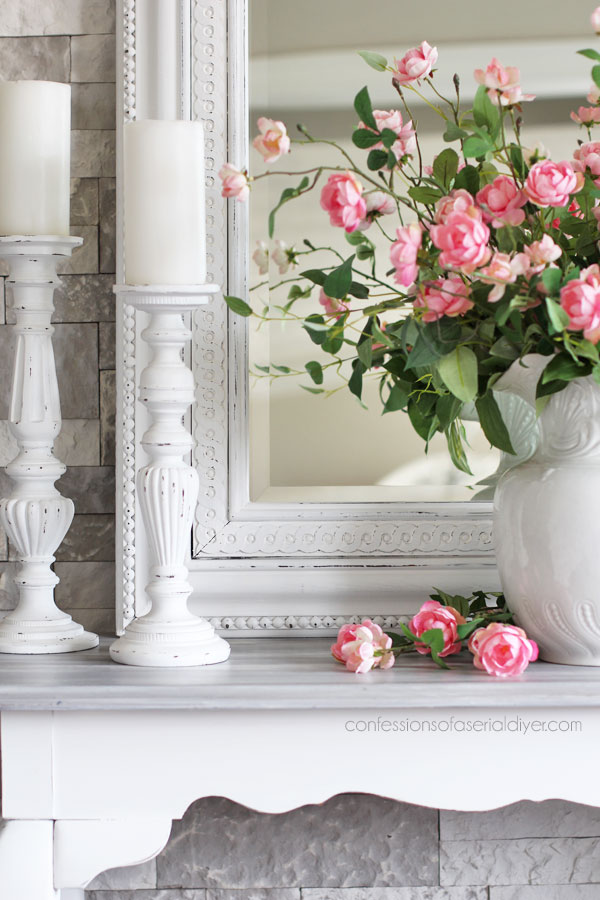
How to Fix Chewed up Trim, the Big Reveal
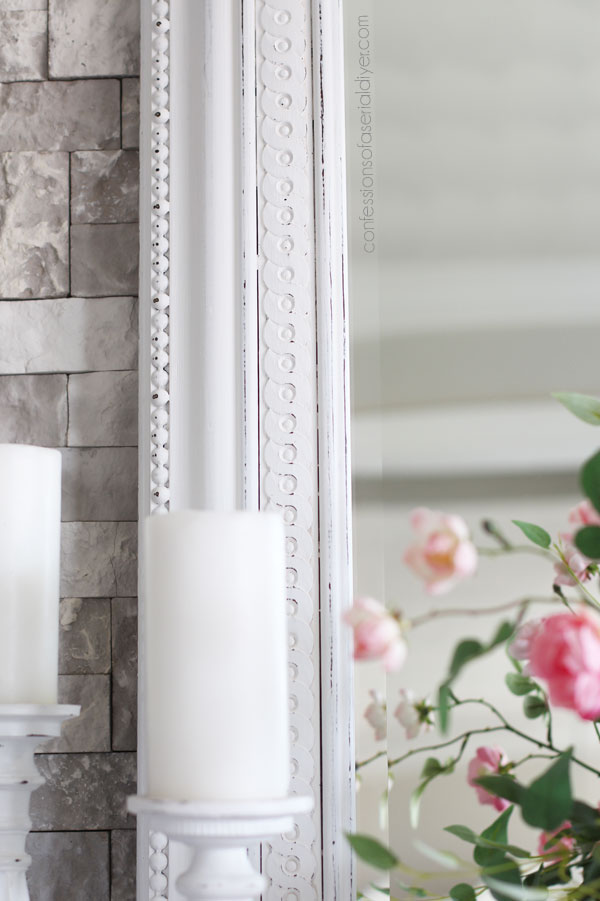
Let’s see if you can see where I fixed it this time!
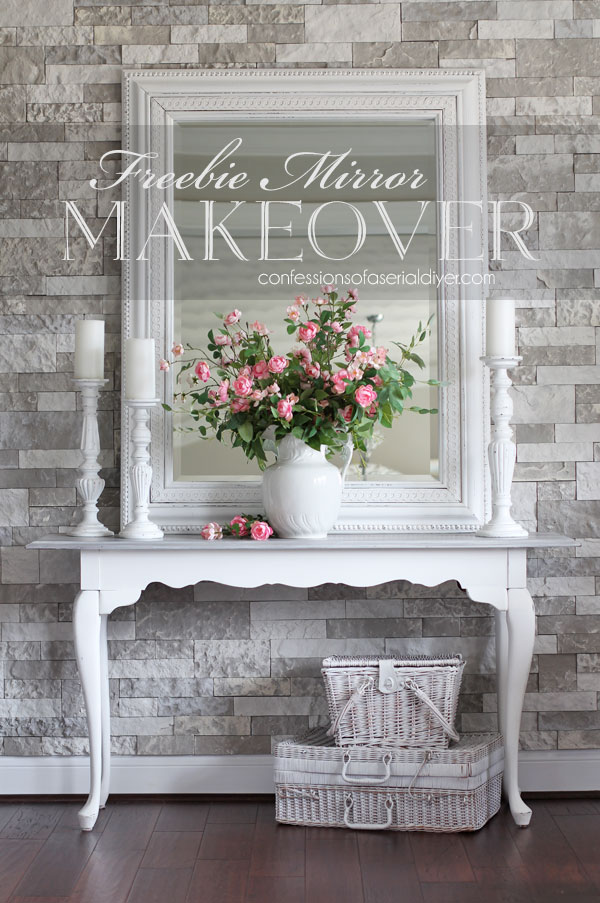
I told y’all it was HUMONGOUS!
But it is fabulous!
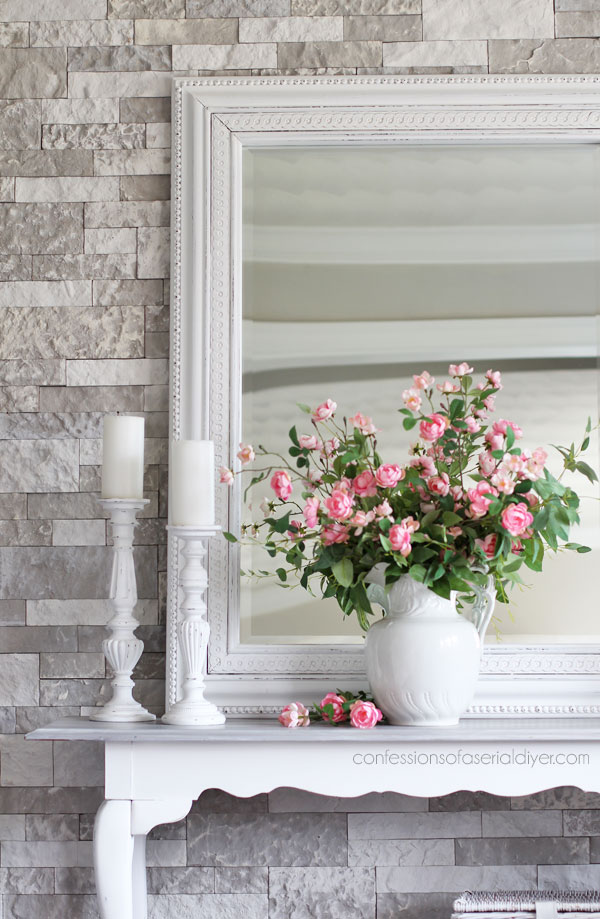
Look at that detail!
I wasn’t sure if I would remove that nail head trim before painting or not, but in the end I decided just to paint right over it…
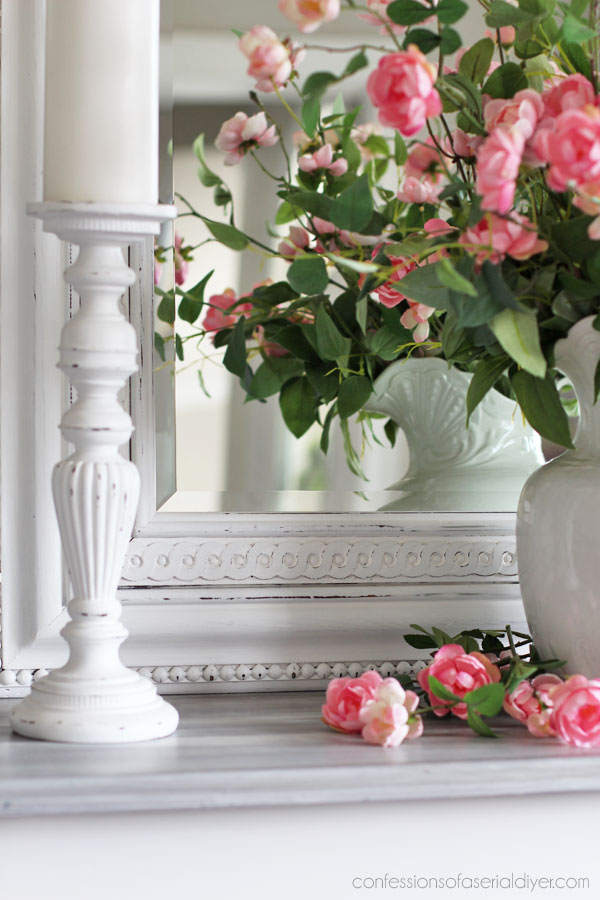
The flowers are actually right in front of the trim I repaired…let’s move them out of the way!
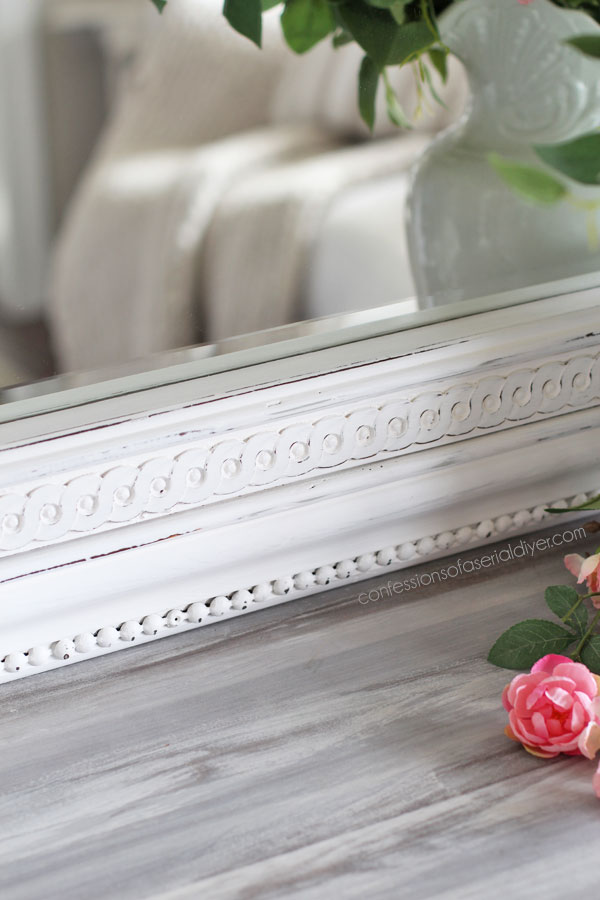
You can see that area didn’t sand as dark since it was gray underneath, but you would never know it had been repaired, right?
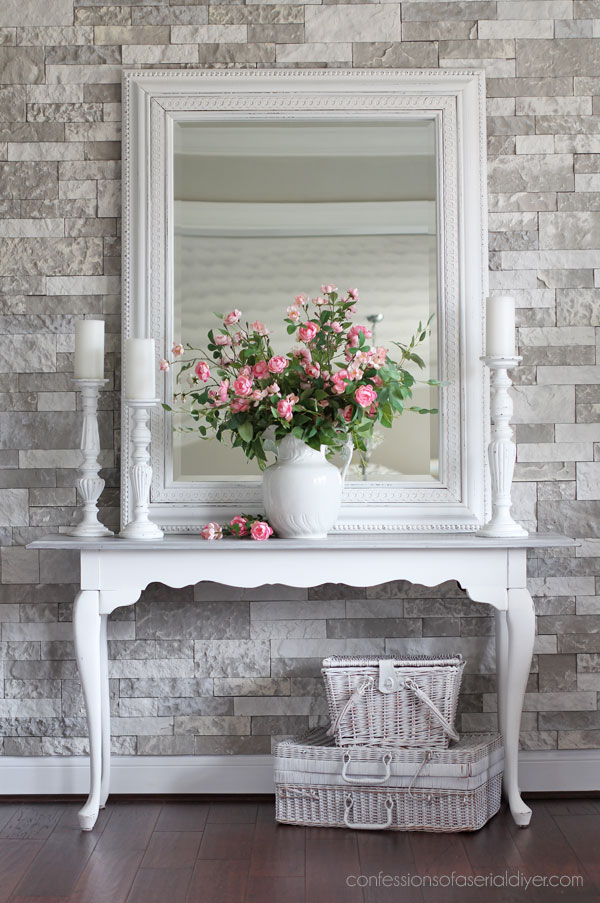
That wall is in my office. You can see more of it and my office from many years ago HERE. A year later, I added a new piece on that wall that I redid HERE. (It now also doubles as my gym and my prop storage!)
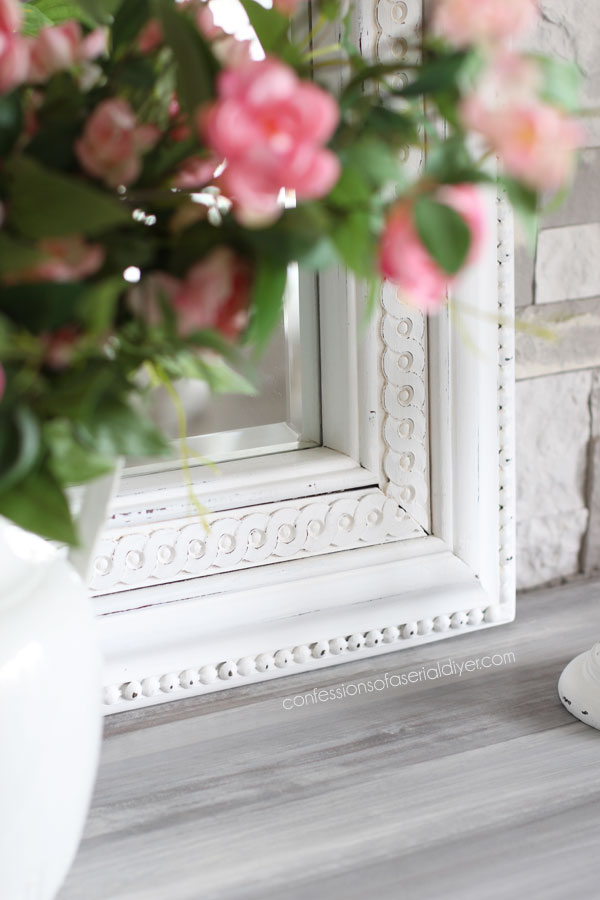
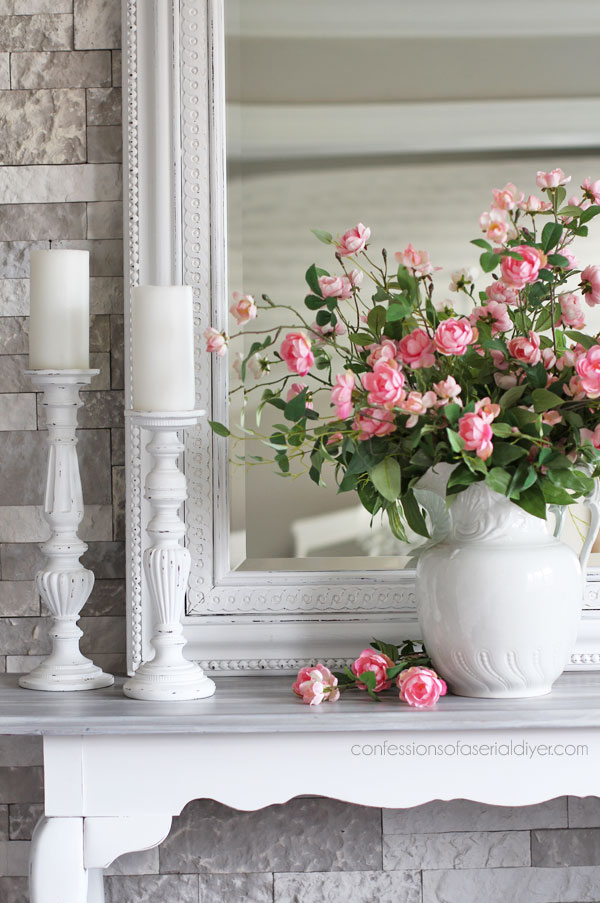
I love how chunky this frame is!
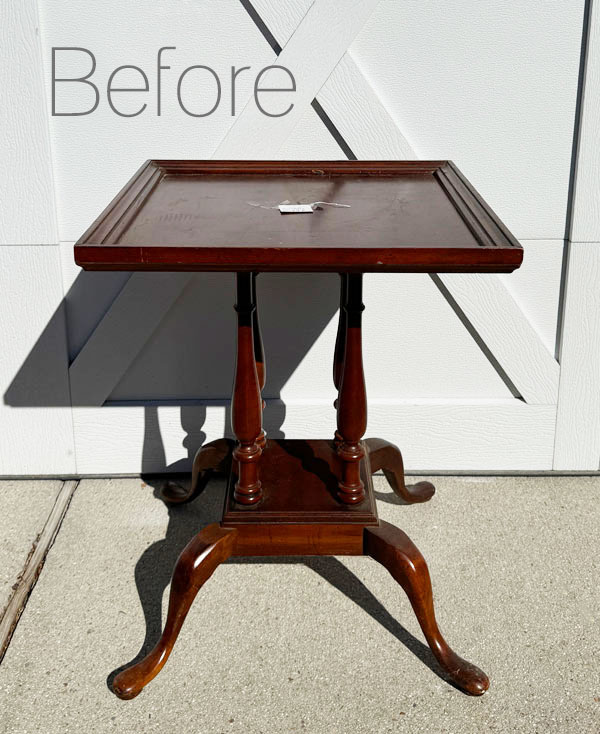
Here is the best repair I ever did using Bondo, and I did utilize the form that time lol!
(And you can see that table redone HERE if you like!)
I’m always happy to get giant mirrors out of my workspace!
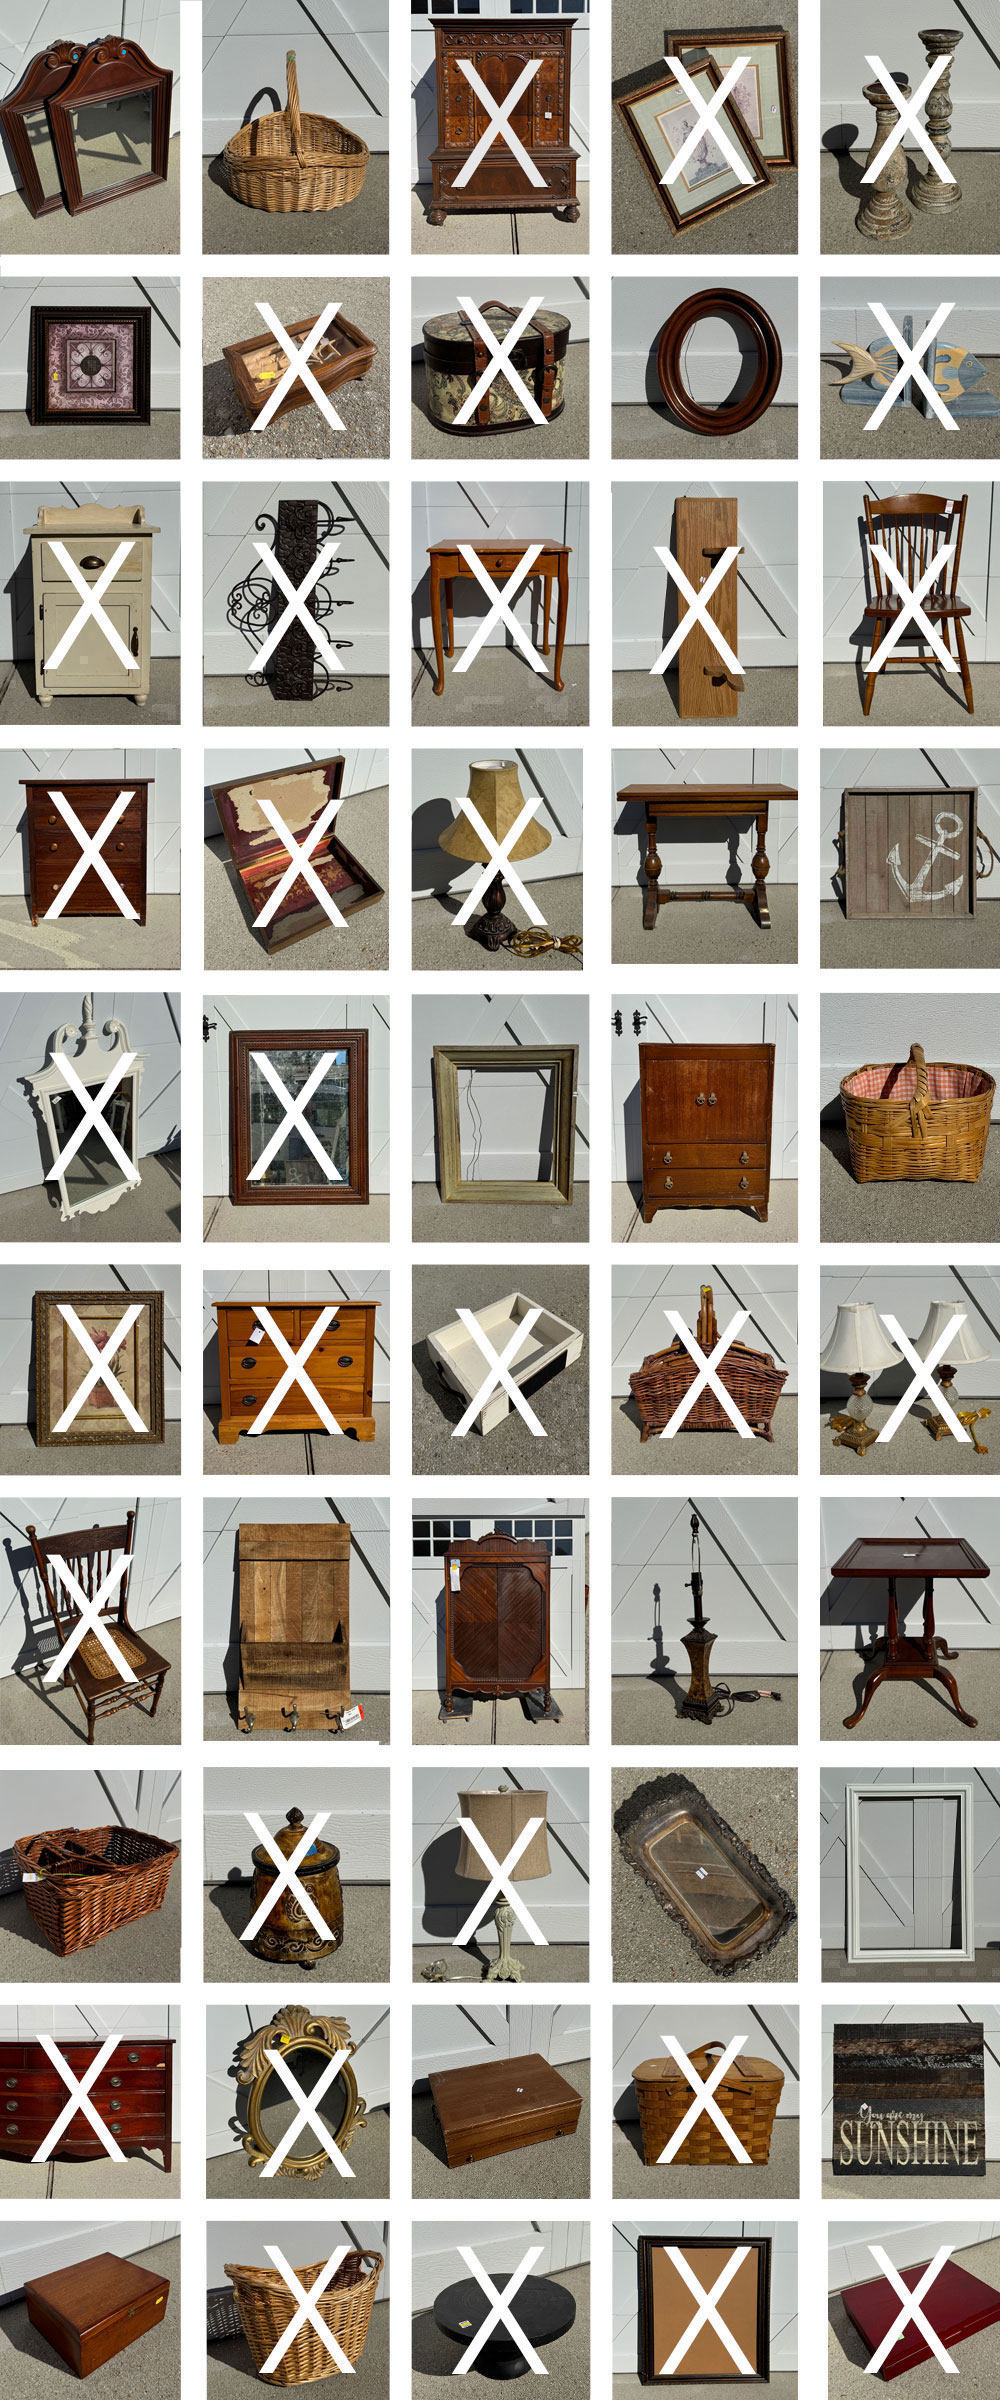
See anything you may have missed below:
The Prettiest Antique Dresser Makeover
Quickie Gold & GLass Lamp Set Redo
Painting the Smalls #40
Easily Update Thrifted Artwork!
Vintage Picnic Basket Update
$5 Painted Press Back and Cane Chair
Painting the Smalls #39
Make an Old Flatware Box Beautiful!
Painted Pine Dresser
Update Lamps with Paint
Give a dated Shelf Vintage Charm
Update a Jewelry Box with Paint and Decoupage Paper
$10 Night Table Makeover
Update a Mirror with Moulds
Update a Flatware Box for the Holidays!
Yellow Painted Chair
Trashed $10 Thrift Store Table Makeover
Round Wooden Storage Case
Washstand Cabinet Makeover
I’ll be back on Thursday sharing what I did with this table I scored for only $10:
I hope to see you then!
UPDATE: No need to wait! See how this pretty piece looks now HERE!
XOXO,

Don’t Miss a Thing!
If you like what you see, there are several ways to follow along!
EMAIL * INSTAGRAM * FACEBOOK * PINTEREST

Get FREE SHIPPING on all orders over $50 in my Etsy shop. (No code needed at checkout!) Orders under $50 enjoy $8 flat rate shipping!
Most orders ship same or next business day! Visit my shop below!


Jackie C says
wow! What a find! Turned out lovely! I have a question about how to hang a big heavy mirror. I have one that’s close to probably 15 to 18 pounds.
i’d love to hang it on a dining room wall which is knotty pine. I haven’t painted the mirror yet, and it’s still leaning up against the wall, because I can’t decide the best way to hang it. What do you suggest?
Christy says
Thank you, Jackie! Right? It was just sitting there waiting for me lol! I would suggest using heavy duty D-ring hardware like these: https://amzn.to/4cZuezf I know you don’t need a 50 pack, that is just for reference, but find ones that hold the weight you need. Those hold up to 40lbs. Add one to either side and hang those on screws in the pine wall. XOXO
josee says
Your fix was just amazing. The next table for $10! I don’t know how you do it but keep it up.
Christy says
Thank you, my friend! Ha ha I just keep going! XOXO
Cecilia says
Goodness, that’s one big mirror! You did a good job fixing the chewed up looking spots even if your forms didn’t work. I like the nailhead trim too – glad you left it on. Such pretty detail on the mirror!
😊Cecilia
Christy says
It sure is a big one ha ha! Thank you, Cecilia! Yes, things don’t always go according to plan around here, but I’m glad it worked out in the end! XOXO
Cyndi says
It’s magnificent! And you’re right…you can’t tell where the repair is. Good job! You did not use Bonding Boss on this before painting? Or did I miss something?
Christy says
Aww thank you, Cyndi! I did not use Bonding BOSS this time. This wood didn’t have any red tones to it and it didn’t appear that old, so I took my chances! XOXO
Tracey A says
GORGEOUS!
Christy says
Thank you, Tracey! XOXO
Rhonda says
It looks beautiful. Great repair job.
How do you determine when to use bondo over Dixie mud?
Christy says
Thank you, Rhonda! Great question! I try not to use Bondo too much because it is so stinky, so for filling holes and scratches, Dixie Mud works great, but if I need to build up a surface like in this instance, Bondo is the better option. XOXO
Mary C King says
Love It! You know I am huge “Cotton” fan!!
Christy says
Aww thank you, my friend! Me too!! XOXO
Liliane says
You did an absolutely fabulous job. The mirror is beautiful.
Christy says
Thank you so much, Liliane! XOXO
Janice Redden says
That mirror is ginormous!! Looks so much better – beautiful – in its new color. Great repair too… can’t wait to see what you so with that table…..
Christy says
Ha ha right?? It is absolutely huge! Thank you, my friend! See ya Thursday! XOXO
Nancy @ Artsy Chicks Rule says
It is huge!! haha!! But gorgeous now with your bondo fix. xoxo
Christy says
Right?? Had I known it would turn out this well, I would have saved it for TTT since it was actual trash lol! Thank you, my friend! XOXO
Amanda says
So pretty!!
Christy says
Thank you, Amanda! XOXO
Mary Kaiser says
Oh it is Fantastic! I love that you have a fix for every thing. I love that big mirror in white! It is amazing for free, I love that!
Christy says
Thank you, Mary! I love getting the chance to try all these fixes and it’s always a big win when it works out in the end! I’m so glad I dragged this home! XOXO
Geri Davis says
Looks great, you did a great job on the trim fix with Bondo! Don’t you just love the freebies that we can find ?!
Christy says
Thank you, Janet! Yes…freebies are always my favorite! XOXO
Kathy from Jax says
You did a great job on the repair. She’s gorgeous. As always, love the simplicity of this. See you Thursday.
Christy says
Thank you, Kathy! I didn’t think this would be a very exciting makeover since I just repaired it and painted it white, but that made a big difference! See you tomorrow, my friend! XOXO
Michele M. says
WOWZA!!!!!!!! That mirror is gorgeous. The nailhead trim is my favorite part of it – glad you left it!!! Well done, Christy.
Christy says
Thanks again, my friend! I would have kept the nailhead, but just removed it to paint and replaced it. I do love it painted though, and I am all for less work ha ha! XOXO