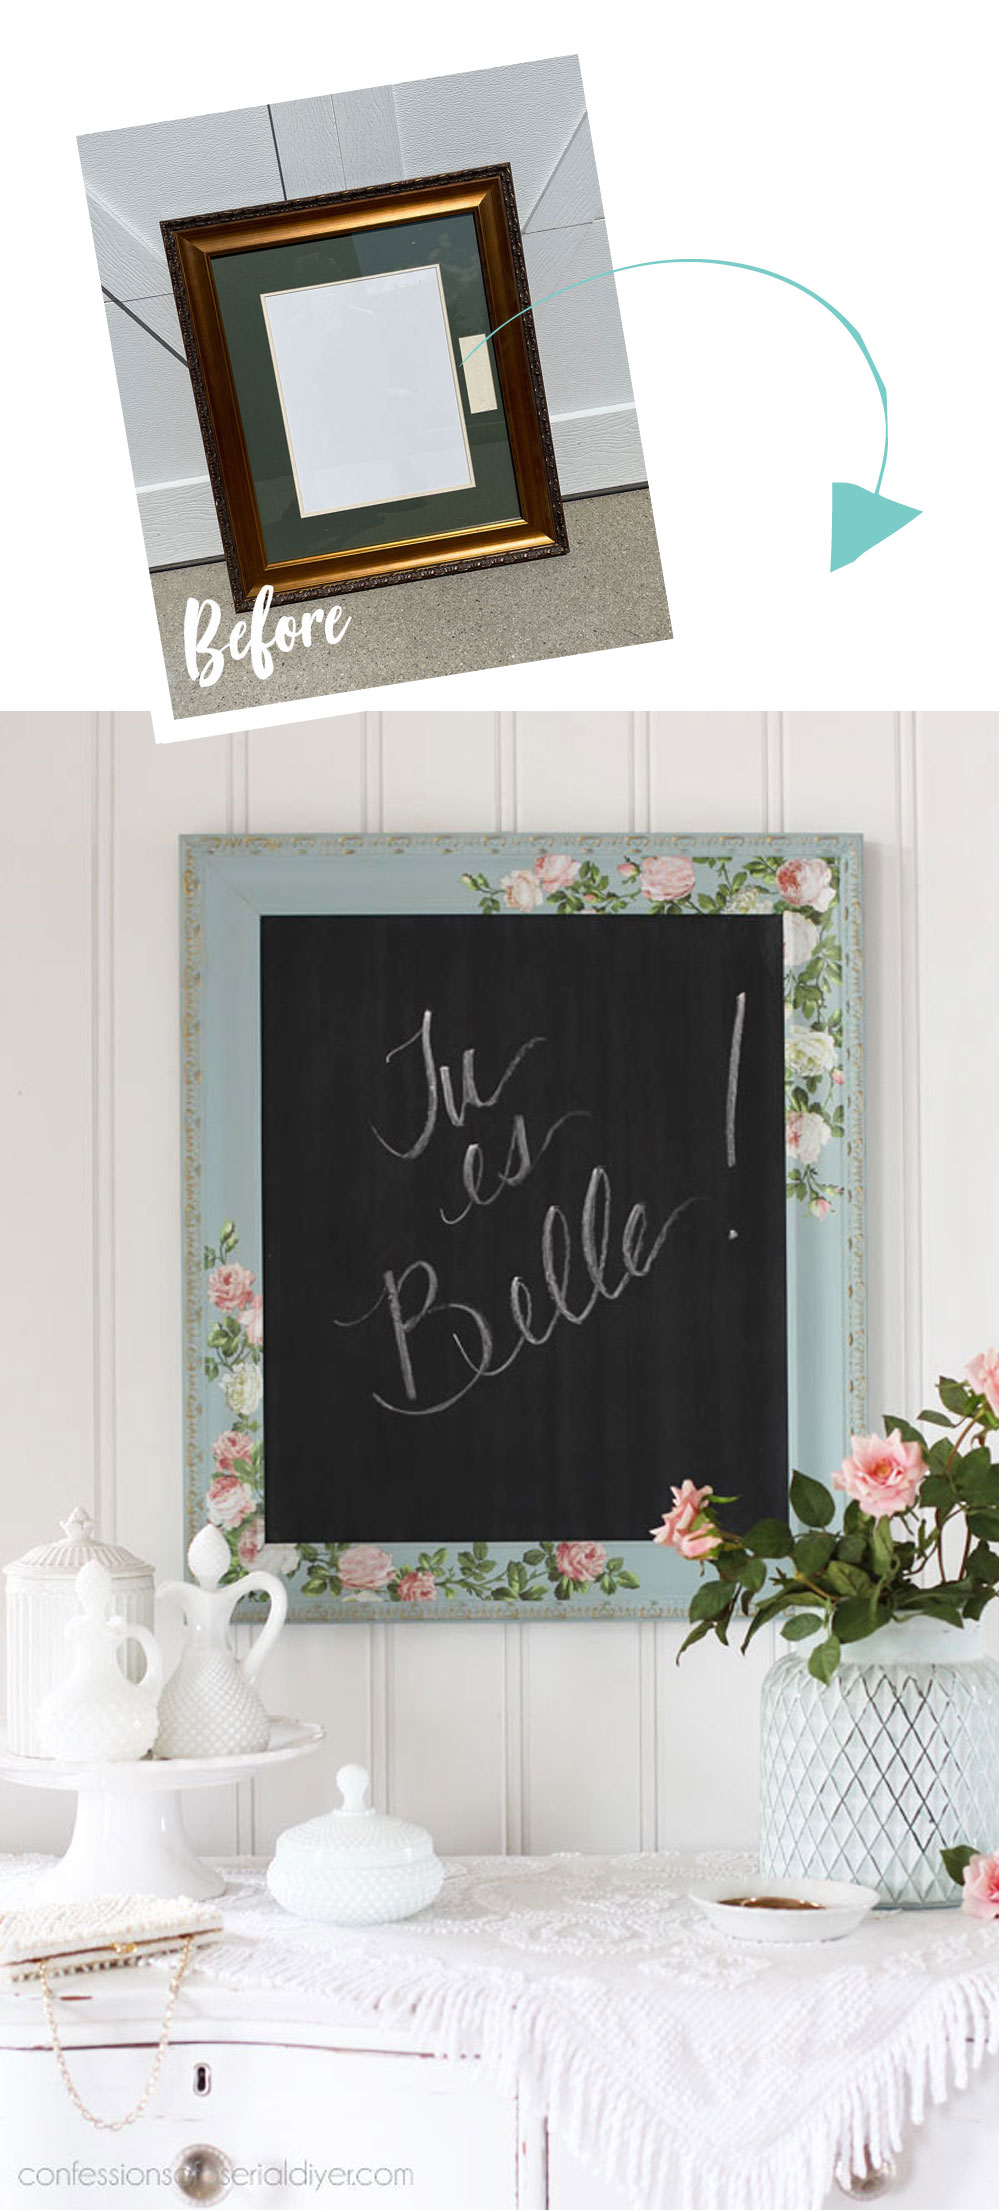
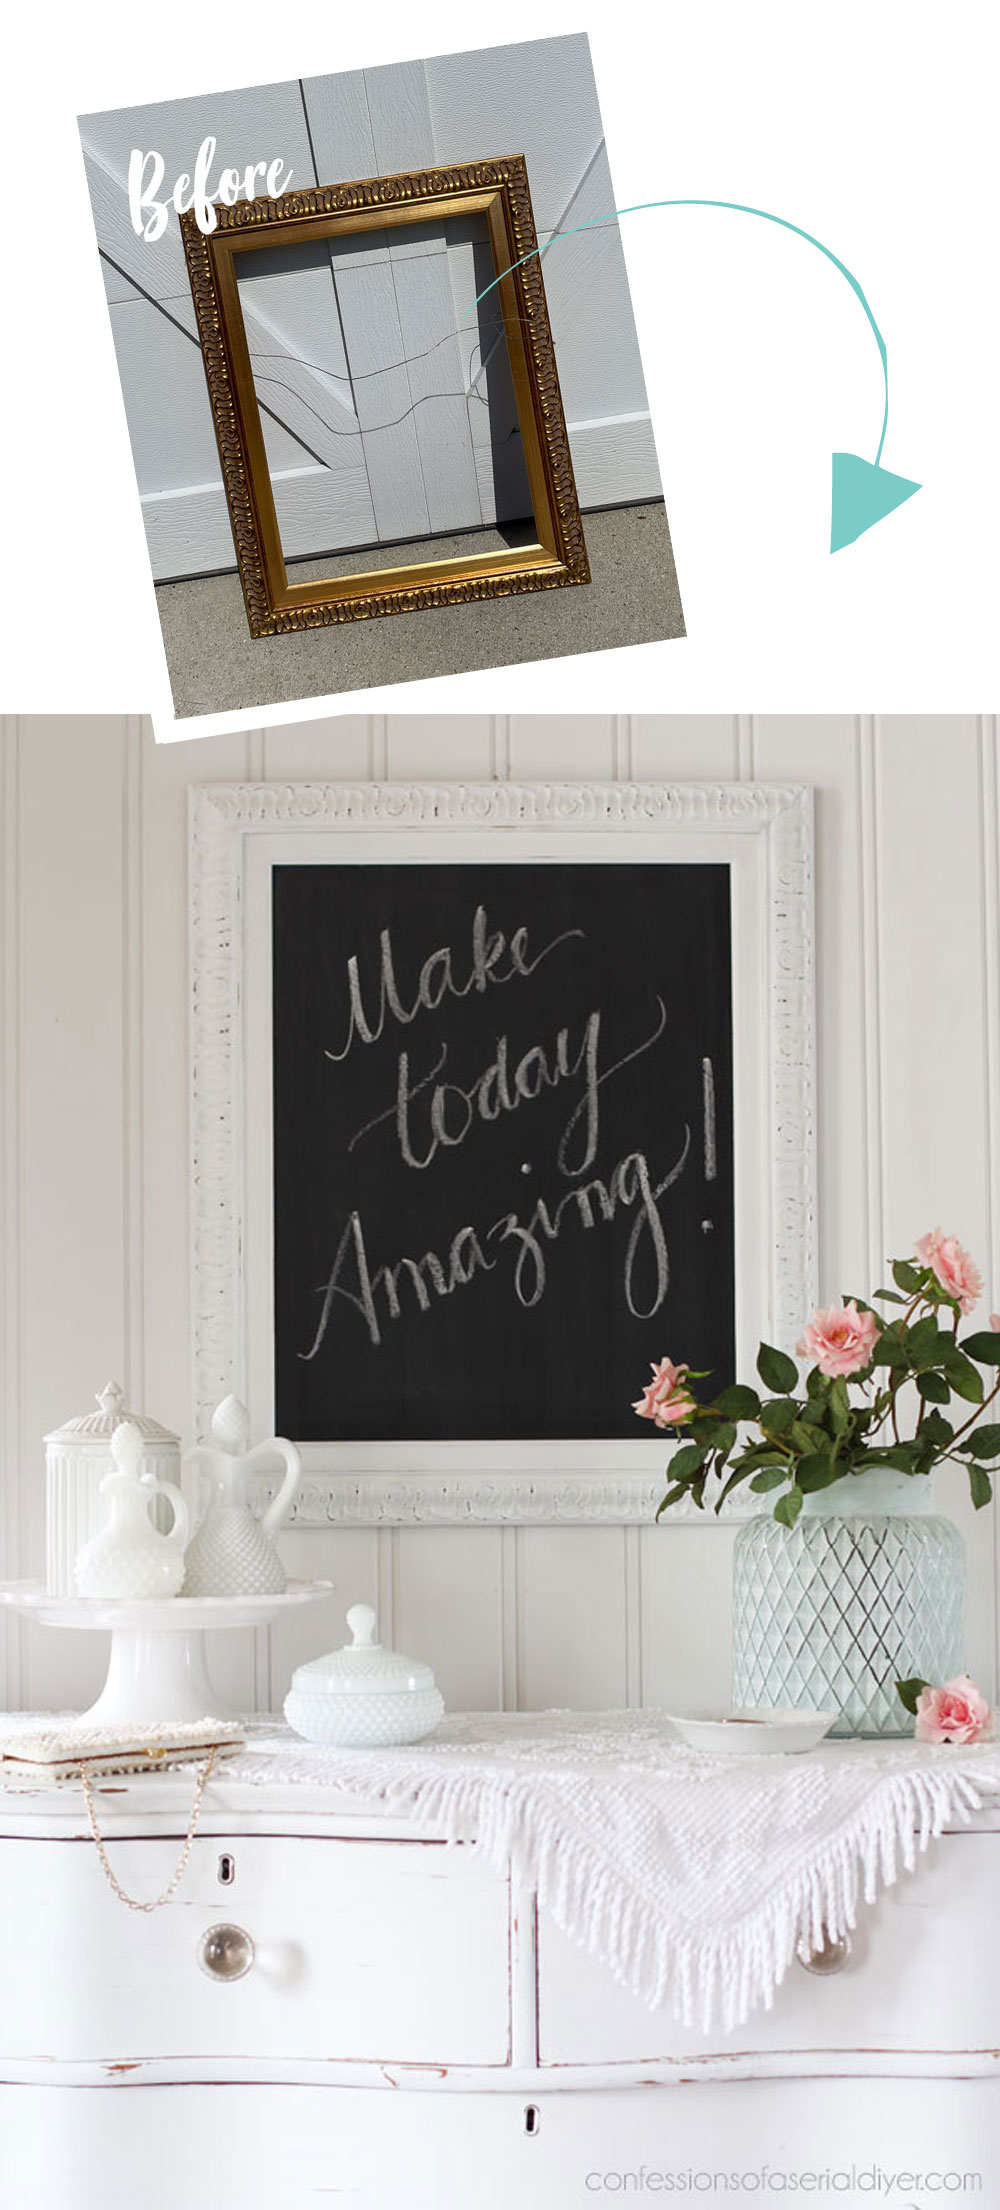
Can a chalkboard be gorgeous? Well, let’s find out! Hello, sweet friends! I am down to two frames and three oars in my current haul and today, I am sharing how to turn a frame into a gorgeous chalkboard using the two leftover frames.
Here are the two frames I have left:
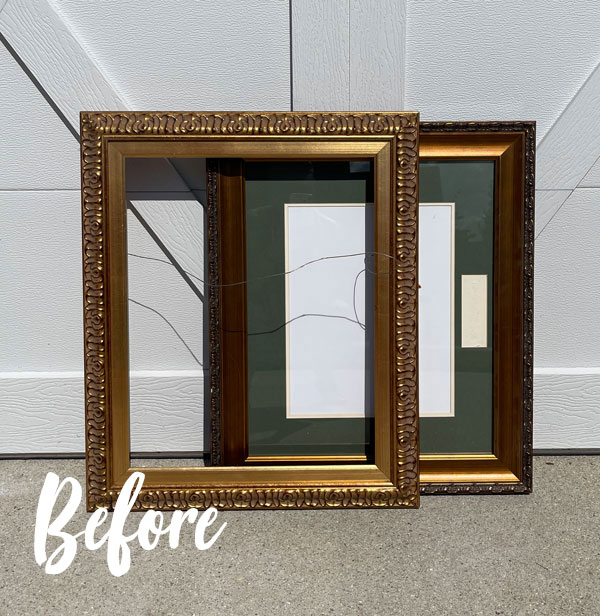
I rarely pass up a good frame. How about you?
I’ve included a few affiliate links so you can find the products I love.
I gave them both a quick cleaning with White Lightning and they were ready for paint!
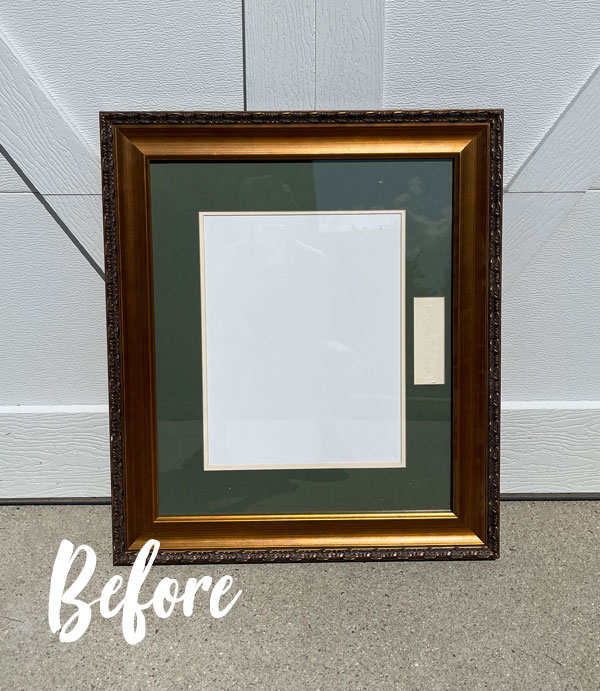
Frame #1
This frame was a solid find at only $6:
Paint
I chose A 50/50 mix of Vintage Duck Egg Blue and Cotton for this one:
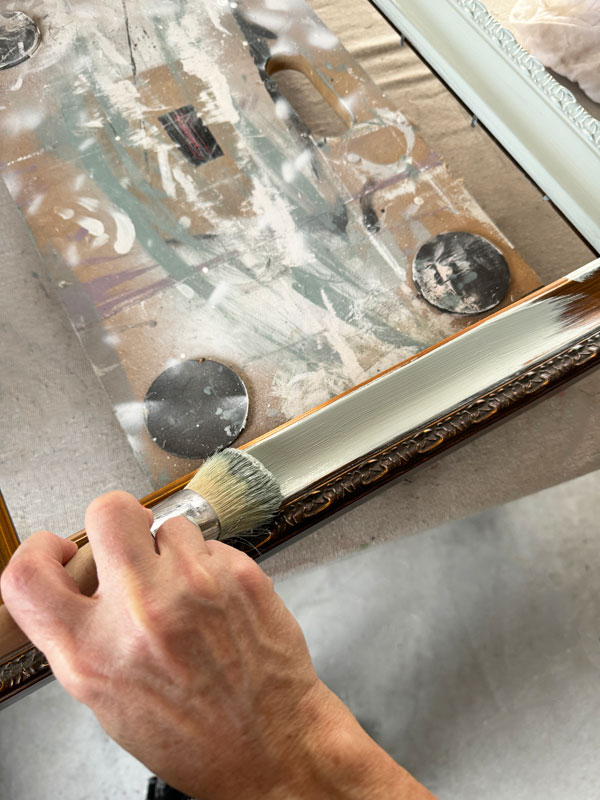
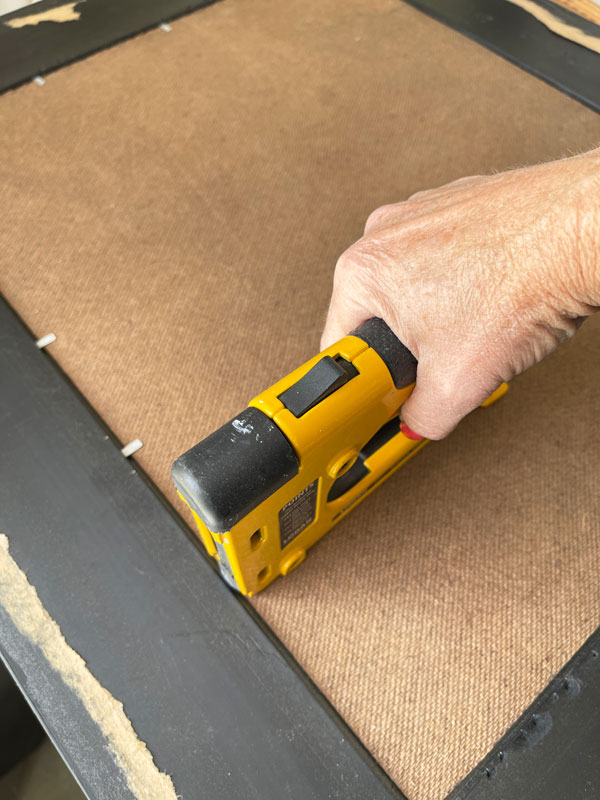
I gave it two coats and once they were dry, I lightly sanded to smooth using a Sanding Sponge.
How do you make a chalkboard gorgeous?
With a transfer, of course!
This beautiful Salon de Diane Maxi Transfer to be exact:
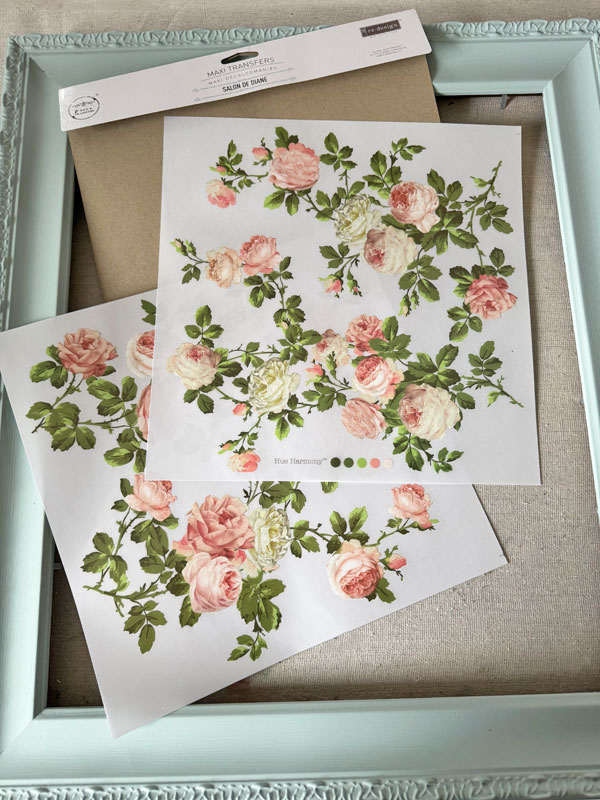
The petite size of the roses made it perfect for that blank space in the frame.
EDITED TO ADD 1/31 : This transfer is sold out, unfortunatley, and as soon as Redesign gets it back in, I’ll be sure to order more!
I started by cutting the pieces apart and laying them out.
I decided not to take it over the detailed outer edge, so I cut each piece straight and then lined it up from that outer edge to apply it:
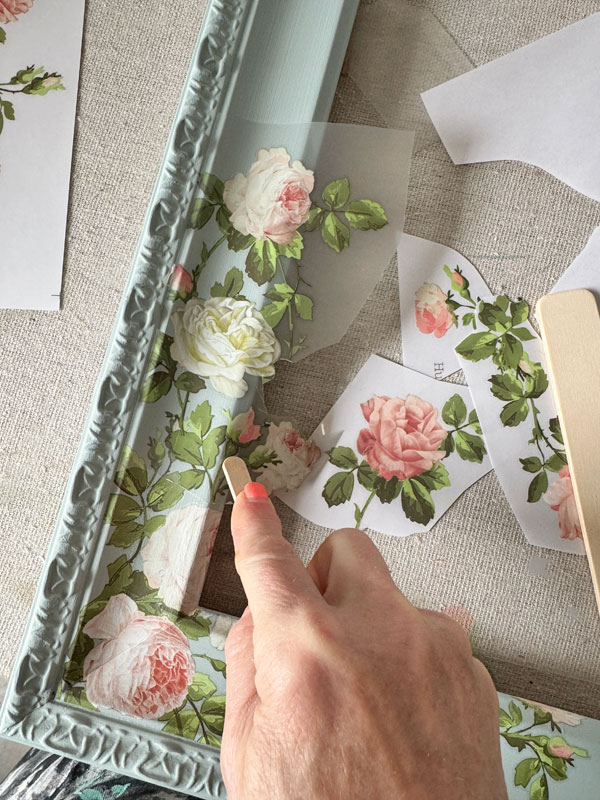
To make it easier, I applied this transfer in several small pieces, matching the design back up when I added them.
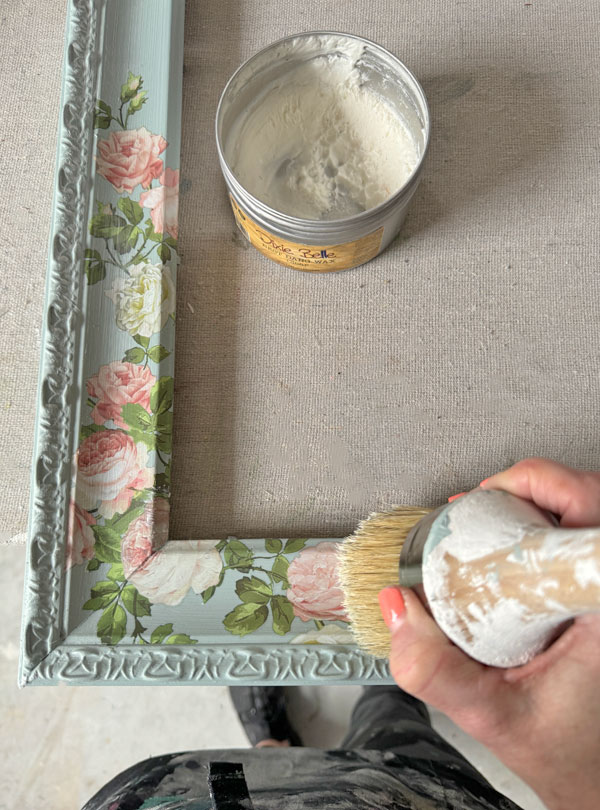
Seal
To seal, I used Best Dang Wax in clear, applying it with my Best Dang brush:
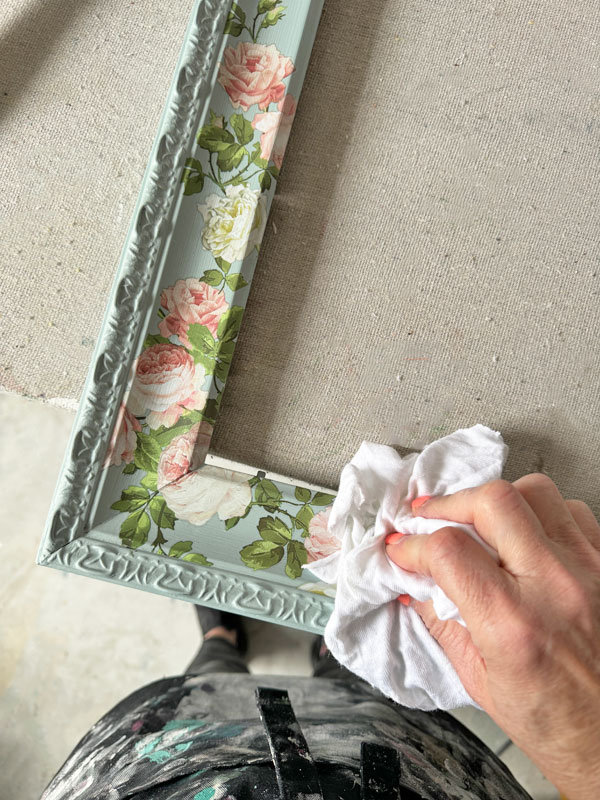
 Then I buffed away any excess with a clean soft cloth:
Making the Chalkboard
I cut a piece of hardboard for each using my Ryobi jigsaw:
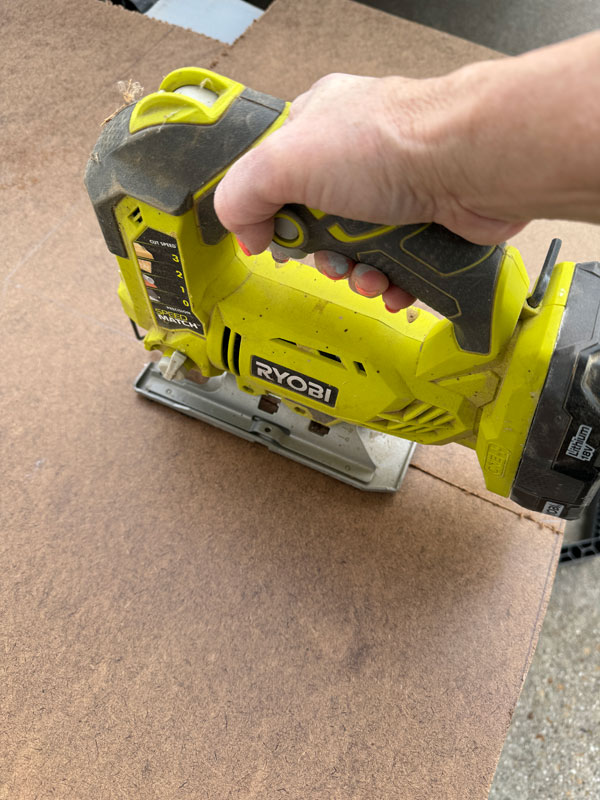
If you’ve never used a saw before and want to try your hand at it, this is a good one to start with. It’s not intimidating at all. I have the cordless version that uses the Ryobi batteries, but it comes in a corded version also.
I don’t have a sophisticated cutting bench either (takes up too much valuable space). I literally propped this up onto two storage bins and cut between them lol.
Next, I used my go to chalkboard spray paint from Rustoleum:

Once they were dry, I seasoned them by rubbing chalk across the entire surface:
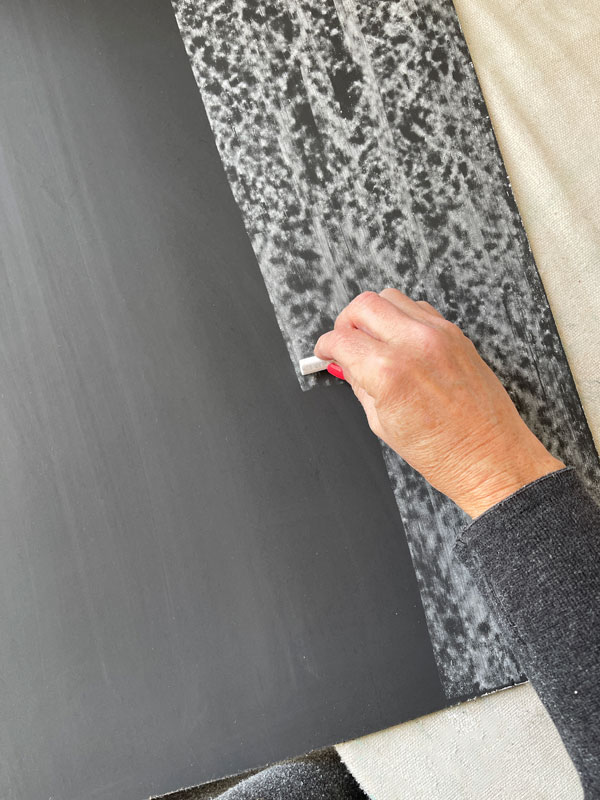
(I borrowed these pics from another post, hence the red nails :). )
Then I wiped it off with a soft cloth:

My favorite chalk comes in this simple packaging that can be found in the bins along the checkout line at Michaels:
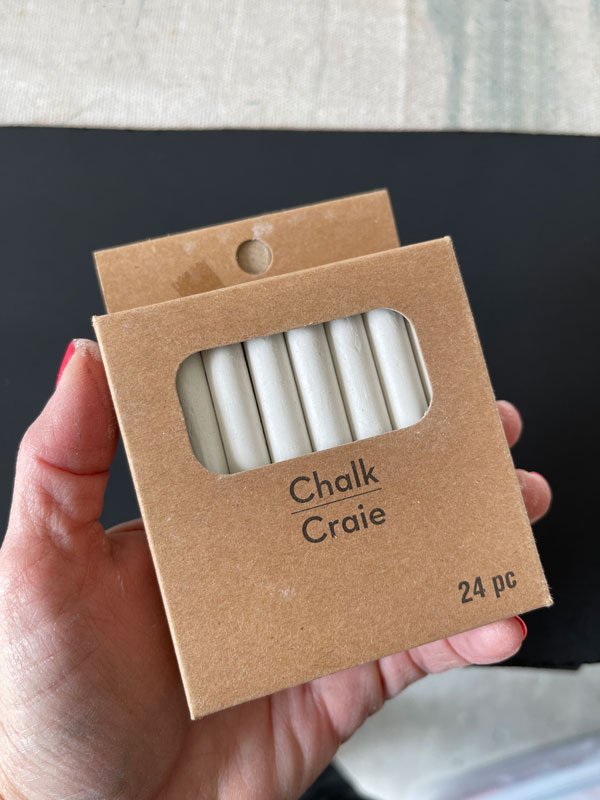
It doesn’t tend to scratch your surface like some others I’ve tried.
Once my chalkboard was done, I secured it in the frame using my Logan Point Driver:
This thing is awesome if you need to secure chalkboards, mirrors, artwork, etc, into their frames.
Finally, I covered the back with this pretty paper I picked up from Amazon:
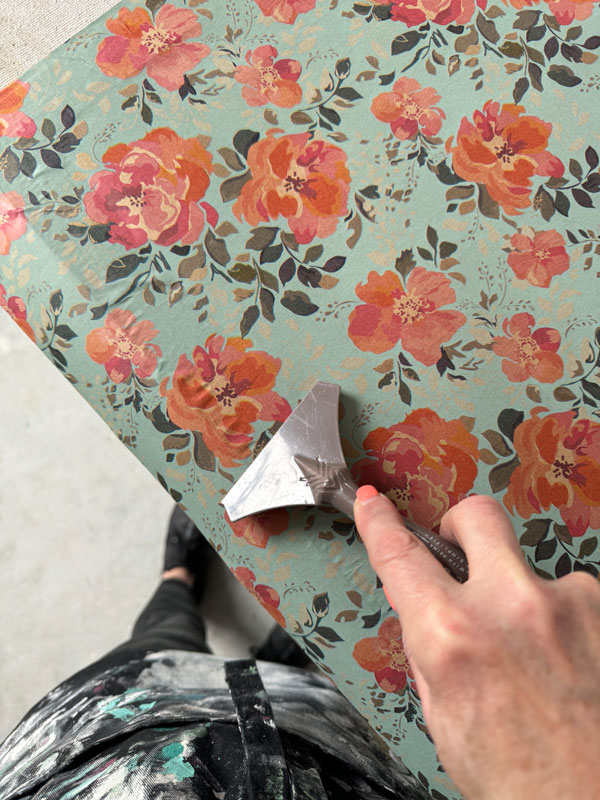
I used matte Mod Podge on the frame and then applied the paper. I trimmed with a razor blade. The transfer tool is great for smoothing out any wrinkles in your paper. I actually find it works better for on this and on decoupage paper than transfers.
To hang, I use either D-ring Hangers or these sawtooth hangers:

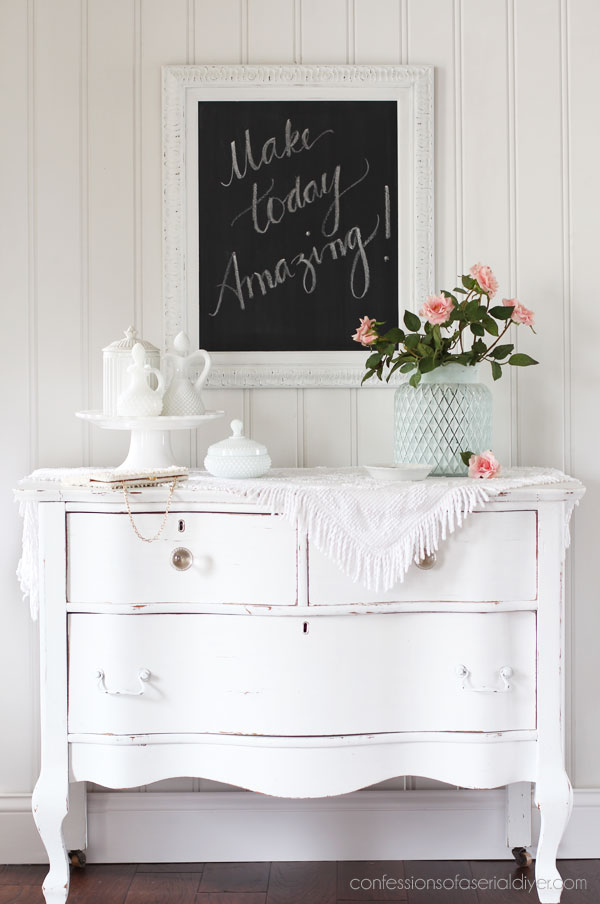
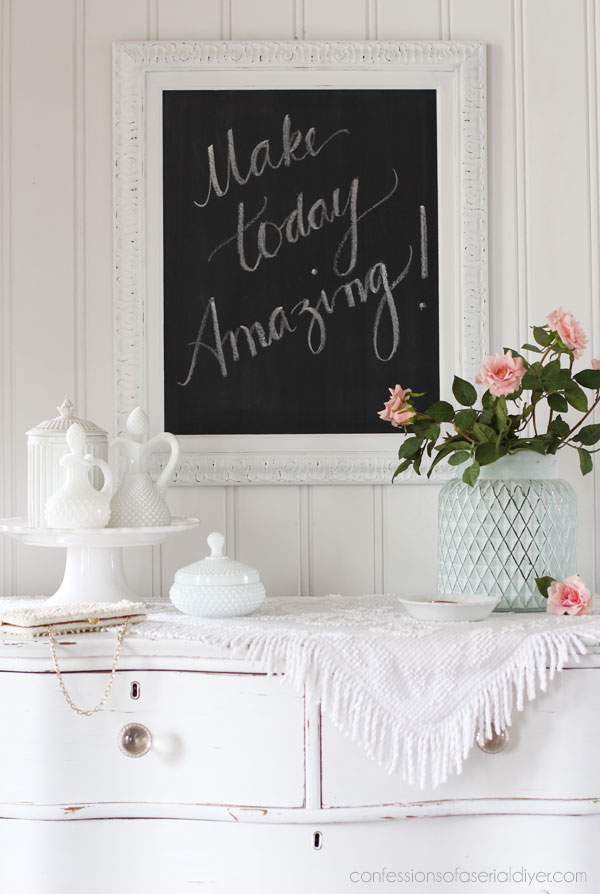
The After
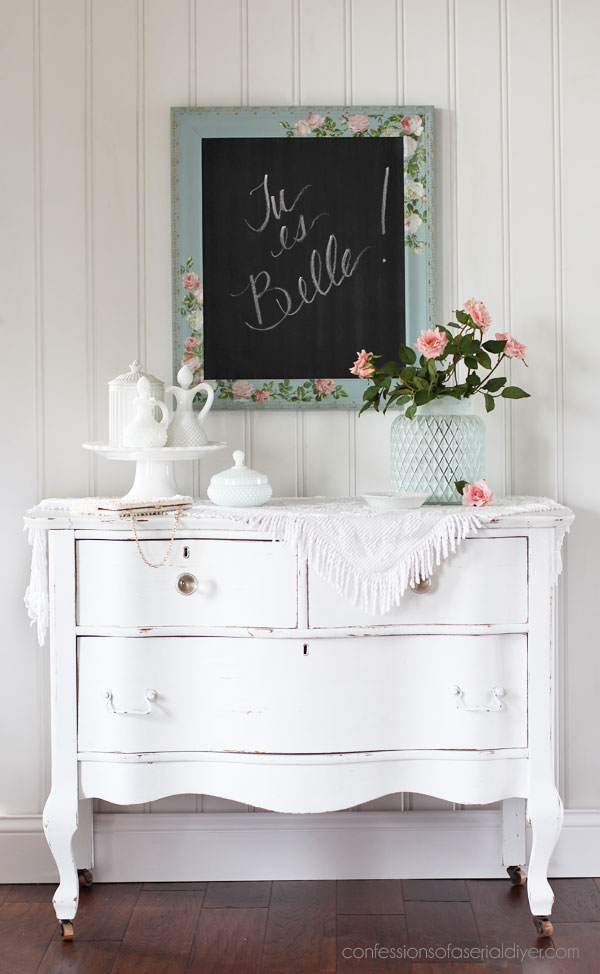 I don’t know if it’s gorgeous, but it sure is pretty!
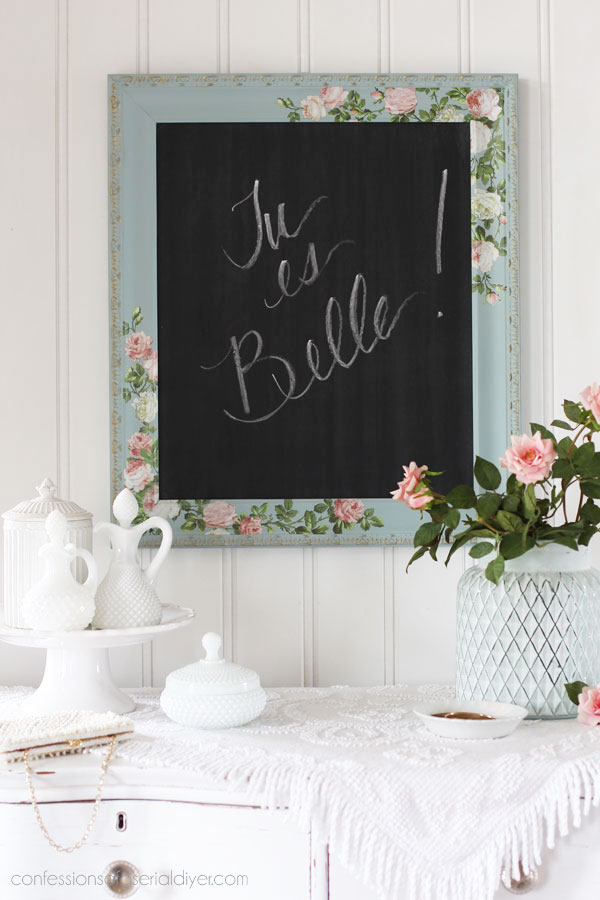
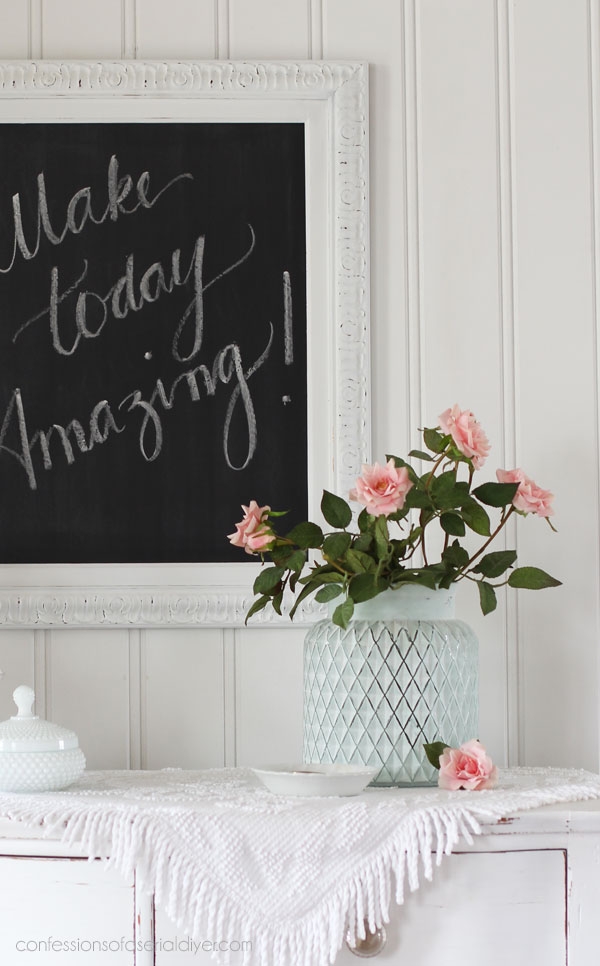
I just love pink florals against a blue background.

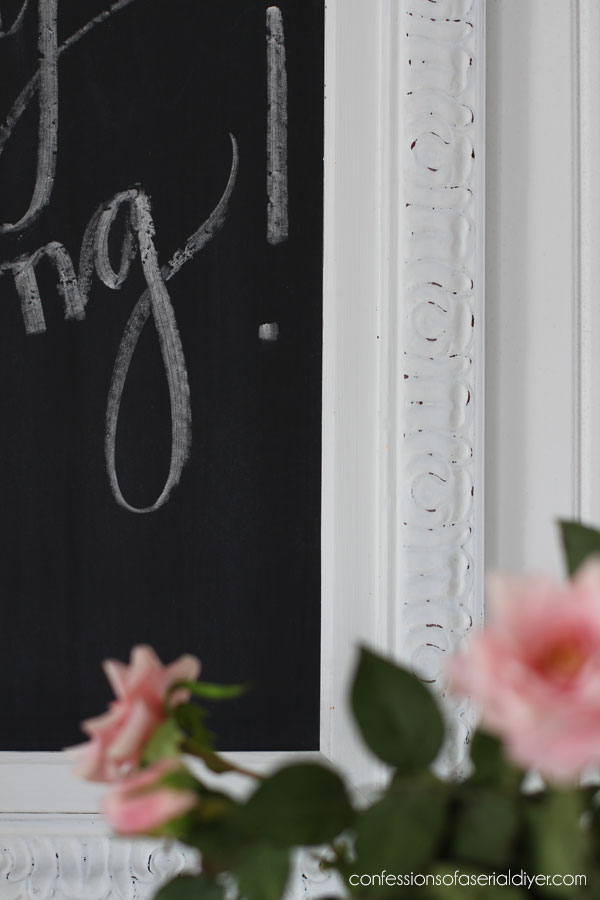
I ended up going back and adding some Gold Gilding wax to the edges…
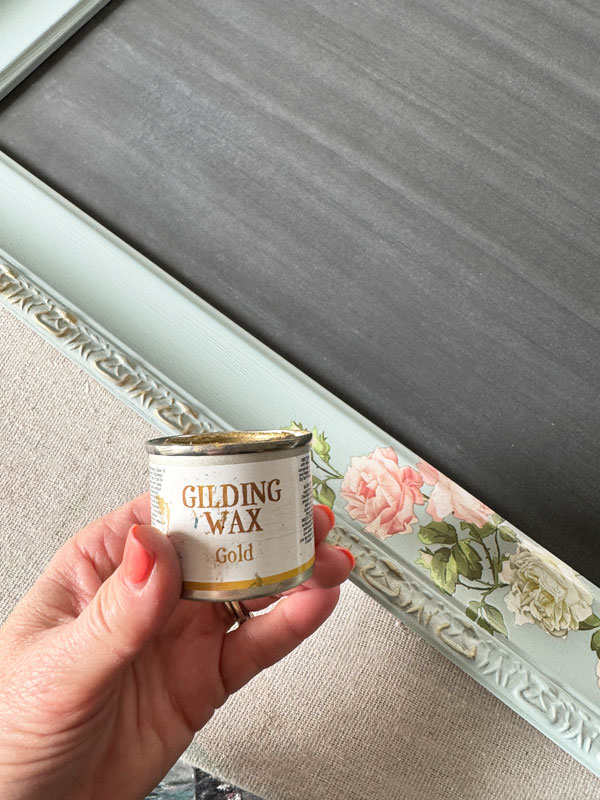
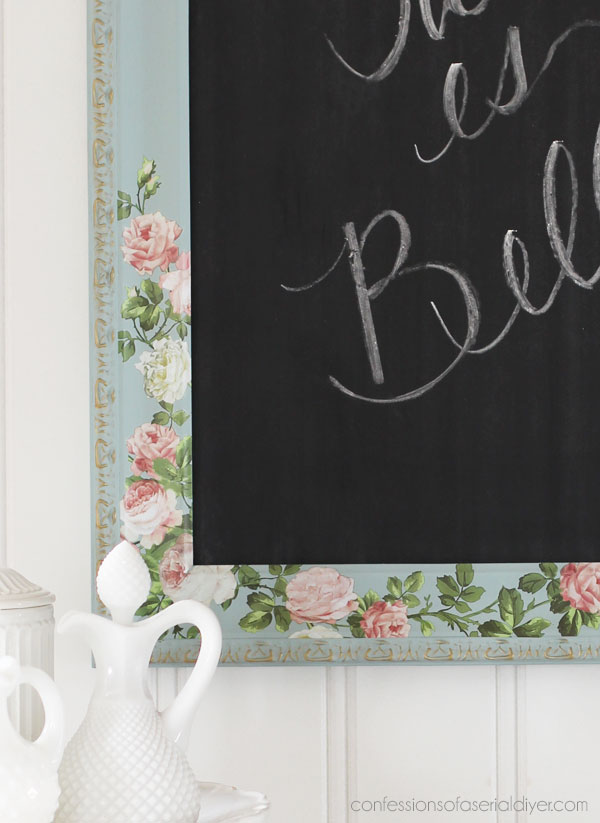
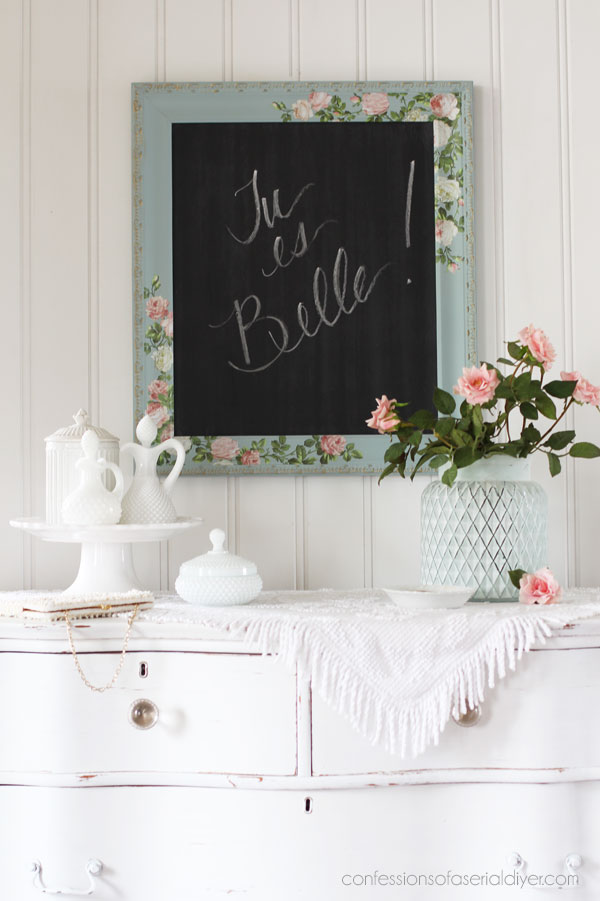
Much better!
Frame #2
The second frame was part of the goodies my reader friend brought me who also gave me the glass knobs I used as feet HERE.
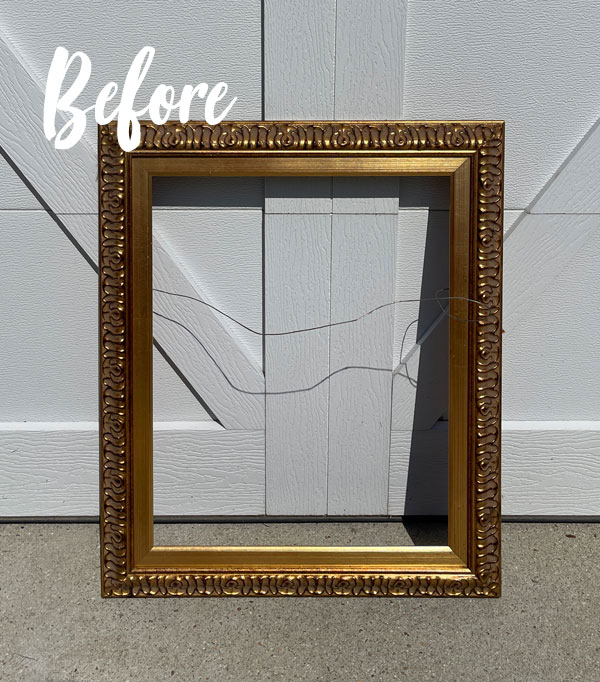
It was in excellent condition and I didn’t even have to remove anything.
Paint
This one got a much more simple makeover in Cotton white:
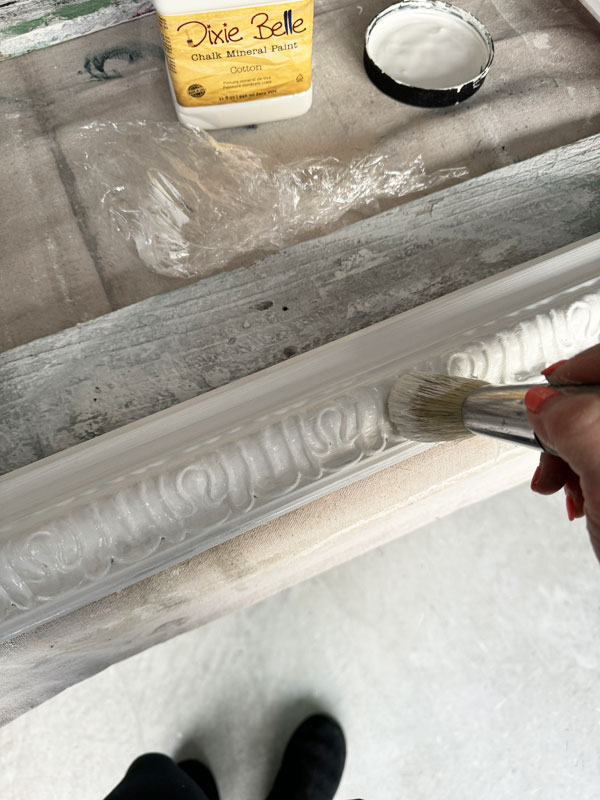
The Belle Brush makes it so much easier to paint the details on pieces like this.
Then, I used a sanding sponge to distress the edges…

I sealed this frame the same way using Best Wax in Clear.
The After
This one is pretty simple!
I just picked up that jar that I’m using for a vase at the thrift store last week for $6.
It had a metal band around the top but the handle was missing, so I just removed the metal band.
It makes a great vase!
I expected gold to come through when I sanded, but I got this darker color…no complaints here!
I still love a chalkboard in my home, and I still sell them in my booth, so I continue to make them!
Only one more to go!!
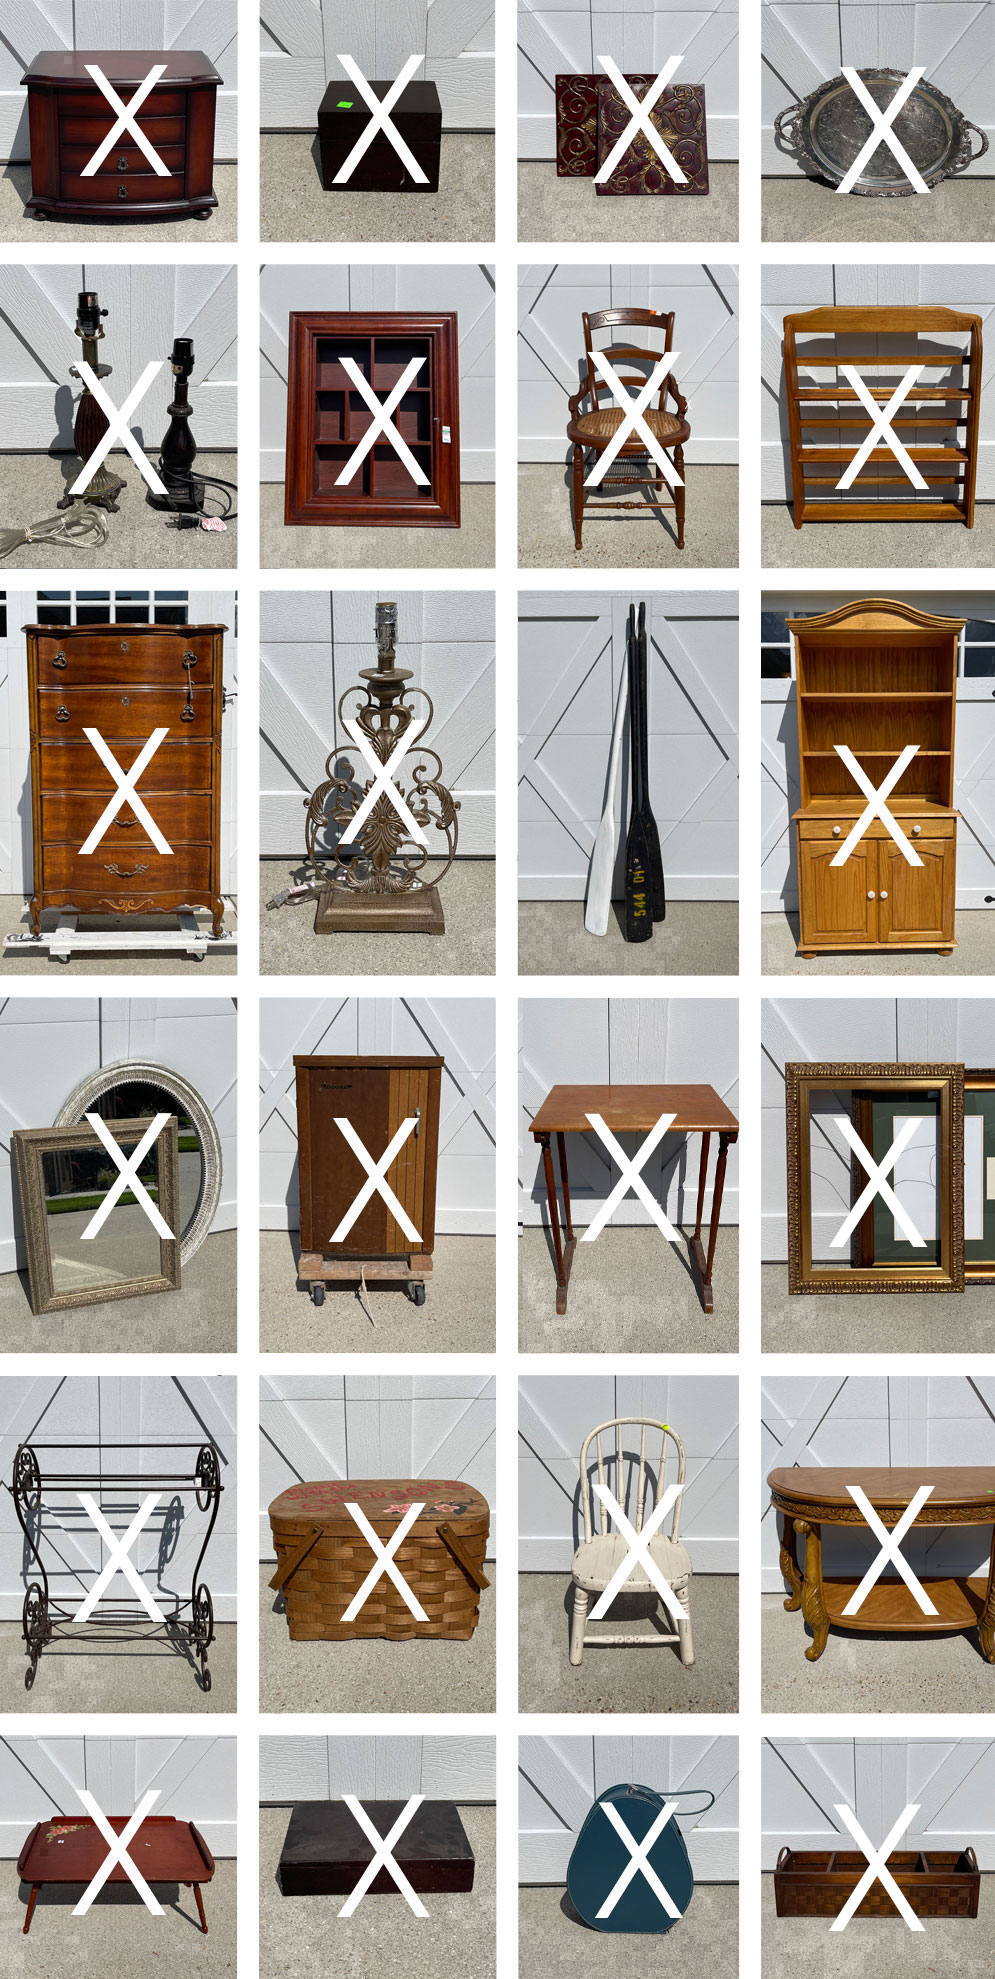
Here is everything I’ve completed from this haul so far!
Planter Box Makeover
Painted Lamp and One More
Painted Thrift Store Jewelry Box
Transform that Old Silverware Box!
Freebie Mini Table Makeover
Travel Case Makeover
Super Easy Chair Makeover
Painting the Smalls #24 (Six mini makeovers!)
How to Update a Silver Tray
Painted Hutch Using Silk Mineral Paint
Update a Plain Box with Paint and Transfers
Vintage Tray/Easel Makeover
Framed Cubby Shelf Makeover
Update a Picnic Basket with Decoupage
Painted Metal Quilt Rack
Vintage Brother Sewing Machine Cabinet Makeover
Child’s Chair Makeover
Painted Console Table
French Provincial Dresser Makeover
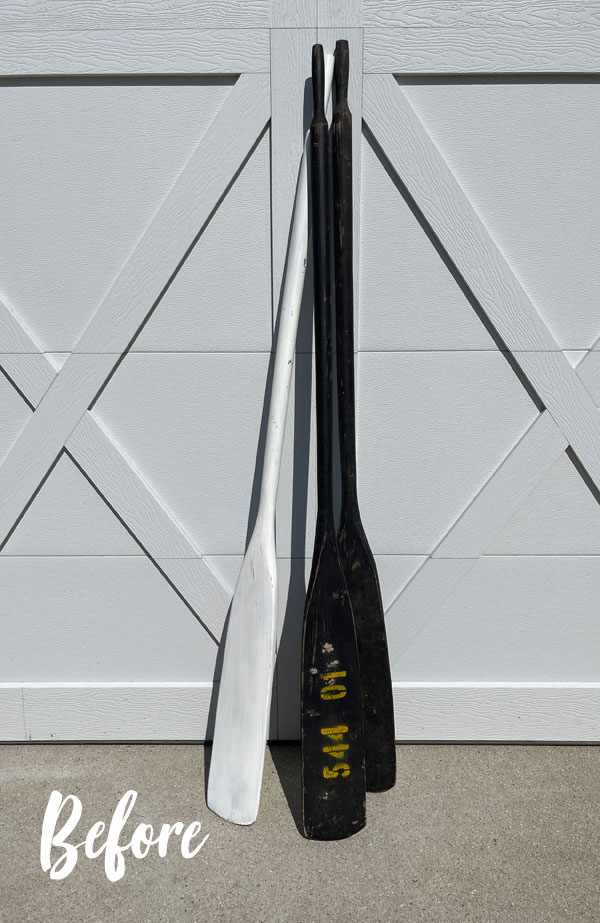
All I have left from my fall haul are these three oars:
Y’all, I need to SHOP! All I have is four lamps. Yep, the only items I have bought so far are lamps lol!
Check out all the BRAND NEW transfers, moulds, decoupage papers, silk colors and more in my shop HERE!
I’ll be back on Thursday sharing what I did with these oars!
UPDATE: See how they look now HERE!
See ya then!
XOXO,

Don’t Miss a Thing!
If you like what you see, there are several ways to follow along!
EMAIL * INSTAGRAM * FACEBOOK * PINTEREST


Mary Kaiser says
Well I am here to tell you they are GORGEOUS! Wow your just about done with this haul, you better get out there and shop!! Can’t wait to see what you do with the oars!
Christy says
Aww thank you, my friend! I need to shop so bad ha ha! XOXO
roe squire says
This is such a great idea! Thank you.
Christy says
I’m so glad you like it, Roe! XOXO
Janice Holt says
I say a chalkboard can be beautiful which is how these turned out. Love that gilding wax on the first one also. Can’t wait to see the oars Thursday.
Christy says
Yay! Thank you, Janice! The oars turned out so cute…I’ll see ya with them Thursday! XOXO
Cyndi says
These are both beautiful! I have some extra frames waiting around and this has inspired me to make chalkboards with them. 🙂
Christy says
Oh great! Thank you, Cyndi! Enjoy! XOXO
Charlene Godby says
Very pretty chalkboards. And “tu es belle” toi aussi!
Christy says
Aww merci beaucoup, mon amie!! XOXO
lisa says
The frames look great. I especially like the first one. Live the gold gilded edge and flowers
Christy says
Thank you, Lisa! That’s my favorite too! XOXO
Debra E Hubbs says
These are so pretty! Ok so I started redoing a cheap chalkboard I had. I didn’t use the chalk spray paint you used but regular chalk type paint. Would it be ok to spray over that paint with the spray paint? I might have to add some transfers around the edge now lol.
Christy says
Thank you, Debra! It should be fine. I would sand it smooth first if it isn’t already and then just spray right over it. I am finding that I can add transfers to just about anything ha ha! XOXO
Debra Hubbs says
Thank you.
Christy says
Sure thing! XO
Cecilia says
Love, love, love the rose transfer. That mirror now chalkboard is plain gorgeous! Definitely my favorite. The other one looks great painted white with the dark distressing. I think they will sell quickly! ????Cecilia
Christy says
Thank you, Cecilia! Isn’t that transfer so pretty? I knew I wanted to use that one on something right away! XOXO
Lizzy says
You are so creative! It’s very pretty.
Christy says
Aww thanks so much, Lizzy! XOXO
Leticia Beam says
Very beautiful! I love them!
Christy says
Thank you so much, Leticia! XOXO
p says
Hmmmm. I’ve never had a chalkboard in any of my homes…
But now I’m seeing why it would be a nice idea !
Thanks for the inspiration.
Can’t wait to see your next haul. You Do find great stuff –
and always have such creative ideas 🙂
I look forward to your creations every week !
Christy says
We have a chalkboard in our kitchen and use it all the time! And I can’t wait to see my next haul too ha ha…I need to get shopping!! Thank you so much, my friend! Have a great weekend! XOXO
Marcie Lovett says
Yes, a chalkboard can be beautiful, Christy! The transfer is lovely with the blue and gilding is always a good thing ????
Christy says
Aww thank you, Marcie!! I’m looking to see where I can hang that one lol! XOXO
Elise says
I love the two chalkboards. Gorgeous, no doubt. And the way you staged the real flowers against the flowers on the one chalkboard—that was perfection. (great vase too).
Christy says
Thank you, Elise! Lucky that the flowers matched so well, and I’m so glad I didn’t leave that vase behind! XOXO
Patricia says
What beautiful transformations.
Thank you for sharing your techniques, making it look so easy.
Patricia
Christy says
Thank you, Patricia! It is always a pleasure to share! XOXO
Michele M. says
WOWZA!!! It absolutely positively is gorgeous! I love love love that, Christy.
You are a true magician I swear.
Christy says
Thank you so much, my friend!! You are the sweetest! XOXO
Addie says
What I like best about your projects is…You pay attention to details. All your edges, drawer liners and backings are finished. To perfection I might add. Some DIY’ers paint their kitchen cupboards and don’t even paint the insides!!!! That would drive me nuts!!!! It’s all about just getting it done fast….not for me…I don’t follow them. Some don’t even clean insides of dressers or take the drawers out to paint…???? No can do!!!
Good job!!!
Christy says
Aww thank you so much, Addie!! I’ll never understand painting dressers with the drawers in lol! XOXO
Cathy V says
Christy,
I love your chalkboards and HAVE collected a few frames to convert. How do you get rid of the glass? Does anyone ever want it? Or do you break it and throw it away (scary)?
Christy says
Thank you, Cathy! I put it into our big outside bins when they are nearly empty so there is no risk of someone cutting themselves with it. Then, I take a hammer and tap it so it breaks apart while in the can. XOXO
Gayle says
Christy, great job, as always! I am trying to locate a makeover you did, maybe 3/4 years ago. You whitewashed a dark piece of furniture using 2 different Voodoo Gel stains. One was a charcoal stain. I looked back through all your old projects, but couldn’t find it. Does this ring any bells?
Thanks for any help you can give!
Christy says
Thank you so much, Gayle! Was it a drop leaf table? I’ve done that same technique on several pieces. You can see that here: https://www.confessionsofaserialdiyer.com/drop-leaf-table-makeover-and-how-to-apply-sealer-with-a-sponge/ I hope that helps! XOXO
Cheryl B Acampora says
Hey, gal,
Your chalkboards turned out beautifully! The fact that you put a finished back on the floral one just says a lot about your work. How fun would it be if people posted pictures of how they used the items they bought? Keep’em coming because you know I never get tired of seeing what you do!
Christy says
Aww that means so much, my friend, thank you! Ask me if the one hanging in our kitchen has a pretty finished back? Ha ha nope. I do like to make them pretty for resale though! I would love it if people shared where they used their pieces in their homes for sure!! XOXO
Lisa Johnson says
I love your projects! This one is so pretty. You have inspired me, we have many unused frames, and I’m definitely going to make one into a chalkboard. Thank you, and all the best in 2024!
Christy says
Thank you, Lisa! I see so many pretty frames with old art in them, I just want to buy them all lol. Enjoy making your chalkboard! XOXO
Heather Taylor says
You are my favourite blogger, you never disappoint and your creations are so beautiful! Love the chalkboards, the floral one to me, is the epitome of cottage core. Have a wonderful day 🙂
Christy says
That means so much to me, Heather, thank you!! I agree…this look is quintesssential cottage for sure, which I love! Enjoy the rest of your week! XOXO
Lisa says
Have you thought about doing these in dry erase form?
Christy says
Hi Lisa! I have done them with dry-erase board in them…you can see those here: https://www.confessionsofaserialdiyer.com/thrift-store-frames-repurposed/ They didn’t sell as quickly for me as the chalkboards do, but I might do them again in the future. XO
Lisa says
I meant a tutorial.